
TunHub Integration
TunHub is a Cloudaware-managed secure proxy that enables the Cloudaware CMDB to discover and monitor resources hosted in private networks. This guide explains how to set up TunHub integration in Cloudaware.
![]() To see the TunHub integration in action, request a demo.
To see the TunHub integration in action, request a demo.
Overview
To allow the Cloudaware CMDB collector to discover resources in a private network, deploy a local proxy. The proxy must have egress access to the Cloudaware TunHub server. The target endpoint must allow ingress from the proxy.
You can deploy the proxy configuration to any Breeze agent that meets the requirements. A single endpoint connection can be supported by up to two Breeze agents.
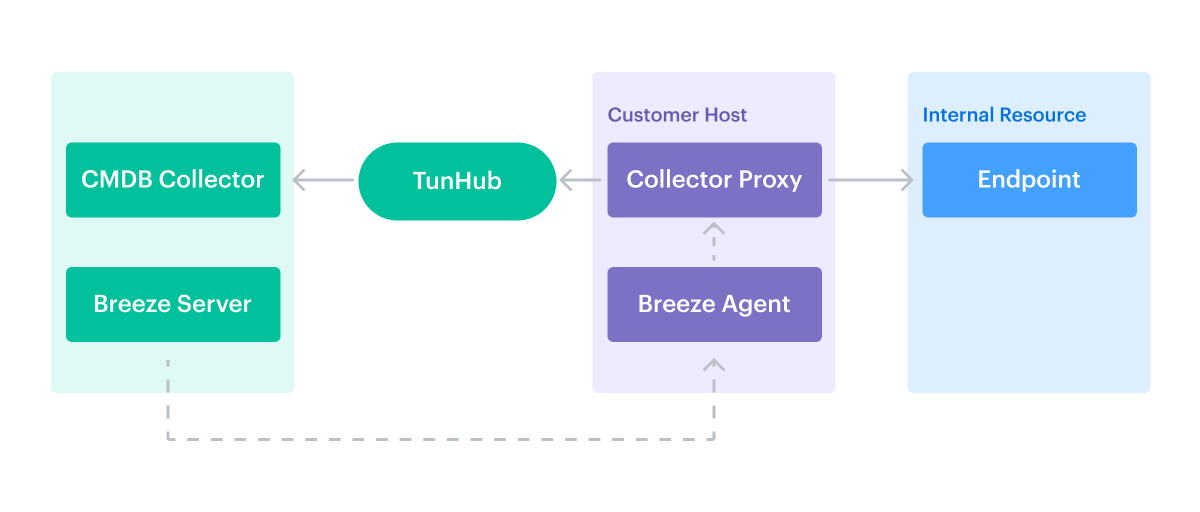
Customers can configure the TunHub integration through the self-service interface in the Cloudaware Admin panel.
High-level integration flow
To integrate a private network resources with Cloudaware:
Install Breeze on a host that can reach private endpoints.
Set up TunHub in the Cloudaware Admin:
Tunnel to assign Breeze channel(s)
Route(s) to destination host(s) and port(s)
Allowlist generated TunHub destination host/port values on your end if necessary.
For more details, refer to the guidelines below.
Step 1. Install Breeze
Select or create a server that can access the target private network resources and connect outbound to Cloudaware. Install the Breeze agent on this server:
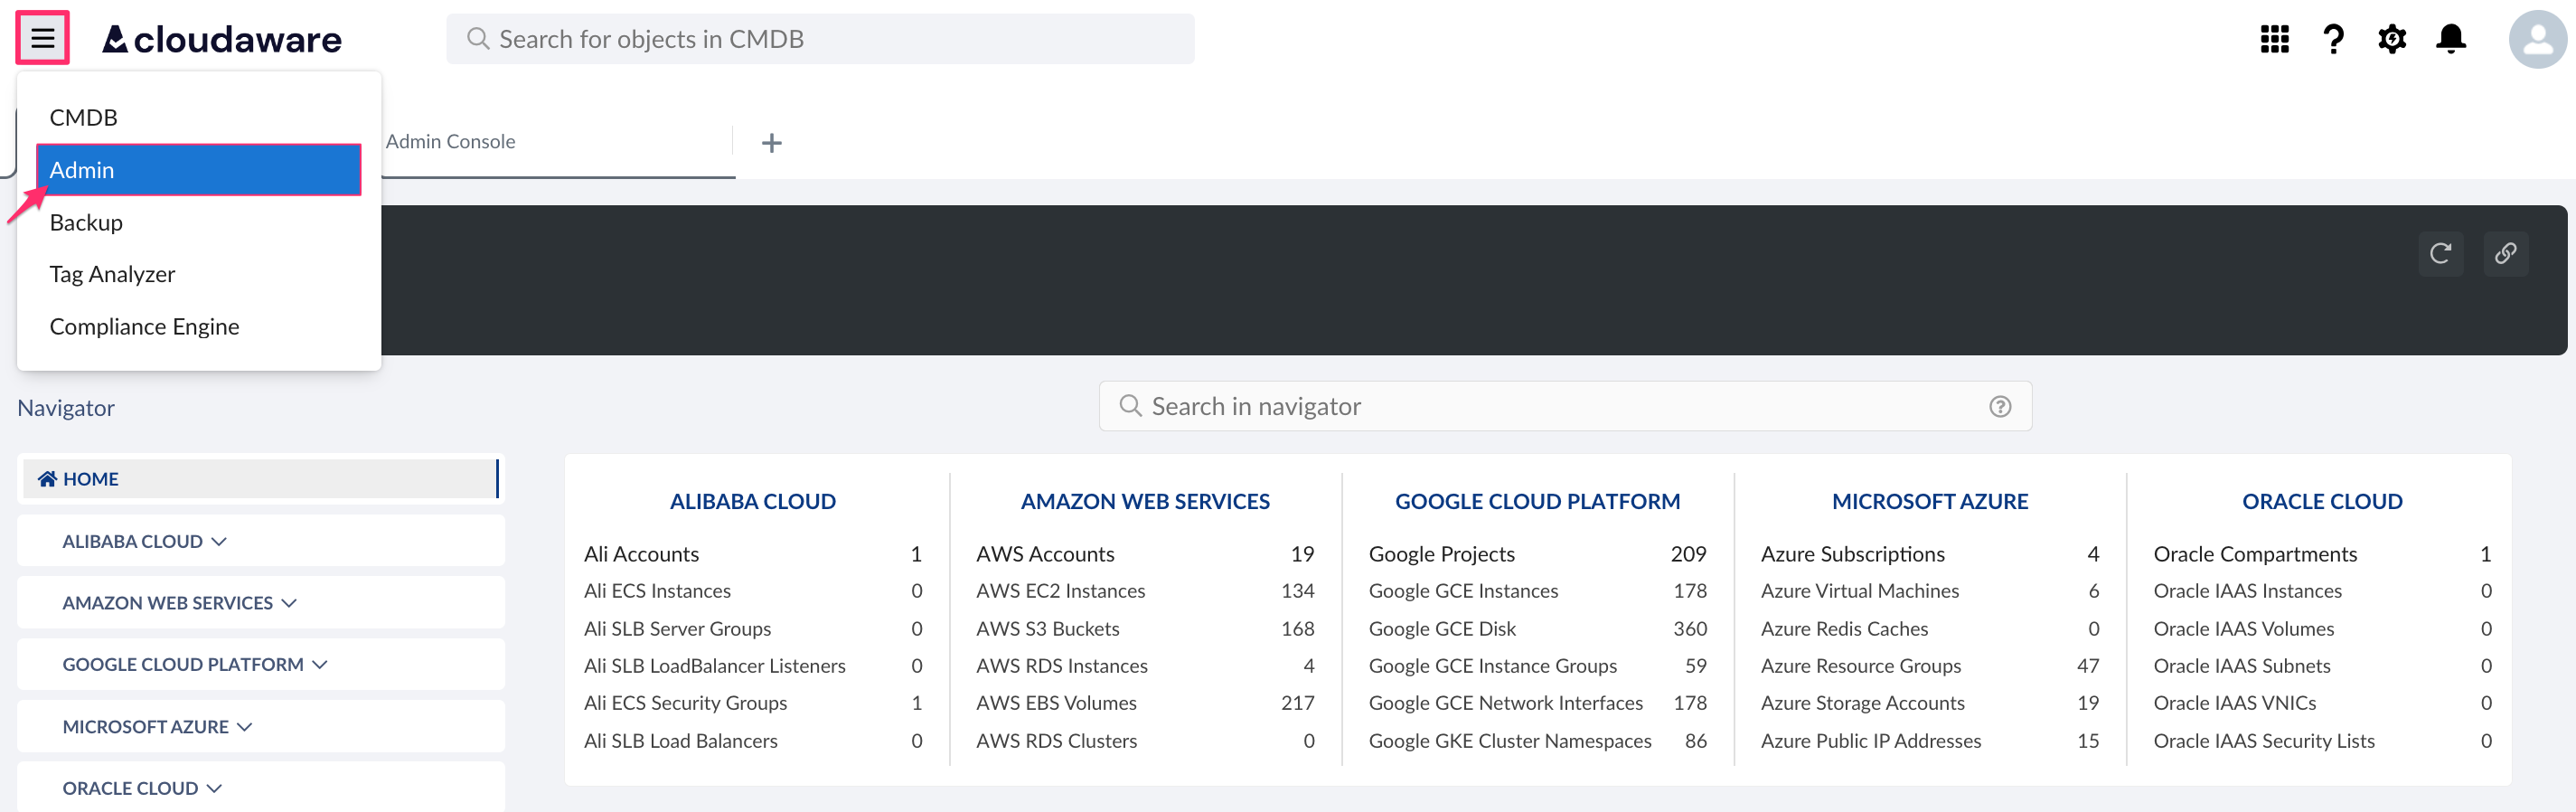
Log in to Cloudaware → Admin.
Under DevOps integrations, find Breeze → click 1 CONFIGURED.
Select the desired version and download the installer.
Install Breeze agent on a dedicated server. Read more
Once Breeze is installed, this server gets access to
breeze-server.cloudaware.comand may act as TunHub proxy.
Step 2. Configure TunHub
Create a tunnel
Create a tunnel to grant Cloudaware access to private network resources. A tunnel must include at least one route.
Log in to Cloudaware → Admin.
Find TunHub in DevOps integrations. Click +ADD.

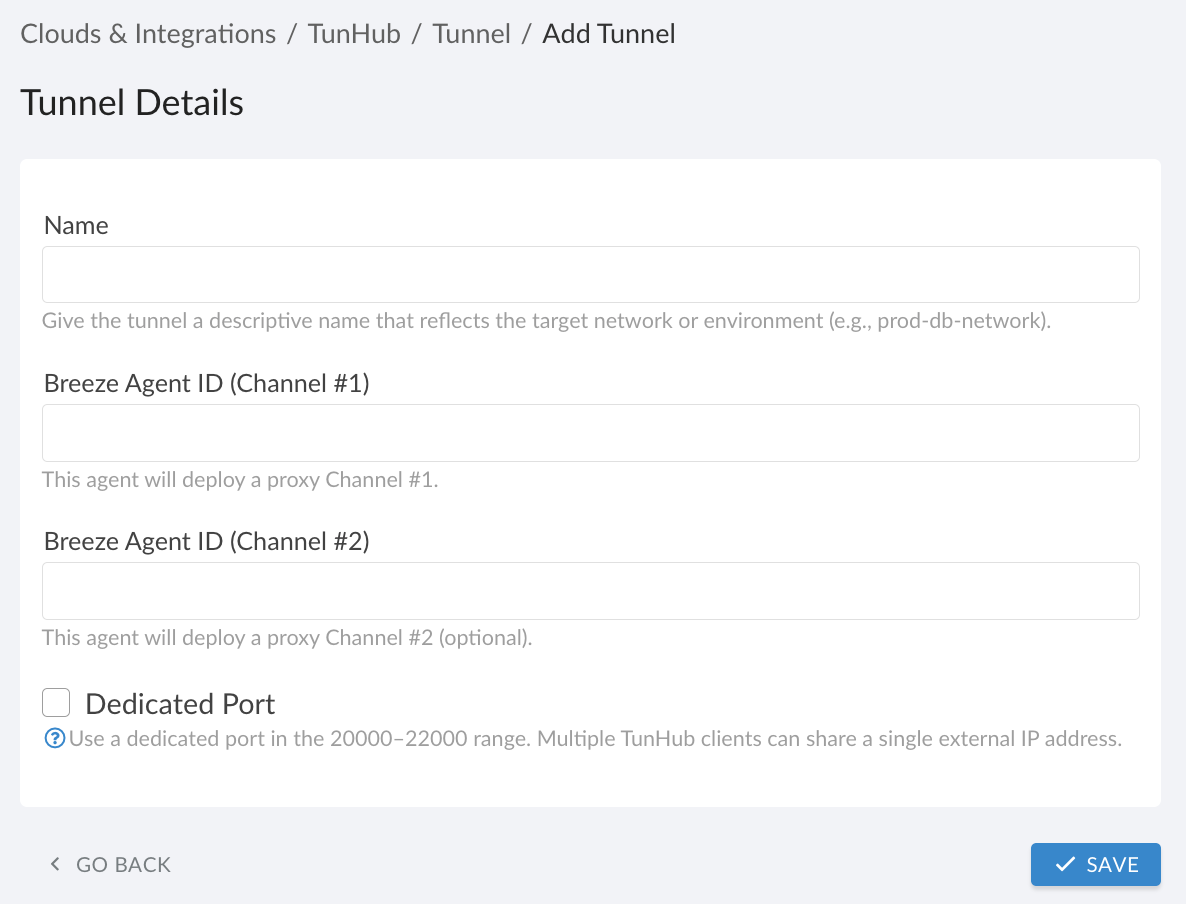
Fill out the form:
WHERE
Name: descriptive TunHub tunnel name indicating the destination network, e.g., Kubernetes.
Breeze Agent ID (Channel #1): Breeze agent ID* for the agent installed on a host.
Breeze Agent ID (Channel #2): (optional) Breeze agent ID* for an agent installed on an additional host. Traffic is load-balanced between both agents.
Dedicated Port: select if you don’t have a unique public IP for outbound connections. Cloudaware assigns a port in[20000-22000); ensure outbound traffic in this range is allowed. If Dedicated Port is cleared, TunHub uses port443and requires a unique public IP address for the connection.
*To locate the Breeze Agent ID, use the CMDB Navigator. Open the server record and check the ‘Breeze Agent' field. For Azure Virtual Machines, use the value in the ’VM ID’ field.
Breeze Agent ID formats vary by server type:
AWS EC2 Instance: i-XXXXXXXXXXXXXXXXX (Instance ID)
Azure Virtual Machine: XXXXXXXX-XXXX-XXXX-XXXX-XXXXXXXXXXXX (VM ID)
Azure VM Scale Set Instance: XXXXXXXX-XXXX-XXXX-XXXX-XXXXXXXXXXXX (VM ID)
vCenter Virtual Machine: vcenter_XXXXXXXX-XXXX-XXXX-XXXX-XXXXXXXXXXXX_vm-1111111 (vCenter ID + Virtual Machine External ID)
Google GCE Instance: 1111111111111111111 (Google ID)
Physical Server: ipXX.XX.X.XX_macXXXXXXXXXX (Name)
Channel #1 and Channel #2 must have different public IPs.
Click SAVE to test connectivity.
Review the integration status. A yellow indicator for the channel means Breeze is initializing. When the connection succeeds, the indicator turns green.
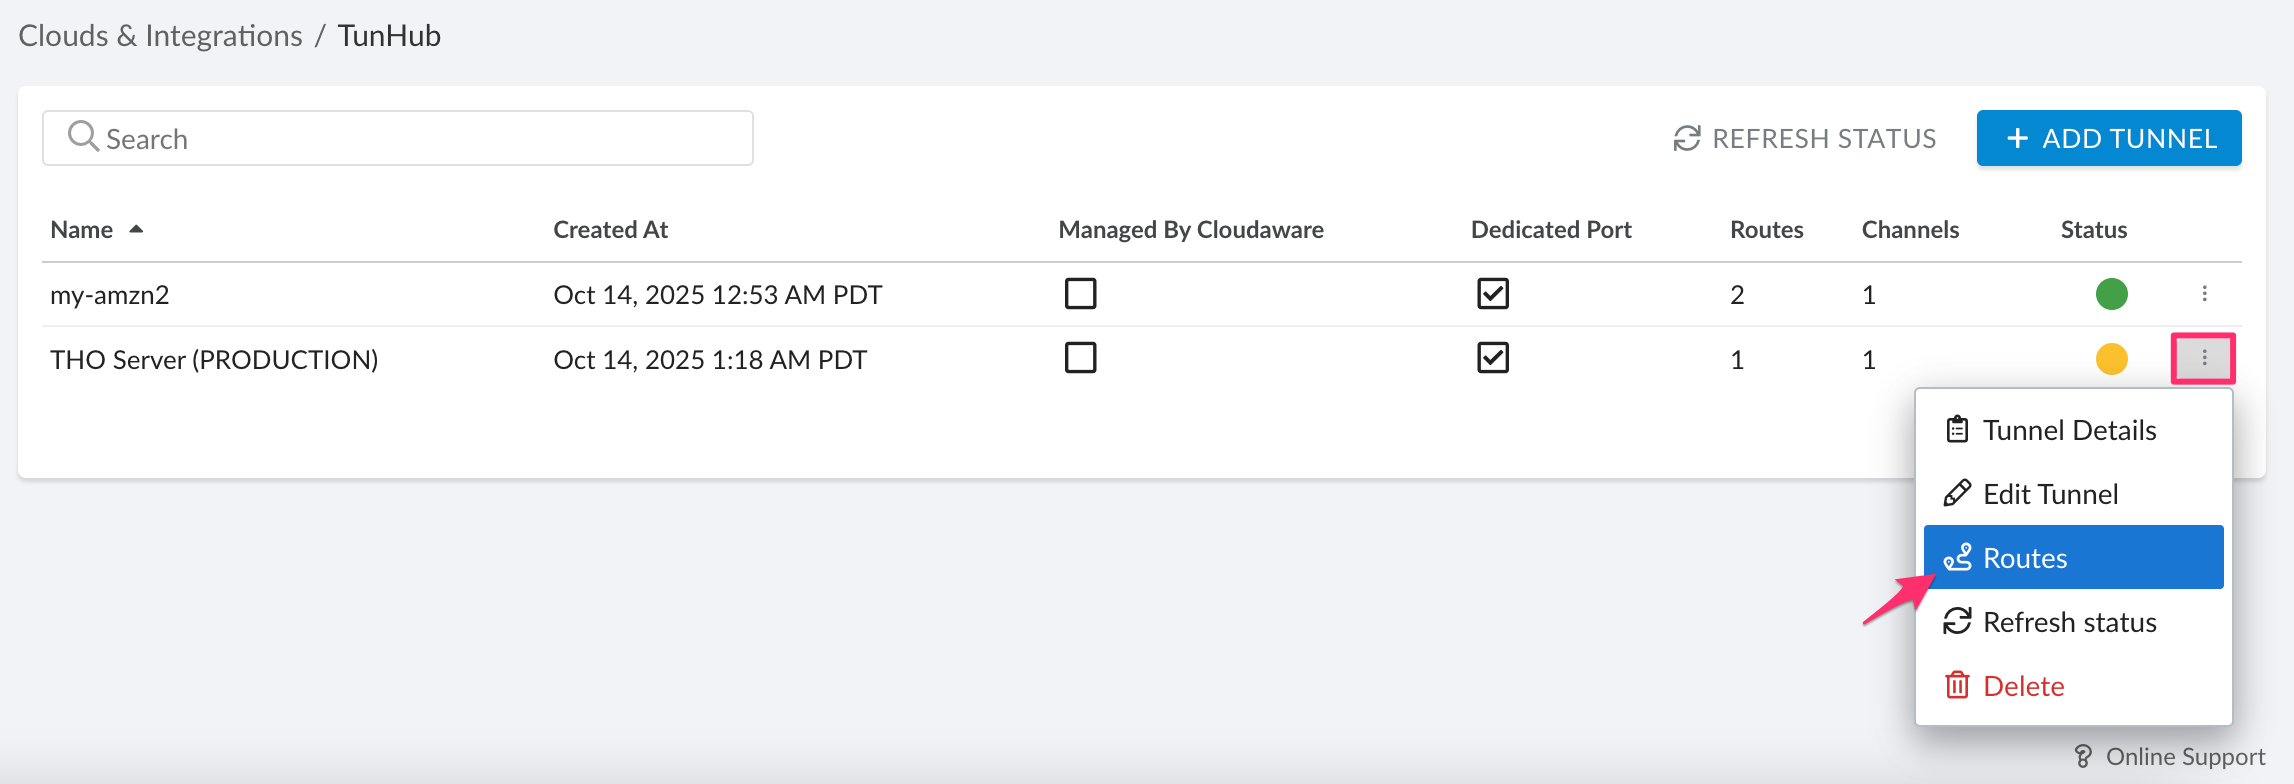
Configure routes
Each internal resource requires its own route. A route links an address in the private network to an address accessible by Cloudaware and creates an alternate address for integrations that require a secure connection.
Open the three-dot menu next to the configured tunnel → Routes.
Click +ADD ROUTE.Fill out the form:
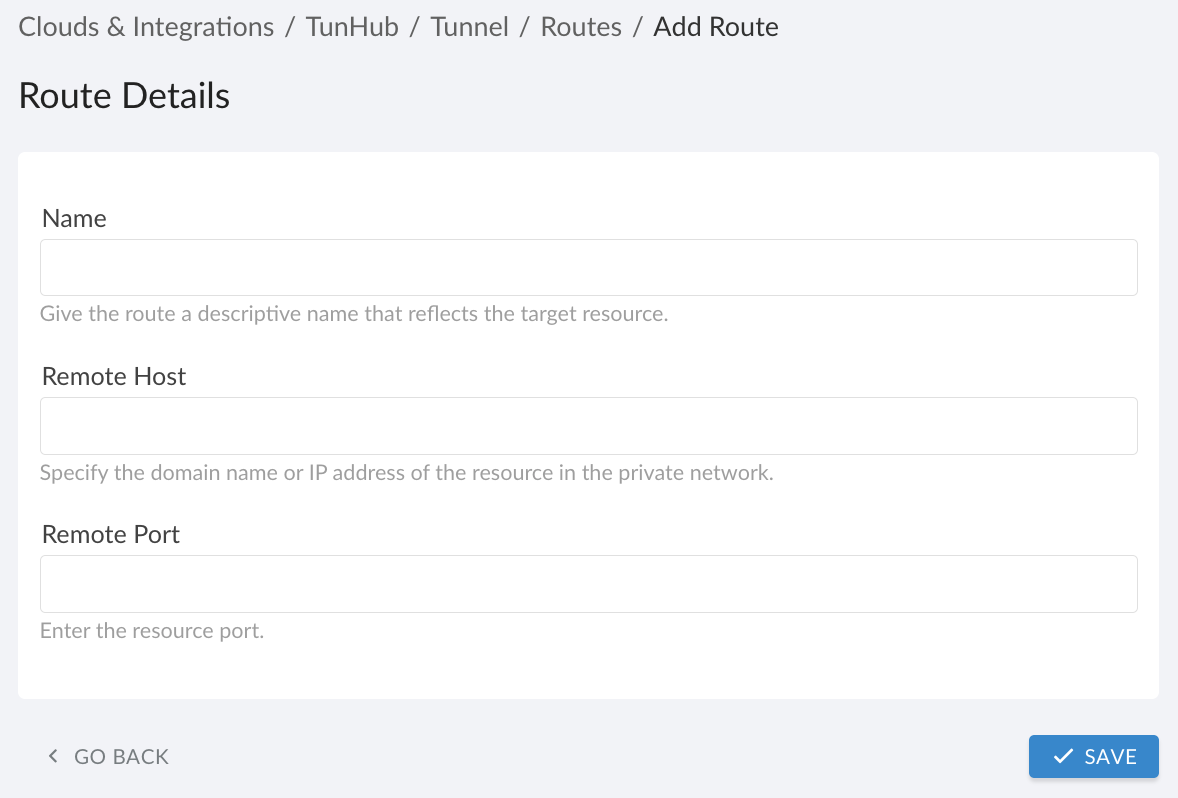
WHERE
Name: descriptive resource name, e.g., internal-node.
Remote Host: internal DNS name or IP address. Prefer an IP address. Use internal DNS only for hosts with dynamic IP addresses.
Remote Port: internal port number.
Each private network resource requires a unique designated route to be configured in Cloudaware TunHub.
Click SAVE. Wait for the route status to turn green, indicating the route is active.
Once the route is pre-configured and ready, use the destination endpoint values when configuring integrations. Cloudaware generates a private endpoint for each route, typically in the format
https://gw.tunhub.cloudaware.com:<assigned-port>. For example:
Integration name | Destination Host/Port examples |
|---|---|
URL (e.g. | |
Host (e.g. Note that port | |
SCCM (now Microsoft Endpoint Configuration Manager) | Host (e.g. |
URL (e.g. Note that port | |
URL (e.g. |
Go back to the integration details. A green light in Status indicates successful configuration. If the light is red, contact support@cloudaware.com.
If the Managed by Cloudaware box is checked, changes to such a tunnel must be performed by Cloudaware Support.
Managed Kubernetes
When using TunHub for Kubernetes-based resources:
A dedicated outbound port is required.
Breeze must run inside the Kubernetes cluster so the tunnel originates from the cluster’s internal network. https://cloudaware.atlassian.net/wiki/spaces/DOCS/pages/4743397378
Use the Kubernetes cluster identifier as the Breeze Agent ID, for example:
EKS:
arn:aws:eks:<region>:<account_id>:cluster/<CLUSTER_NAME>AKS:
/subscriptions/<subscription_id>/resourceGroups/<resource_group>/providers/Microsoft.ContainerService/managedClusters/<CLUSTER_NAME>GKE:
/projects/<project_id>/locations/<location>/clusters/<CLUSTER_NAME>
Allowlisting
If your environment uses outbound IP allowlists or domain restrictions, refer to this guide for allowlisting requirements: Cloudaware Service Endpoints & Public IPs