
With IAM Role (Recommended)
Use this guide to connect AWS to Cloudaware during trial registration using an IAM role.
Start in Cloudaware
In the Cloudaware Launcher (Control Hub), fill out the form:
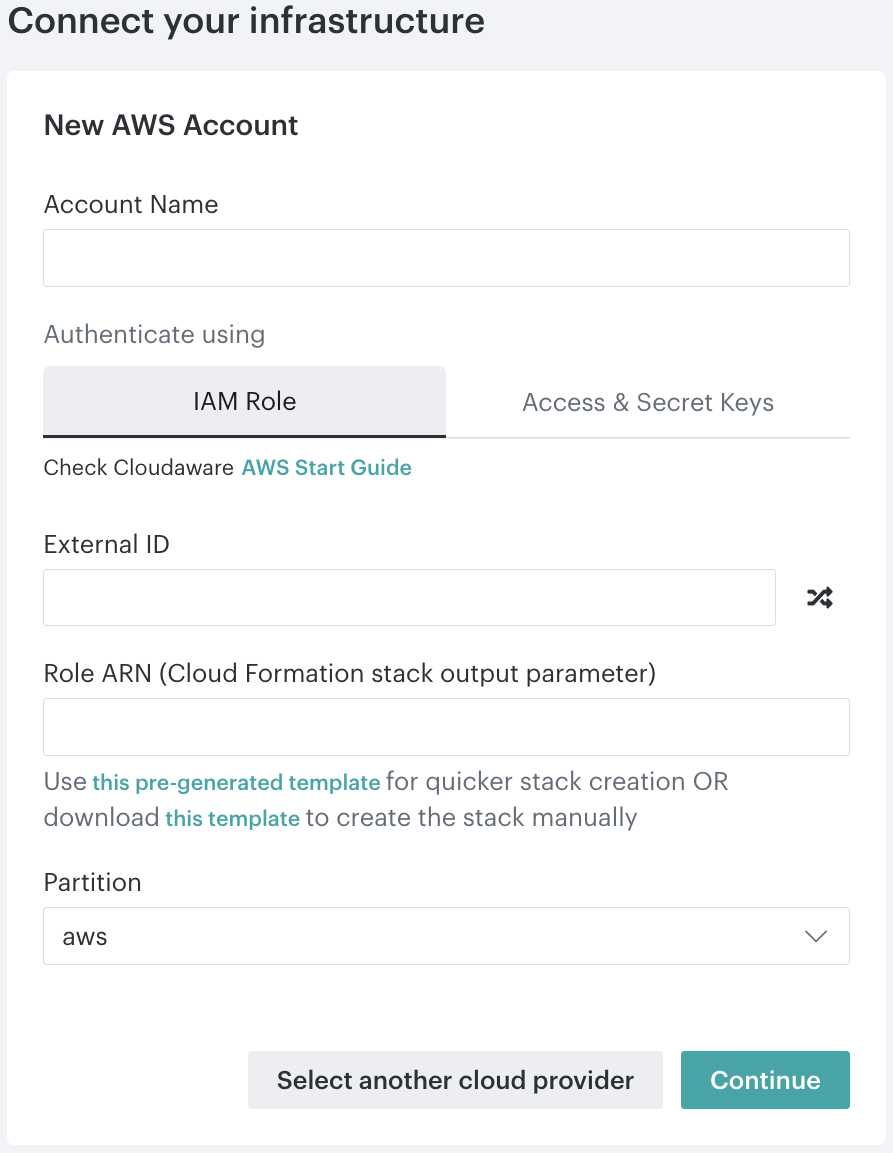
Enter an AWS account name.
Click Generate External ID (crossed-arrows icon).
Select the AWS partition*:
awsfor public AWS cloud.aws-us-govfor AWS GovCloud.
Select one of the CloudFormation launch options:
Click this pre-generated template to open a pre-generated CloudFormation template in the AWS Console. For the next steps, see Quick launch below.
Click this template to download the CloudFormation template and create the stack manually. For the next steps, see Manual creation below.
Continue the setup in the AWS Console based on the selected option.
*Cloudaware also supports the AWS China partition. Authenticate with Access & Secret Keys.
Set up the IAM Role in AWS
Quick launch
The pre-generated CloudFormation template opens directly in the AWS Console.
In the AWS Console:
On the ‘Create stack’ page, review the template details. The Amazon S3 URL is pre-selected as the template source.
Click Next to proceed to stack parameters.
Specify the stack parameters.
Stack name: Enter a descriptive stack name.
CloudAware Role ARN: Enter
CloudAware.aws.CloudAware Role Name: Enter a descriptive role name, for example,
CloudawareRole.External ID: Paste the External ID generated in Cloudaware.
Optional: Configure tags, stack failure options, and additional settings,
Acknowledge IAM resource creation, then click Next.
Review the stack settings, then click Submit to create the stack.
After the stack deployment completes, open the Outputs tab.
Copy the IAM Role ARN.
Manual creation
Use this option if you downloaded the CloudFormation template to create the stack manually in the AWS Console.
In the AWS Console:
Navigate to CloudFormation.
Click Create stack → With new resources (standard).
Under Specify template, select Upload a template file. Upload CloudFormation template downloaded from Cloudaware.
Click Next to proceed to stack parameters.
Specify the stack parameters.
Stack name: Enter a descriptive stack name.
CloudAware Role ARN: Enter
CloudAware.aws.CloudAware Role Name: Enter a descriptive role name, for example,
CloudawareRole.External ID: Paste the External ID generated in Cloudaware.
Optional: Configure tags, stack failure options, and additional settings.
Acknowledge IAM resource creation, then click Next.
Review the stack settings, then click Submit to create the stack.
After the stack deployment completes, open the Outputs tab.
Copy the IAM Role ARN.
Complete the setup in Cloudaware
Return to the Cloudaware Launcher (Control Hub):
Paste the IAM Role ARN into the form.
Click Continue to check the credentials.
Click Save.
After Cloudaware validates the AWS account, the trial registration is submitted.
Next steps
Check the inbox for the Registration Complete email.
Registration may take up to 1 hour.