
Manual Installation Using XML File
This guide explains how to configure the Cloudaware application when installed using the .xml file. Cloudaware extends the Configuration Item table in ServiceNow with additional cloud inventory data.
Summary
Get credentials for ServiceNow-to-Google from Cloudaware at support@cloudaware.com.
Download the Cloudaware app using the installation
.xmlfile sys_remote_update_set_6911728433319610c71d58273e5c7b37.xml.
Configure the application in ServiceNow:
Set up ServiceNow-to-Google integration
Install the application
Configure the workflow in Workflow Studio
See the setup guidelines below for details.
Configure Cloudaware CMDB application in ServiceNow
Cloudaware provides credentials for setting up ServiceNow-to-Google integration. This integration is required for JWT-based authorization. The configured JWT Provider will be used as the Connection when creating the data update workflow.
Set up ServiceNow-to-Google integration
Configure JWT Key and Certificate.
a. Create a JWT Key:
Navigate to All → System OAuth → JWT Keys.
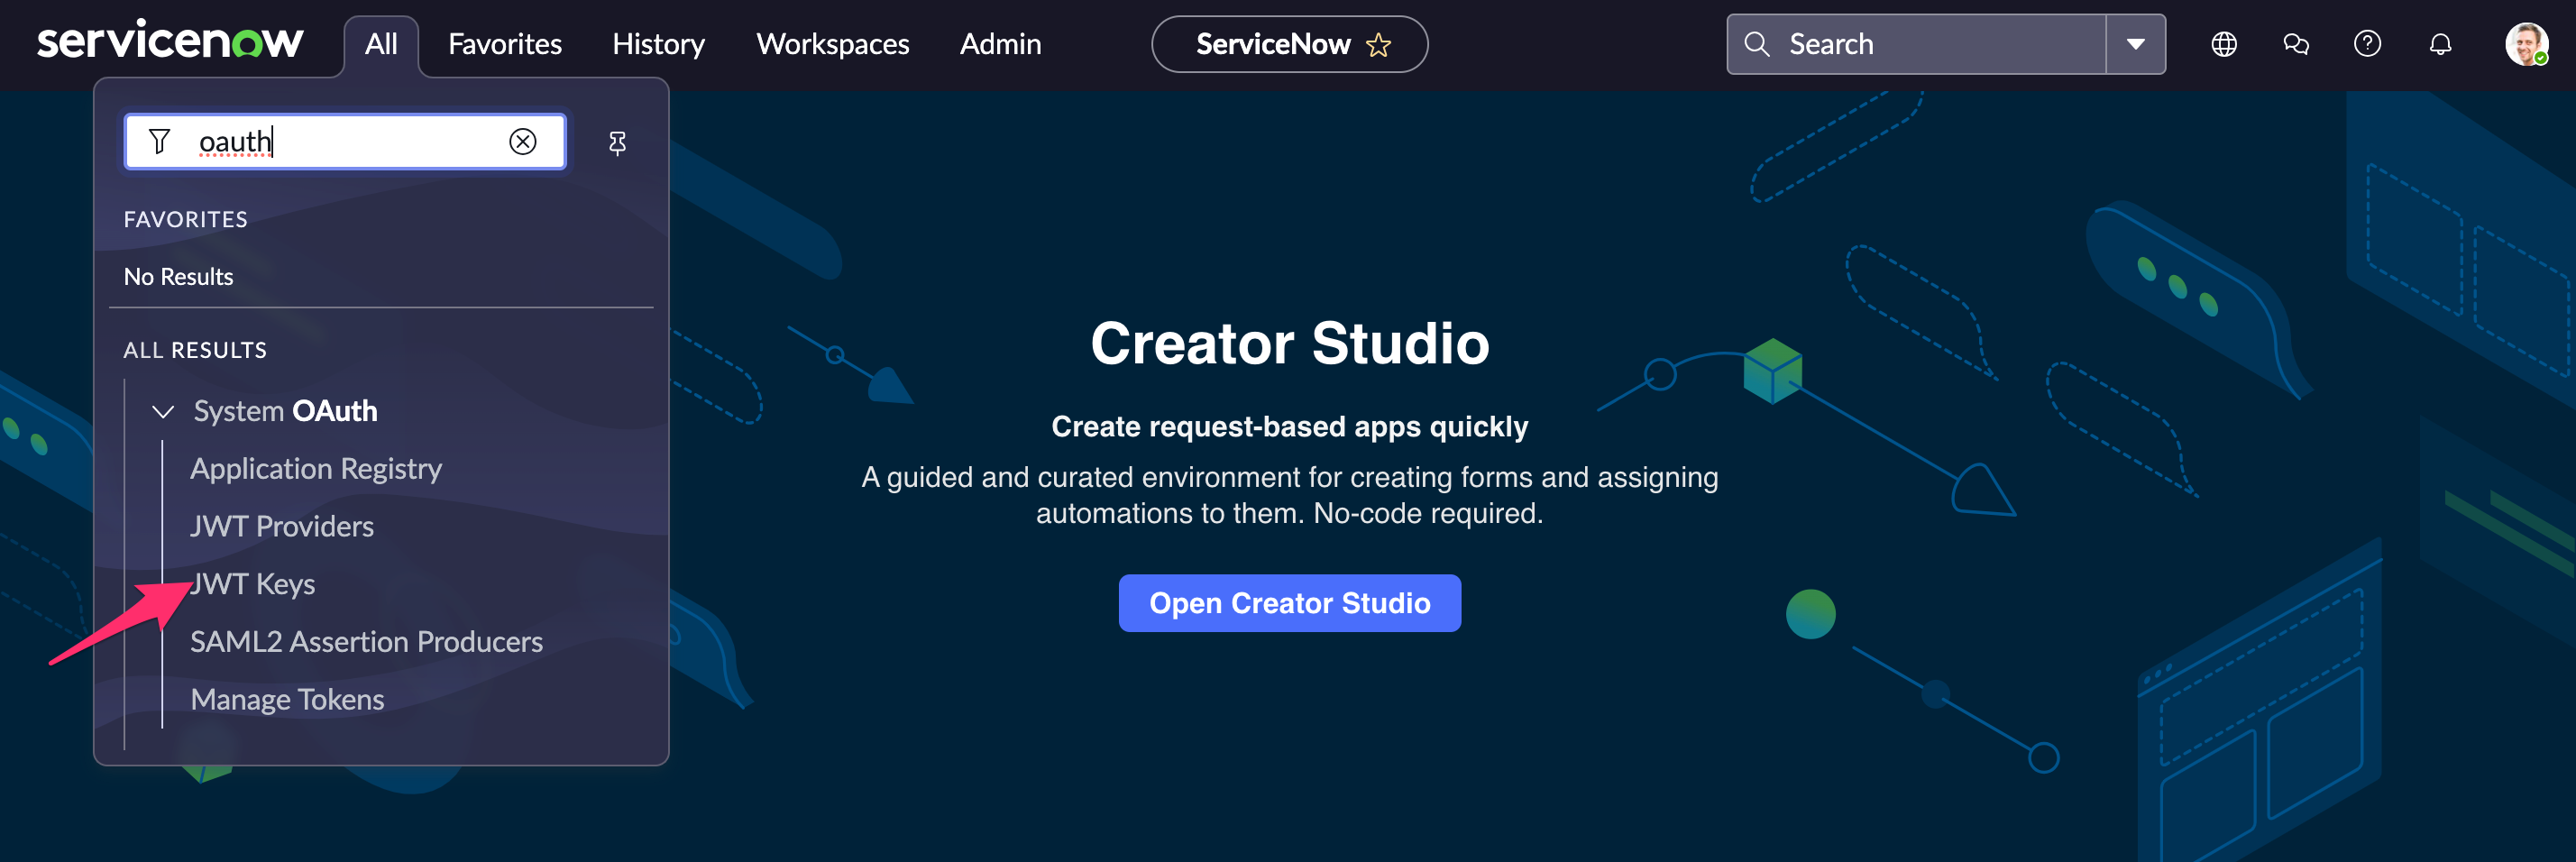
Click New and fill out the form:
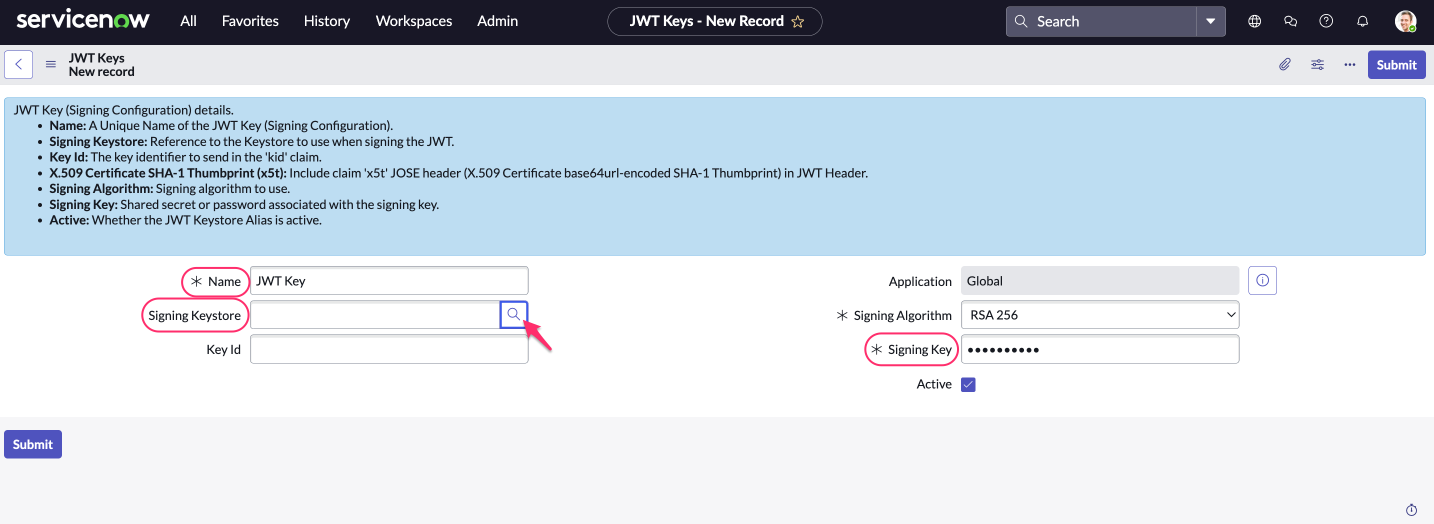
WHERE
Name: a meaningful name, e.g. Google JWT Key
Signing Key:notasecret
Signing Keystore: click the magnifier icon to create a new keystore (see step b below)
b. Create a JWT Certificate that will serve as a signing keystore:
In the pop-up window, click New.
Fill out the form:
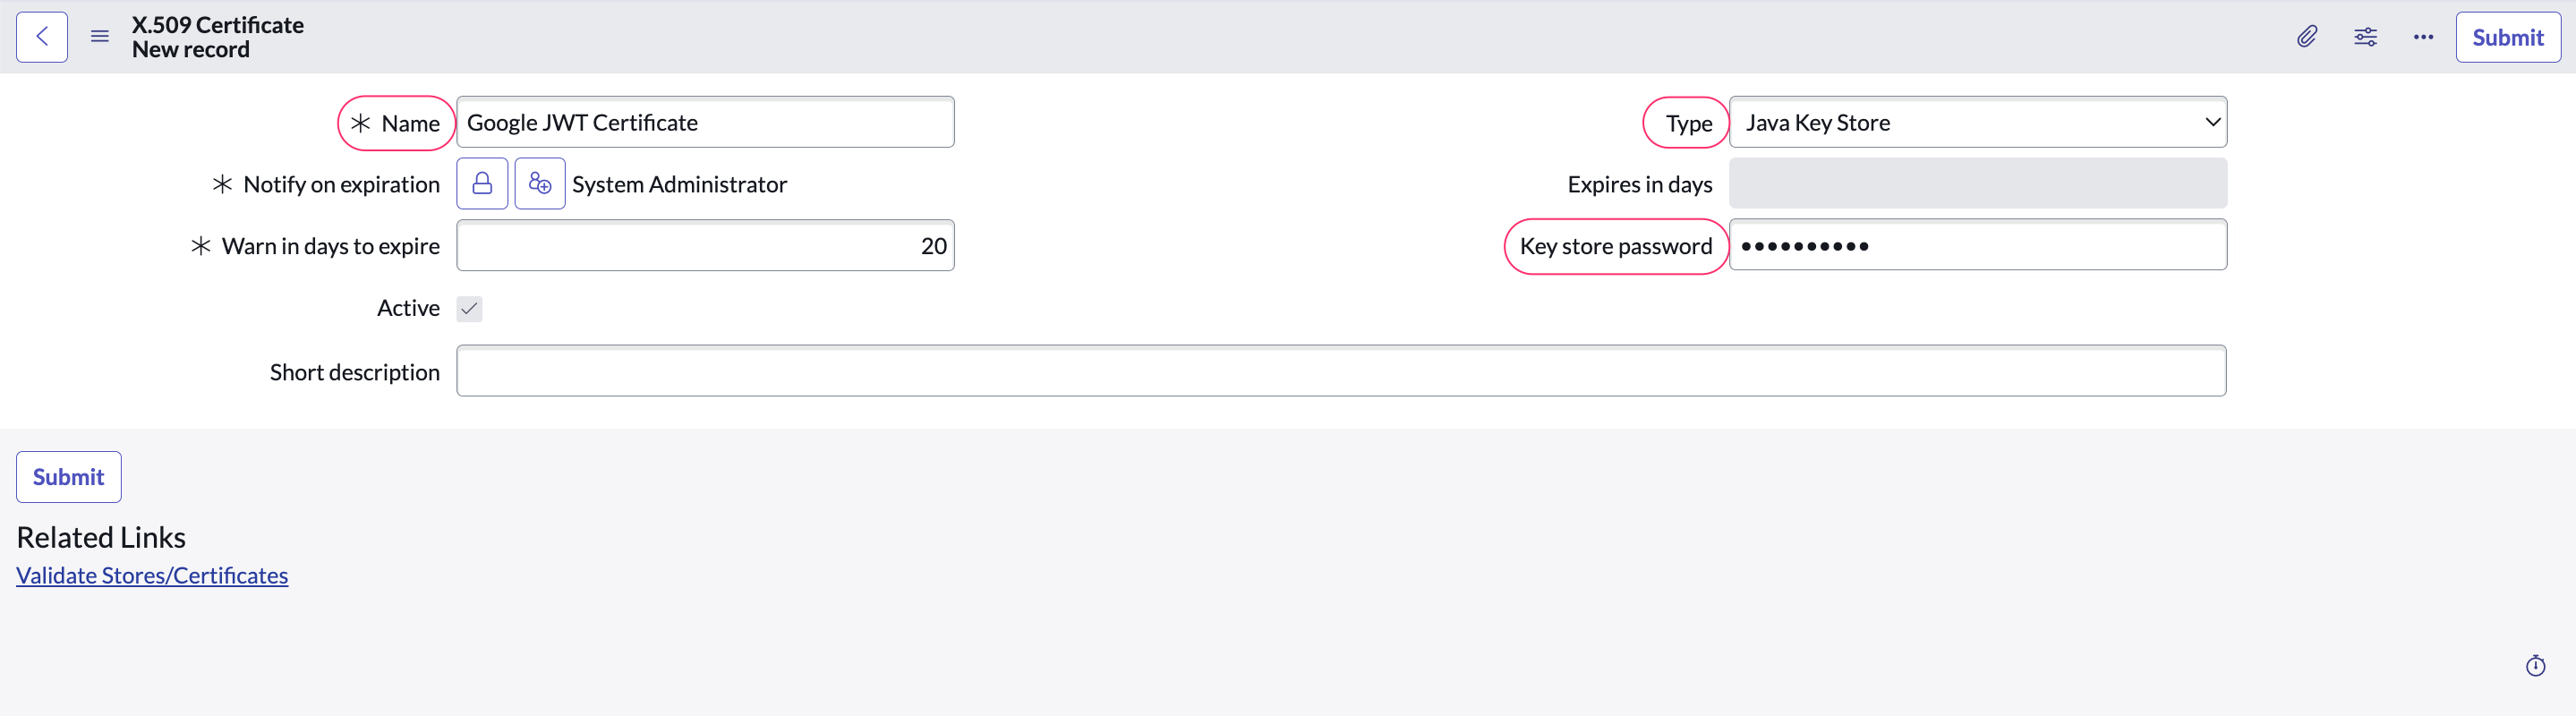
WHERE
Name: a meaningful name, e.g. Google JWT Certificate
Type: Java Key Store
Key store password:notasecretClick the paperclip icon, then Choose file to attach the
.p12certificate provided by Cloudaware.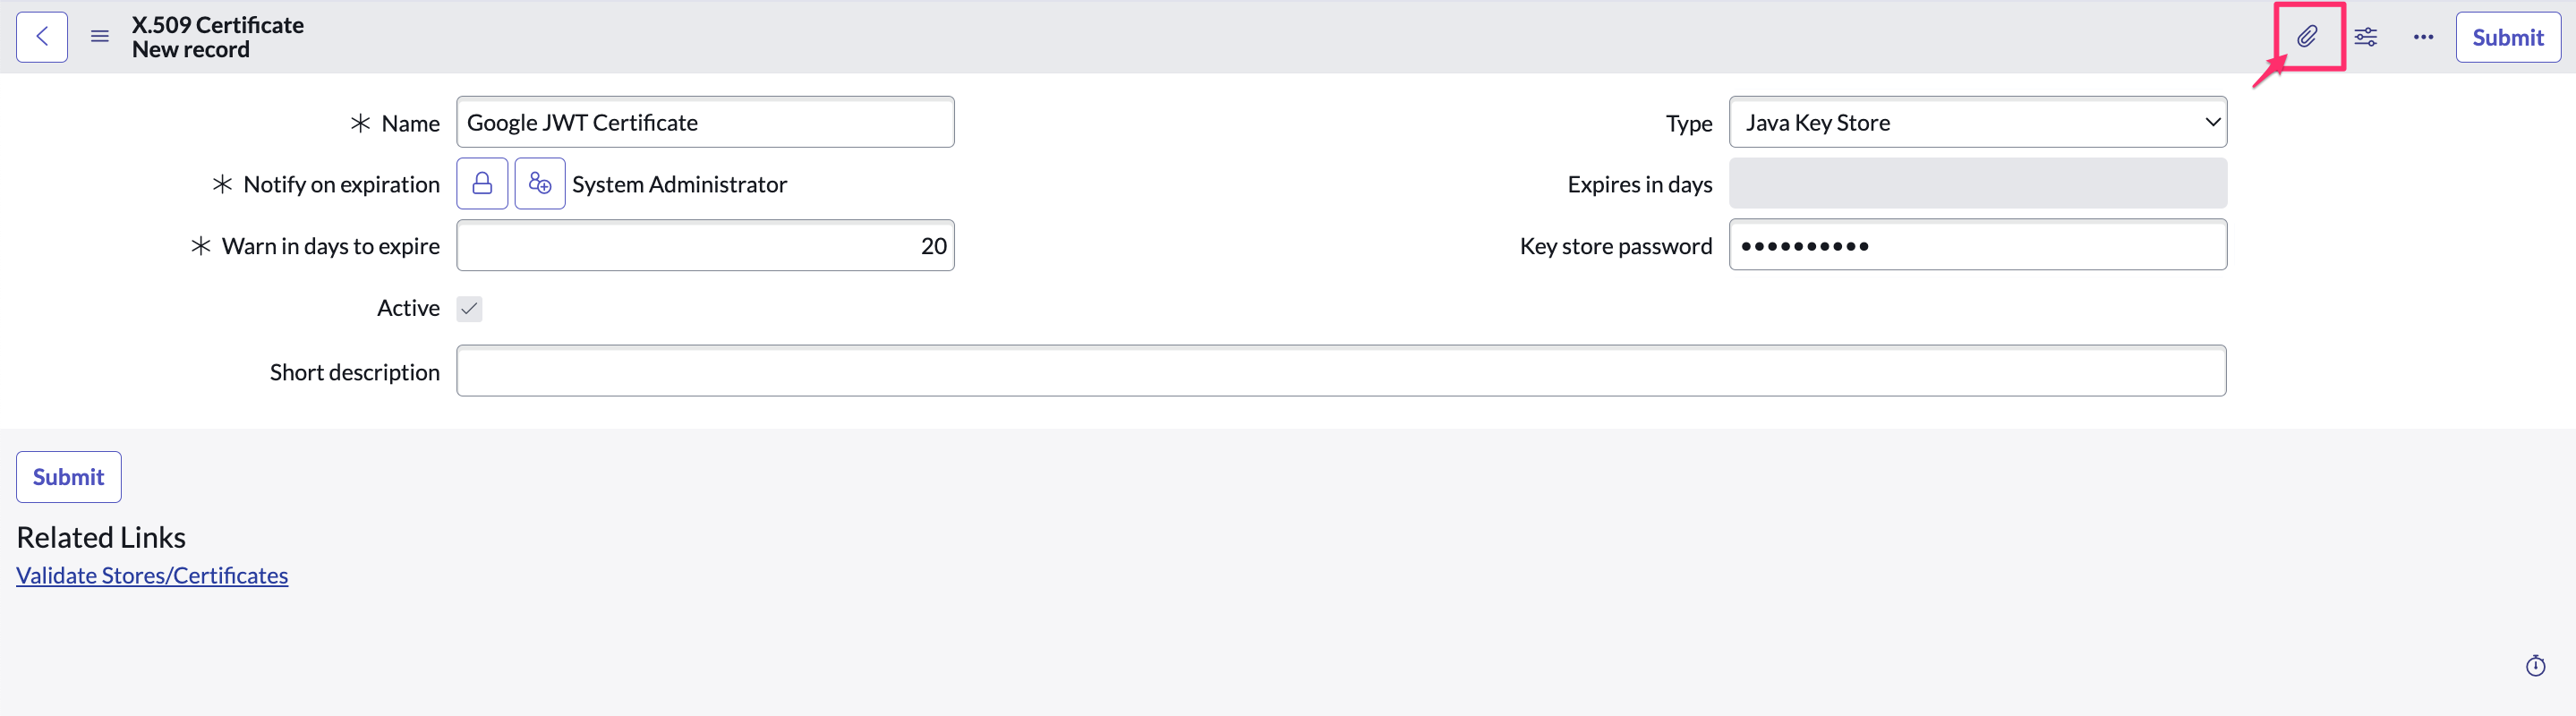
Click Submit.
c. Return to the JWT Key form. Under Signing Keystore, select the created certificate (Google JWT Certificate).

Click Submit.
Configure JWT Provider.
Navigate to All → System OAuth → JWT Providers:
Click New and fill out the form:
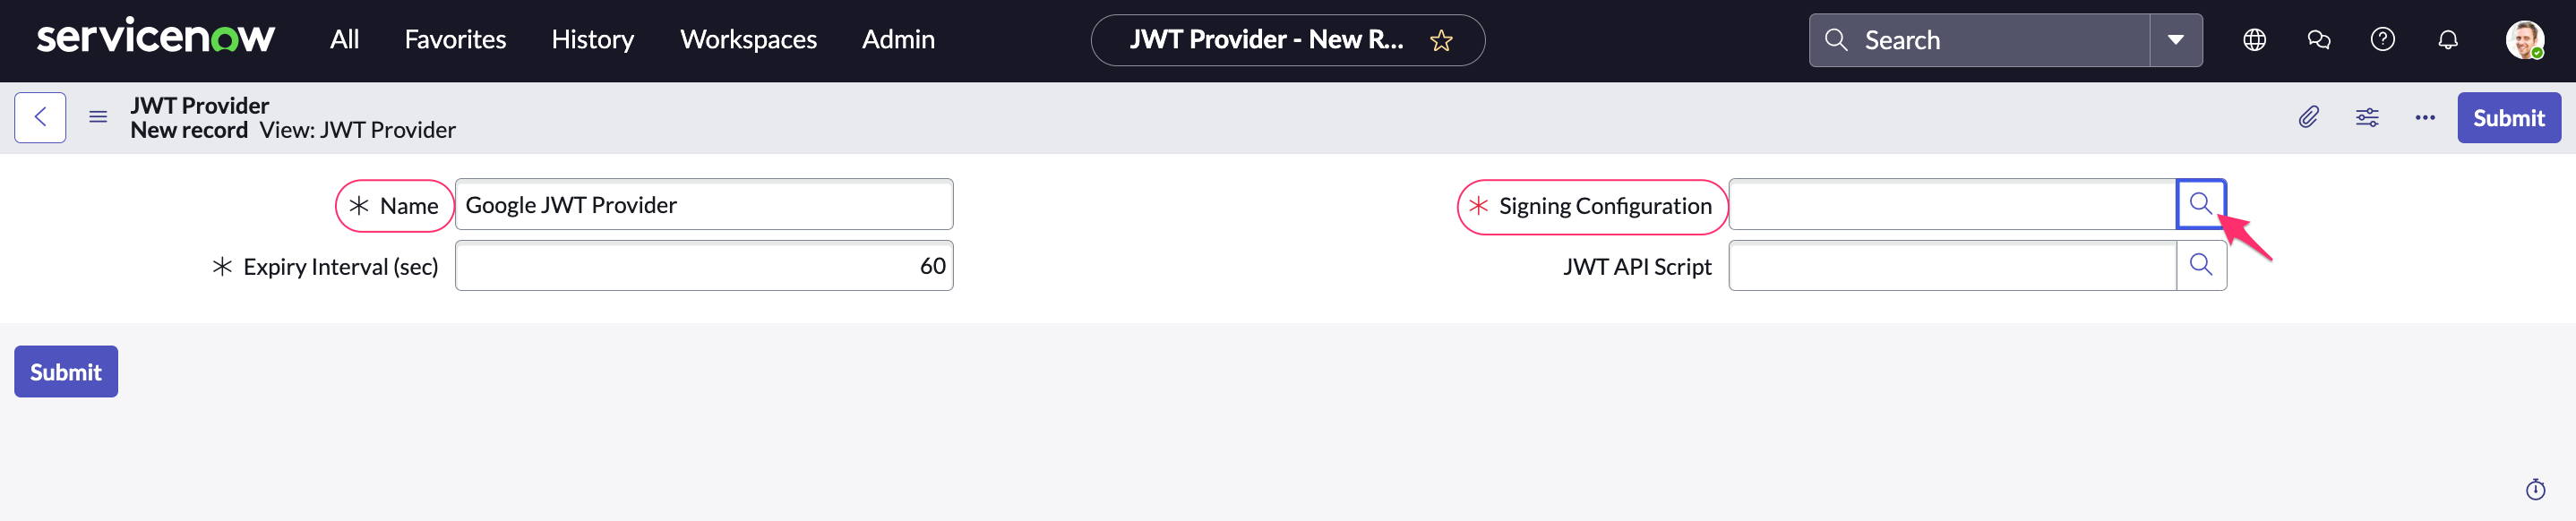
WHERE
Name: a meaningful name, e.g. Google JWT Provider
Signing Configuration: click the magnifier icon (Lookup using list) and select the configured Google JWT Key from the list
Open the JWT provider record (in this example, Google JWT Provider) to edit settings. Select the tab 'Standard Claims'. Add the following claims:
iss - string - Service Account email address provided by Cloudaware
sub - string - Service Account email address provided by Cloudaware
aud - string -https://oauth2.googleapis.com/token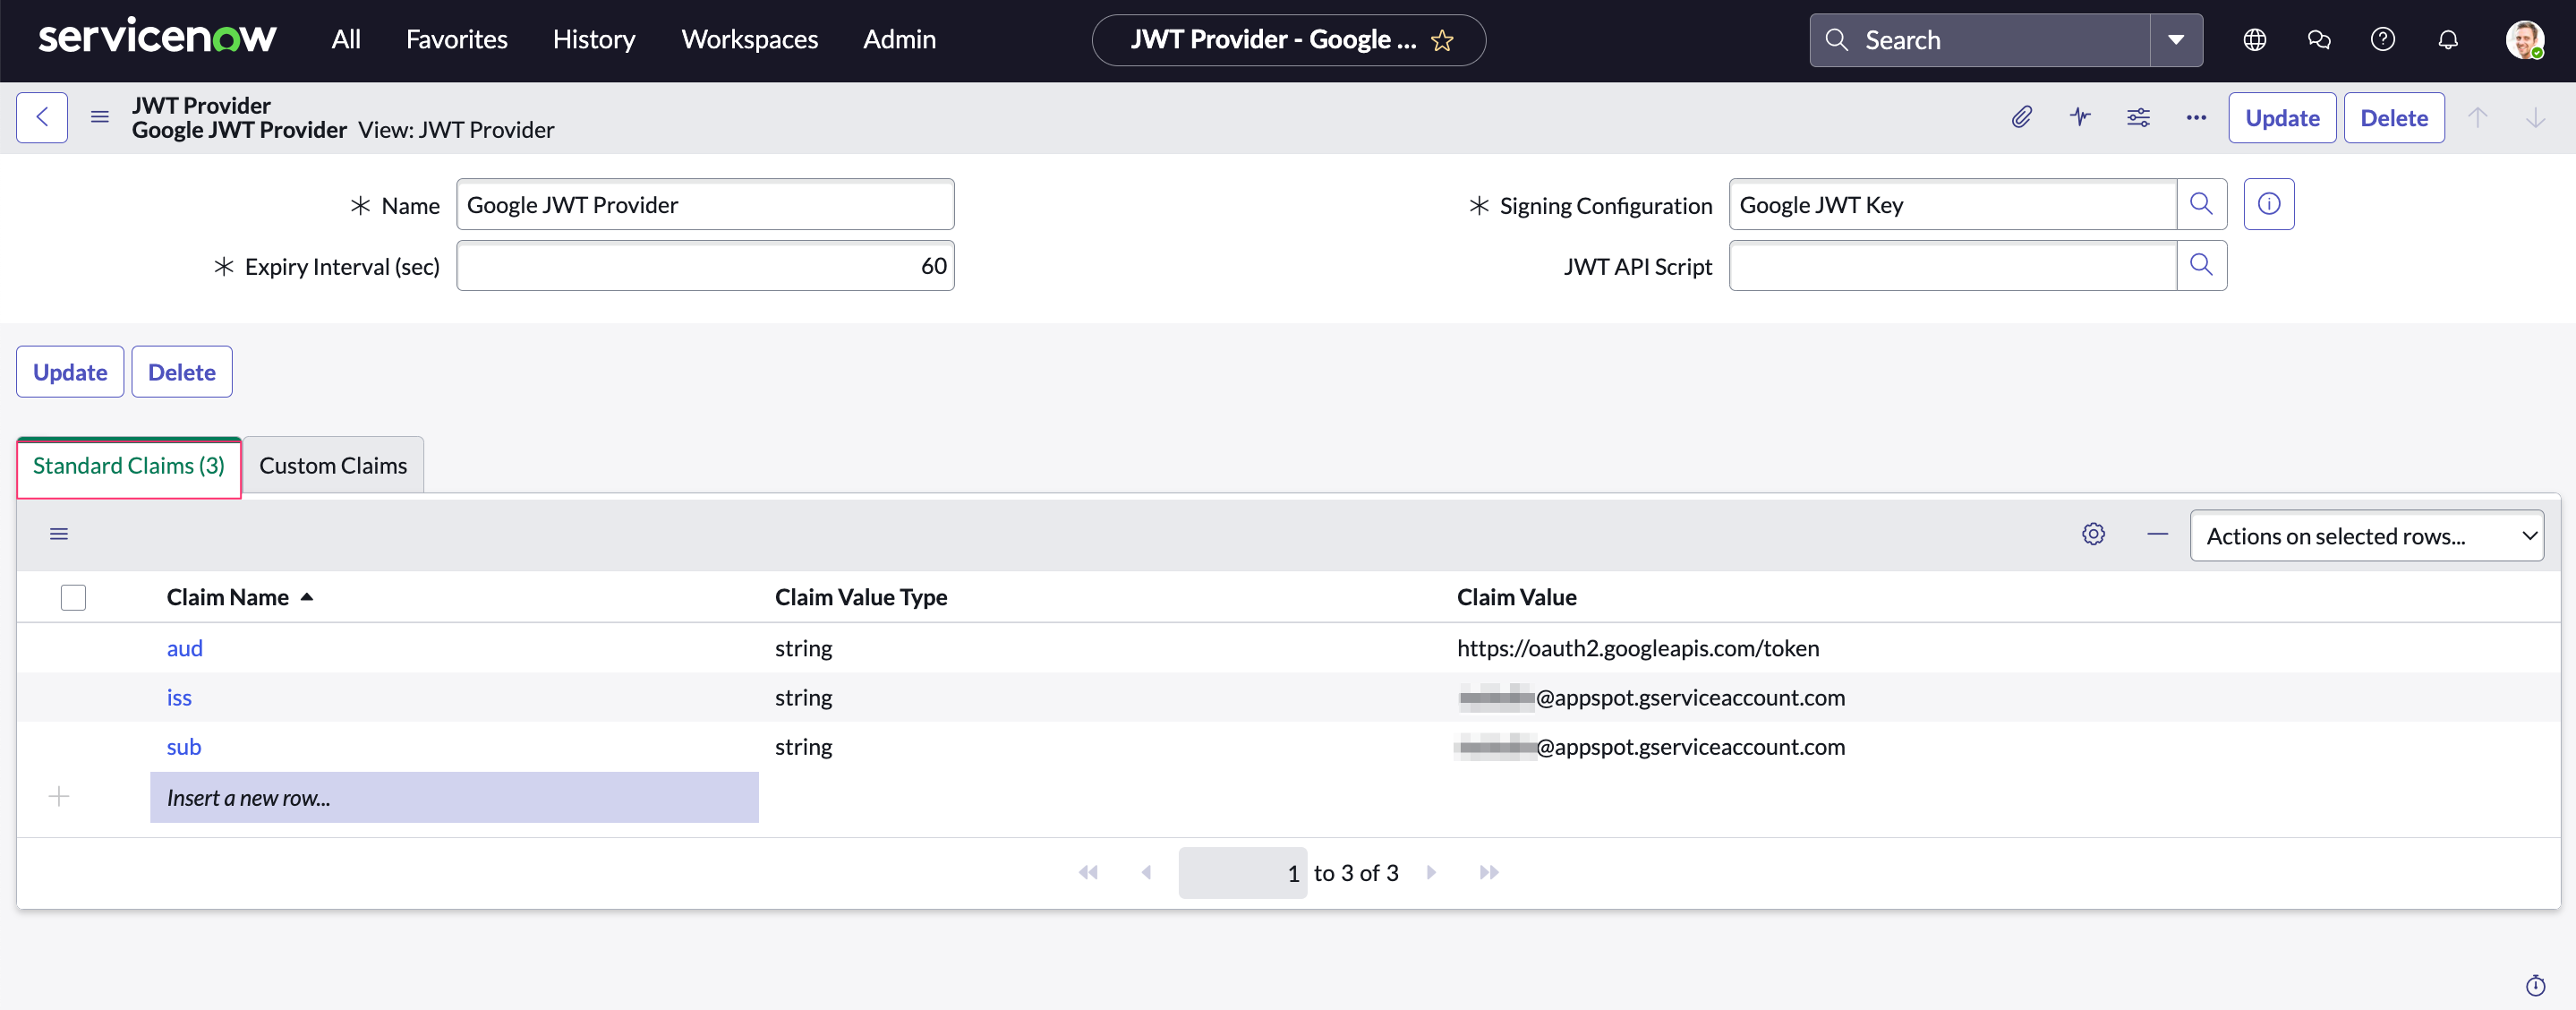
Click Update.
Configure Application Registry.
Navigate to All → System OAuth → Application Registry.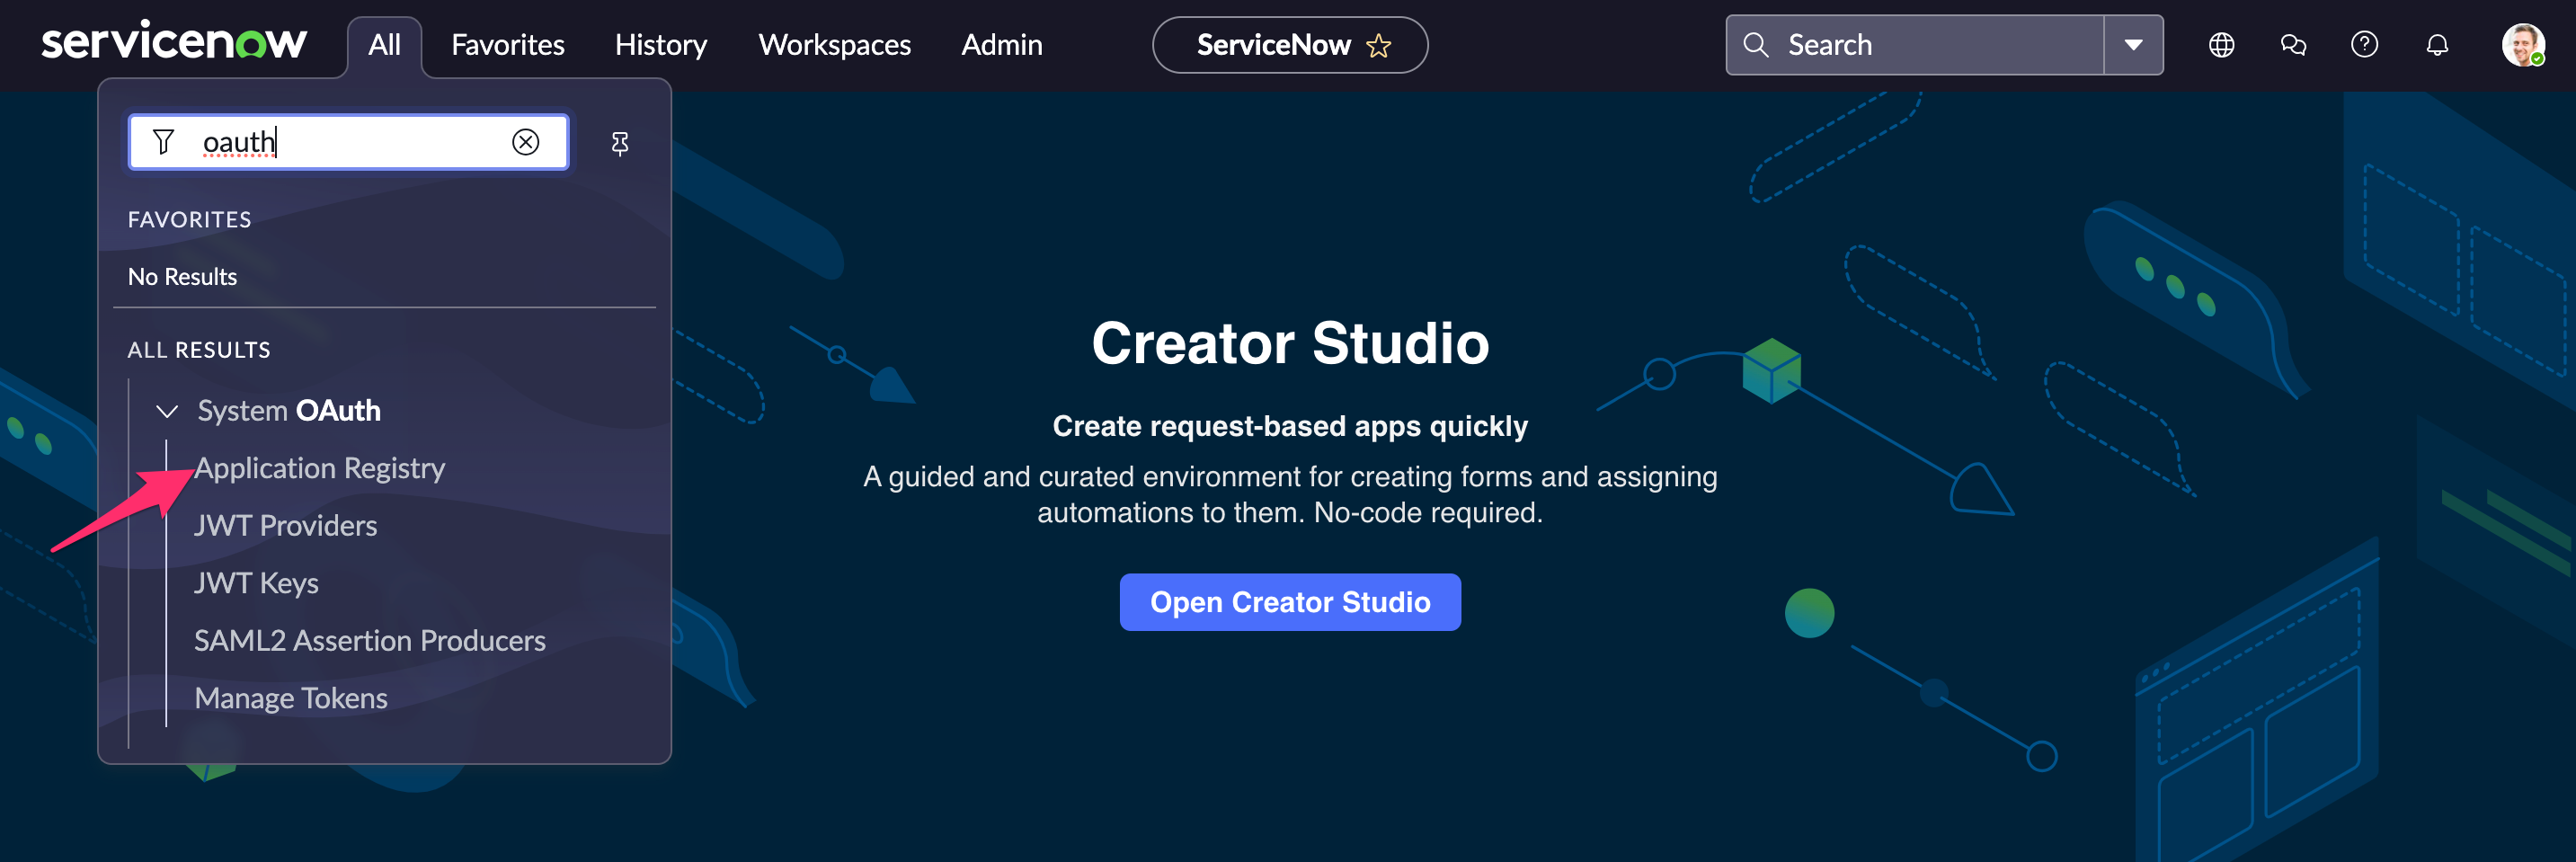
Click New → select 'Connect to a third party OAuth Provider' from the list. Fill out the form:
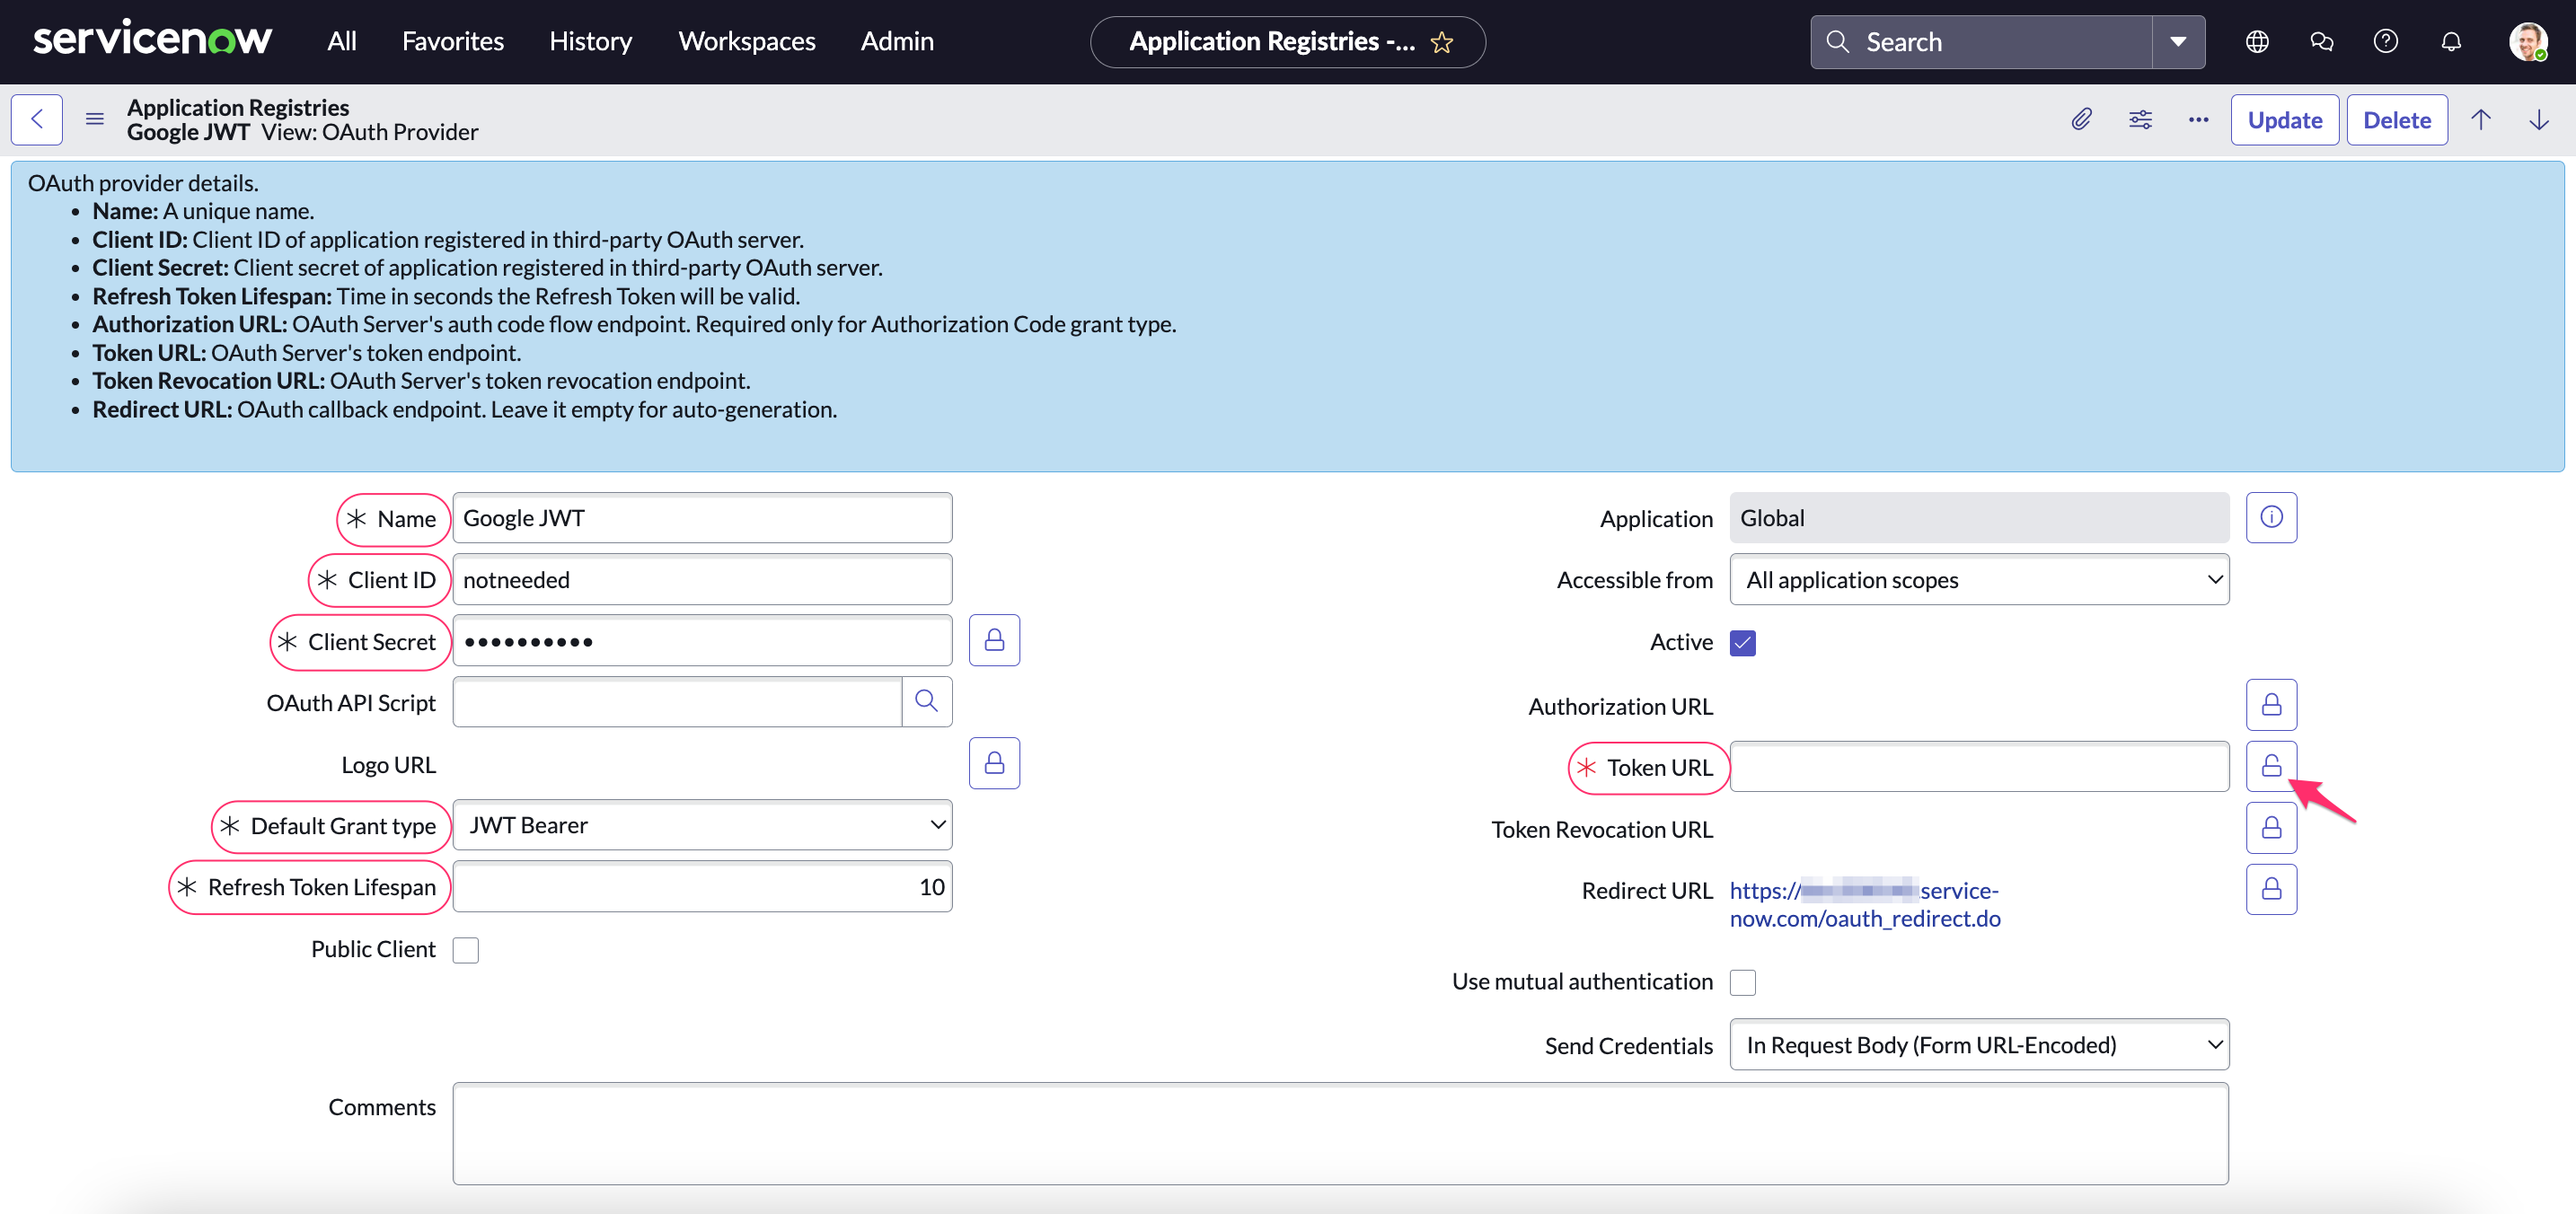
WHERE
Name: a meaningful name, e.g. Google JWT
Client ID:notneeded
Client secret:notneeded
Default grant type: JWT Bearer
Token:https://oauth2.googleapis.com/token
Refresh Token Lifespan: 10
Click Submit.
Click on the name of OAuth Entity Profile (in this example, Google JWT default_profile) to edit settings: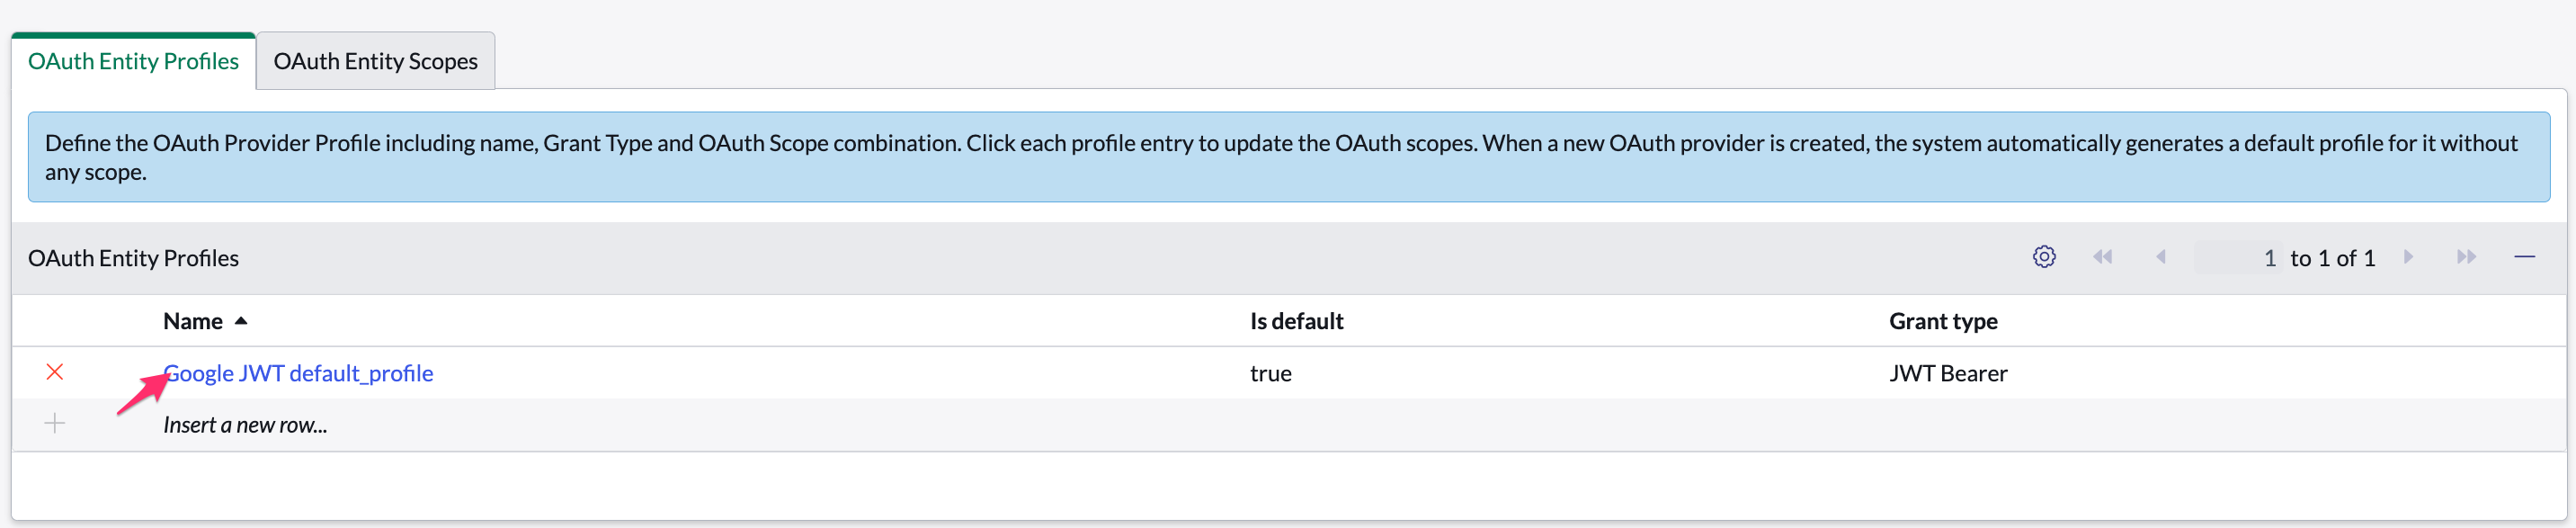
Next to the JWT Provider, click the magnifier icon (Lookup using list) and select the Google JWT Provider from the list.
Click Update.
Go back to JWT Providers. Select the configured Google JWT Provider from the list.
Select the tab 'Custom Claims'. Add a new claim: scope - string -https://www.googleapis.com/auth/bigquery.readonly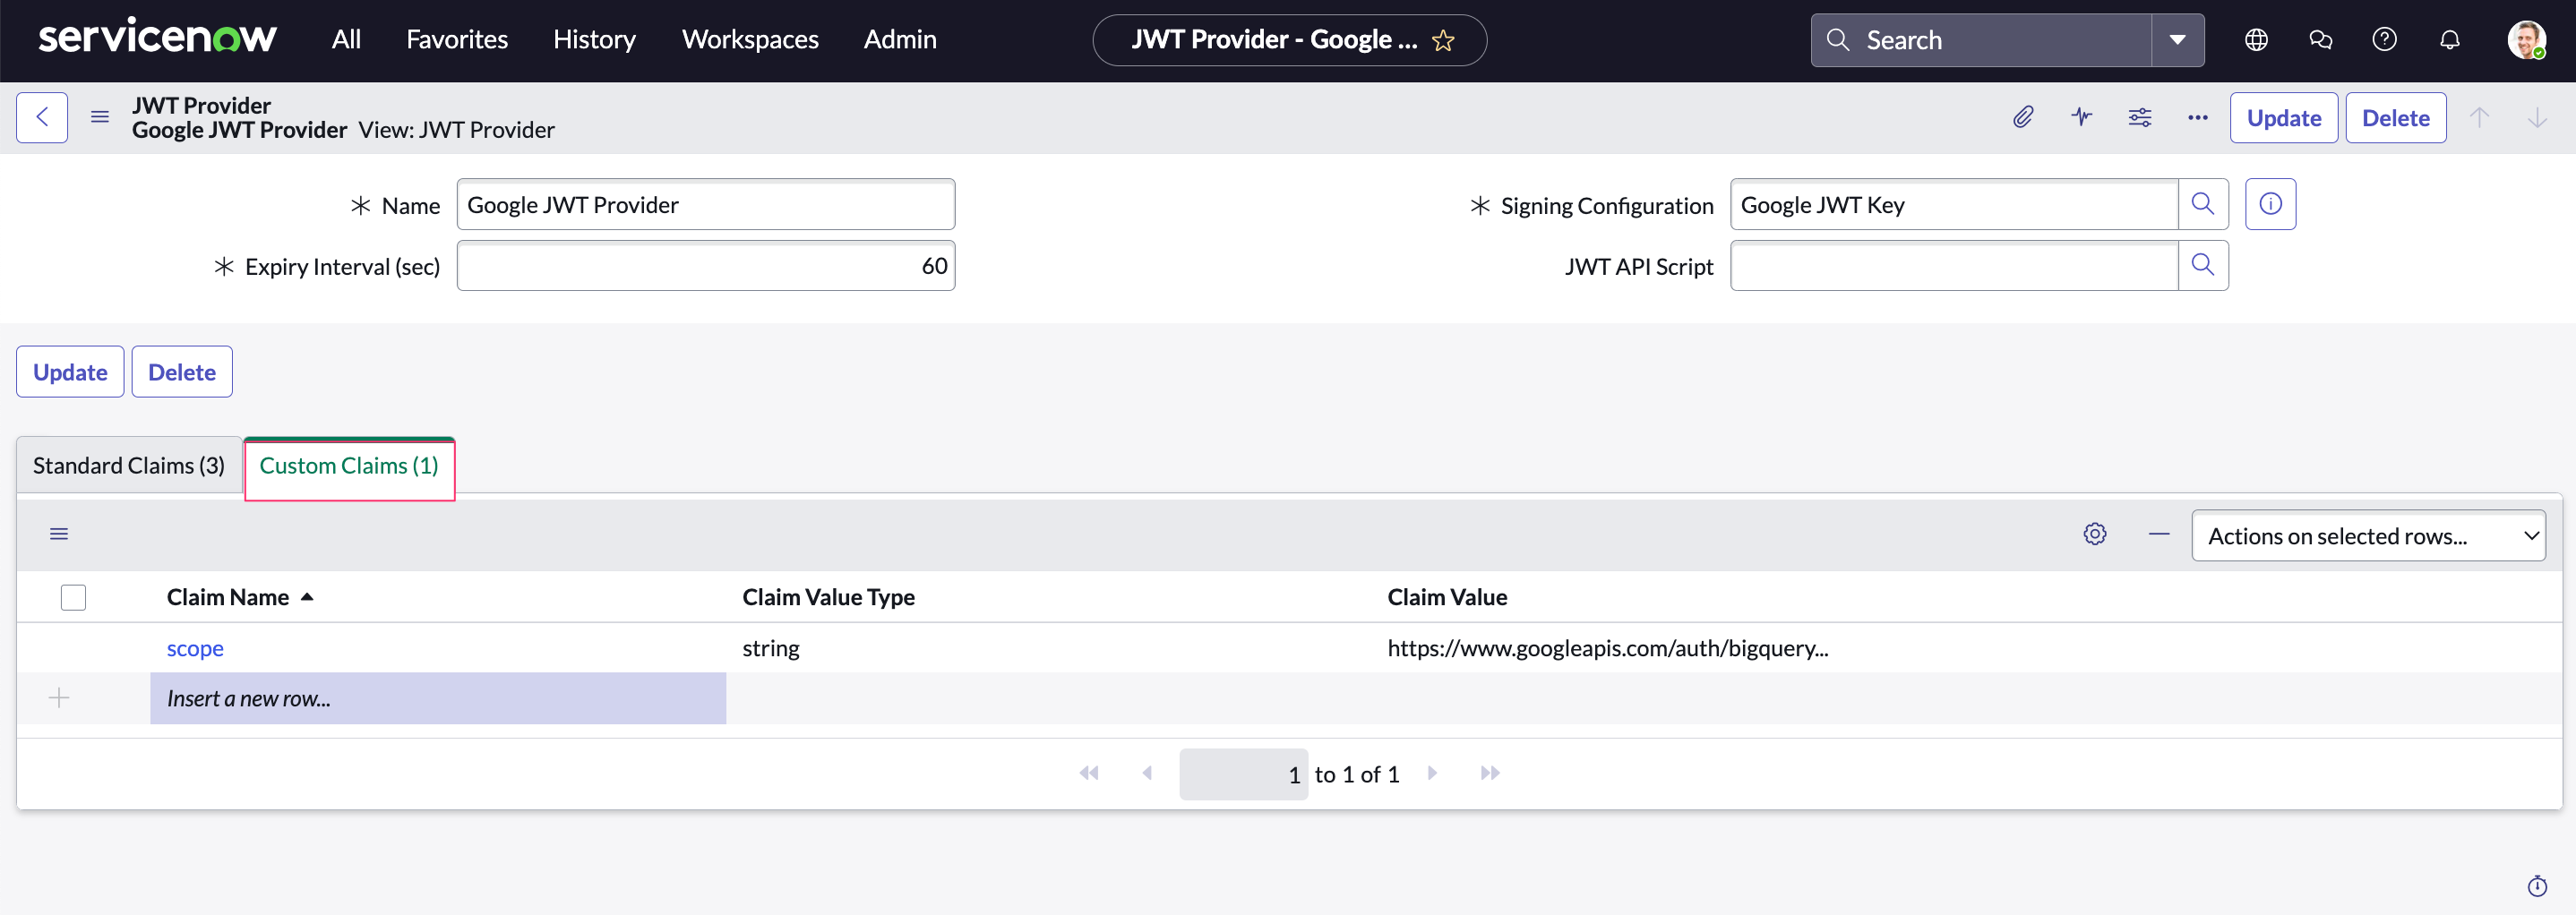
Click Update.
Configure Credentials.
Navigate to All → Connections & Credentials → Credentials.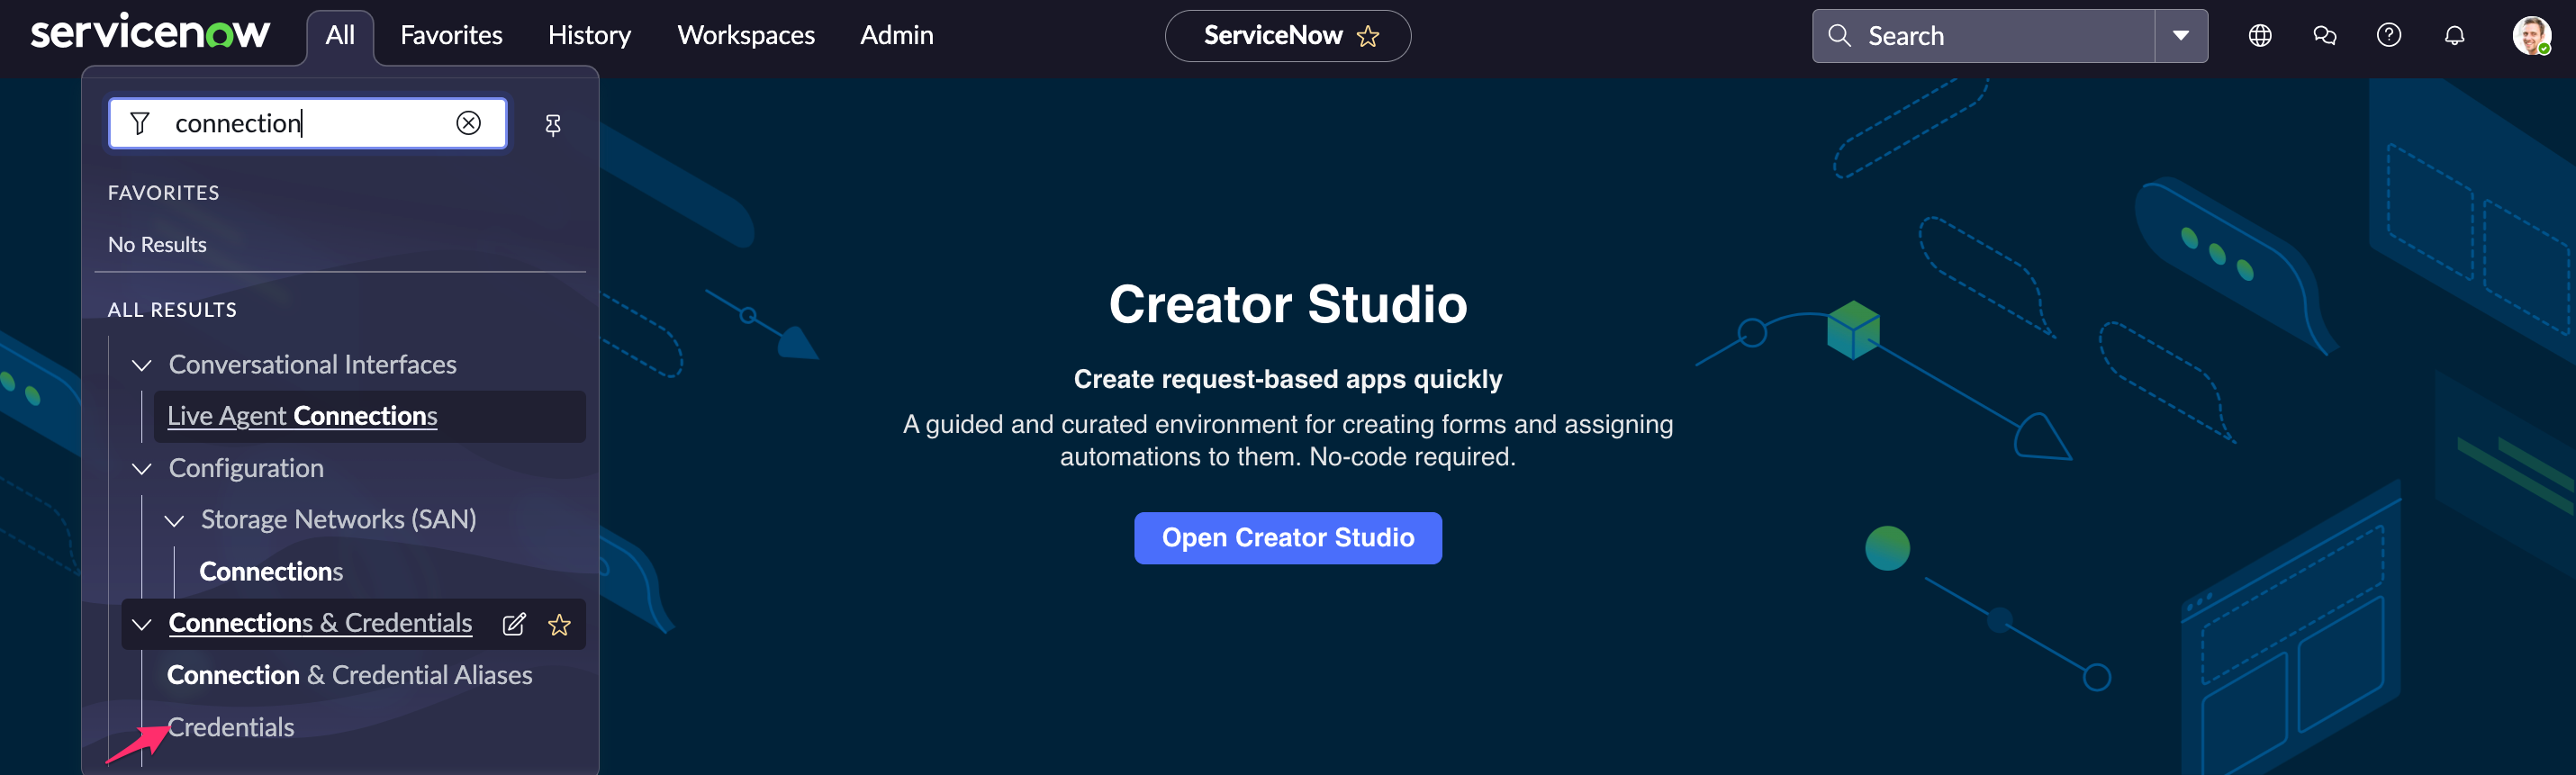
Click New → select 'Auth 2.0 Credentials' from the list. Fill out the form:
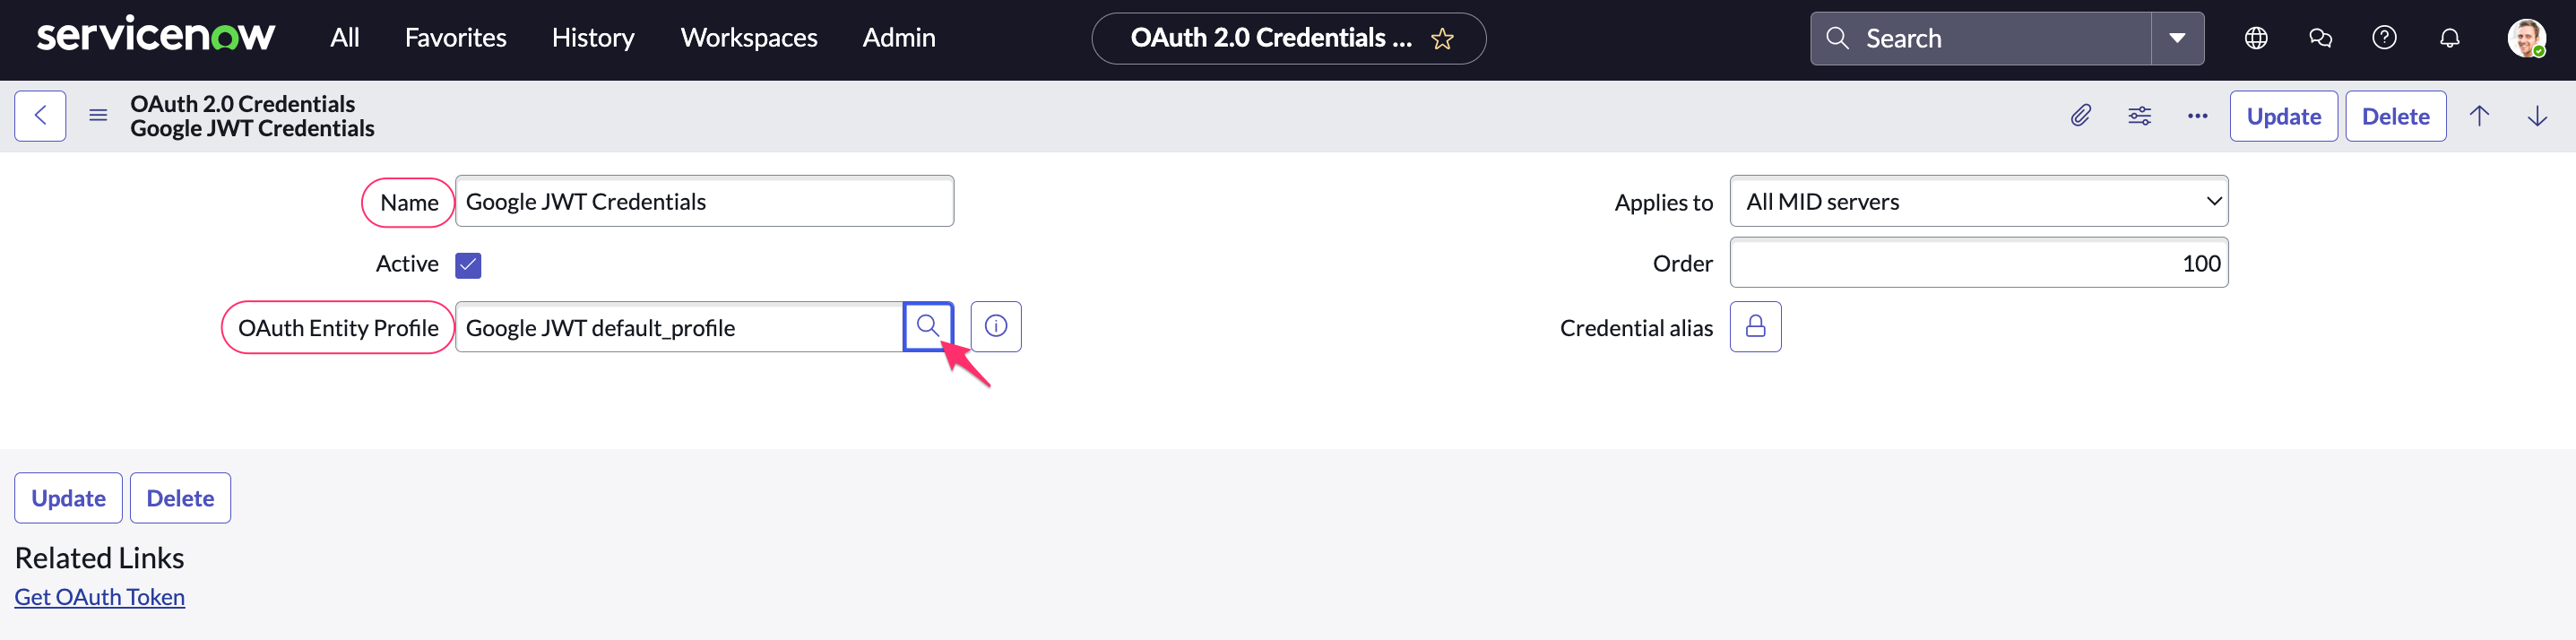
WHERE
Name: a meaningful name, e.g. Google JWT Credentials
OAuth Entity Profile: select the configured OAuth Entity Profile (in this example, Google JWT default_profile)
Click Update. Click Get OAuth Token to test the connection.
Navigate to All → Connections & Credentials Aliases. Click New.
Set the alias as Google JWT and save it by right-clicking on the upper grey menu.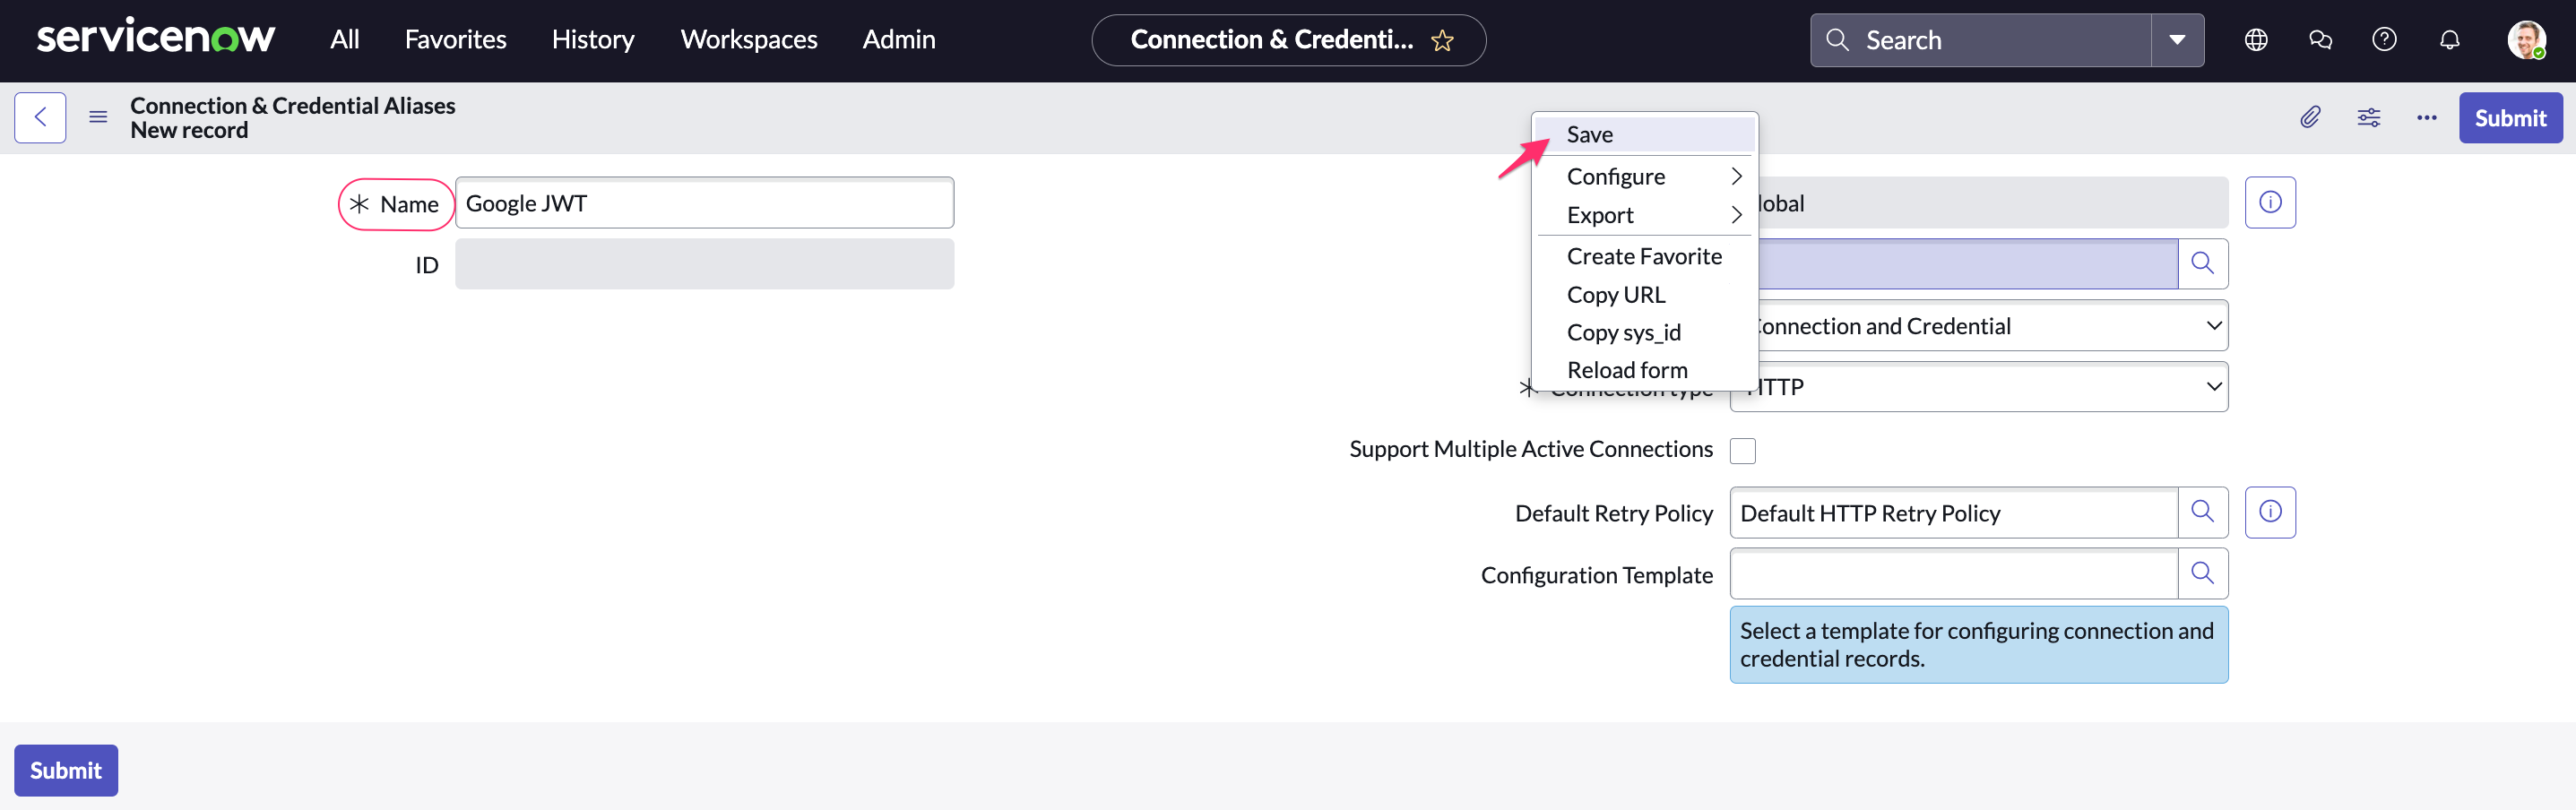
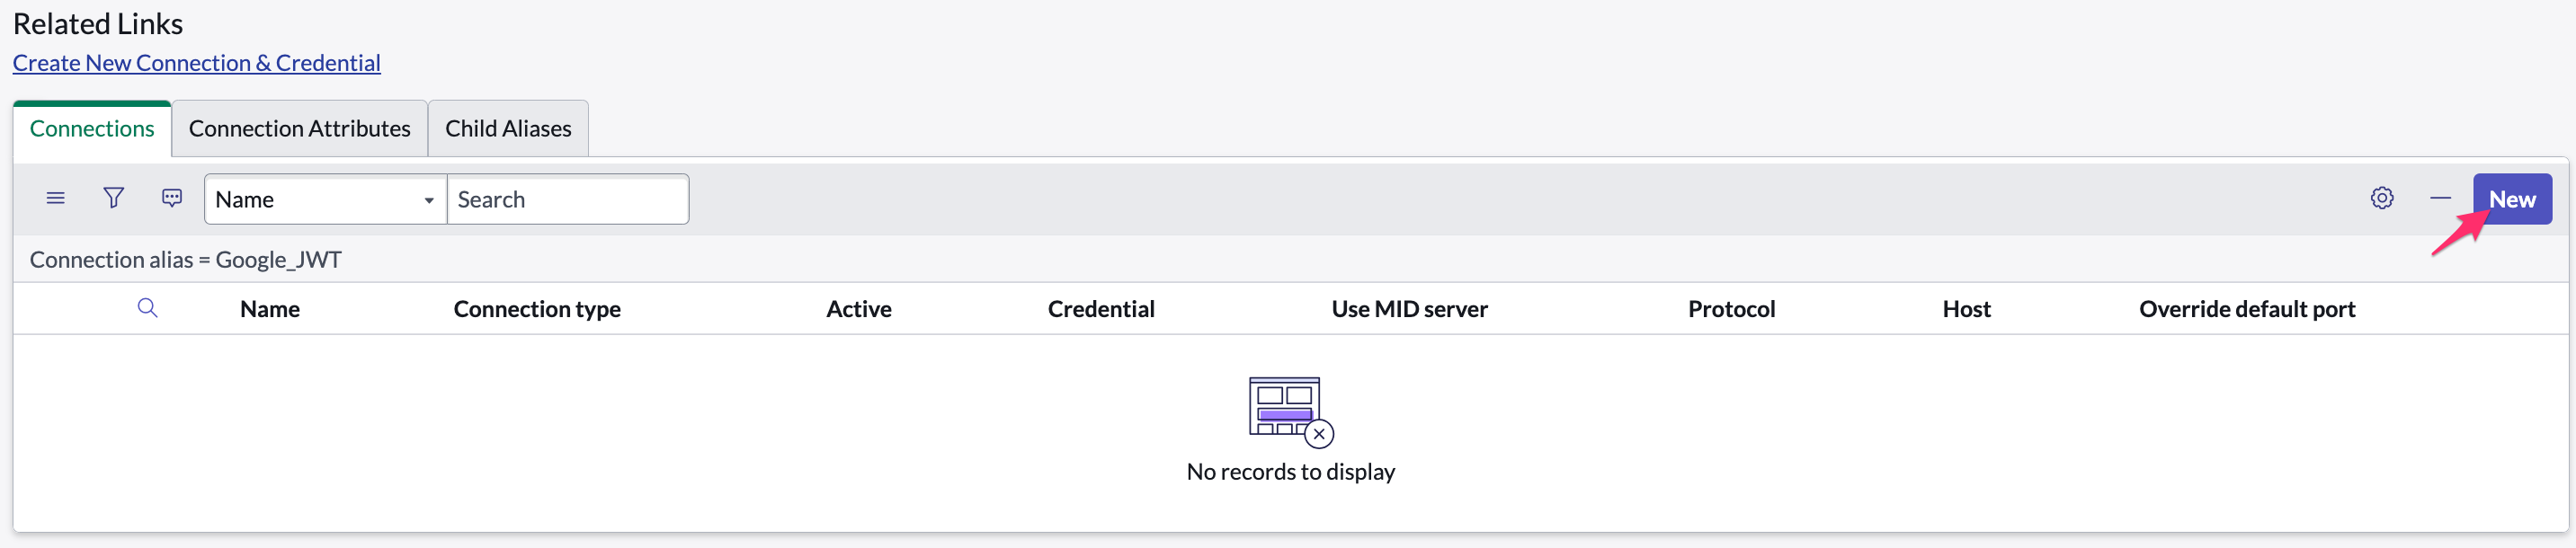
In the section that appears, click New to create a HTTP(s) Connection.
Fill out the form:
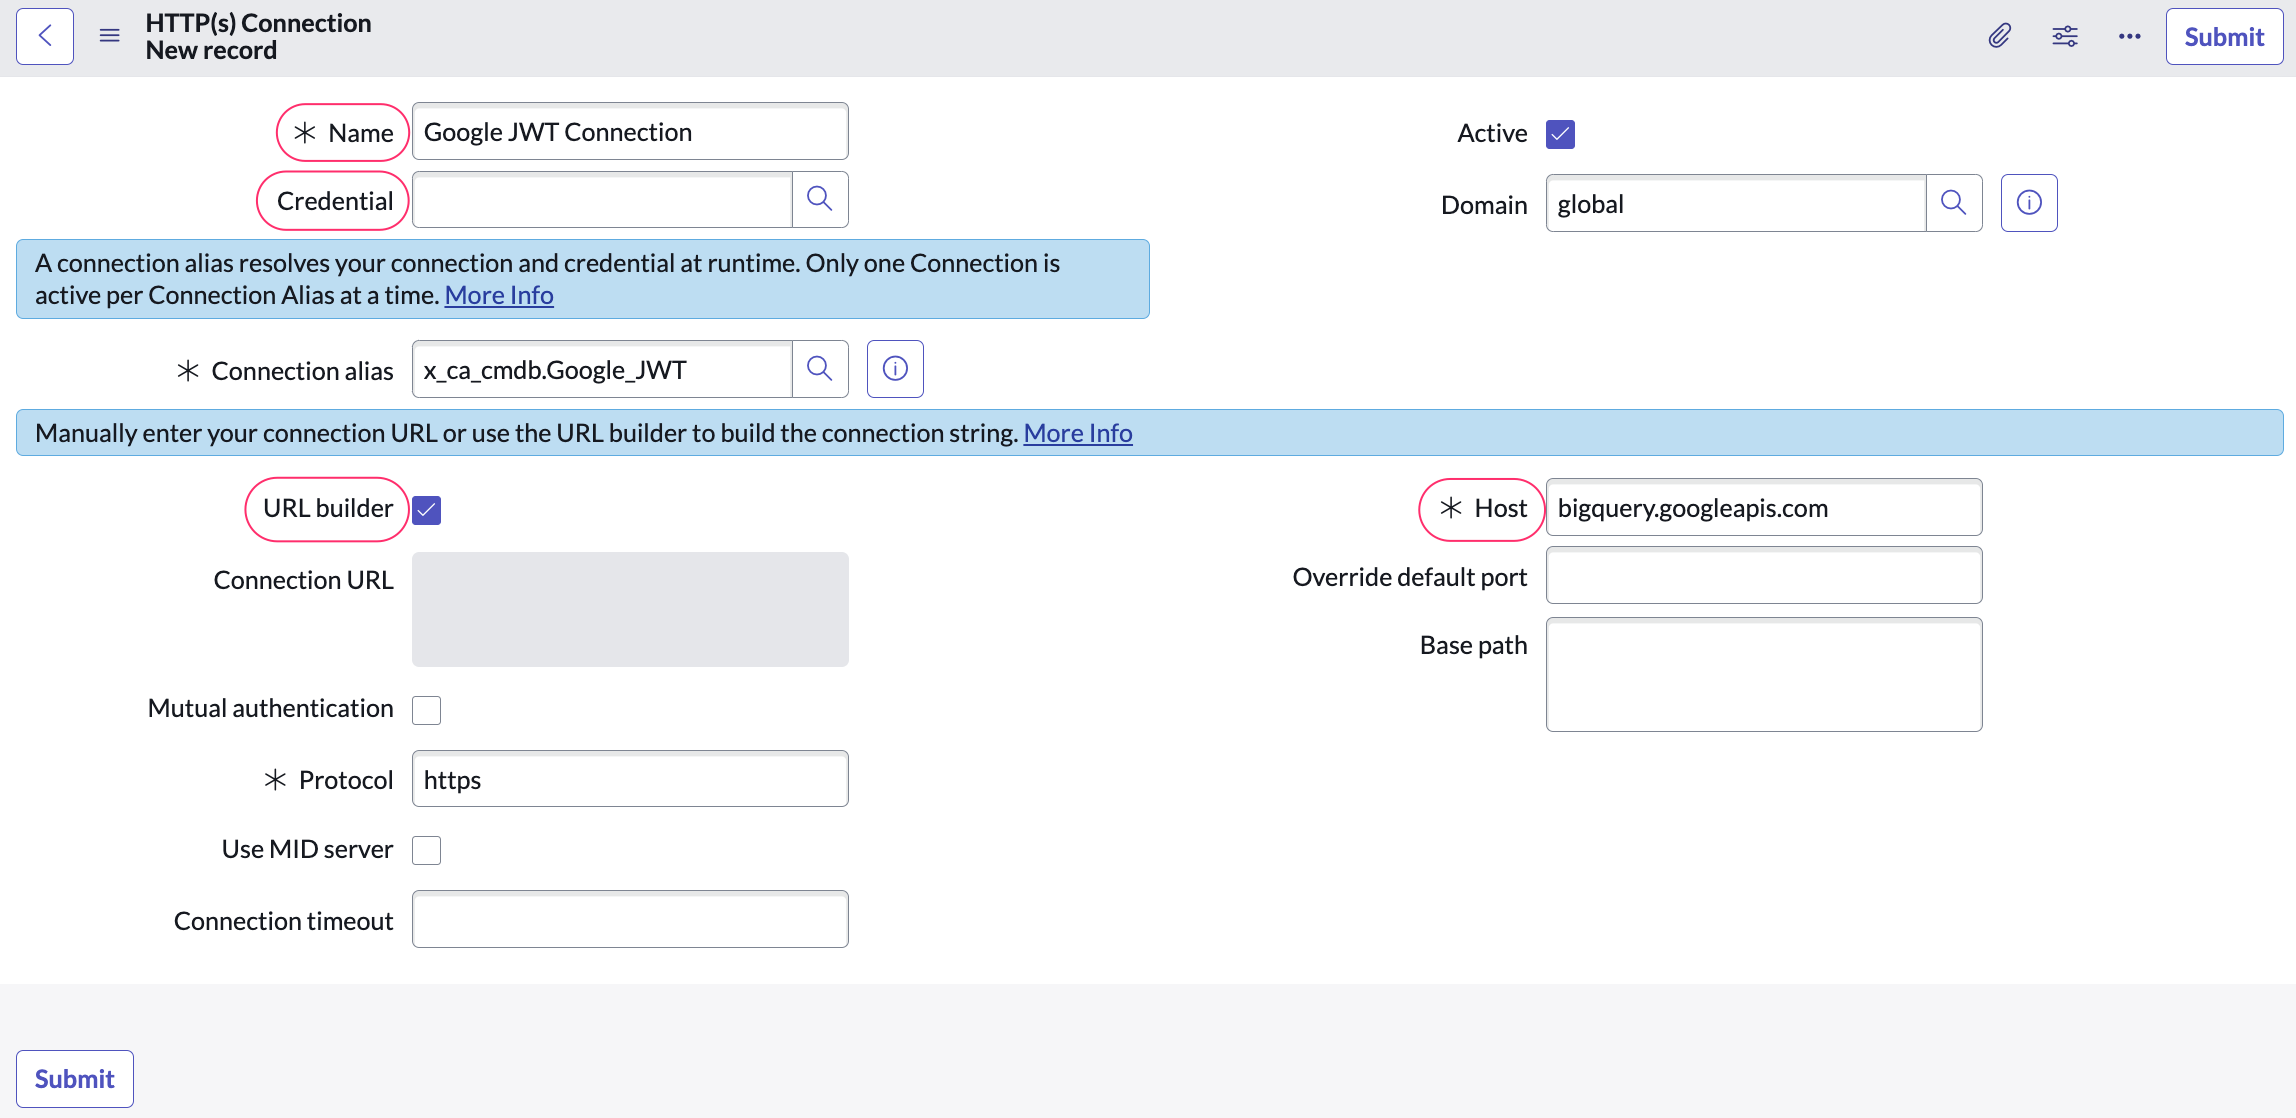
WHERE
Name: meaningful name, e.g. Google JWT Connection
Credential: select Google JWT Credentials
URL builder: check this box
Host:bigquery.googleapis.com
Click Submit.
Install the Cloudaware CMDB application
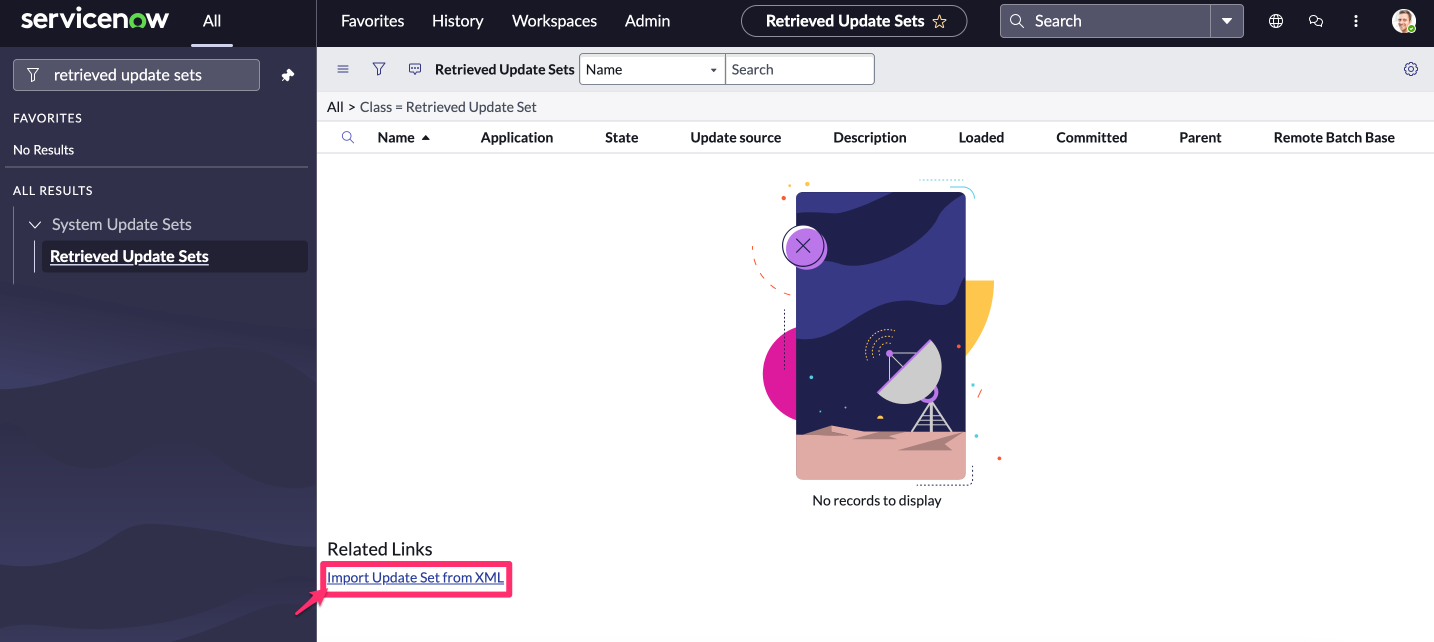
Navigate to All → Retrieved Update Sets:
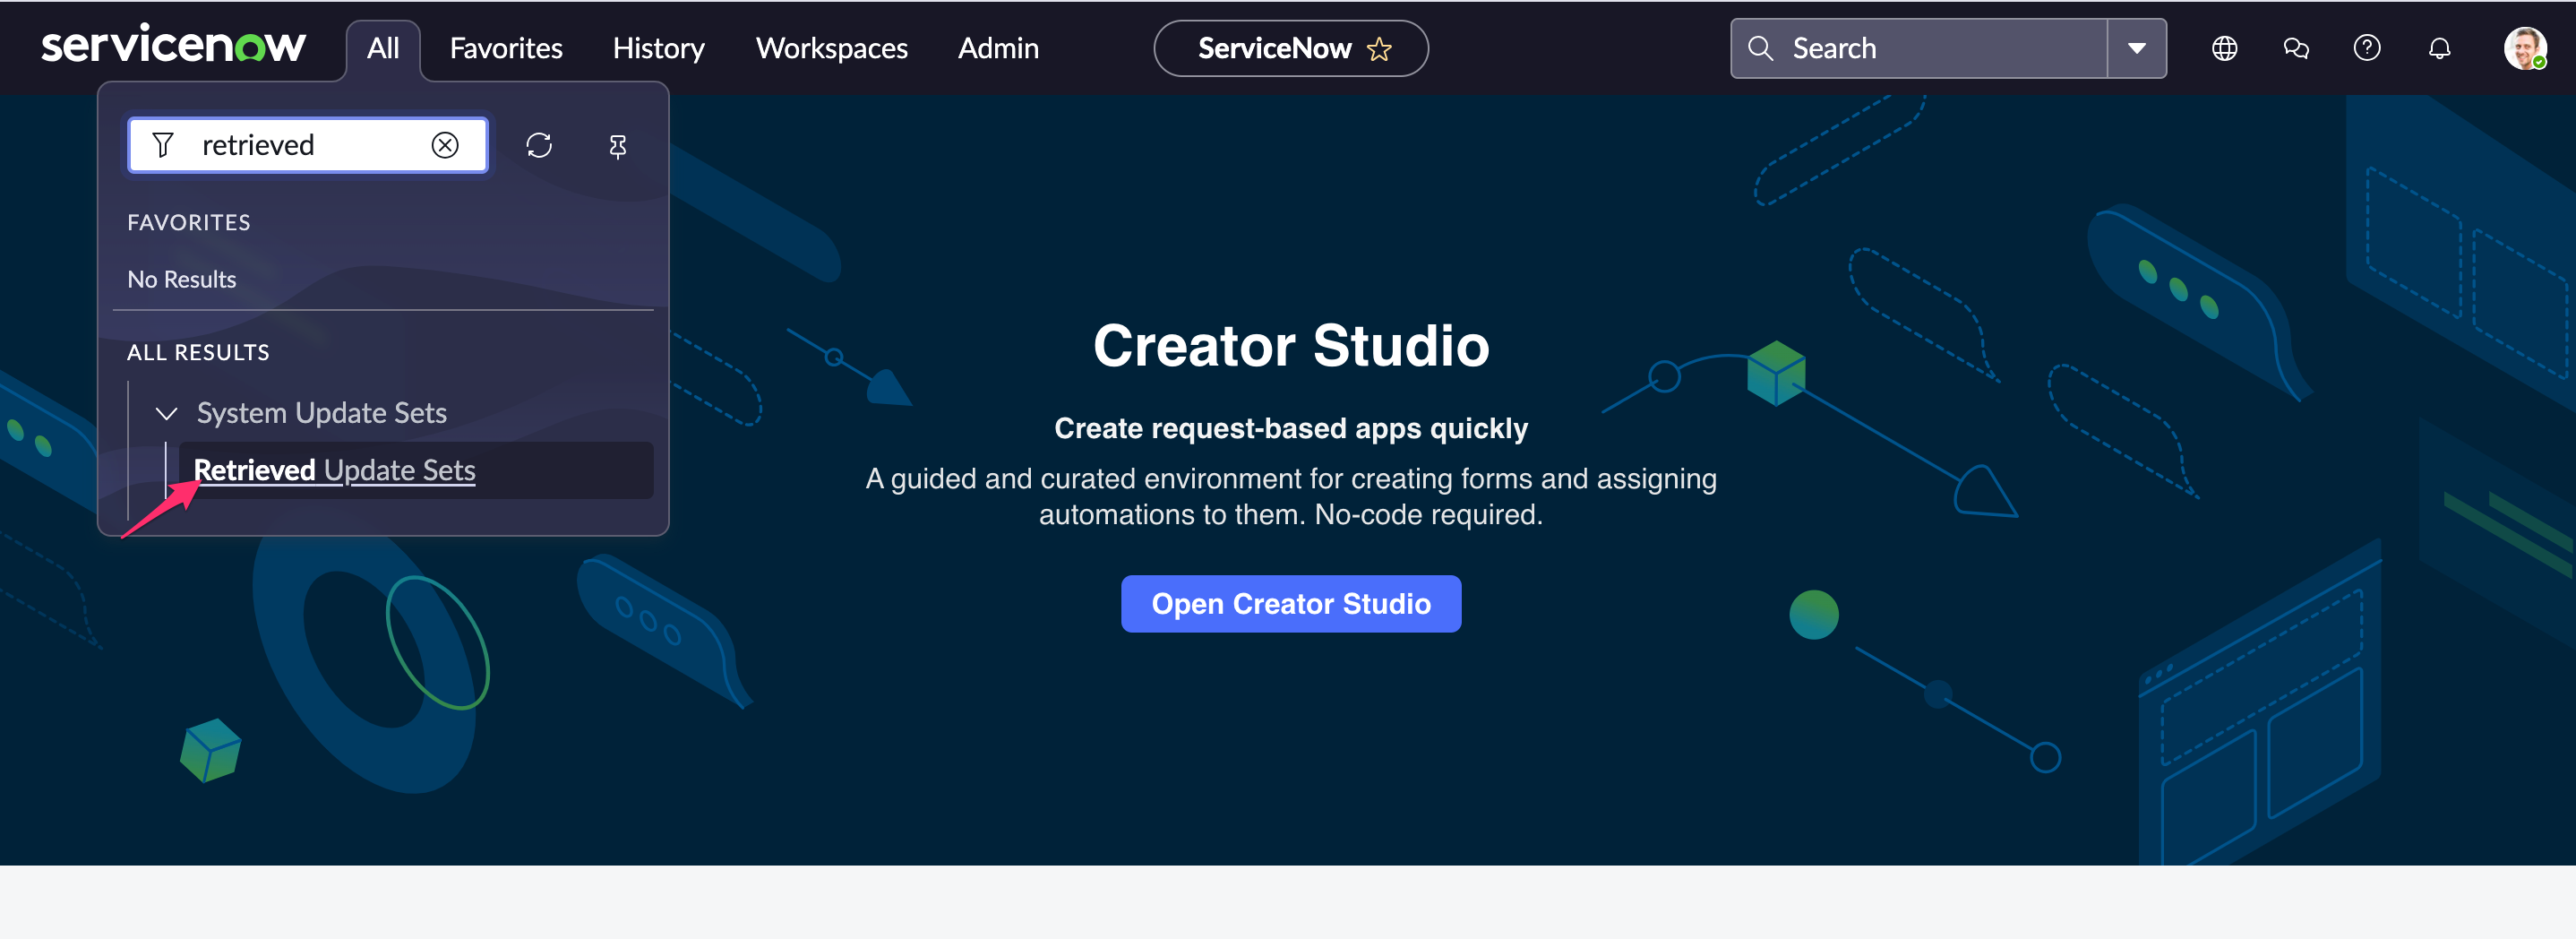
Click the link Import Update Set from XML.
Choose the
.xmlfile downloaded before. Click Upload.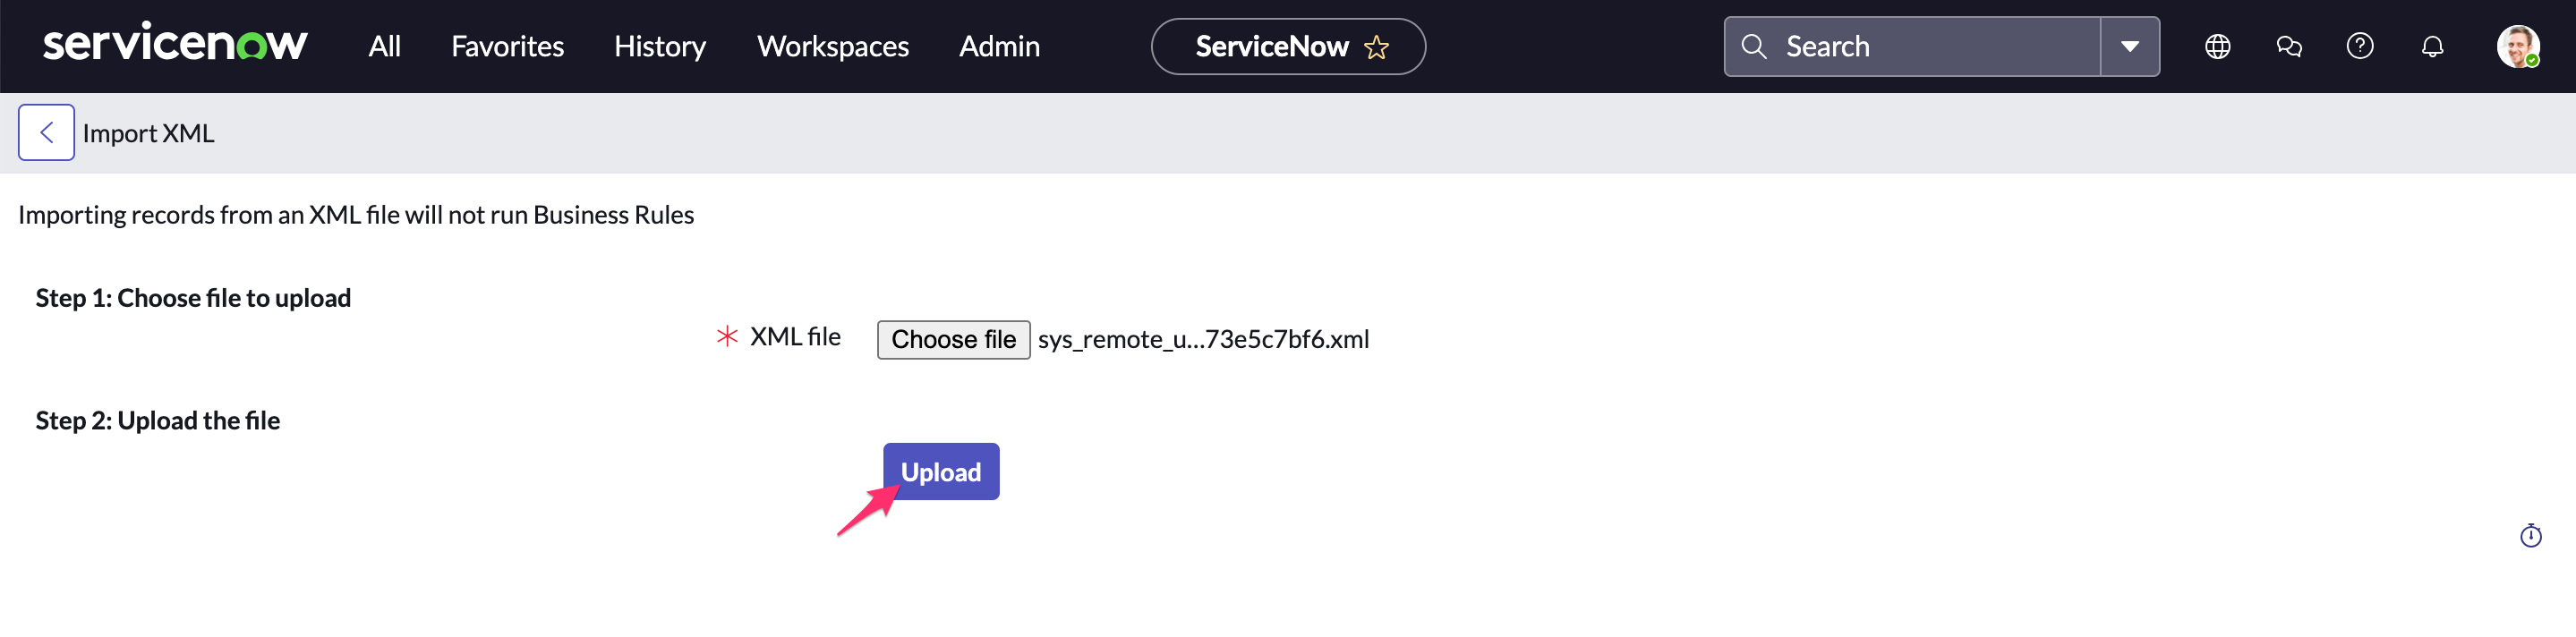
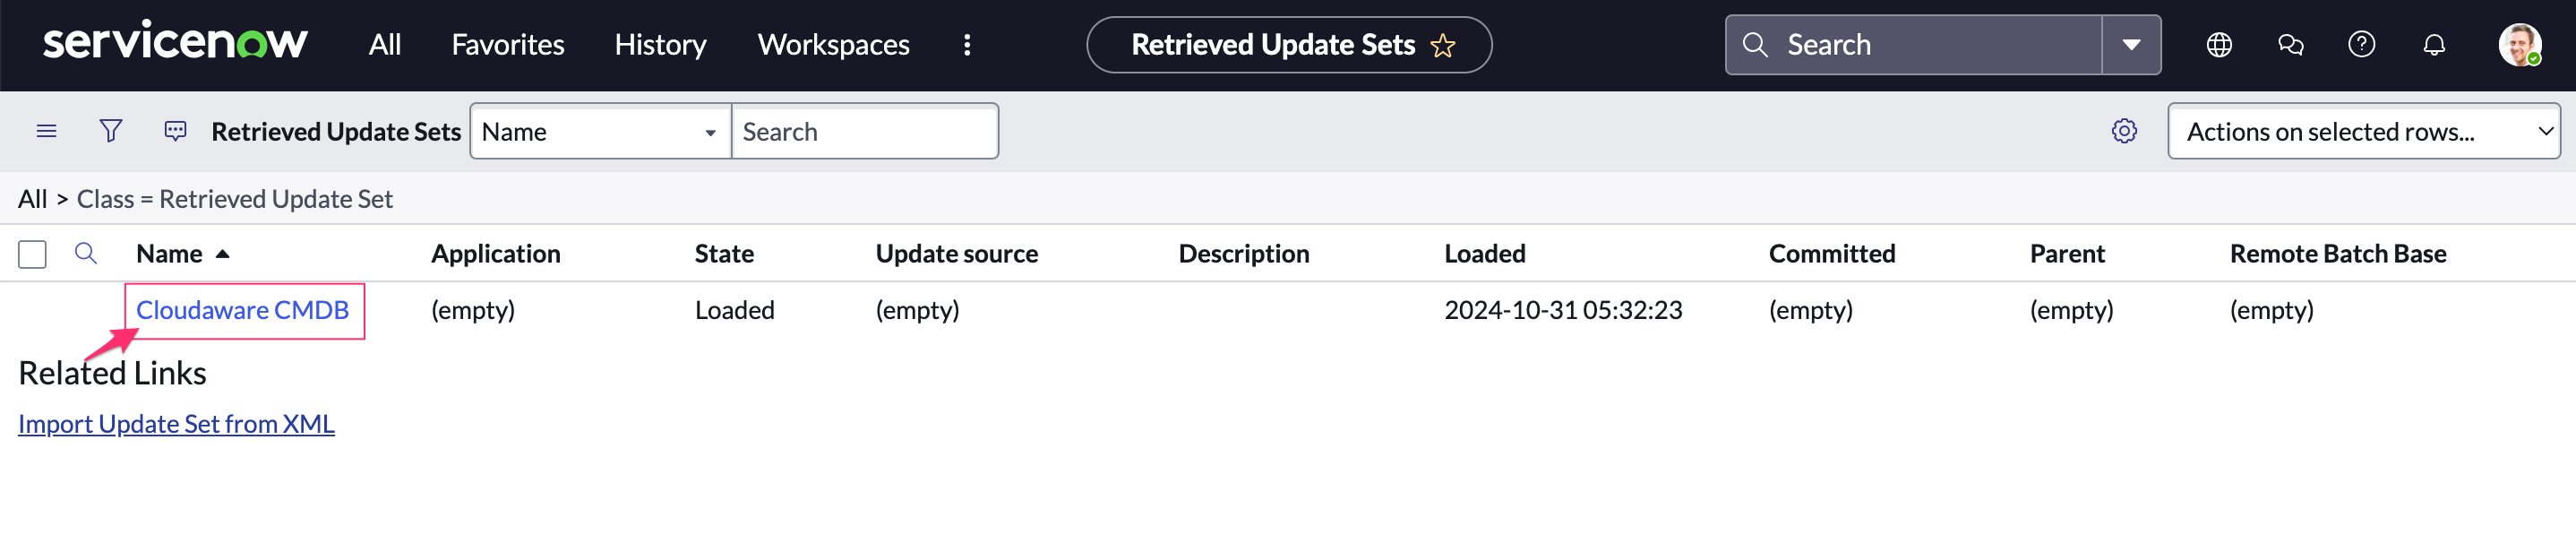
Select the created application.
Click Preview Update Set.
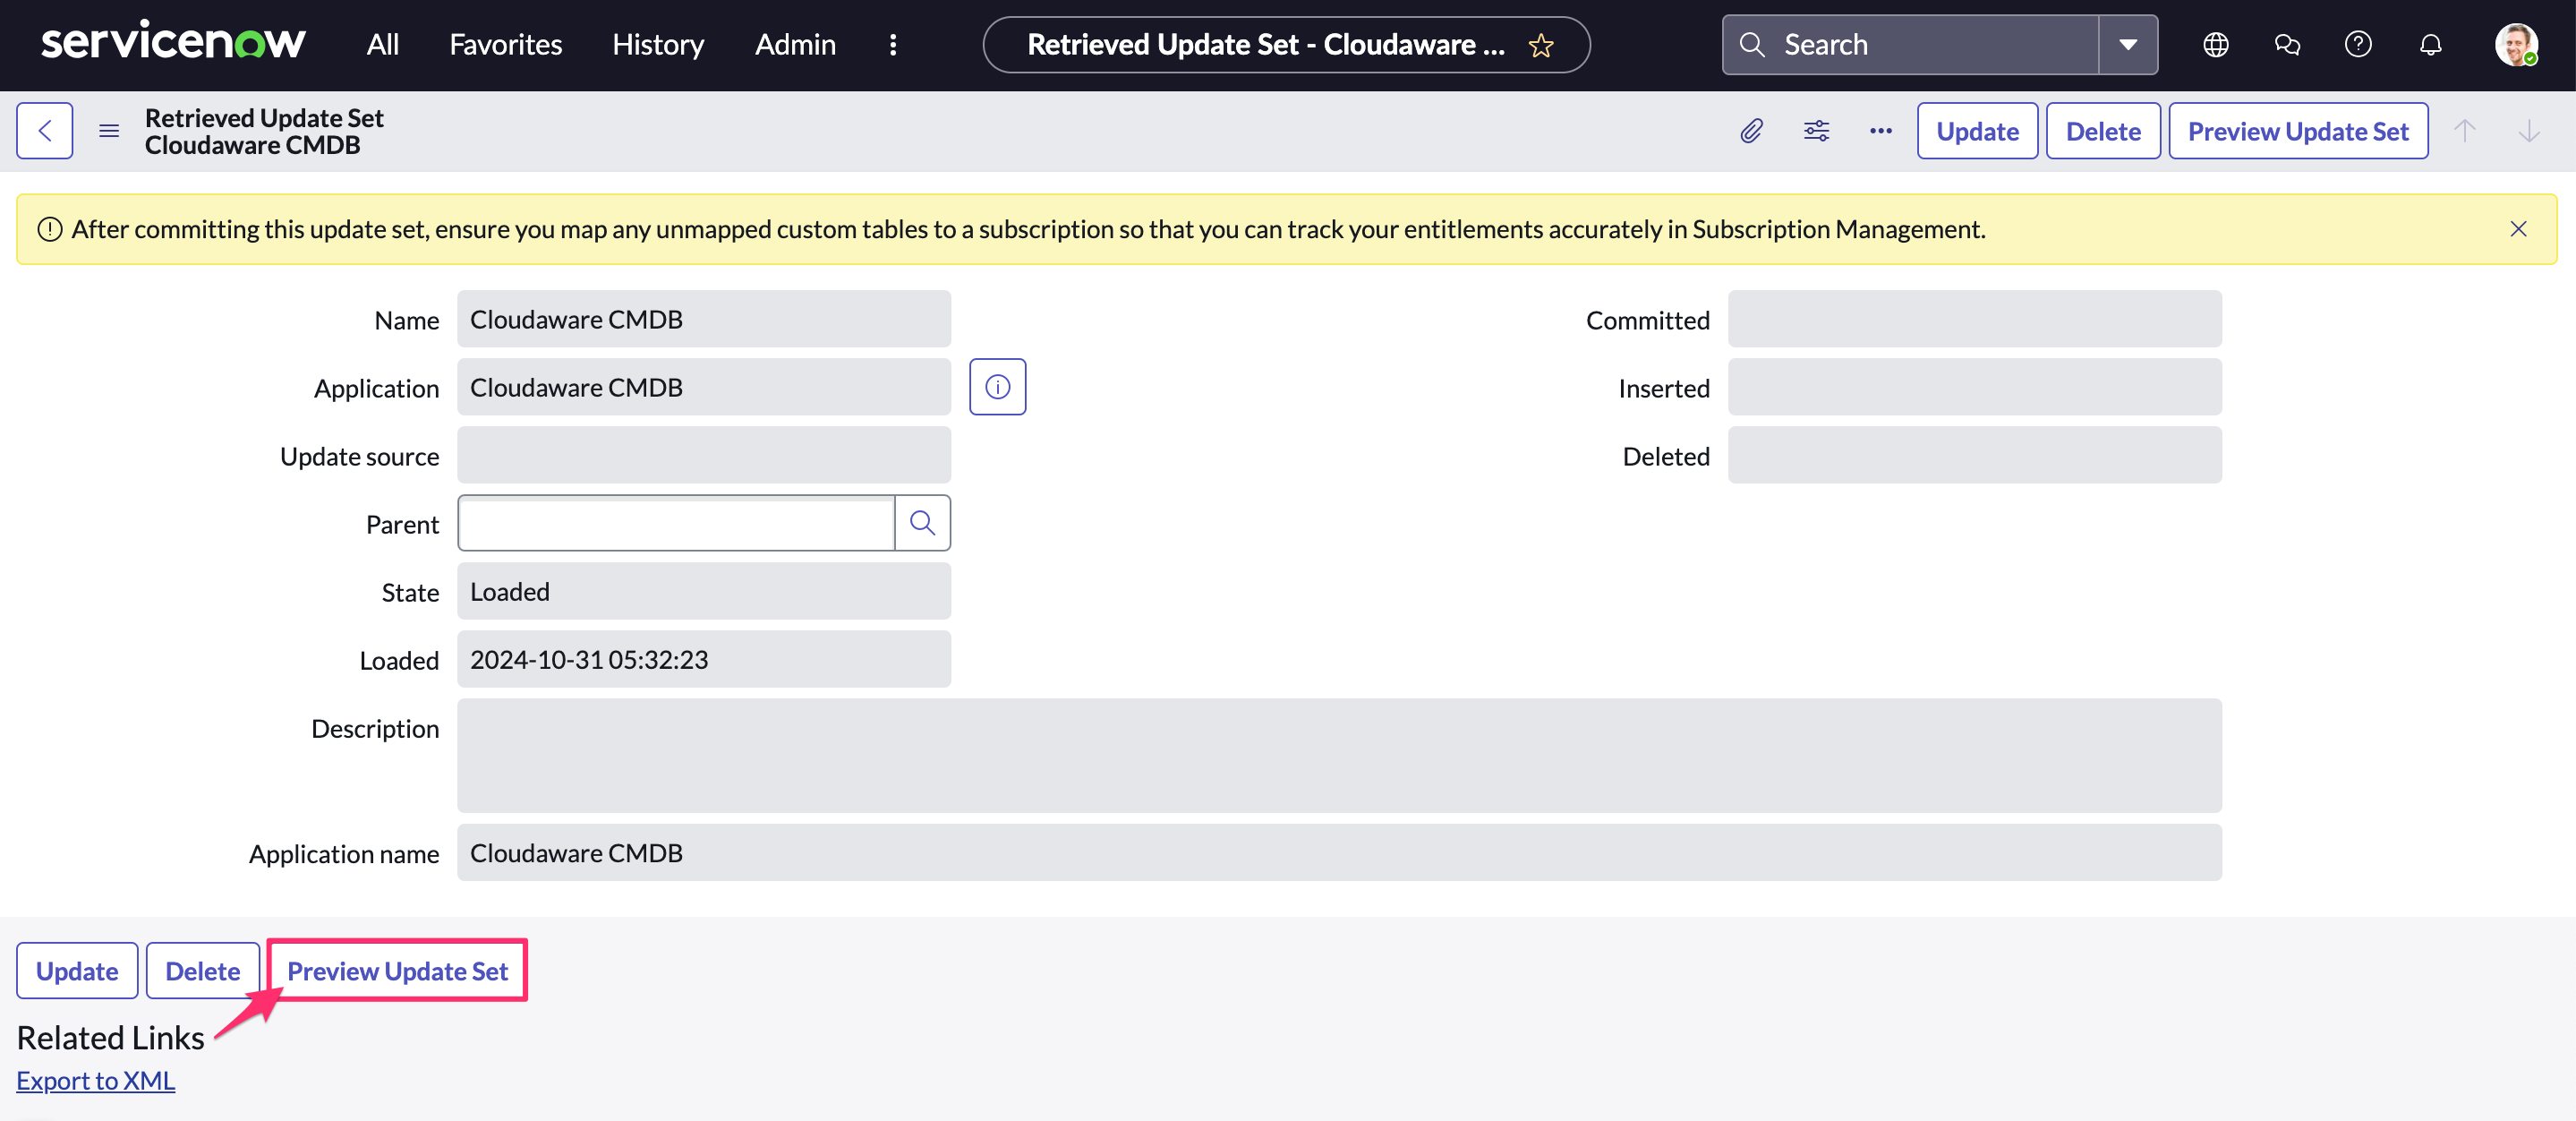
Click Commit Update Set to install the application.
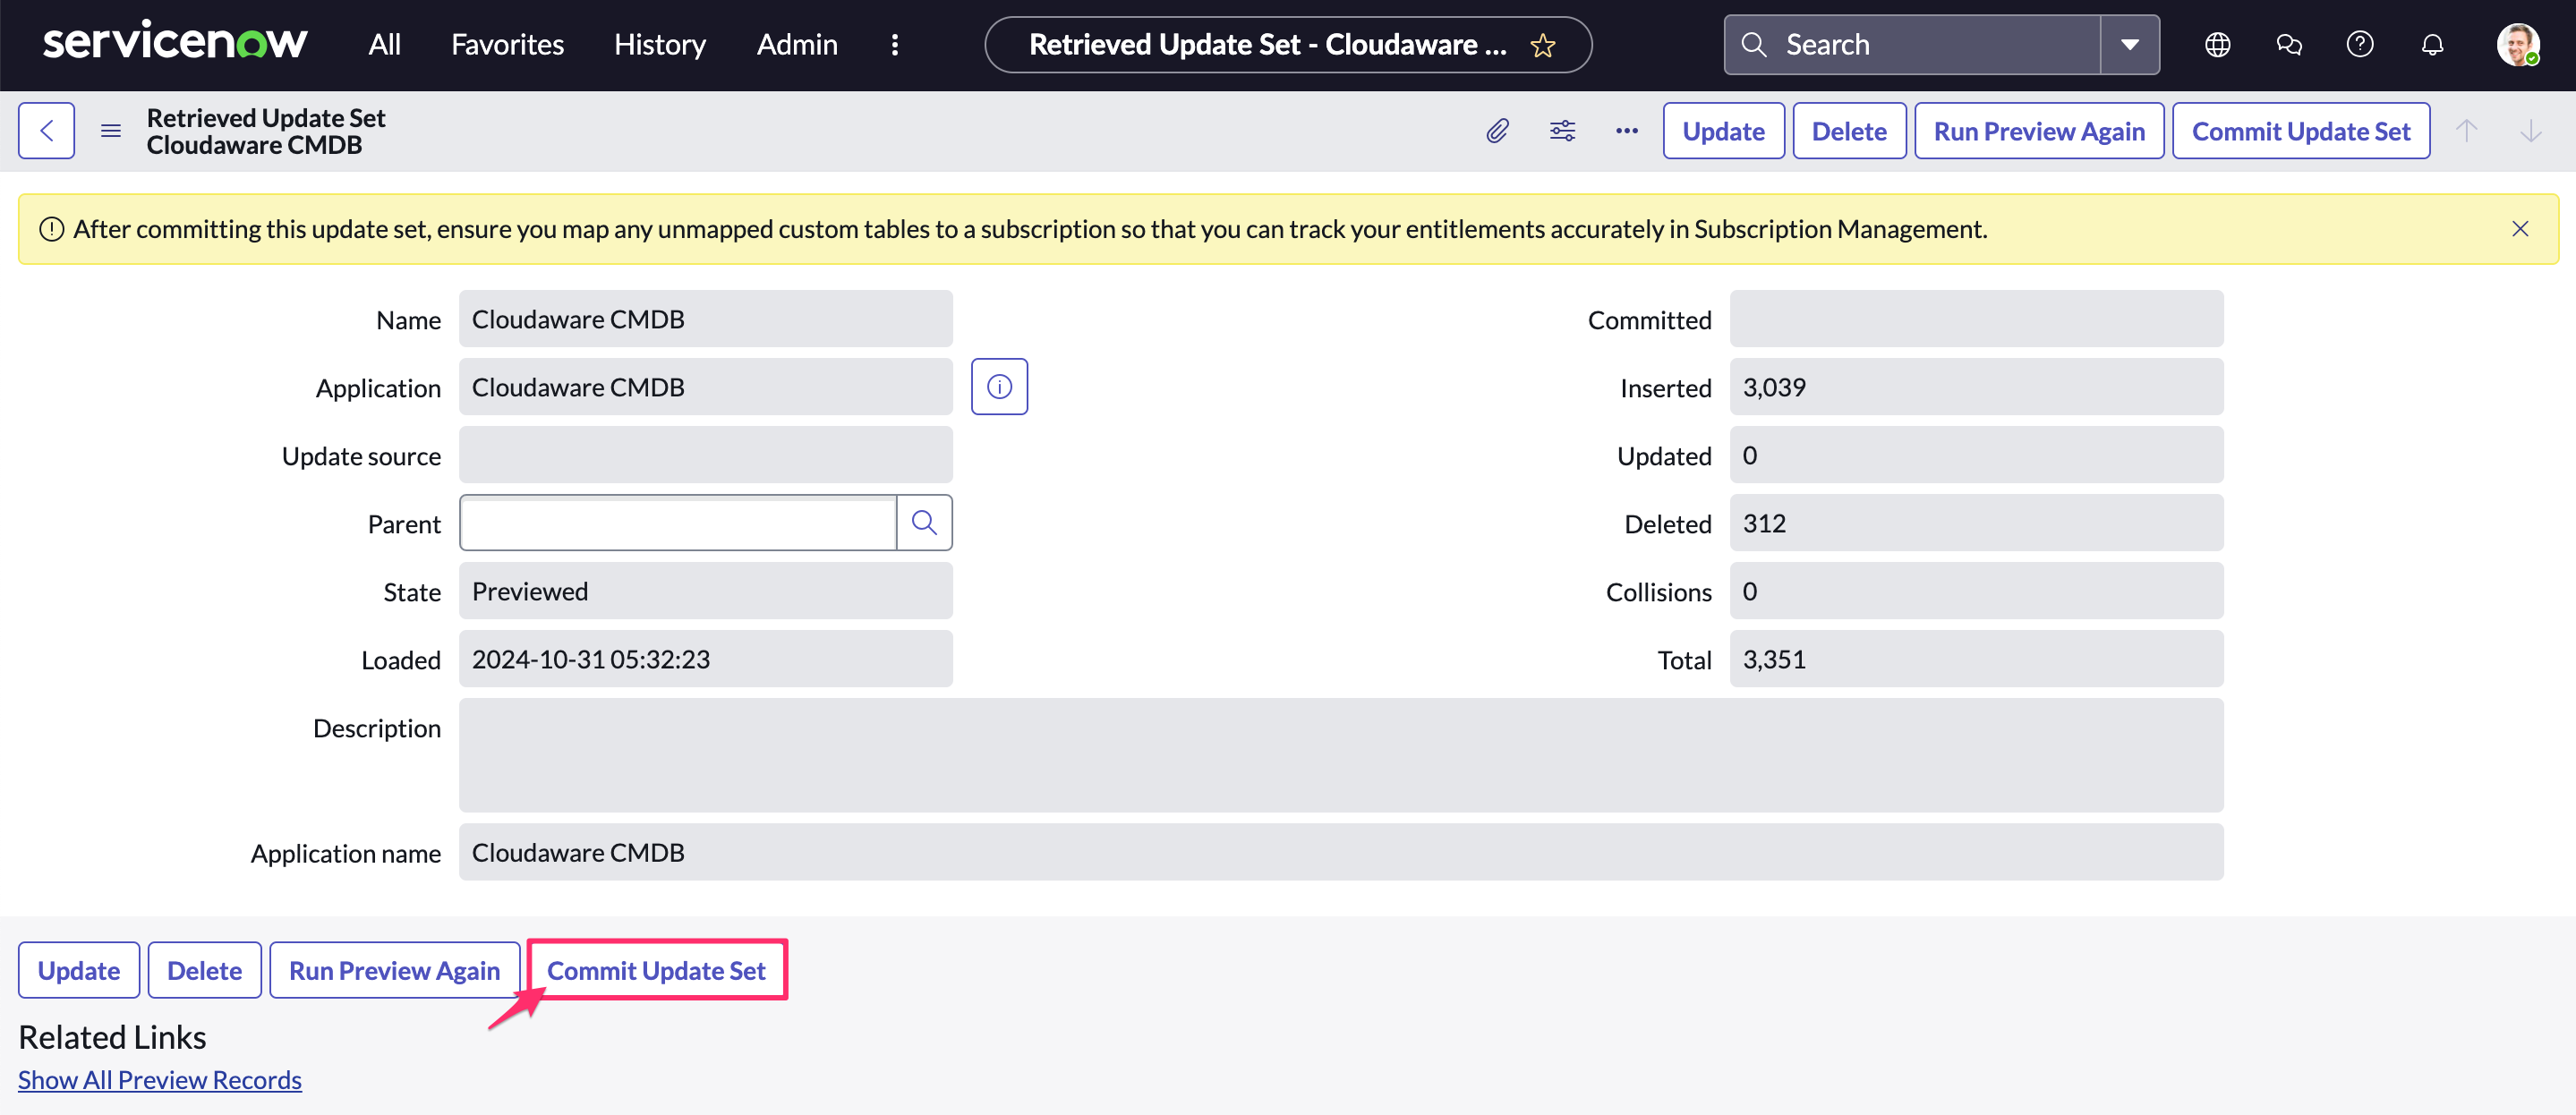
Please allow some time for the application to be created.
Configure the workflow
Navigate to All → Workflow Studio:

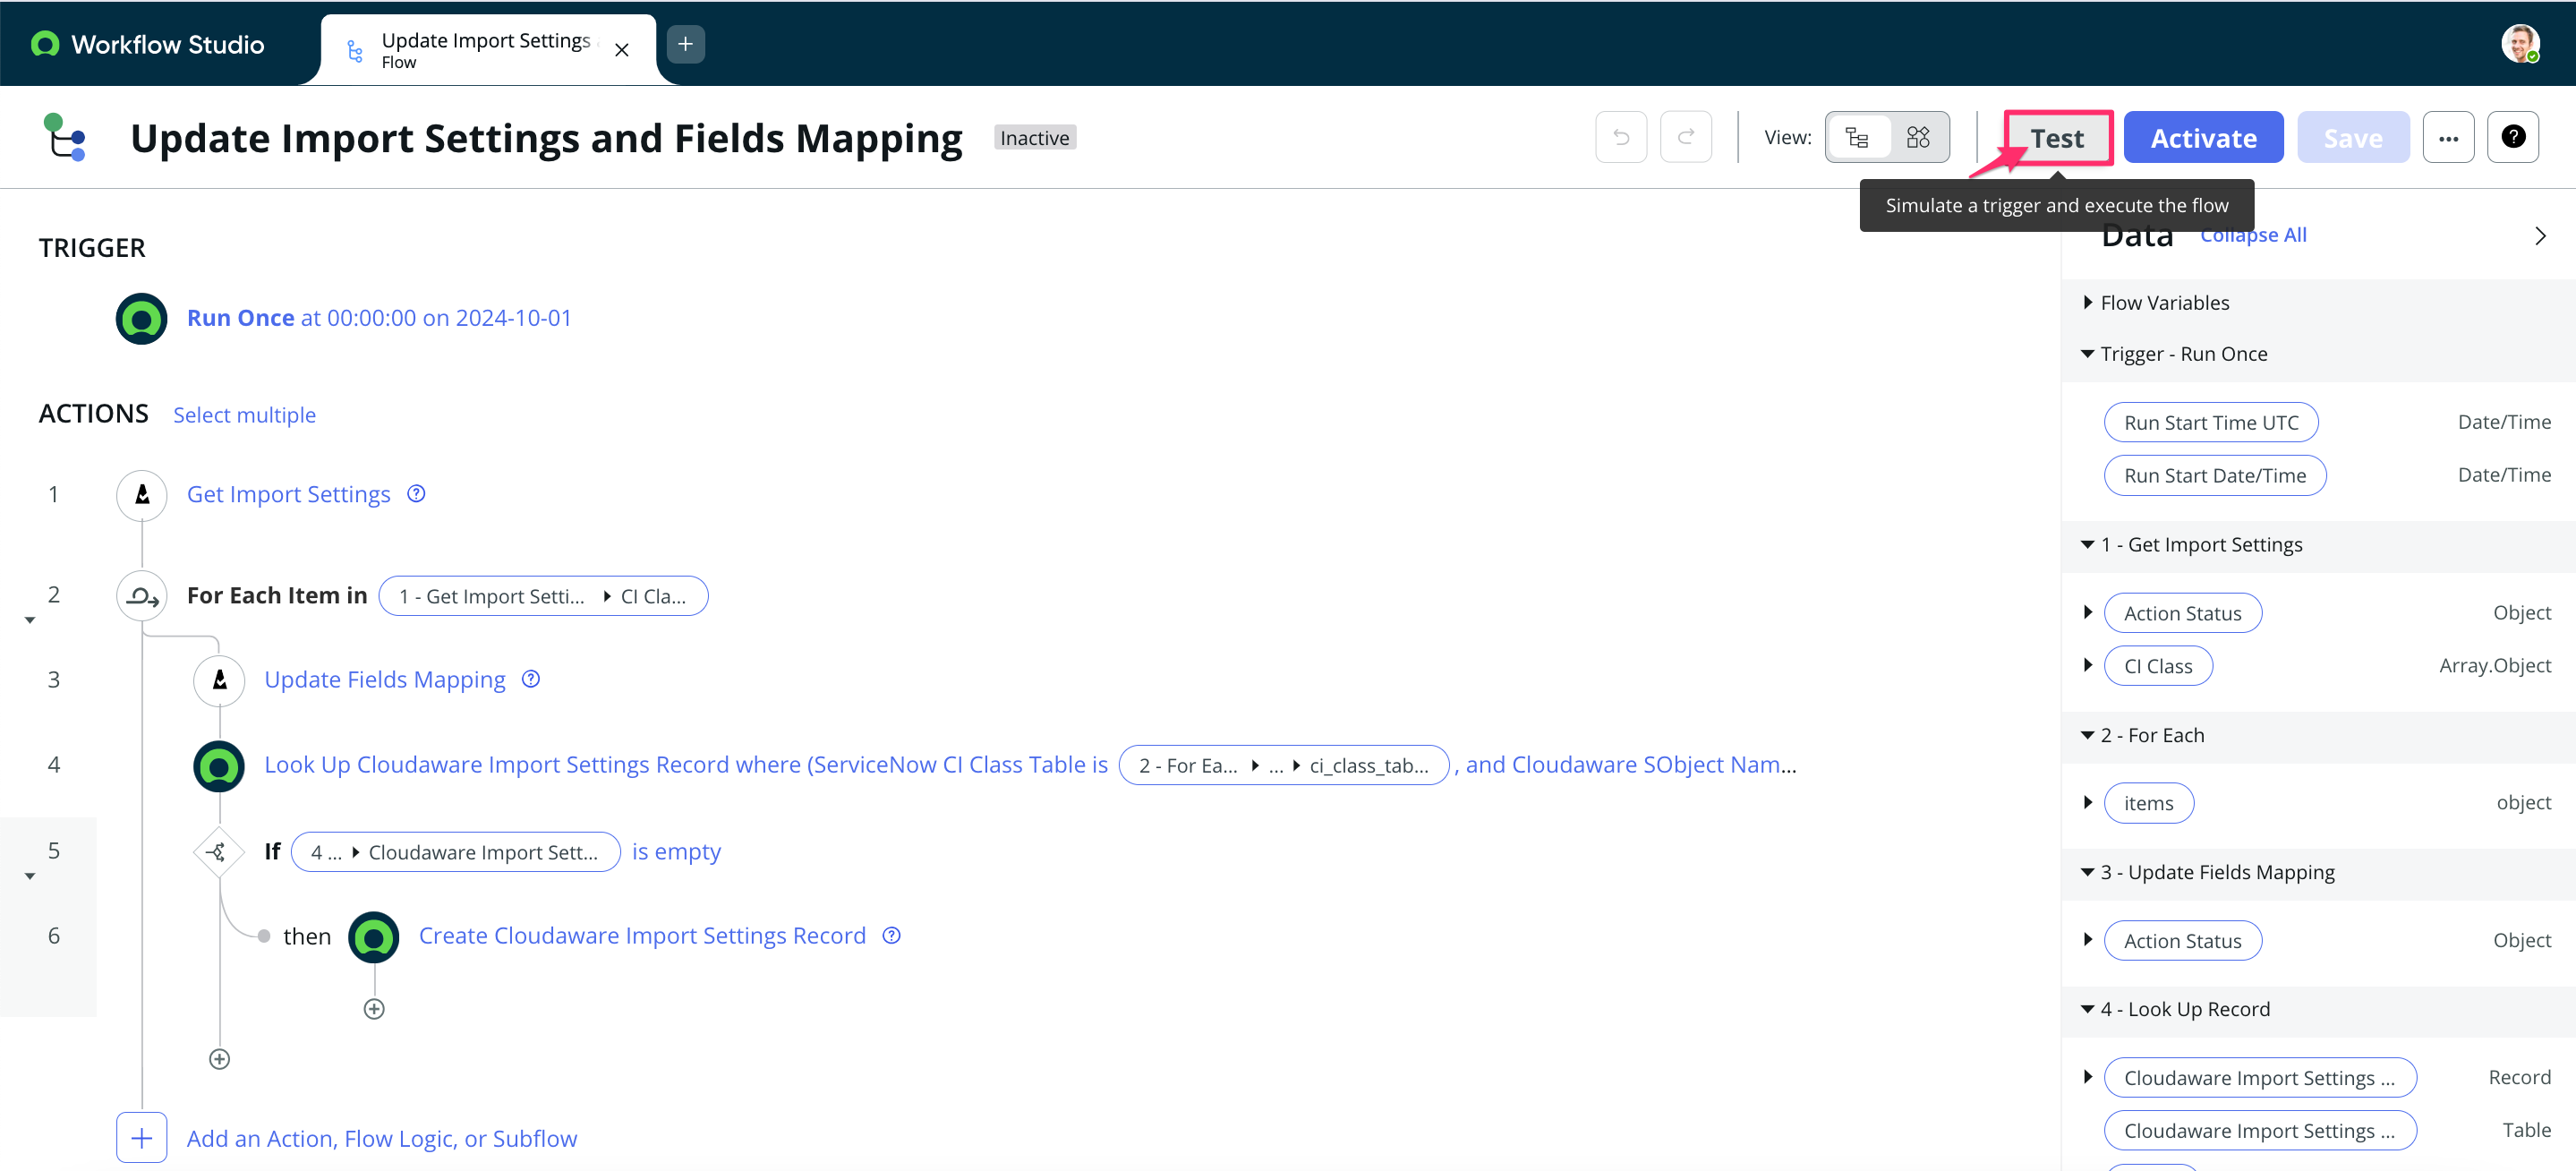
Open 'Flows'. Select the Update Import Settings and Fields Mapping flow.
.png?inst-v=b92f5bfe-9b35-450d-bcf7-3dae9a38a9f2)
Click Test → Run test (required once after installation):
Go back to all flows. Set the Updated column to descending order. Select the Import All CI Data from Cloudaware flow from the list.
.png?inst-v=b92f5bfe-9b35-450d-bcf7-3dae9a38a9f2)
In TRIGGER, click on the section to schedule a trigger. Select 'Scheduled' → Daily* → set the time:
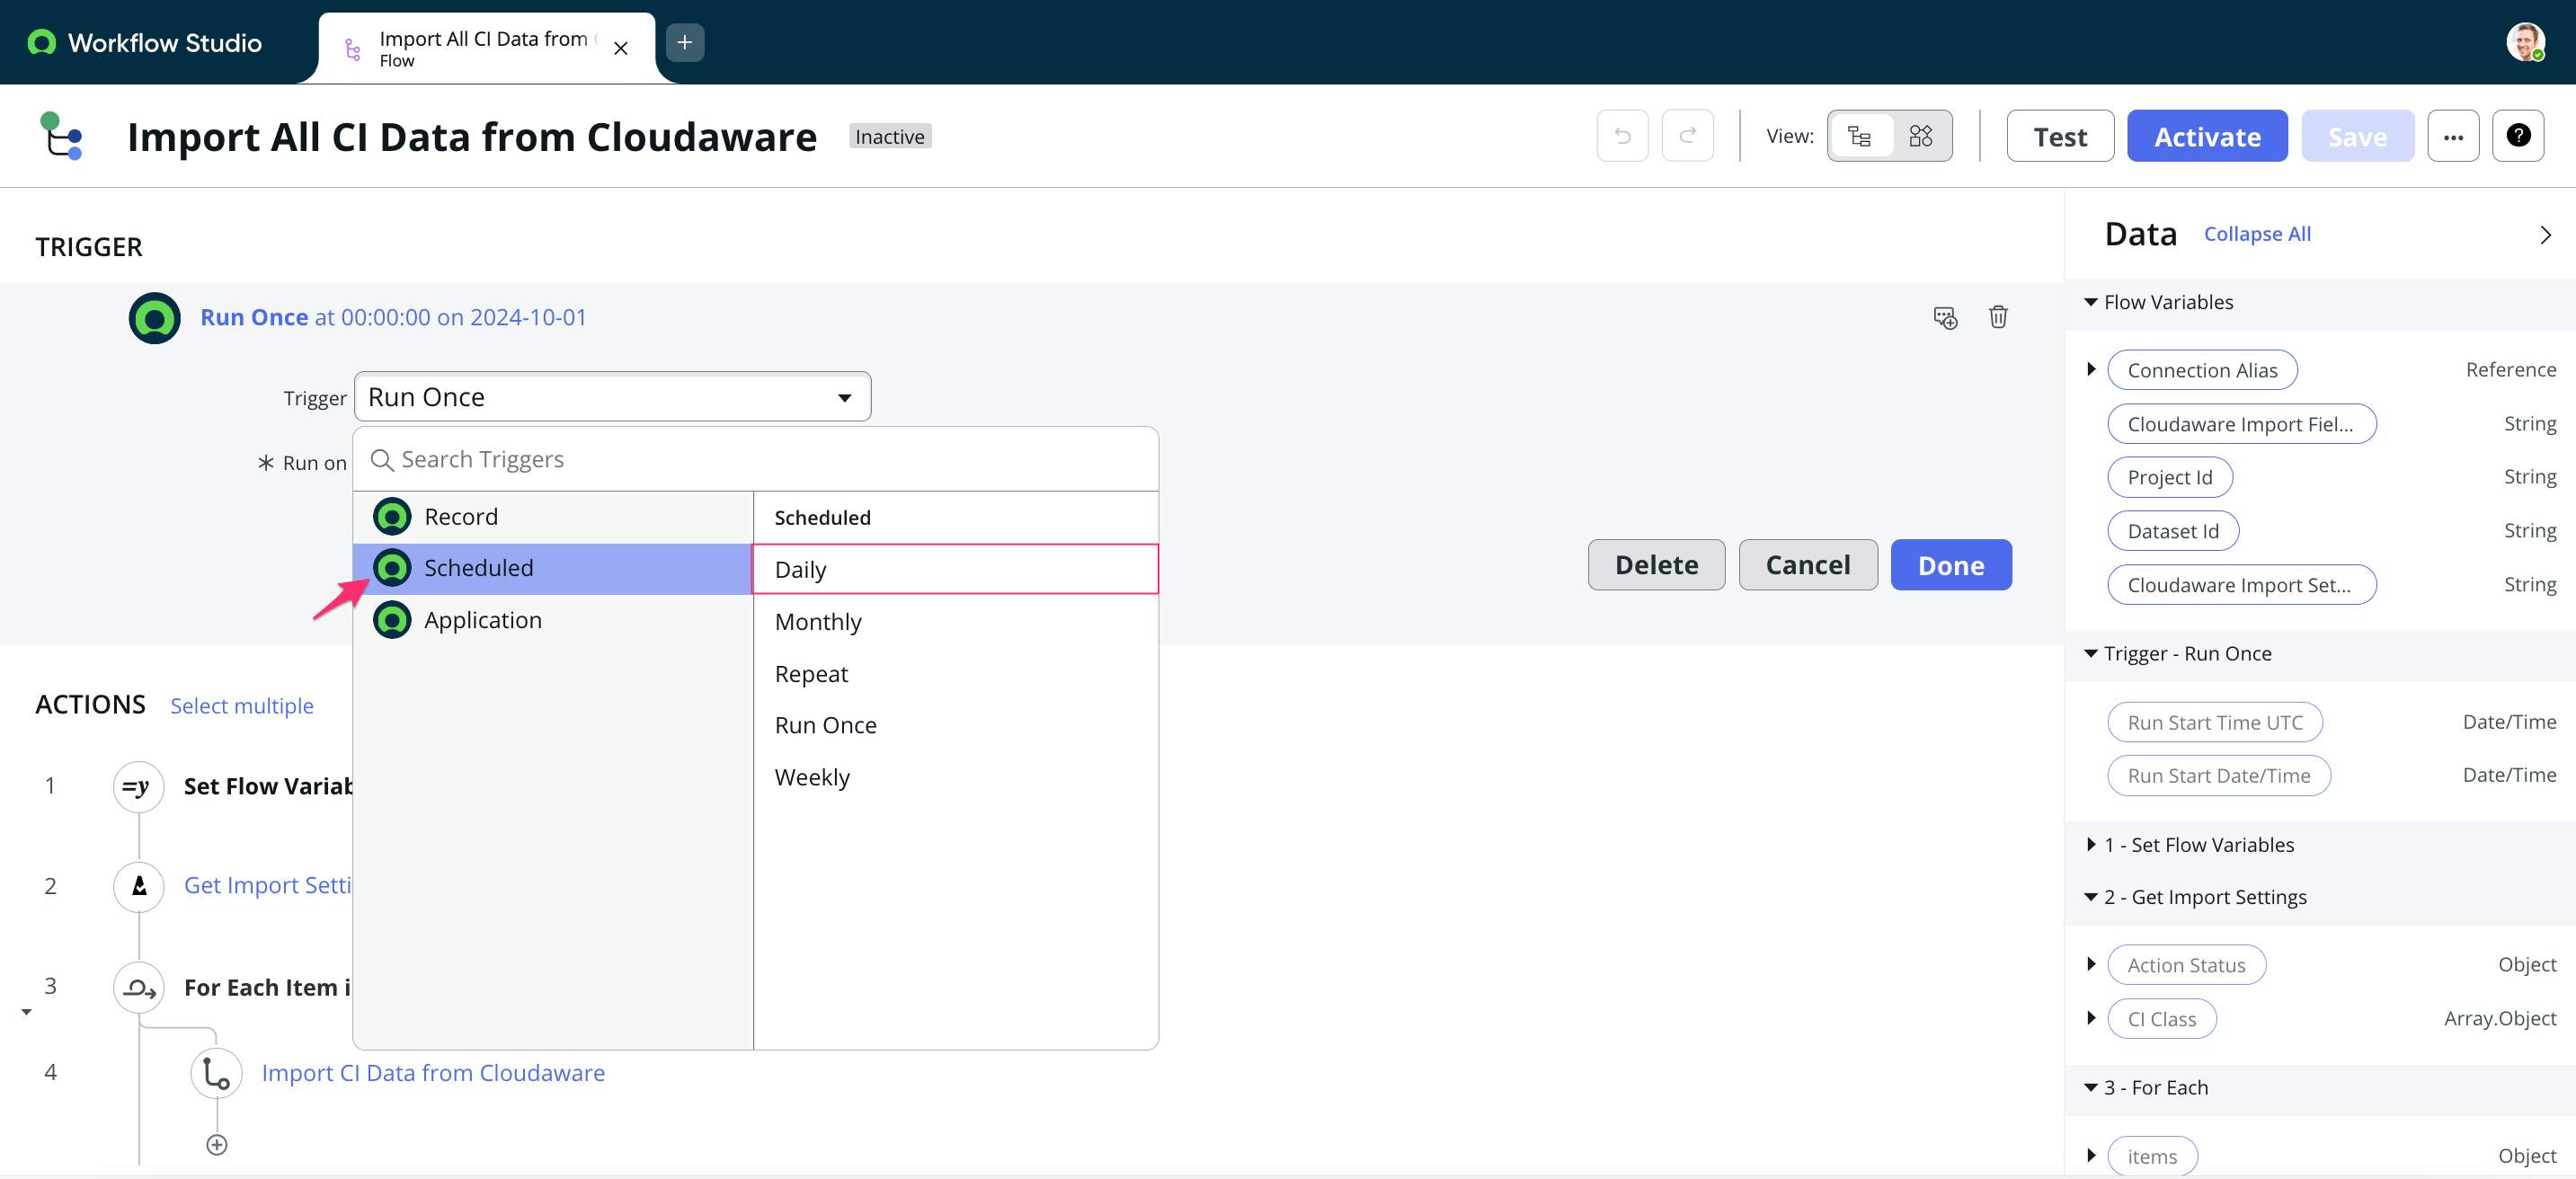
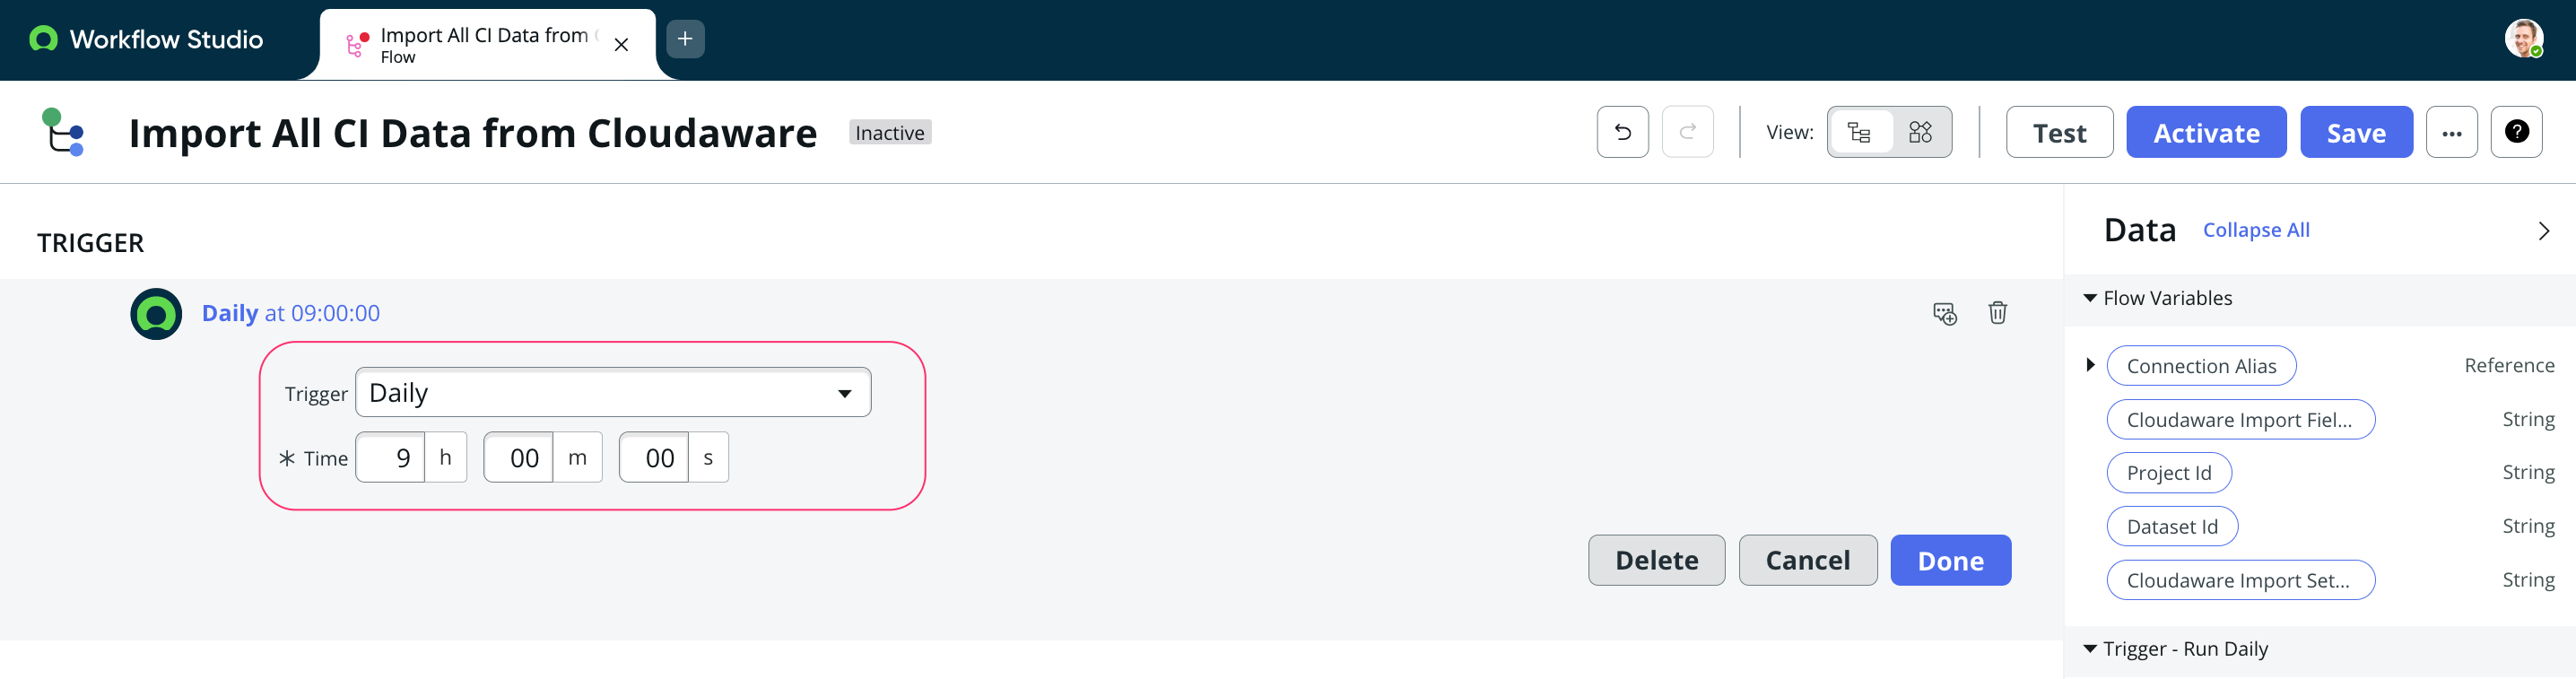
Click Done.
*The recommended frequency is once per day.
In ACTIONS, click Set Flow Variables to select:
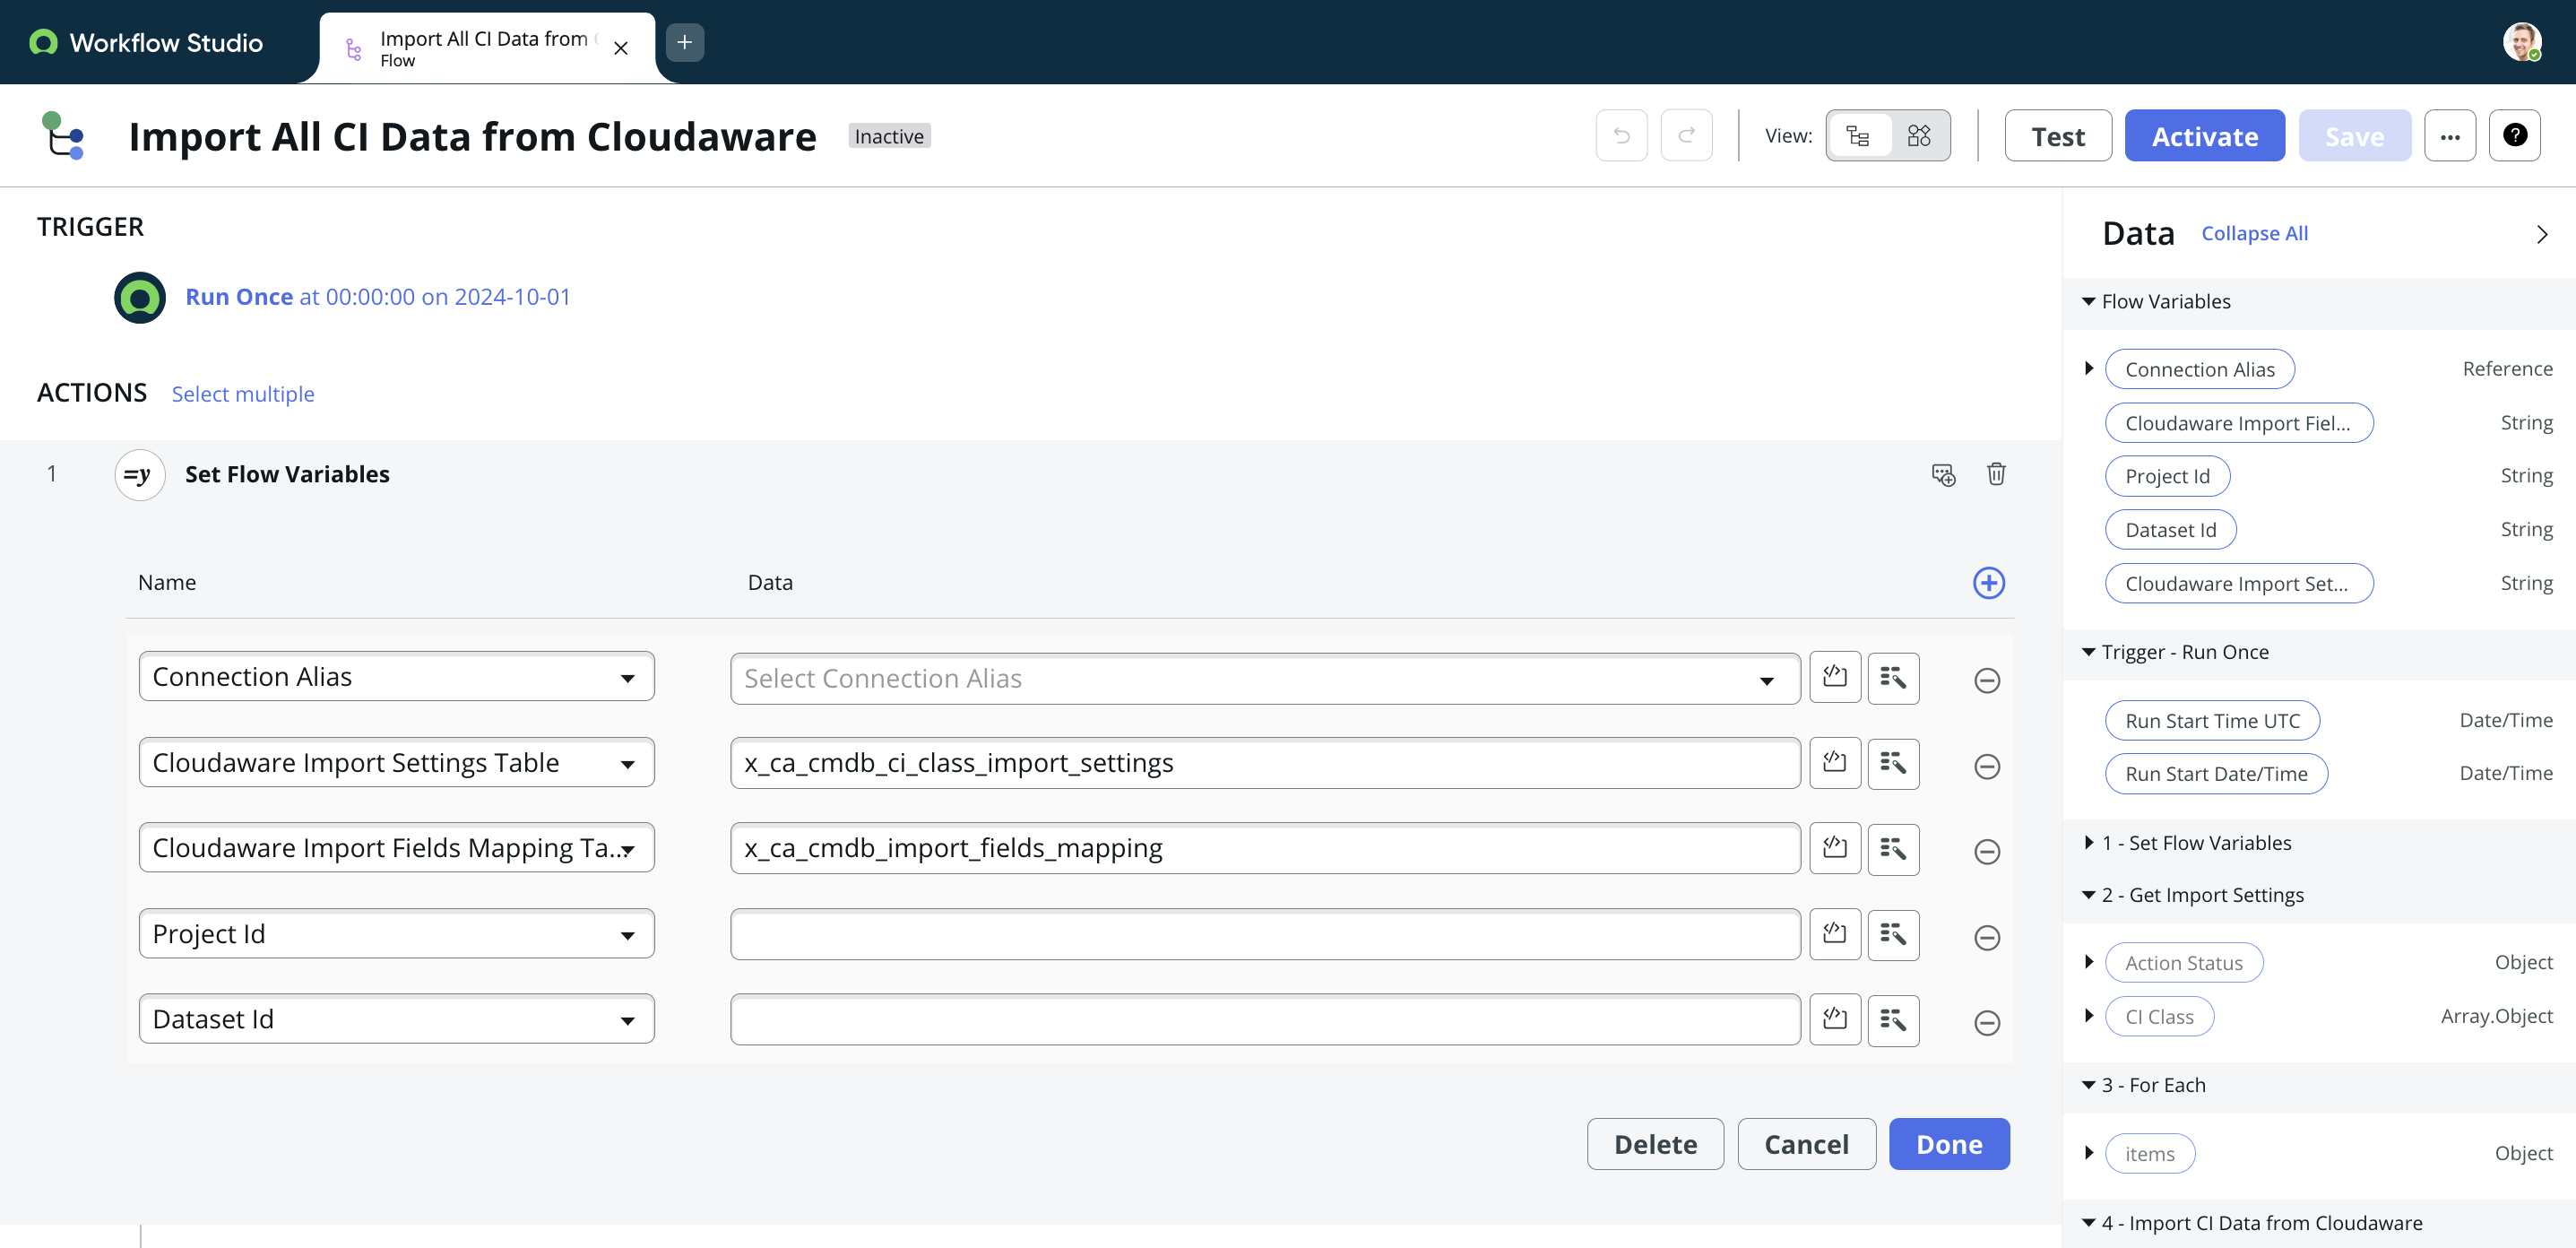
WHERE
Connection Alias – select the Connections & Credentials Aliases configured in the section ‘Set up ServiceNow-to-Google integration’ (in this example, Google JWT)
Cloudaware Import Settings Table – the value is auto-populated as this is a system table
Cloudaware Import Fields Mapping Table – the value is auto-populated as this is a system table
Project Id – the Import Project Id provided by Cloudaware
Dataset Id – the Import Dataset Id provided by CloudawareClick Done.
Save and activate the workflow.
Allow some time for data to load. Verify by checking upload status.
Tables
As a result, the following tables will be created in ServiceNow:
System tables
Label | Name |
|---|---|
Cloudaware CI |
|
Cloudaware CMDB Schema |
|
CI Class Import |
|
Cloudaware Import Settings |
|
Cloudaware Import Fields Mapping |
|
Application tables
Label | Name |
|---|---|
AWS Account |
|
AWS DynamoDB Backup |
|
AWS DynamoDB Table |
|
AWS EBS Snapshot |
|
AWS EBS Volume |
|
AWS EC2 Image |
|
AWS EC2 Instance |
|
AWS EC2 Security Group |
|
AWS ELB Load Balancer |
|
AWS ElastiCache Cluster |
|
AWS ElastiCache Node |
|
AWS Lambda Function |
|
AWS RDS Cluster |
|
AWS RDS Instance |
|
AWS Redshift Cluster |
|
AWS S3 Bucket |
|
Imports for some application tables can be disabled by the admin in the system table Cloudaware Import Settings (x_ca_cmdb_ci_class_import_settings). To disable the import, set the property 'Active' to False. Data for inactive tables will not be imported from Cloudaware.
Verify data upload status
Append /x_ca_cmdb_ci_class_import_settings.do to the ServiceNow instance URL in the web browser:
https://YOURINSTANCE.service-now.com/x_ca_cmdb_ci_class_import_settings.do where YOURINSTANCE is a placeholder for your ServiceNow instance ID.