
Setup in Azure
Use this guide to register and configure a Cloudaware application in Microsoft Azure.
Summary
To integrate Microsoft Azure with Cloudaware:
Create a new Azure application for Cloudaware.
Assign API permissions:
Azure Service Management
Delegated permissions:
user_impersonation
Microsoft Graph
Application permissions:
Directory.Read.AllDelegated permissions:
Directory.Read.All
Add role assignments:
Choose the scope by assigning roles
Under
Tenant Root Groupfor subscription auto-discoveryUnder a specific subscription
Roles:
ReaderMembers: Application created in point 1
Upload a certificate from Cloudaware.
See the setup guidelines below for details.
Create Azure application for Cloudaware
Log in to the Azure portal. Select Microsoft Entra ID.
Under 'Manage', go to 'App registrations' → +New registration.
Set up the application as follows:
Name: cloudaware-api-access
Supported account types: Accounts in this organizational directory only (Default Directory only - Single tenant) OR Accounts in any organizational directory (Any Azure AD directory - Multitenant)
Redirect URI (optional): Web - https://cloudaware.com/
Click Register.
Configure API permissions
Select the created Azure application (in this guide, cloudaware-api-access).
Go to 'API permissions' → +Add a permission.
Select the tab 'Microsoft APIs'.
For Azure Service Management:
Select the tile 'Delegated permissions' → check the box 'user_impersonation. Access Azure Service Management as organization users (preview)'. Click Add permissions.
For Microsoft Graph:
Select the tile 'Delegated Permissions'* → Directory → check the box Directory.Read.All. Click Add permissions.
Select the tile 'Application Permissions' → Directory → check the box Directory.Read.All. Click Add permissions.
*Note that User → User.Read (Sign in and read user profile) permission is added by default when the application is created.
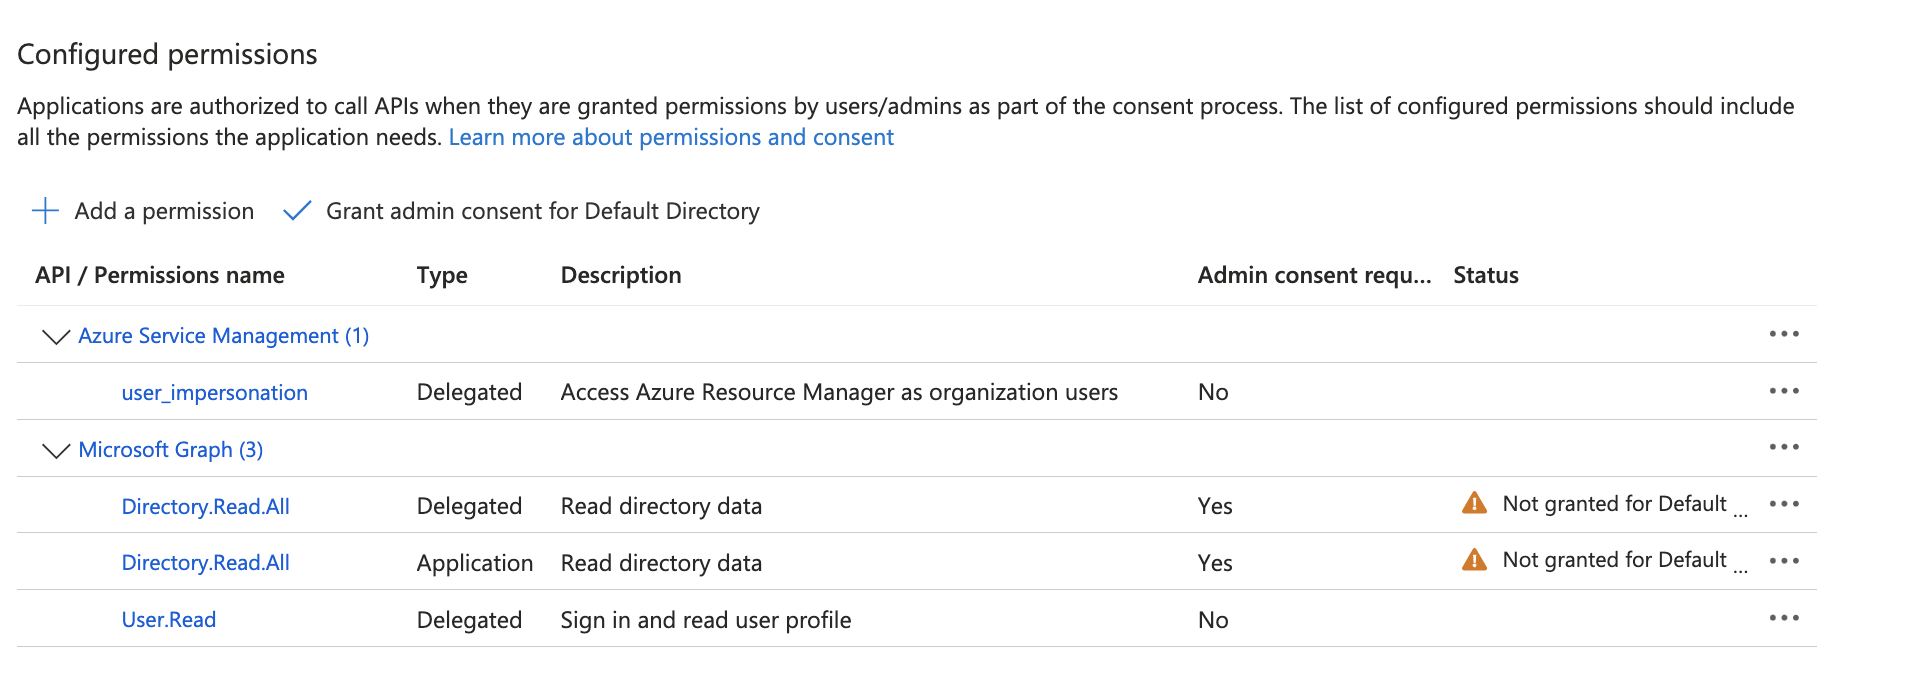
Ensure that all necessary permissions are assigned as below:
Click Grant admin consent for
<Directory Name>to populate permissions.
Microsoft takes up to 30 minutes to populate the permissions added in previous steps.
Add role assignments
Grant permissions at tenant or subscription level:
Tenant level |
|---|
Assign permissions to the Tenant Root Group to allow Cloudaware to discover all subscriptions within the group automatically:
|
Subscription level |
Assign permissions to the specific subscription(s) for Cloudaware to access and discover only those:
The steps 1-4 are required for each subscription that will be integrated into Cloudaware. |
Configure certificates & secrets
Certificate (recommended)
Select the application (in this guide, cloudaware-api-access).
Go to 'Certificates & secrets' → the tab 'Certificates' → Upload certificate.
Click Select a file → choose the certificate file*.
*To get the certificate from Cloudaware, refer to Azure setup in Cloudaware → Add Azure Active Directory → Certificate.
Click Add.
Once the certificate is uploaded, continue the configuration.
Client secret
Select the application (in this guide, cloudaware-api-access).
Go to 'Certificates & secrets' → the tab 'Client secrets' → +New client secret.
Set up the client secret:
Description: ca-api-key
EXPIRES: 730 days (24 months)
Click Add.Click Copy to clipboard to save the secret value.
Once the key is created and saved, continue the configuration.
! Next step - Azure setup in Cloudaware