
Jira Actions
This guide explains how to configure Jira actions in Cloudaware to create issues in Jira based on specified criteria. Cloudaware can also post comments on existing Jira issues when the original conditions change.
Prerequisites
Ensure that a Jira service account is added to Cloudaware. See this guide.
Ensure that the user or principal specified during Jira integration setup in Cloudaware has the following Jira permissions:
BROWSE_PROJECTSCREATE_ISSUESADD_COMMENTS
Summary
To configure Jira actions in Cloudaware:
Set up the Jira action:
Required: select the target Jira account, the project, and the issue type
Optional: configure a summary (subject) and description (body) for Jira issues
Optional: provide a comment message to be posted by Cloudaware
Configure an outbound message:
Required: select the fields to be included in Jira issues
Configure a flow:
Required: create a flow that triggers Jira issue creation based on specific conditions
Optional: create a flow to post comments when the conditions for the created Jira issues change
Set up a Jira action
Cloudaware provides built-in functionality to automate Jira issue creation and pass CMDB CI attributes to Jira issues.
Use case: A security team wants Jira issues to be created in a specific project when Cloudaware finds high- or critical-risk vulnerabilities on AWS EC2 instances. They also want comments added when the issues are fixed so Jira can close them automatically.
Log in to Cloudaware → Admin.
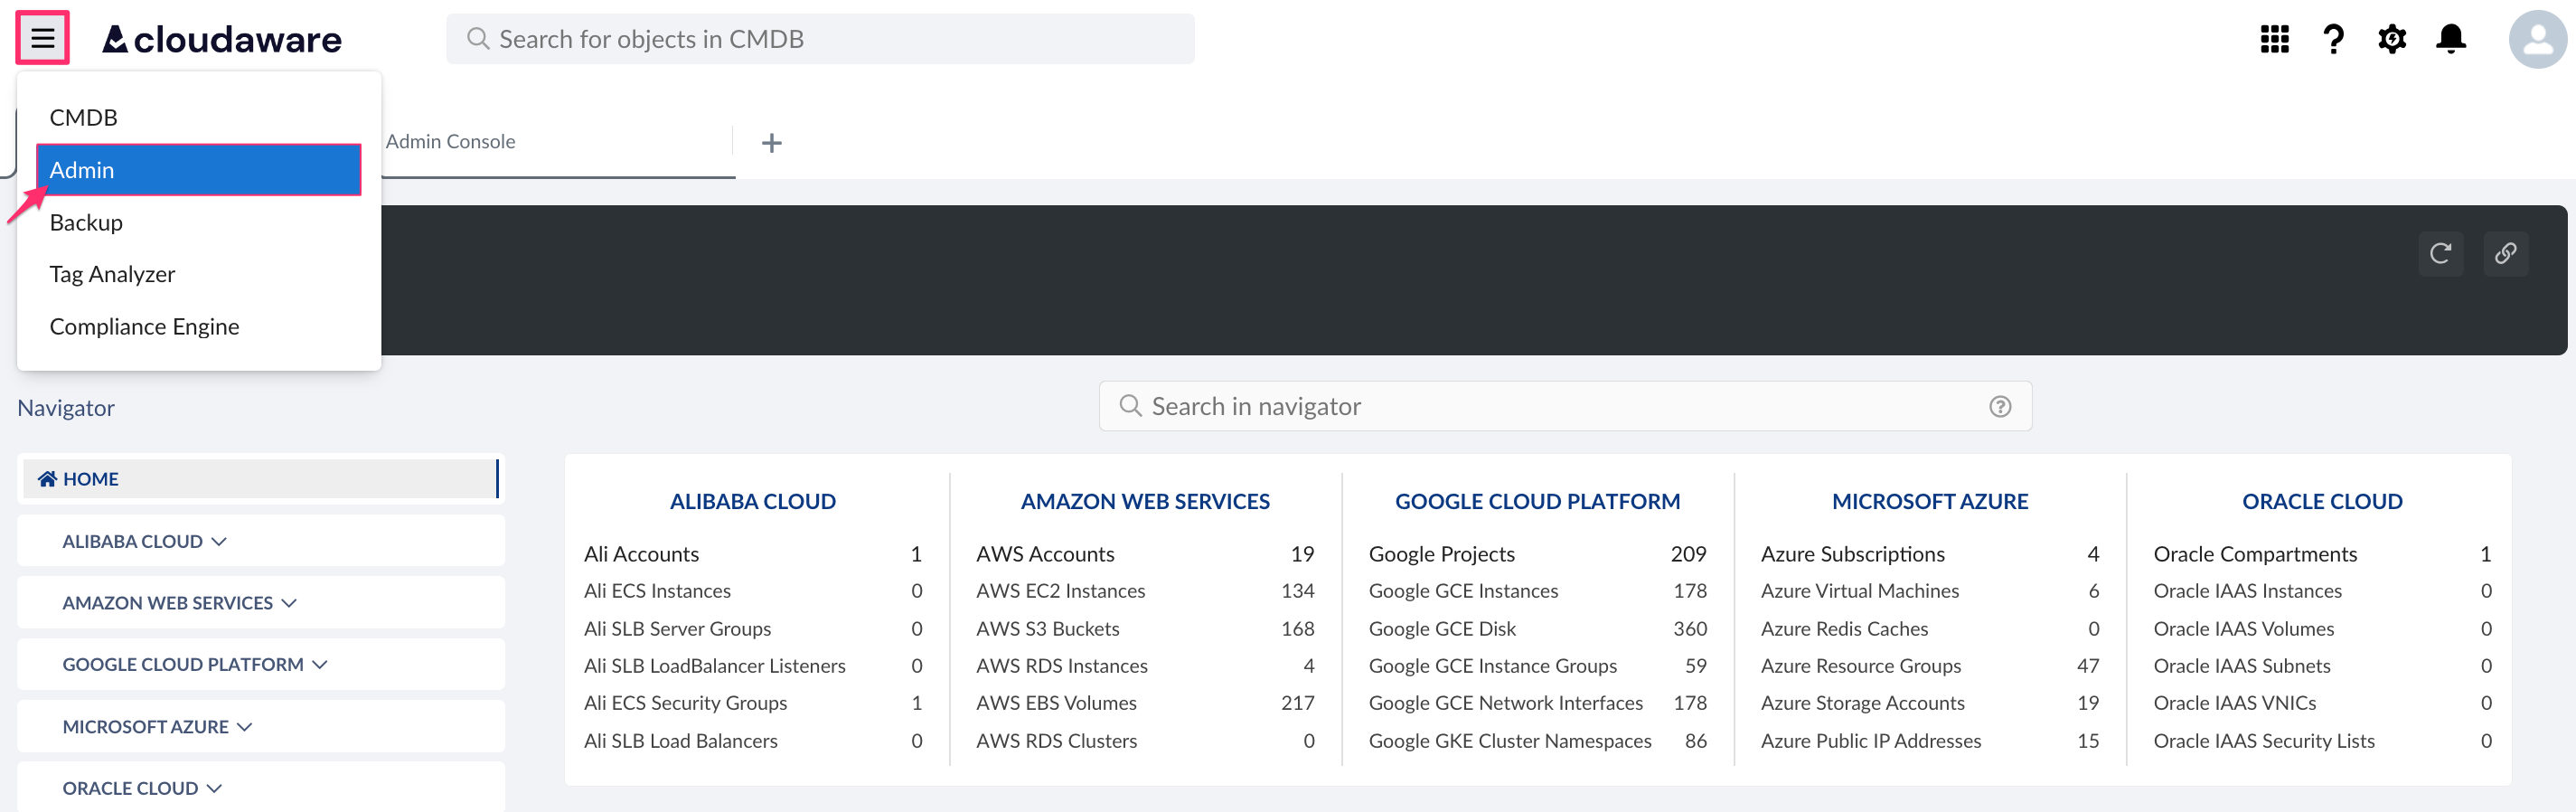
Find Jira Accounts & Actions in integrations. Click N CONFIGURED.

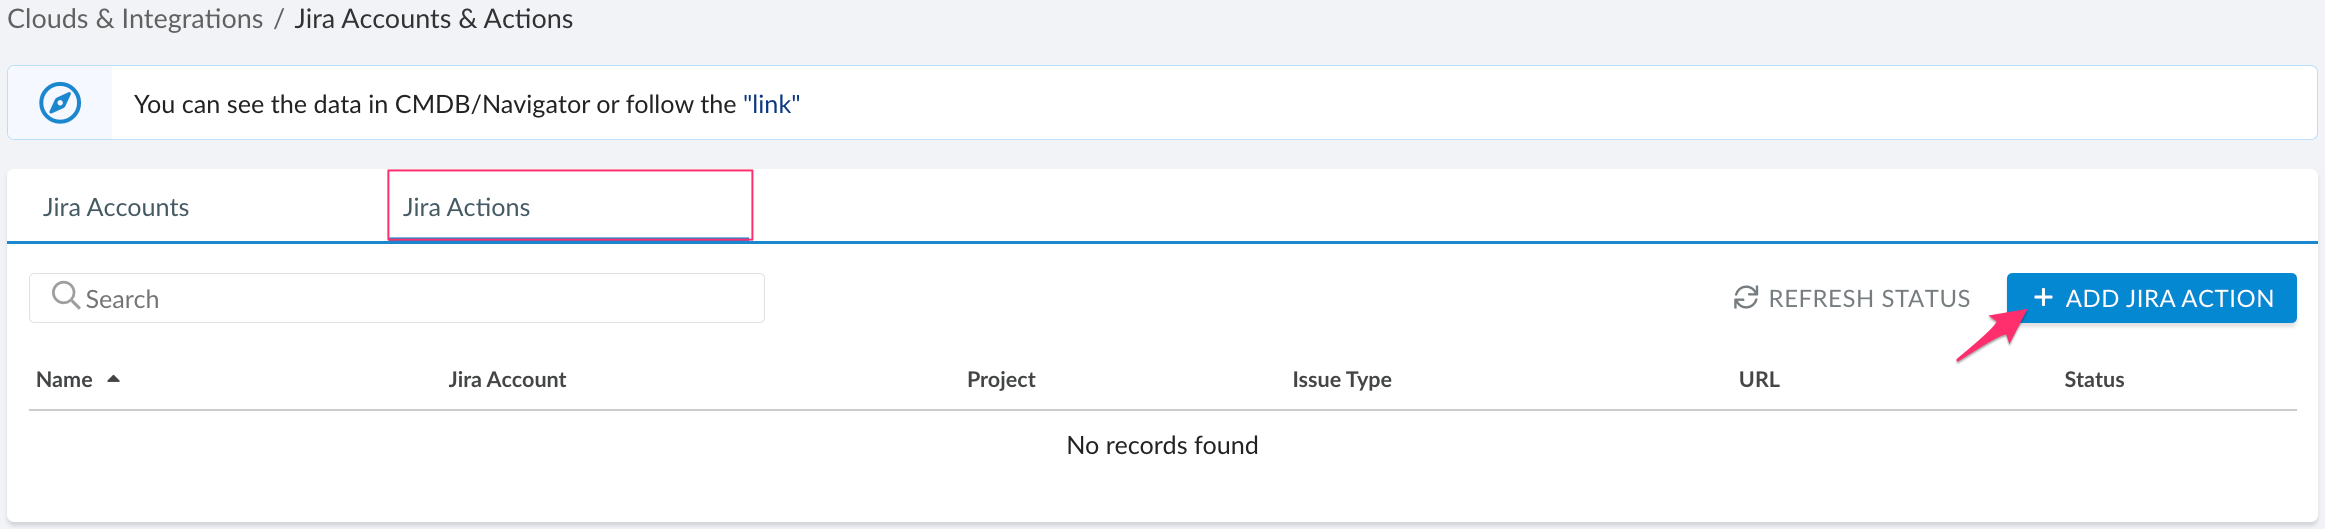
Select the 'Jira Actions' tab. Click +ADD JIRA ACTION.
Fill out the form:
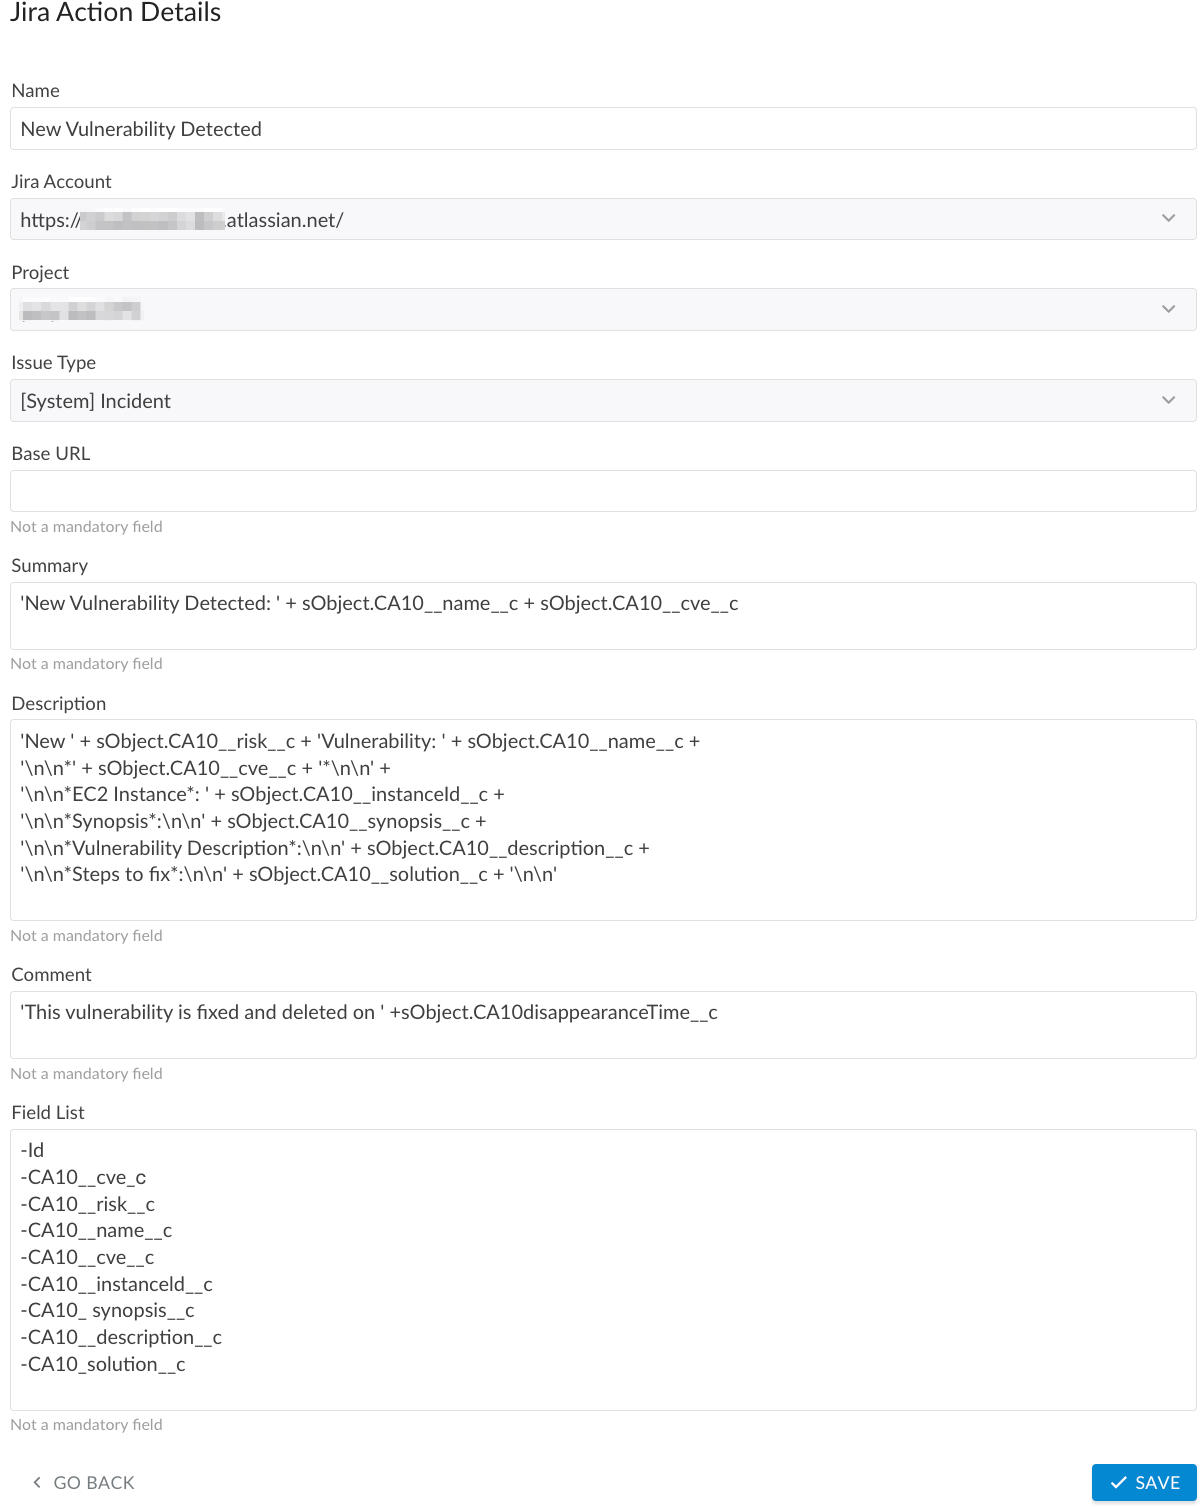
WHERE
Name – a meaningful name for the Jira Action, e.g., New Vulnerability Detected
Jira Account – the preconfigured Jira service account
Project – the Jira project where issues will be created
Issue Type – the issue type as defined in the Jira instance
Summary – the subject line for a Jira issue (in this use case,'New Vulnerability Detected: ' + sObject.CA10__name__c + ' ' + sObject.CA10__cve__cis used, wheresObject.CA10__name__crenders the full vulnerability name, andsObject.CA10__cve__cdisplays the CVE ID)
Description – the body of the Jira issue (in this use case, we use'New ' + sObject.CA10__risk__c + 'Vulnerability: ' + sObject.CA10__name__c, adding the fieldssObject.CA10__cve__c,sObject.CA10__instanceId__c,sObject.CA10__synopsis__c,sObject.CA10__solution__cfrom the CloudAware Vulnerability Scan object)
Comment – the comment posted when the vulnerability is resolved (in this use case,'This vulnerability is fixed and deleted on ' + sObject.CA10__disappearanceTime__cis used, whereCA10__disappearanceTime__cindicates the dateand time when the vulnerability was fixed and removed from the scanner)
Field List* – API names of any fields to exclude from being added to the Jira issue. If empty, all fields from the outbound message are included after the description.
*Do not exclude fields that are used for field mapping between Cloudaware and Jira. Mapping is required to associate Cloudaware CMDB CIs with Jira issues.
Pay attention to the sObject reference syntax. The output depends on the elements used in the input. Examples:
Input | Output | Comment |
|---|---|---|
| This is a text | |
| <ci_name_field_value> | Display the actual CI name, such as Amazon Linux 2 : zlib (ALAS-2022-1772) for Vulnerability Scan |
| Hey, <ci_name_field_value> | Plain text must be enclosed in quotes when combined with a CI record reference |
| AWS EC2 Instance: <ci_ec2_instance_id_value> |
|
| Use |
*Default Description. Cloudaware sends outbound message fields to Jira in the format as follows:
<field_label_1>: <field_value_1>
<field1_label_2>: <field1_value_2>
Use the 'Field List' section to exclude fields from the default description.
Fields used in the Jira Action must be referenced by their API names. The order of selected fields is preserved in Jira.
To find API names: in Cloudaware, go to Setup → Object Manager → use Quick Find bar to search for the object → select the object → Fields & Relationships → review the 'Field Name' column.
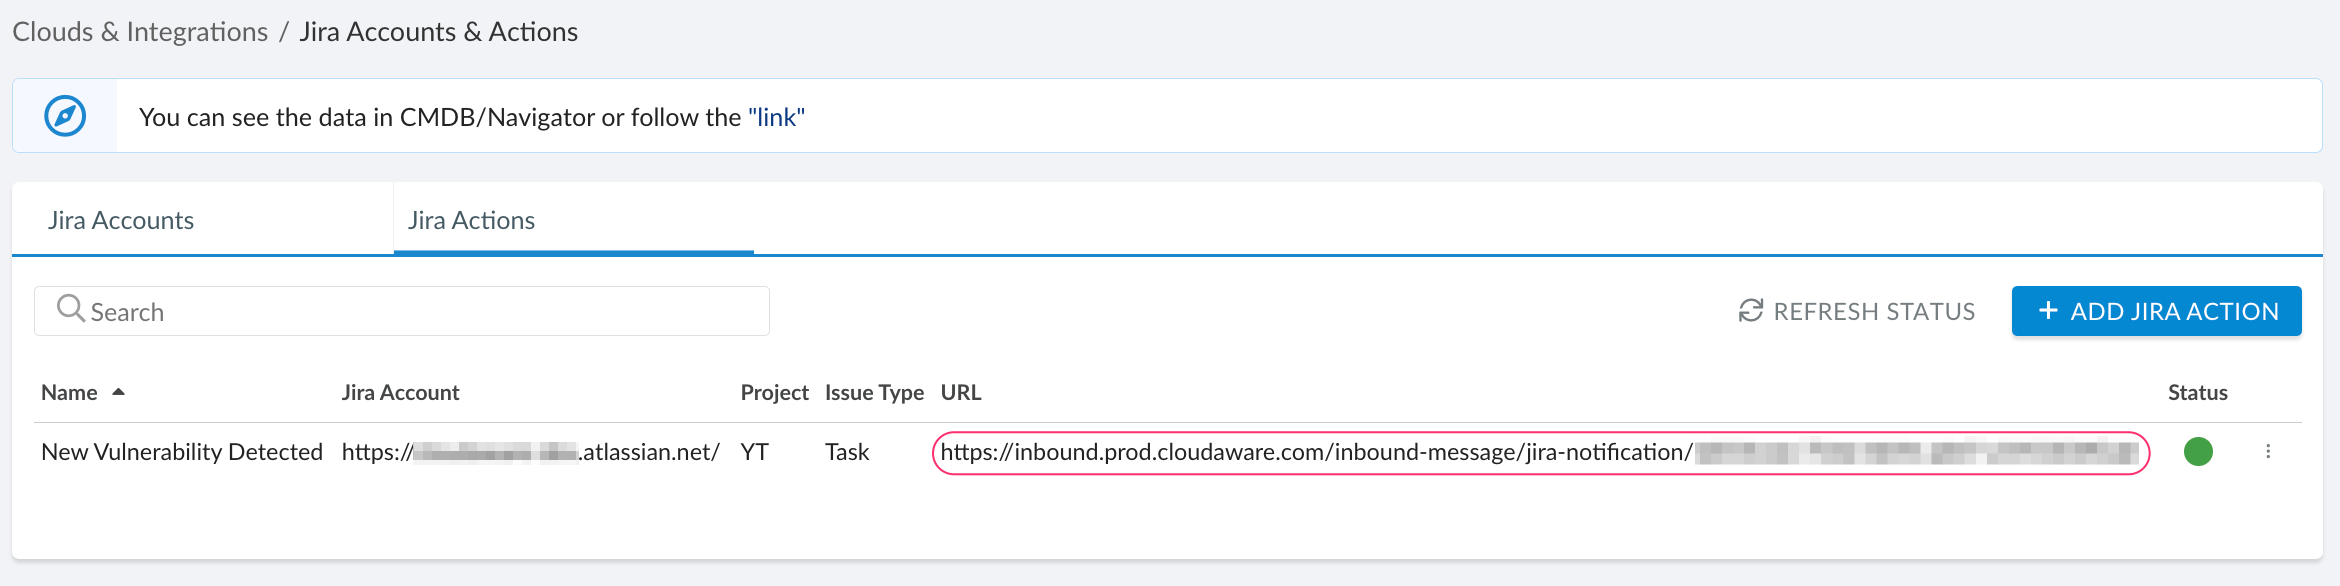
Click SAVE.
Copy and save the generated URL as it is required for further configuration.
Configure an outbound message
After setting up the Jira Action in Cloudaware, configure the outbound message that will be triggered by a flow.
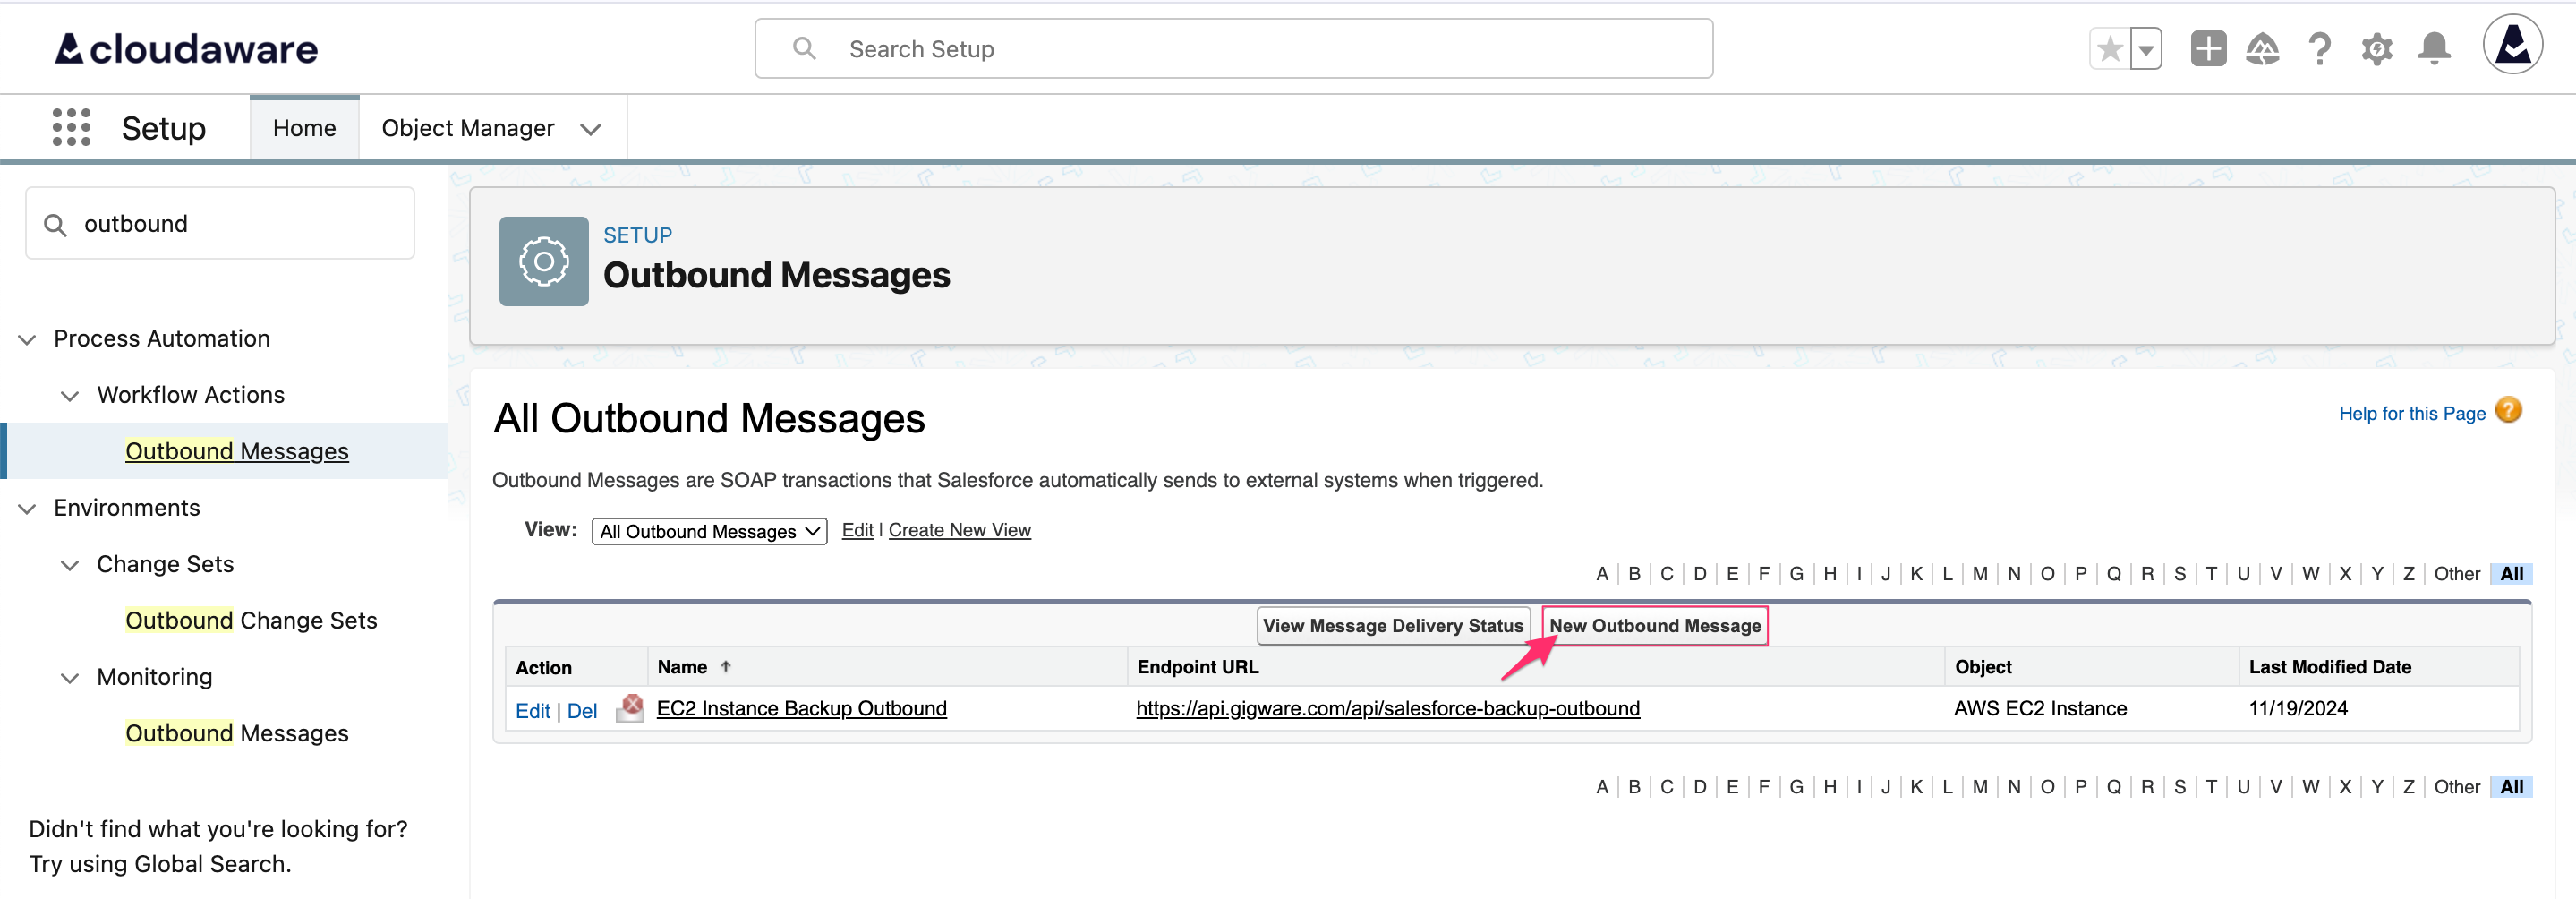
In Cloudaware CMDB Navigator, go to Setup.

Type Outbound in the Quick Find bar. Under Workflow Actions, select Outbound Messages → click New Outbound Message.
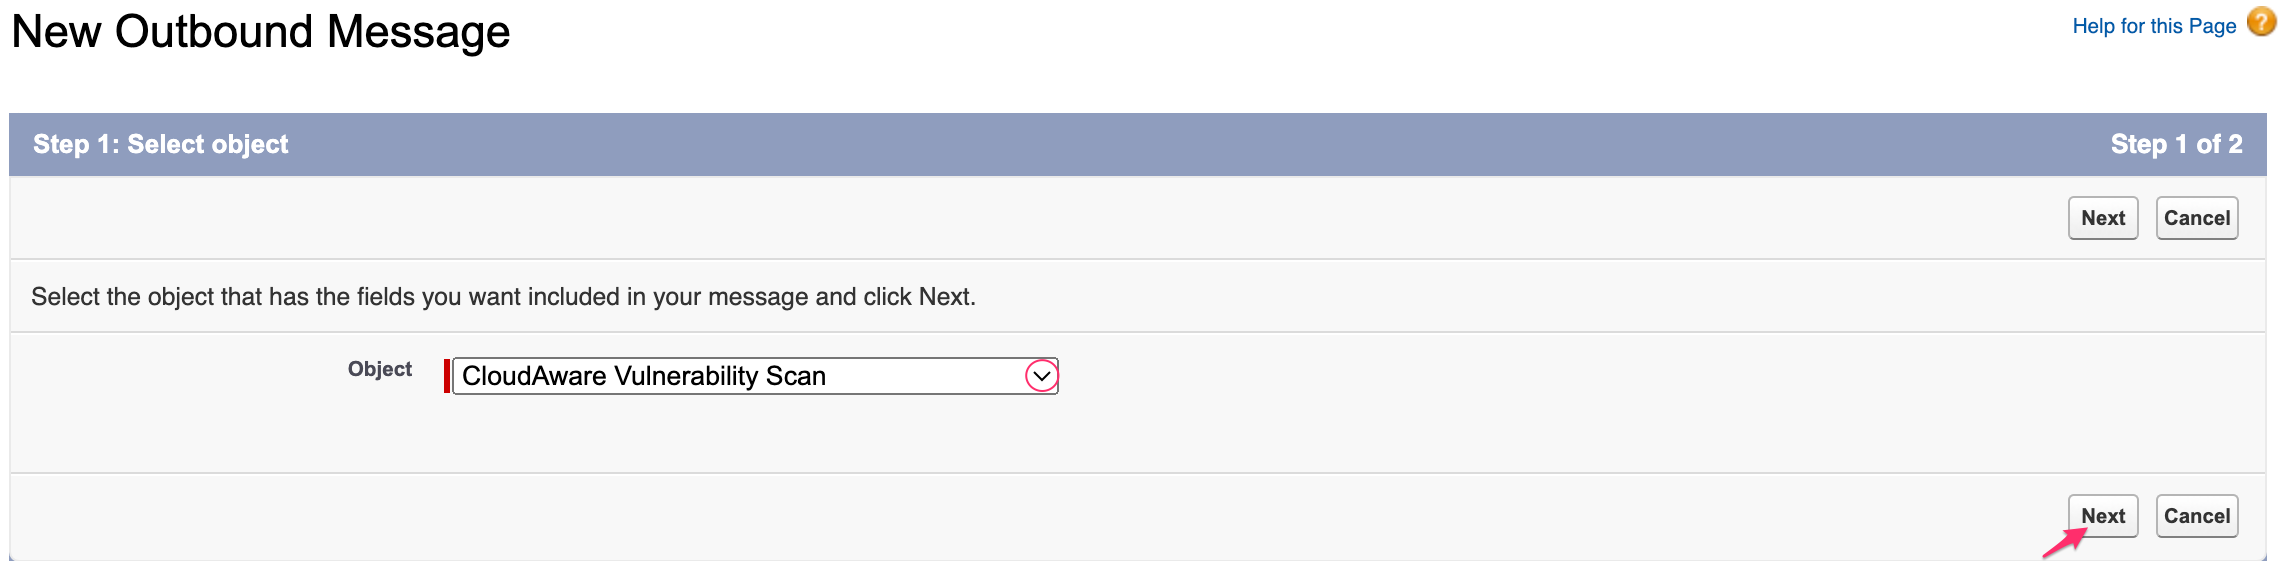
From the drop-down list, select the object (in this example, CloudAware Vulnerability Scan). Click Next.
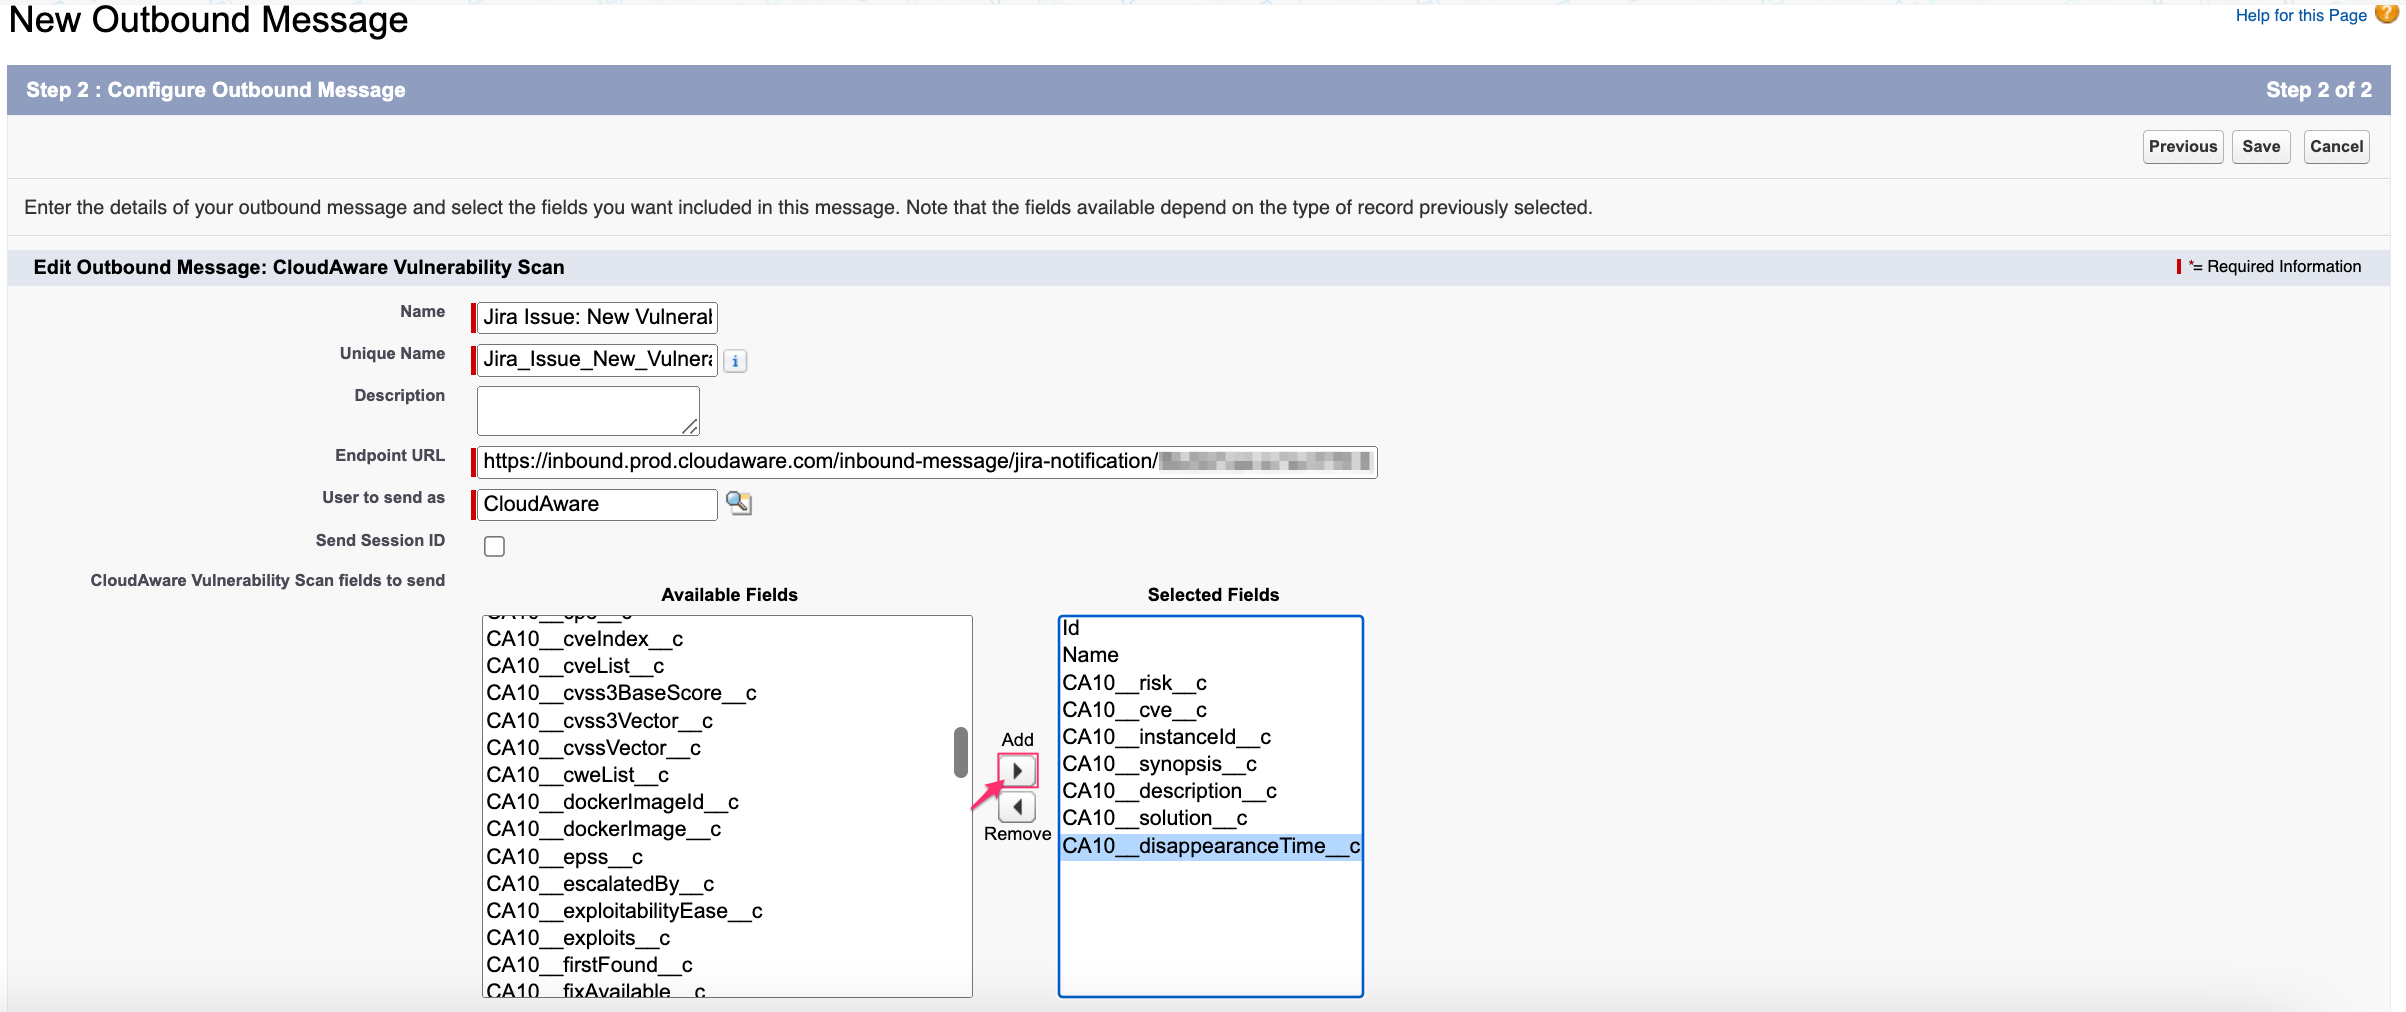
Configure the outbound message:
WHERE
Name – a descriptive name, e.g. Jira Issue: New Vulnerability
Endpoint URL – the saved URL from Jira Action configured in Cloudaware
Selected Fields – move fields from Available Fields to Selected Fields* using the arrow buttons (in this example, fieldsCA10__risk__c,CA10__priority__c,CA10__severity__c,CA10__cvssNumber__c,CA10__CaAwsInstance__c,CA10__description__c,CA10disappearanceTime__care used;Idis a default record field ID)
*Ensure that all fields used in the Summary and Description of Jira Action are included in the Selected Fields list. If any field is missing, Cloudaware will send "undefined" to Jira.
Click Save.
Create a flow
Creating issues
Set up a flow that triggers the outbound message configured earlier. This flow will create a Jira issue each time Cloudaware detects a new vulnerability.
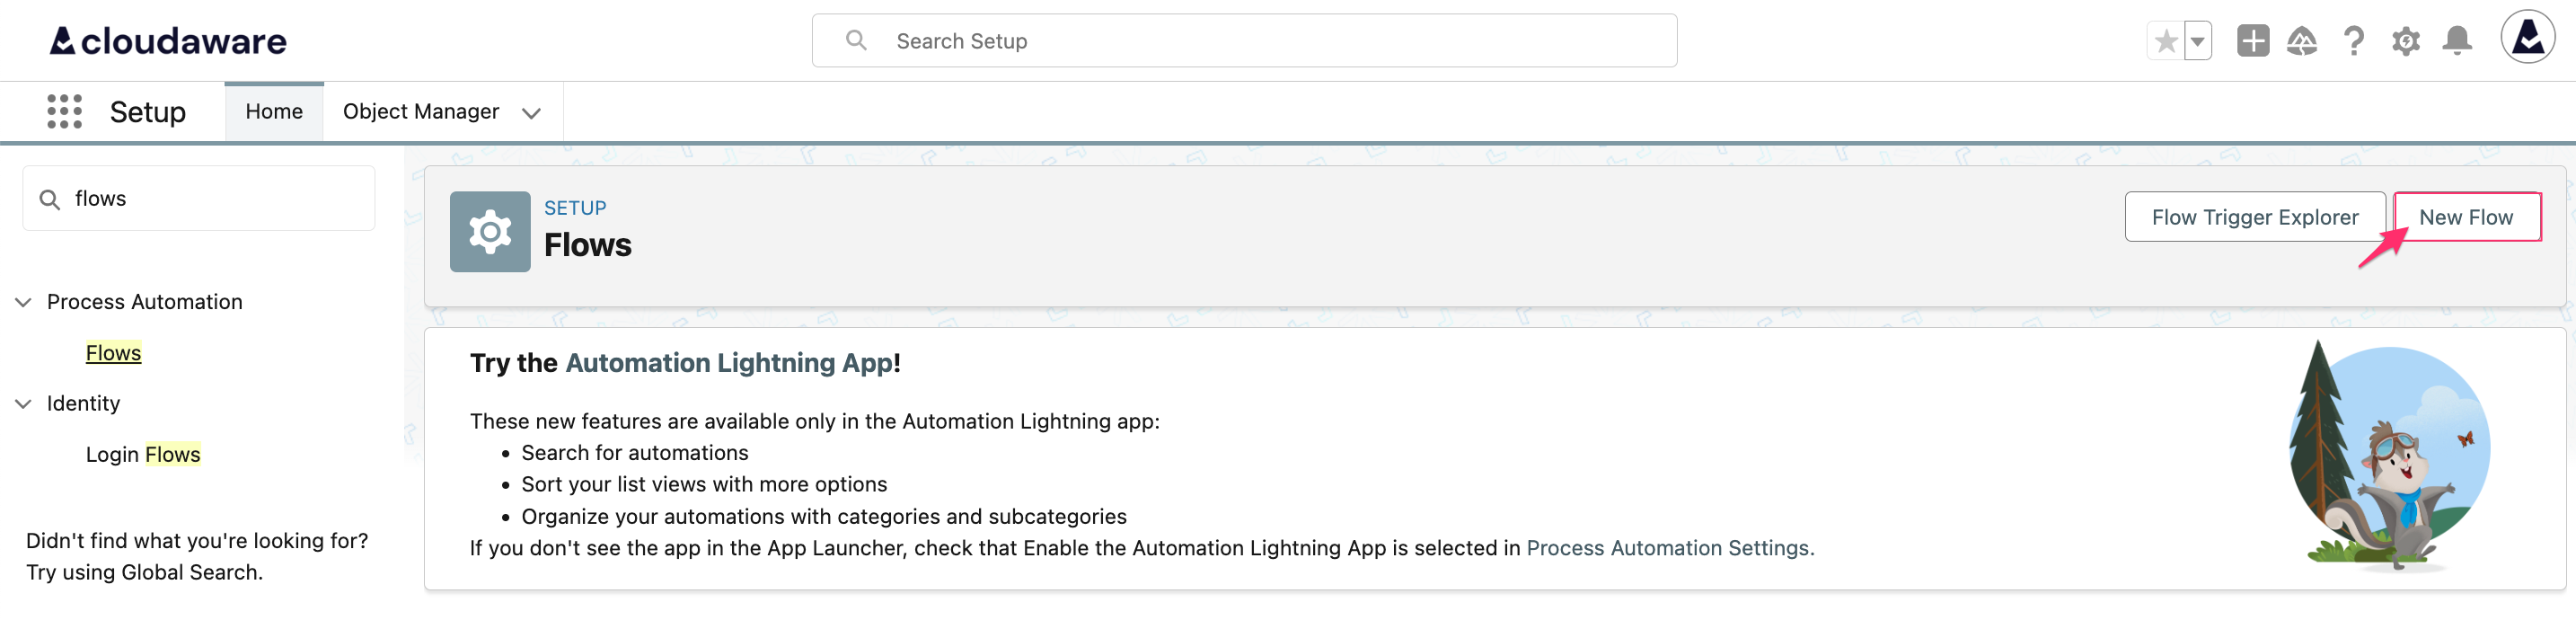
In Setup, type Flows in the Quick Find bar → select Flows → click New Flow.
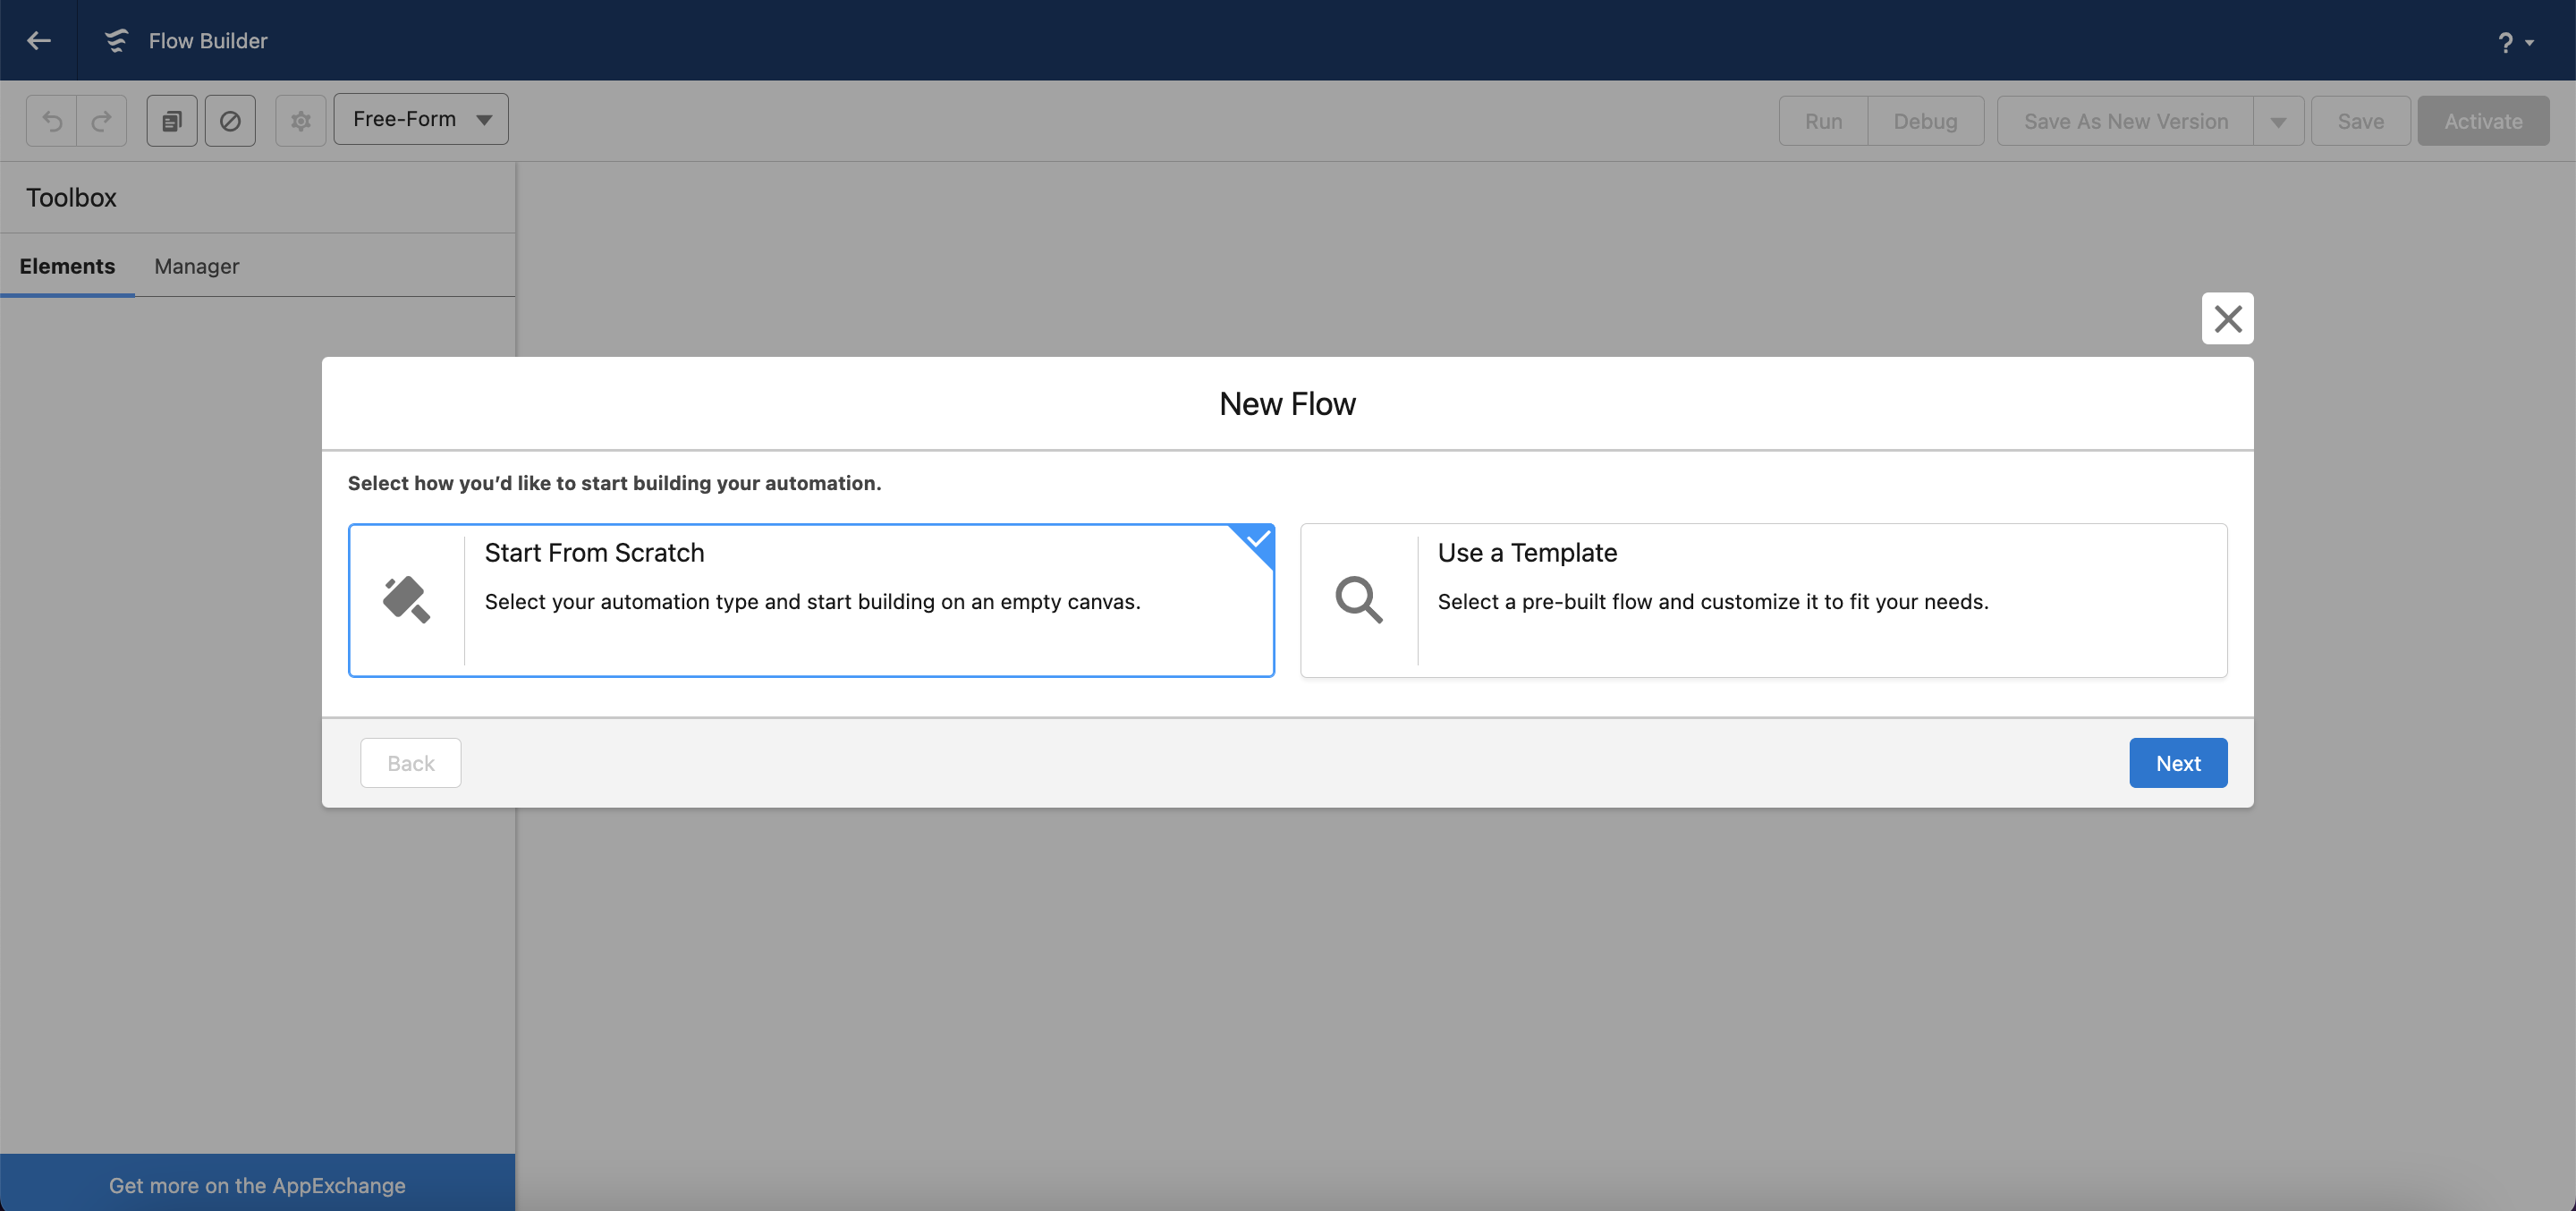
Select Start From Scratch → click Next.
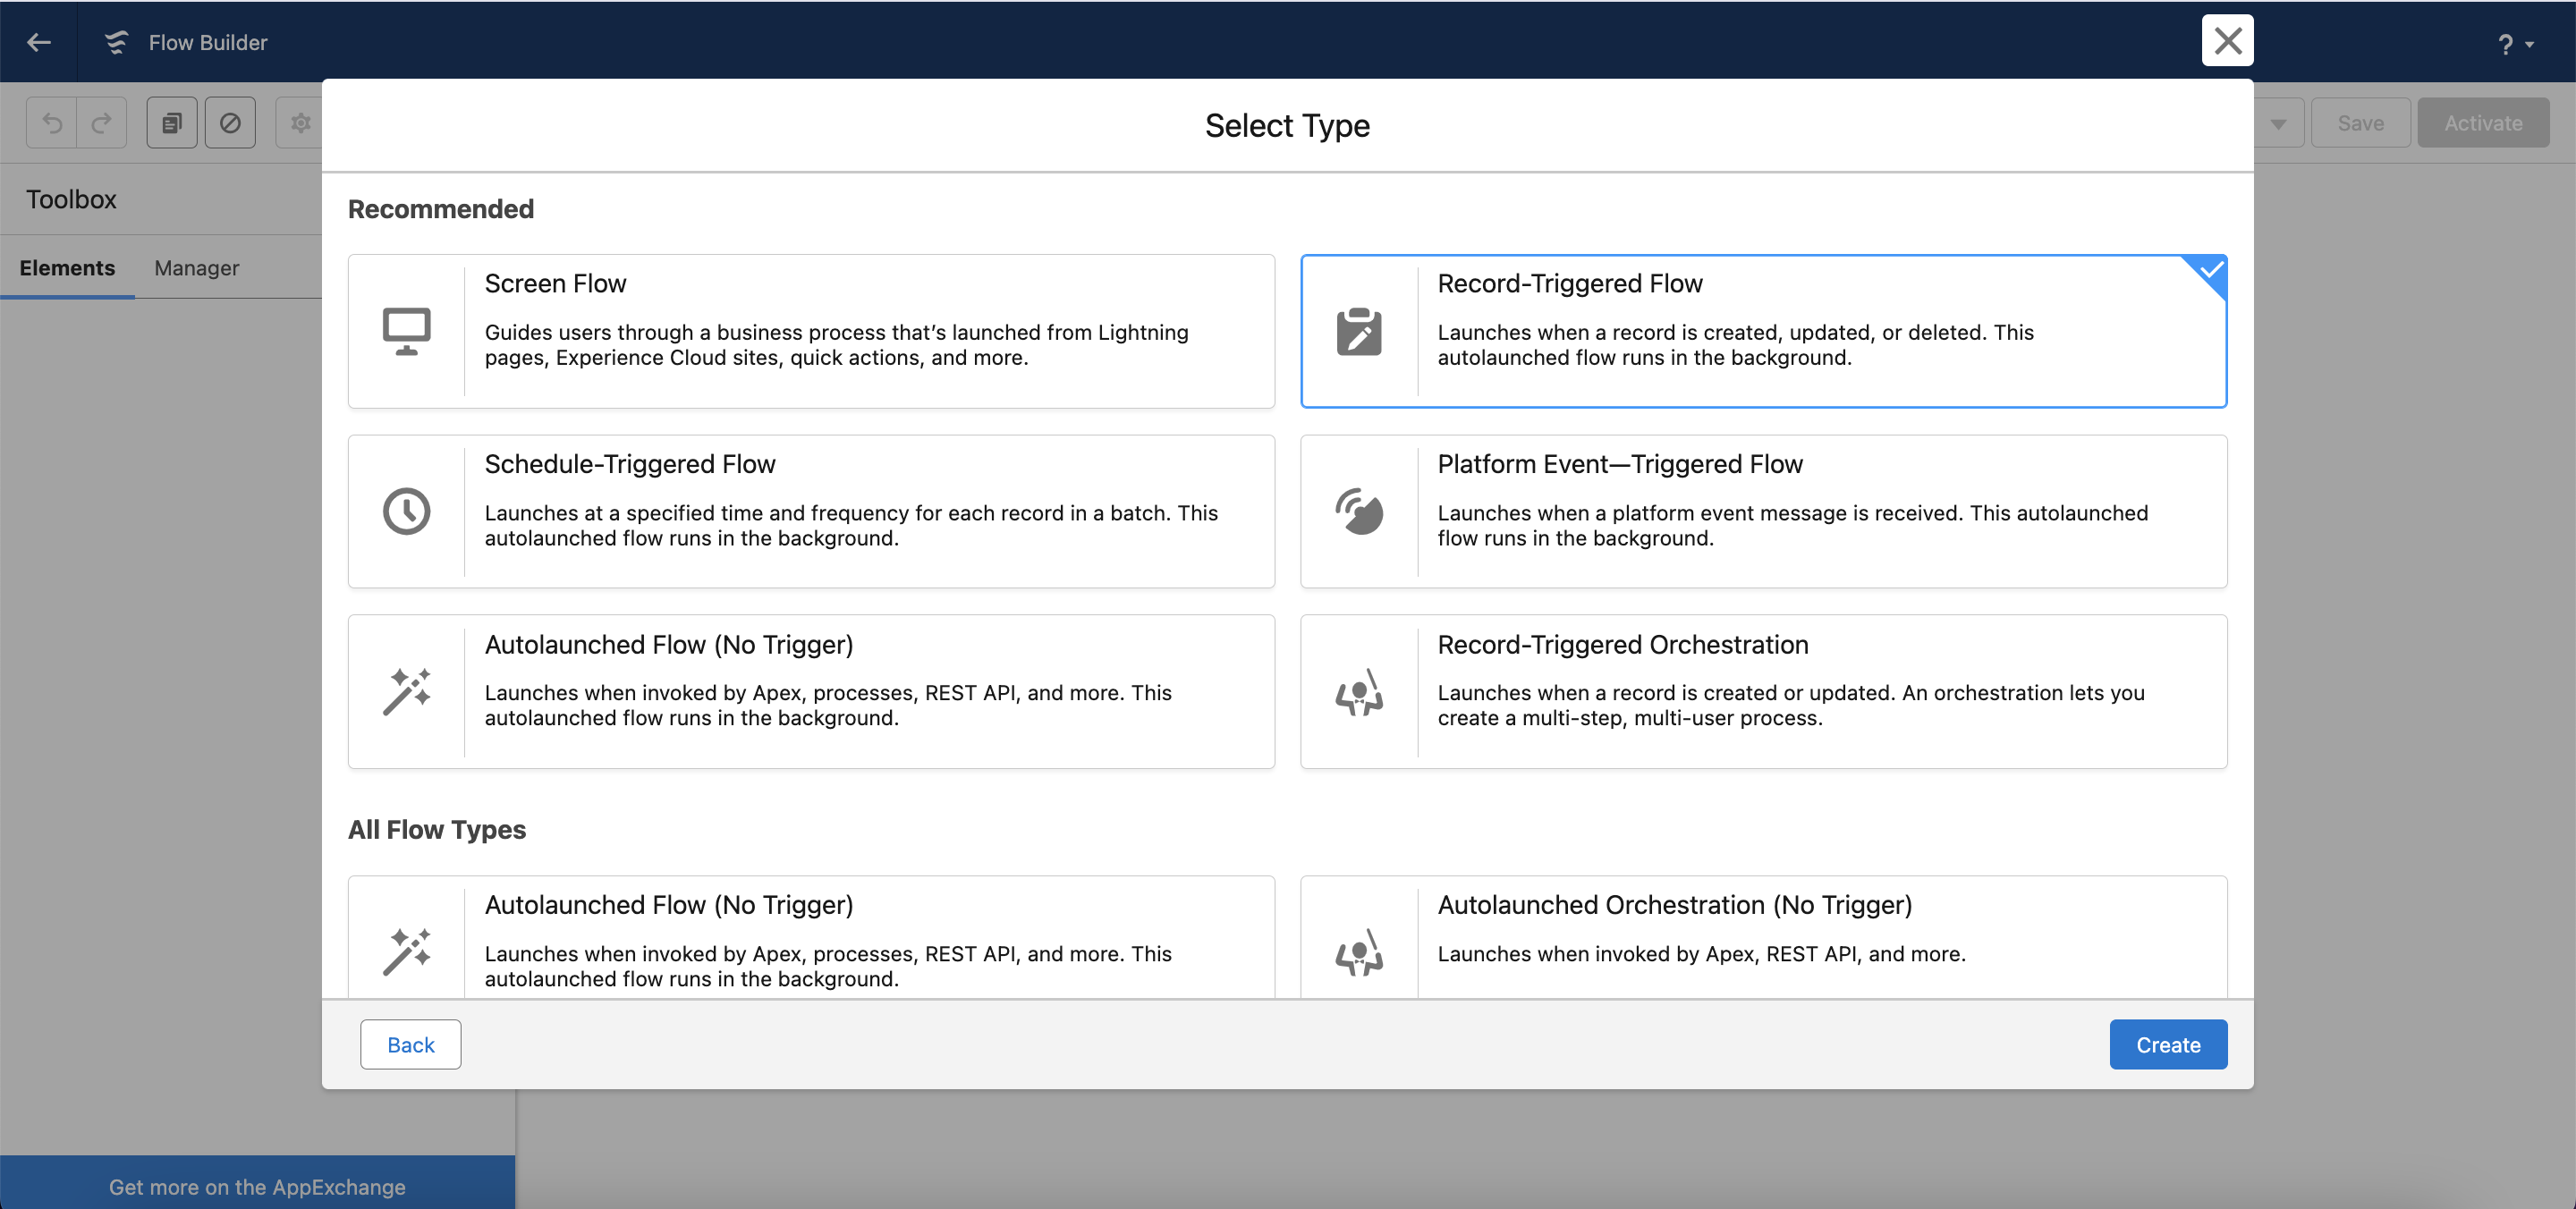
Select Record-Triggered Flow → click Create.
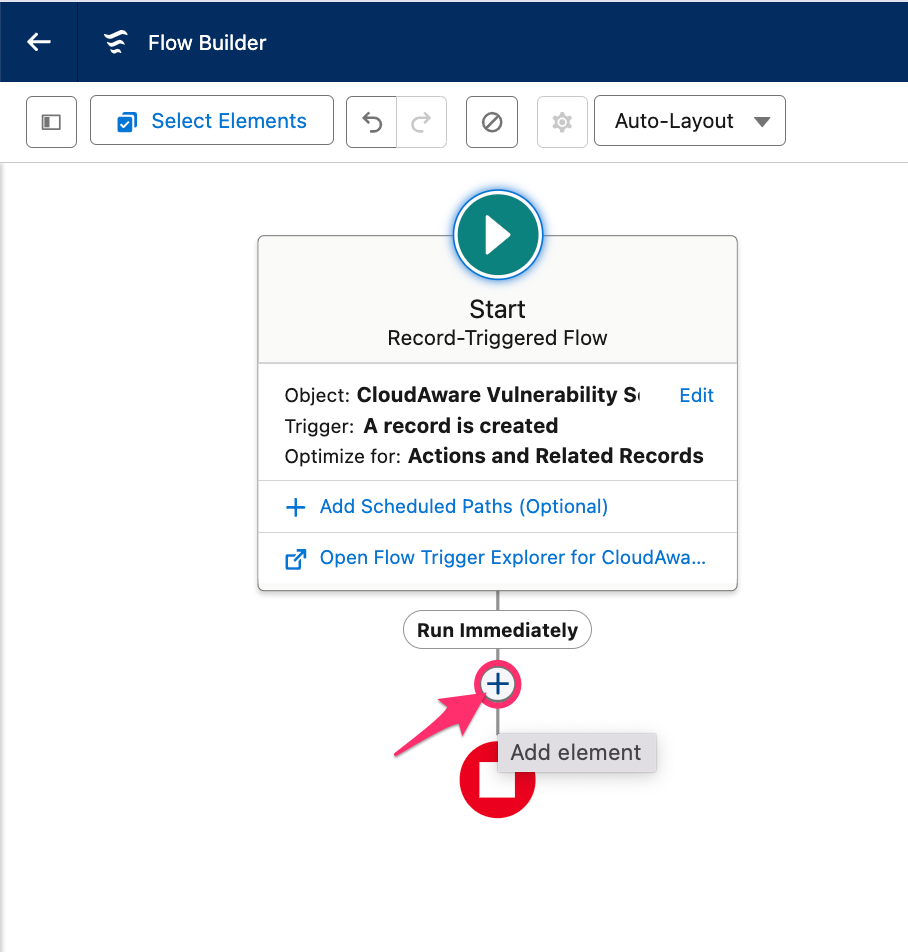
Select the object, configure a trigger, and set entry conditions, e.g., in this case:
Object: CloudAware Vulnerability Scan
Trigger the Flow when: A record is created
Condition Requirements: All Conditions are Met (AND)
Field: Severity
Operator: Greater of equal to
Value: 7
Leave the Actions and Related Records selected. Click Next.
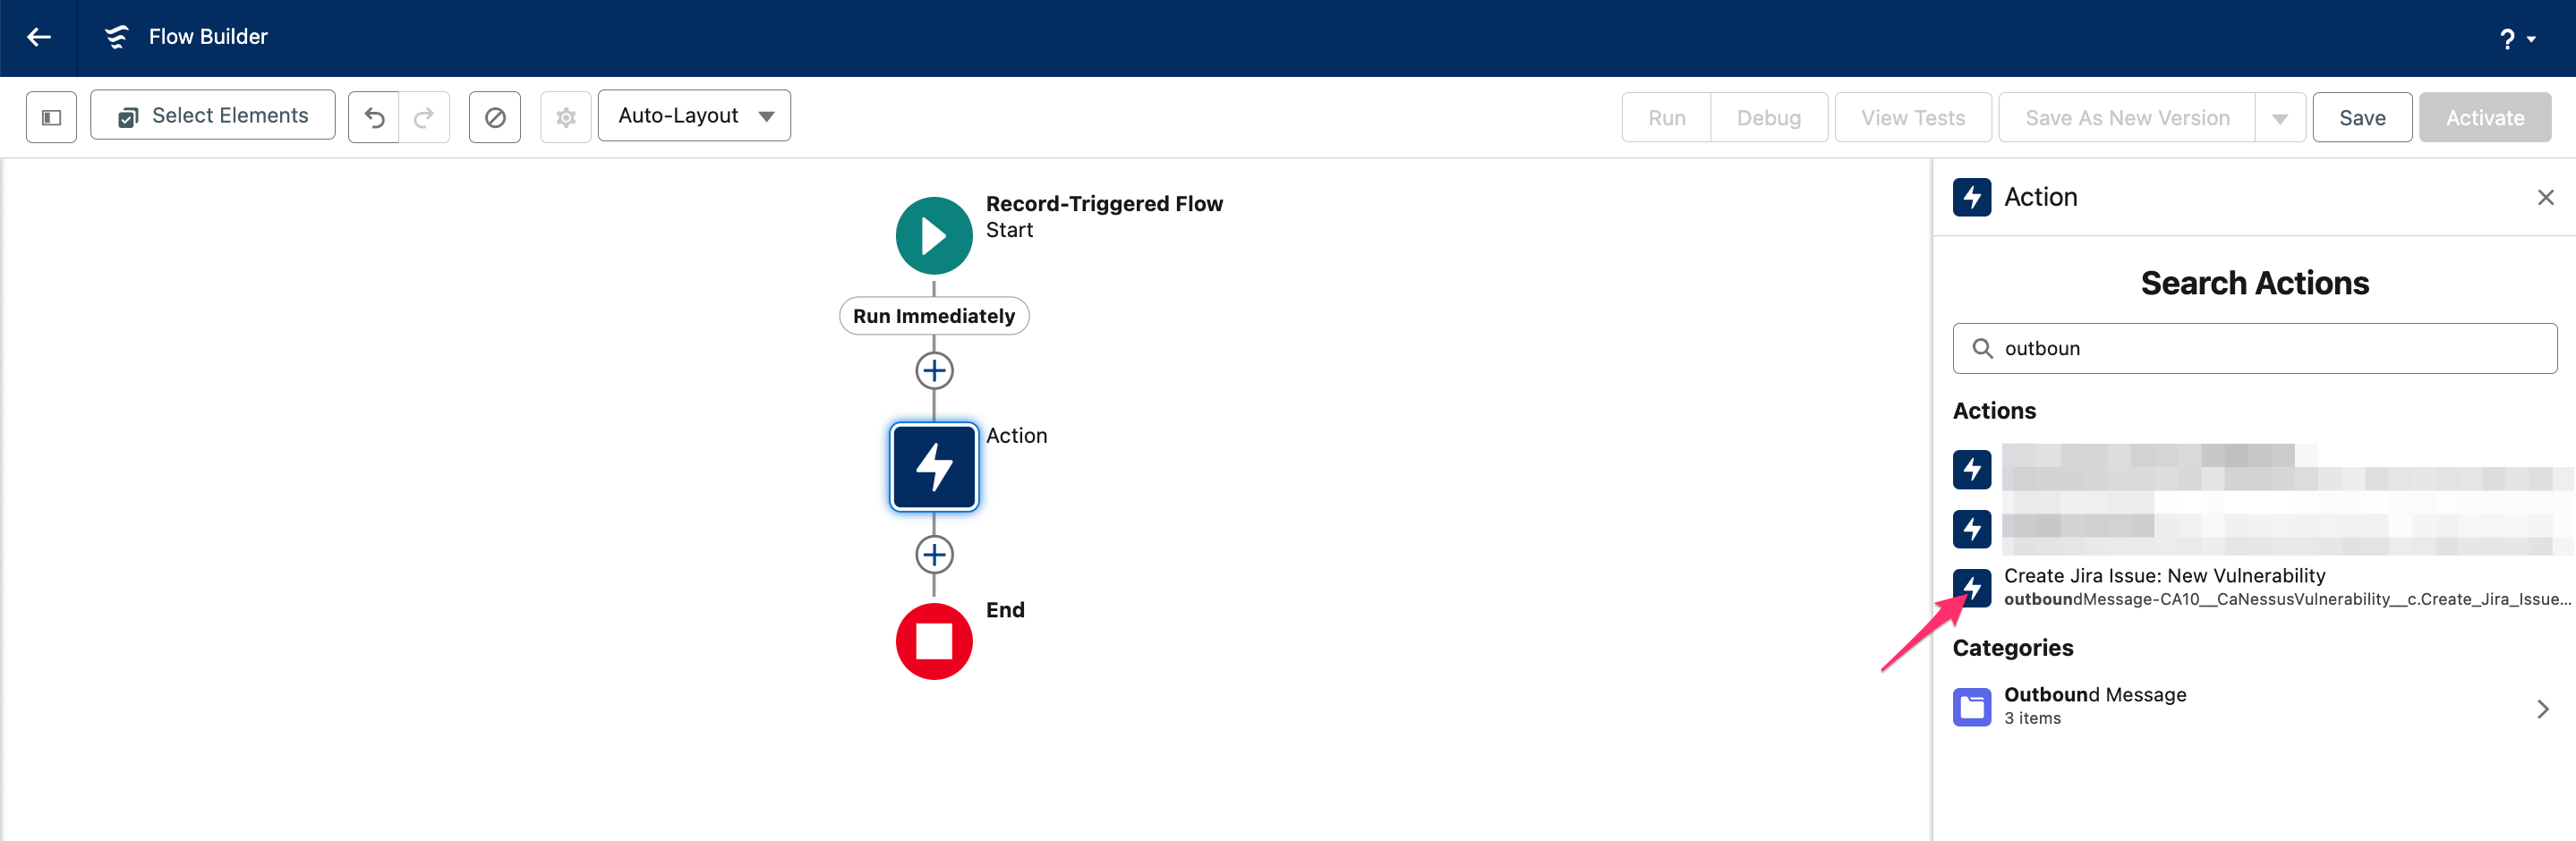
Add an action: click the plus sign in the flow diagram → select Action → Outbound Messages → choose the outbound message created earlier, e.g., in this case Create Jira Issue: New Vulnerability.
Name the action, e.g., Create Issue For New Vulnerability Detected.
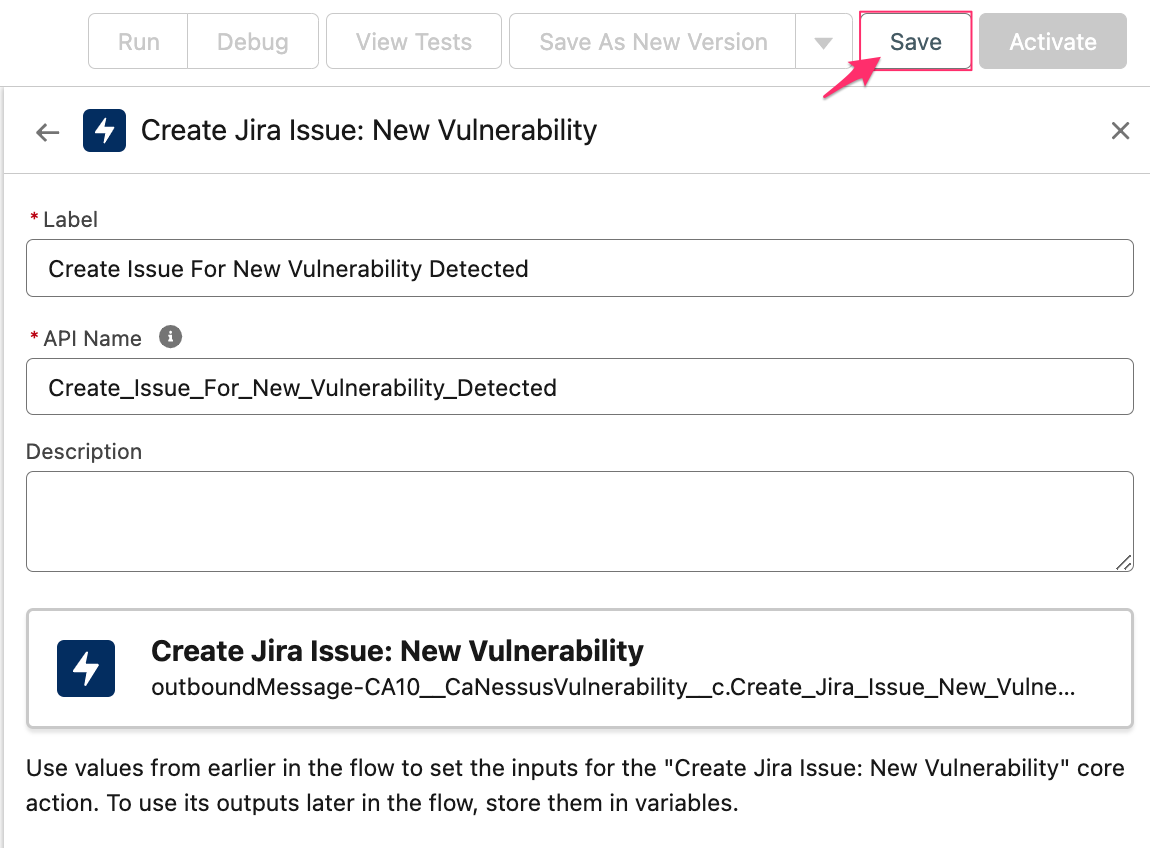
Click Save and name the flow, e.g., Jira issue for new vulnerability.
Click Activate to enable the flow.
Posting comments
Cloudaware can post a comment to an existing Jira issue when certain condition change, such as when a vulnerability is fixed. To enable this, set up a second flow that uses the same outbound message. Ensure that the outbound message includes all necessary fields, e.g., CA10disappearanceTime__c in this use case, which Cloudaware uses to post the comment.
In Setup, go back to Flows → click New Flow.
Select Start From Scratch → click Next.
Select Record-Triggered Flow → click Create.
Select the object, configure a trigger, and set entry conditions, e.g., in this use case:
Object: CloudAware Vulnerability Scan
Trigger the Flow when: A record is updated
Condition Requirements: All Conditions are Met (AND)
Field: IsDeleted
Operator: Equals
Value: True
! In ‘When to Run the Flow for Updated Records’, select Only when a record is updated to meet the condition requirements.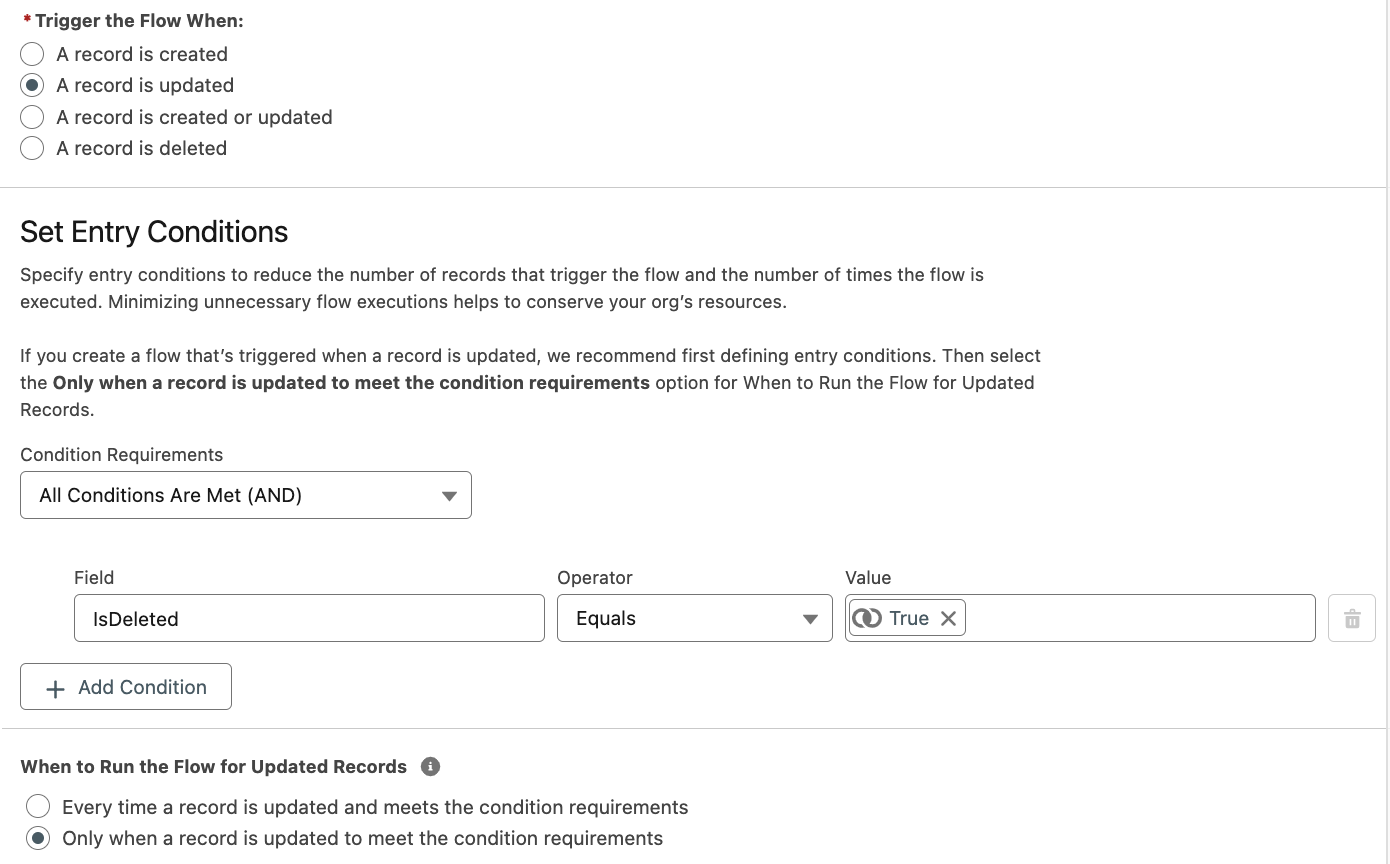
Leave the Actions and Related Records selected. Click Next.
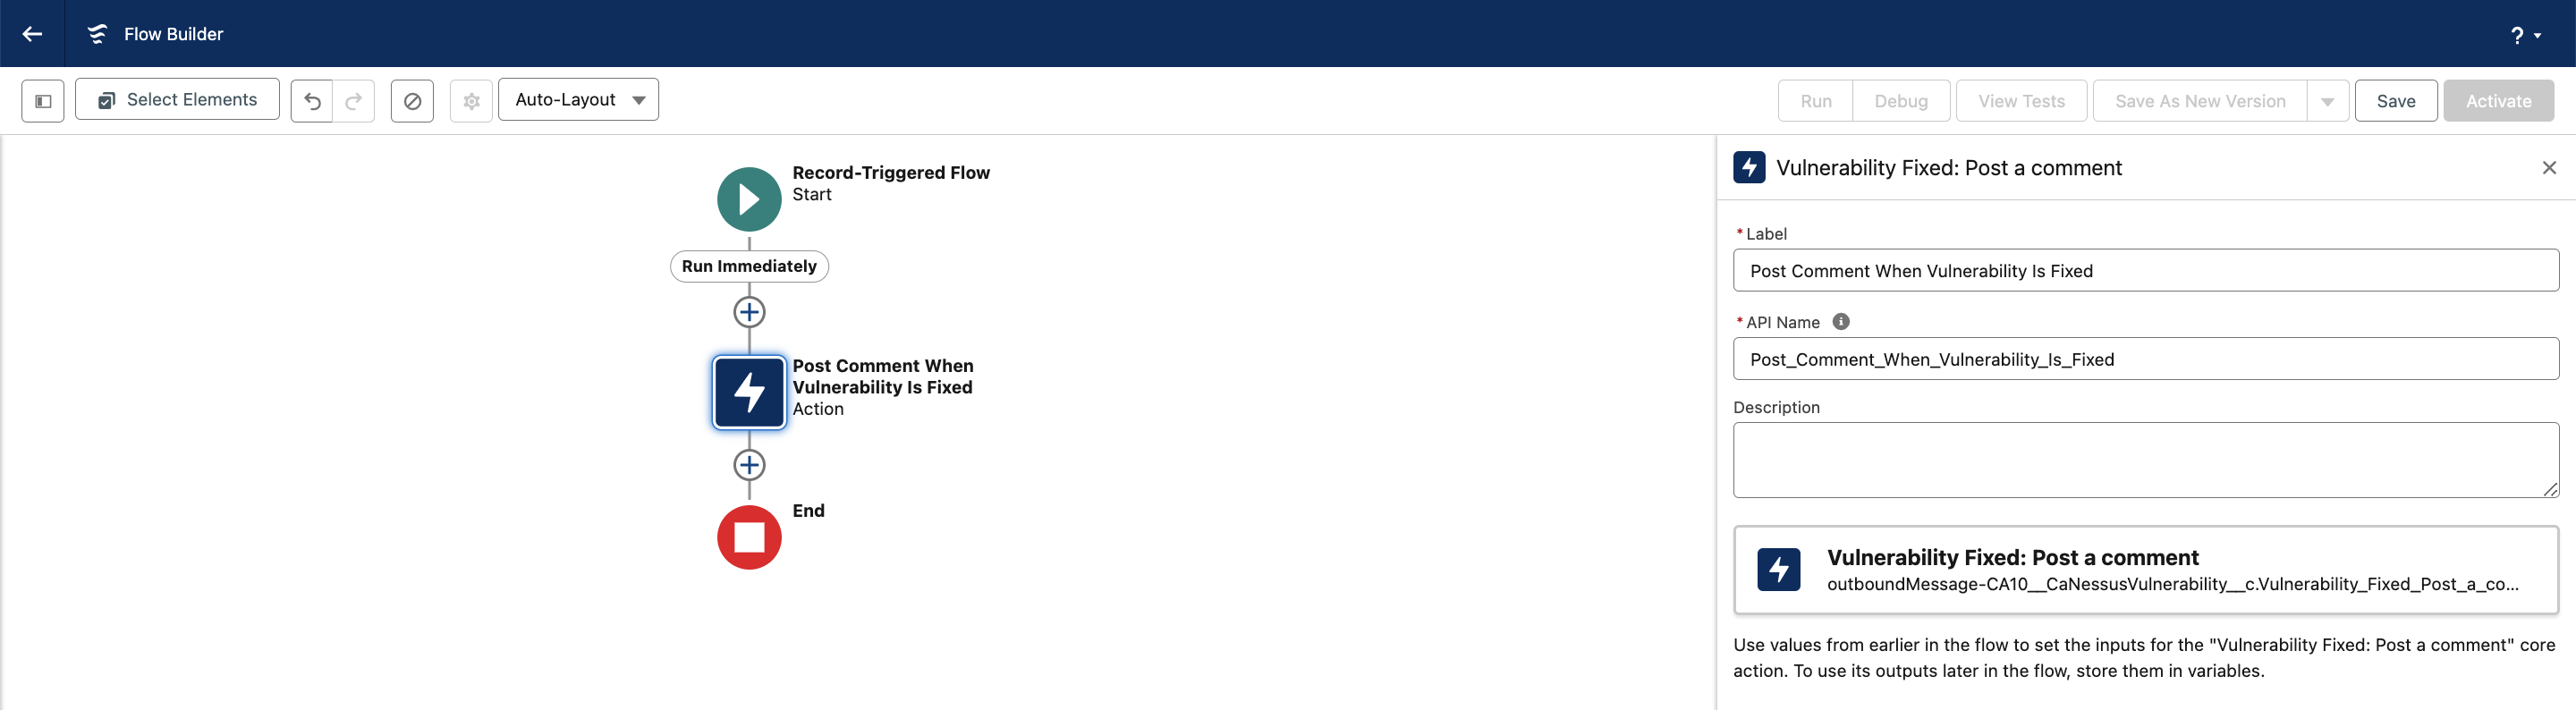
Add an action: click the plus sign in the flow diagram → select Action → Outbound Messages → select the outbound message created earlier, e.g., in this case Jira Issue: New Vulnerability.
Name the action, e.g., Post Comment When Vulnerability Is Fixed.
Click Save and name the flow, e.g., Jira issue update for fixed vulnerability.
Click Activate to enable the flow.
To request assistance with creating flows, contact your dedicated account manager at tam@cloudaware.com.
Examples in Jira
Below is an example of a Jira issue created for a new vulnerability, based on the described use case:

Tip for Jira Action form for creating issues
Action fields | Value |
|---|---|
Summary |
CODE
|
Description |
CODE
|
Field List |
CODE
|
Below is an example of a Cloudaware comment for a fixed vulnerability, based on the described use case:

Tip for Jira Action form for posting comments
Action fields | Value |
|---|---|
Comment |
CODE
|
The security team may use Jira automation to bulk-close issues with comments.
! Next step (optional) - Bulk-close Jira issue with Cloudaware comments