
External Data for Jira Fields
This guide explains how to configure Atlassian's External Data for Jira Fields app to pull Cloudaware CIs data into Jira tickets.
![]() To see how Cloudaware seamlessly integrates with Jira in action, request a demo.
To see how Cloudaware seamlessly integrates with Jira in action, request a demo.
Introduction
Cloudaware CMDB is built on Force.com. Cloudaware manages the discovered cloud and on-prem inventory items as Salesforce custom objects and fields. These objects and fields are considered to be external data for Jira.
Prerequisites
Add Jira account to Cloudaware.
Go to the Jira marketplace to locate the app External Data for Jira fields. Make sure to get yourself familiarized with the pricing or free trial terms before adding the app to Jira instance.
Install the app to Jira instance.
Configure the app
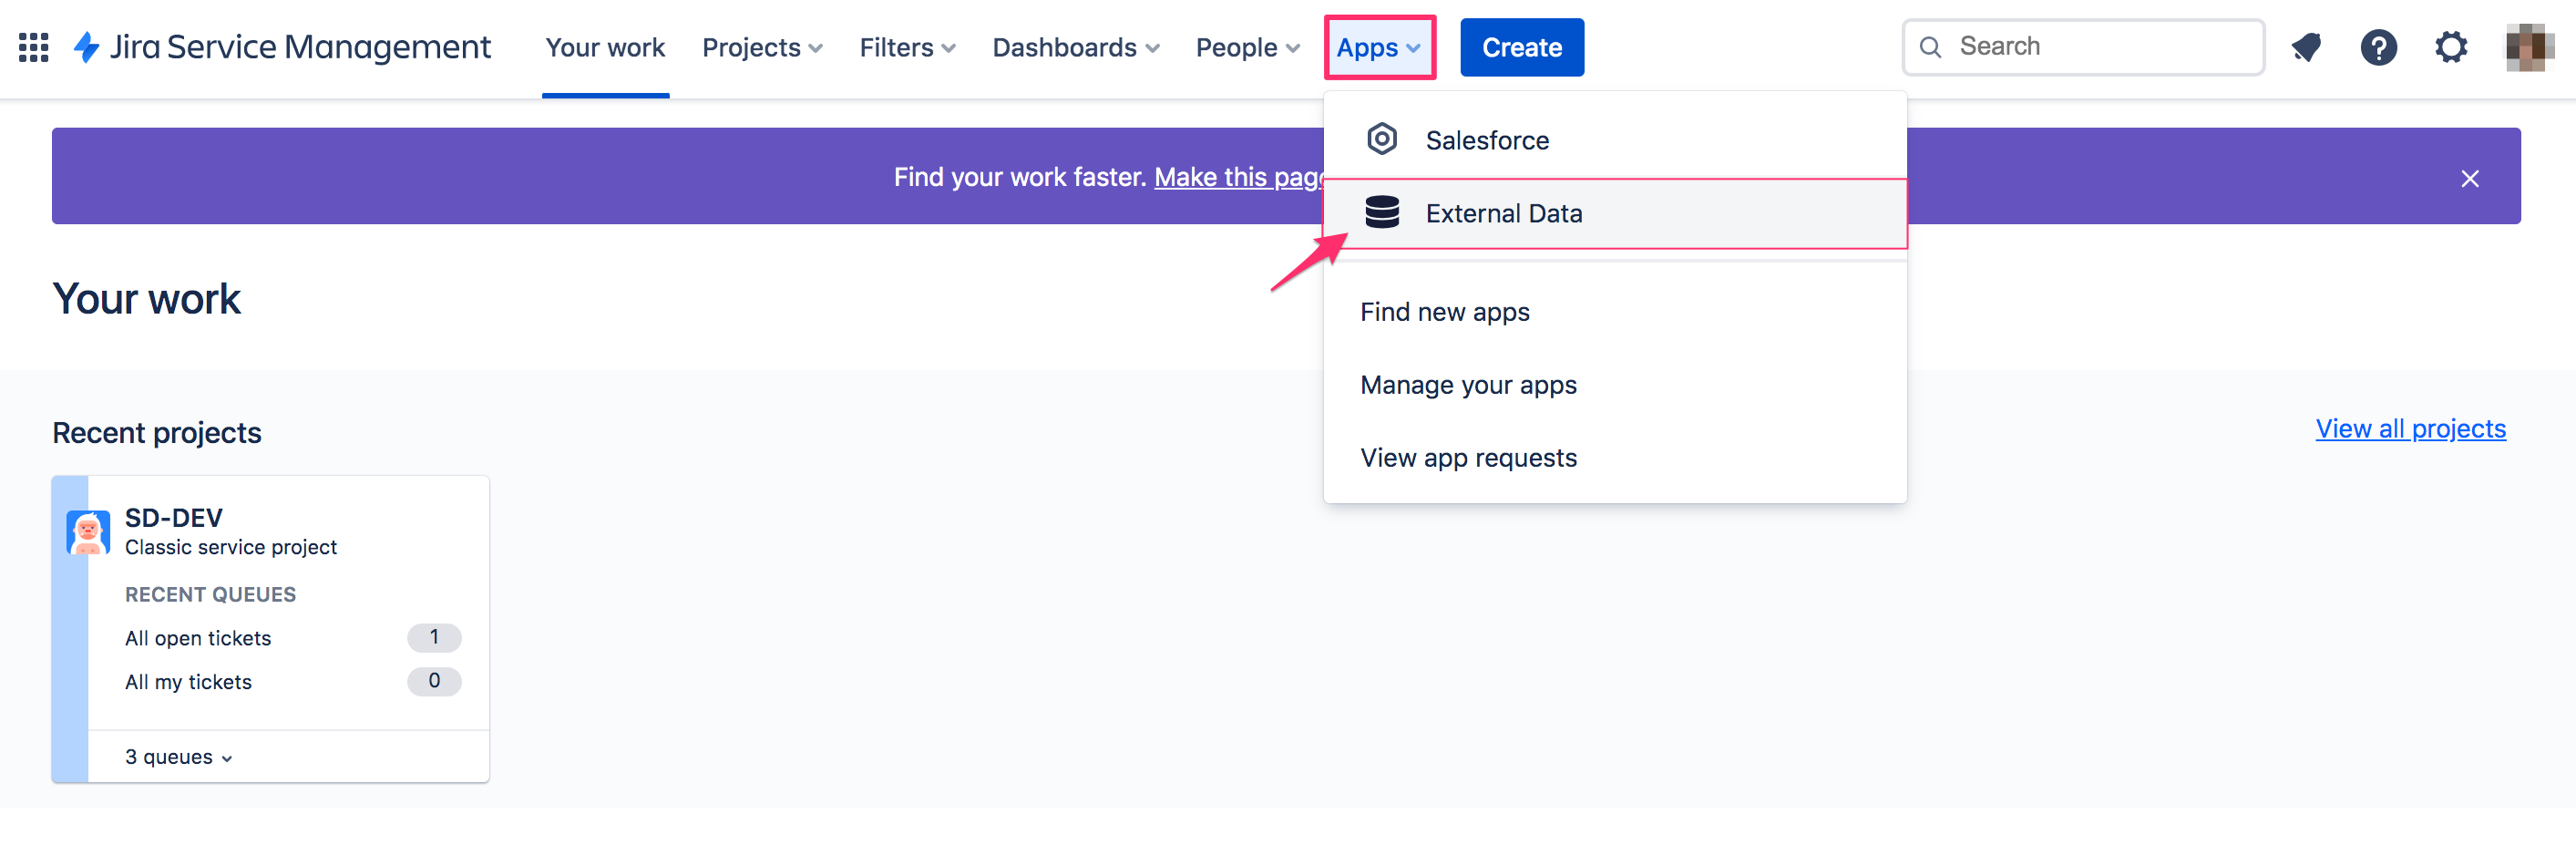
1. Log in to Jira. Go to Apps → External Data to configure external data sources for further configuration.
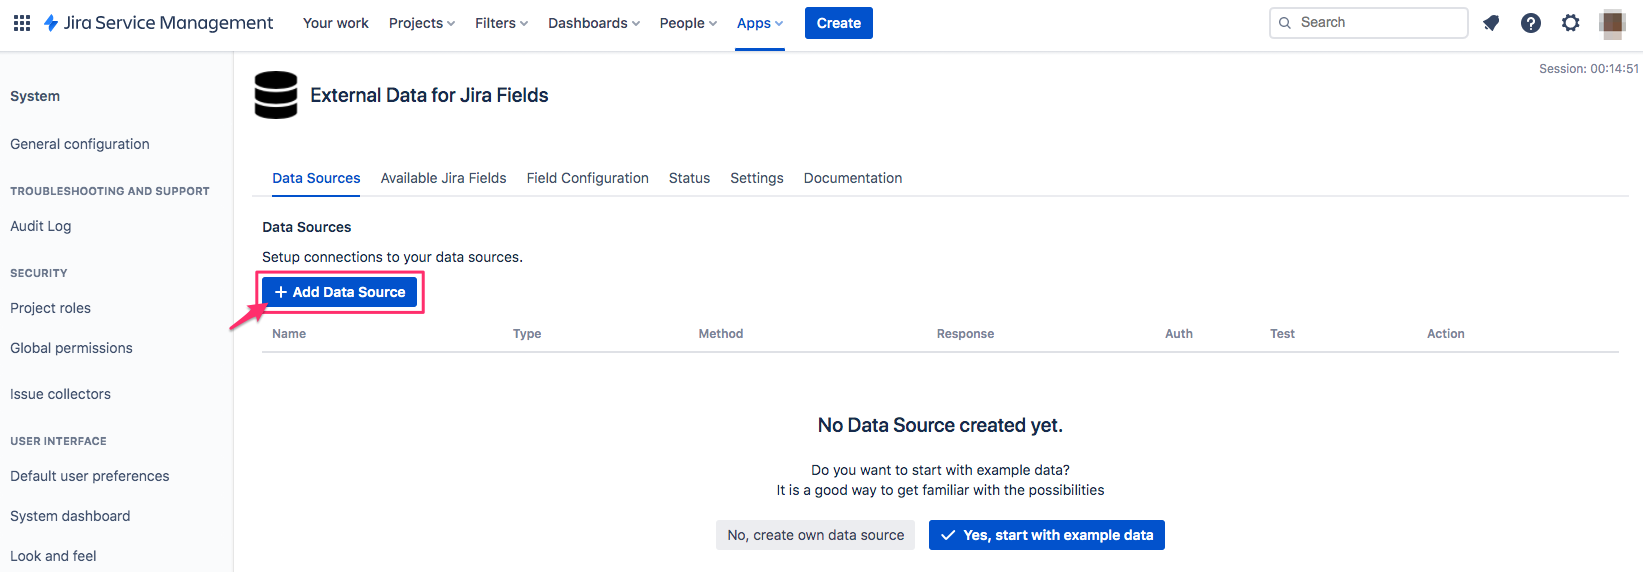
2. Open the tab 'Data Sources'. Click +Add Data Source.
3. Configure two datasets:
Org Metadata that will retrieve object types from Salesforce.
Select 'Salesforce' for Connection Type, click Authenticate with Salesforce. The link to your Salesforce instance will become available for the field 'URL' after you log in to Salesforce*.
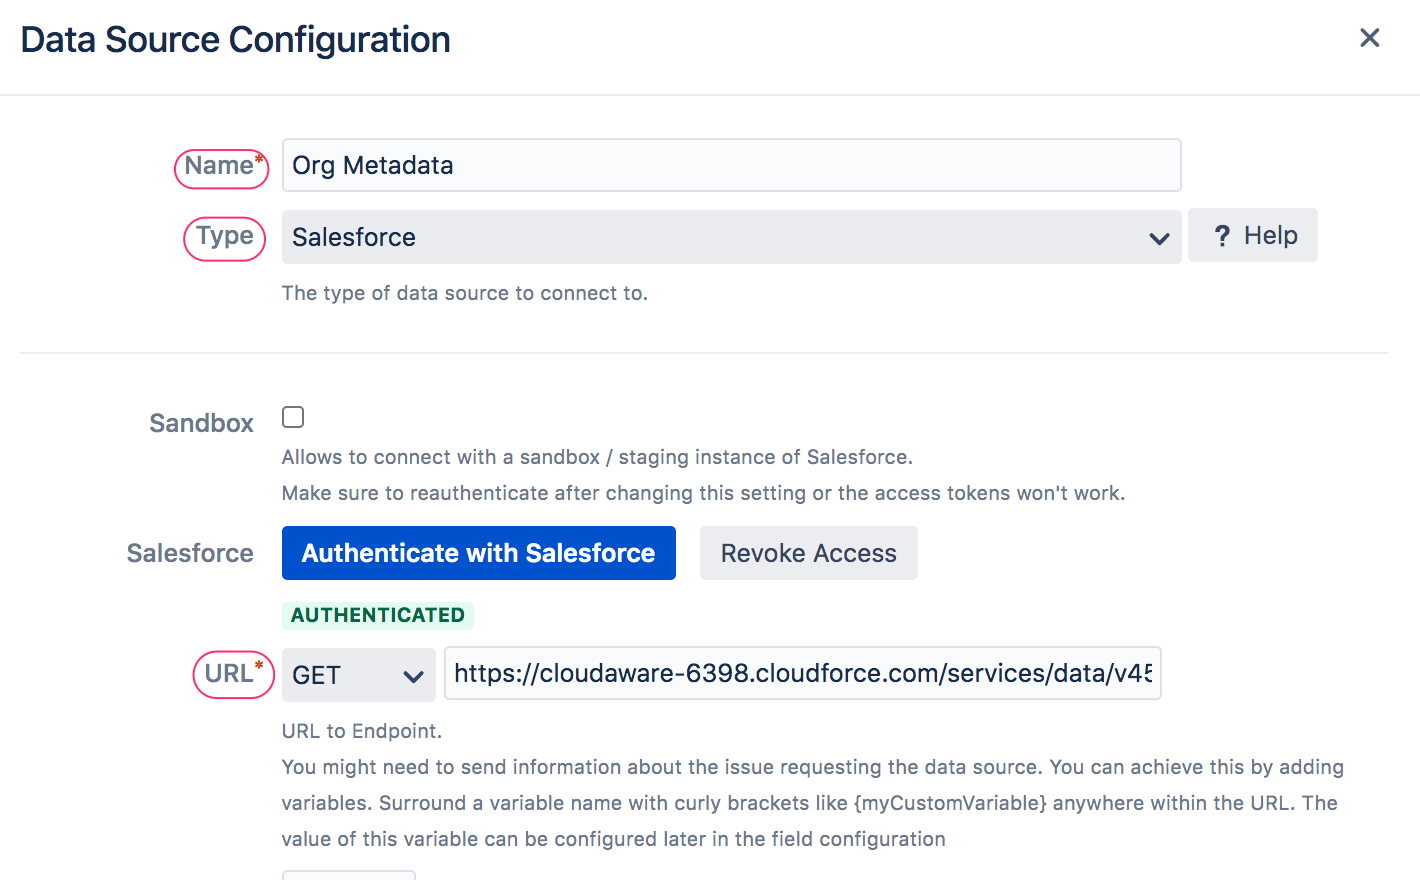
*For successful authentication with Authenticate with Salesforce, use your Salesforce user password. Log in to Cloudaware account → Setup → Users → locate your user → Edit → check the box 'Generate new password and notify user immediately' → Save → click 'Reset Password' → OK → check your email.
Click Save.
Web-Service Data that will retrieve object fields, such as names, IDs, Created Date, etc.
Select 'Salesforce' for Connection Type, click Authenticate with Salesforce. The URL link to your Salesforce instance will become available after you log in to Salesforce*.

*For successful authentication with Authenticate with Salesforce, use your Salesforce user password. Log in to Cloudaware account → Setup → Users → locate your user → Edit → check the box 'Generate new password and notify user immediately' → Save → click 'Reset Password' → OK → check your email.
This dataset requires additional coding inside Salesforce org using Apex, which will be managed by Cloudaware engineers once agreed with a customer.
Cloudaware support can also create a joint dataset with a pre-built Salesforce instance URL.
Click Save.
4. Open the tab 'Available Jira Fields'.
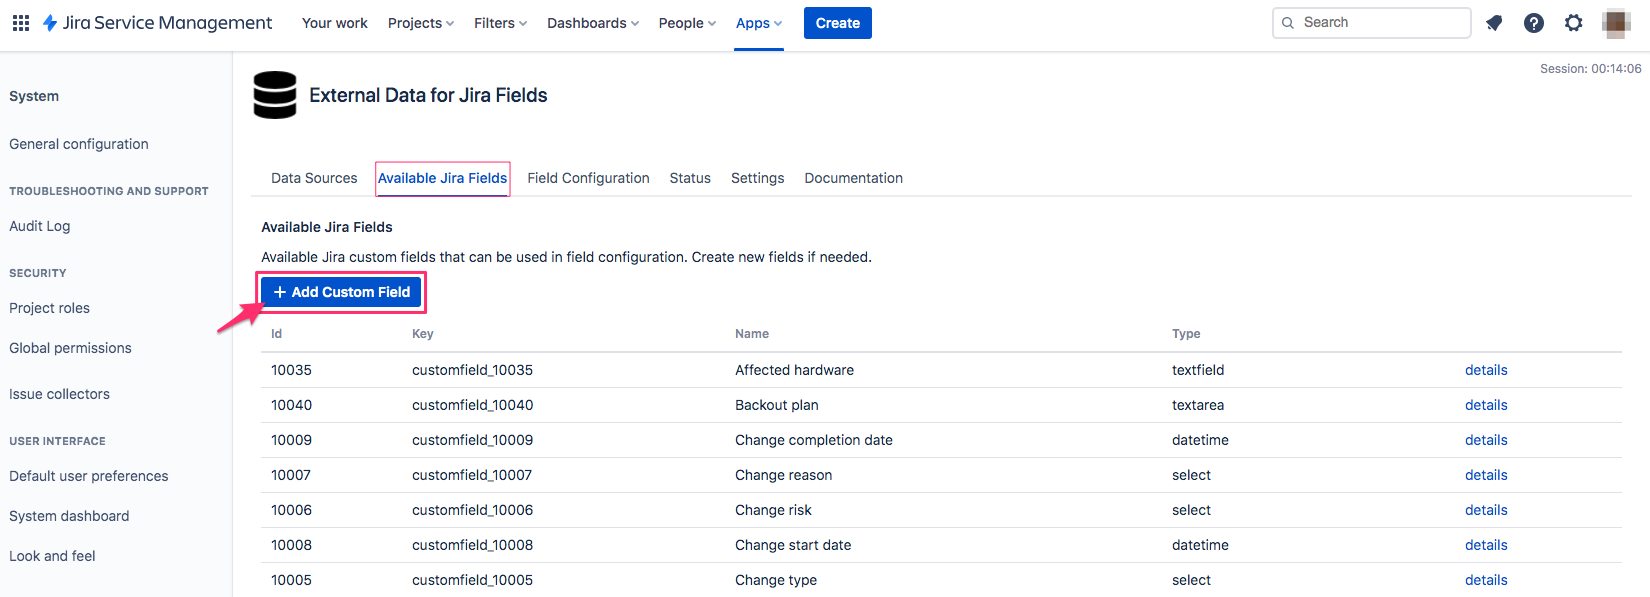
Create the custom fields* as described below:
Object Type - the field is required for retrieving Cloudaware CMDB assets names
Object Identifier - the field is dependant on Object Type and required for mapping newly created tickets to Cloudaware CMDB assets
URL - the field is dependant on Object Identifier and required for retrieving a Salesforce object record link and creating a direct link to the corresponding Cloudaware CMDB asset
*To create a custom field in Jira, go to Settings (Gear icon) → Issues → under Fields on the left, select 'Custom fields' → Create custom field:
a. Name the field 'Object Type' → choose 'Select List (single choice)' as a field type → assign Screens by using the Jira project key and checking the corresponding boxes → Save
b. Name the field 'Object Identifier' → choose 'Text Field (Text Field)' as a field type → assign Screens by using the Jira project key and checking the corresponding boxes → Save
c. Name the field 'URL' → select 'URL Field' as a field type → assign Screens by using the Jira project key and checking the corresponding boxes → Save
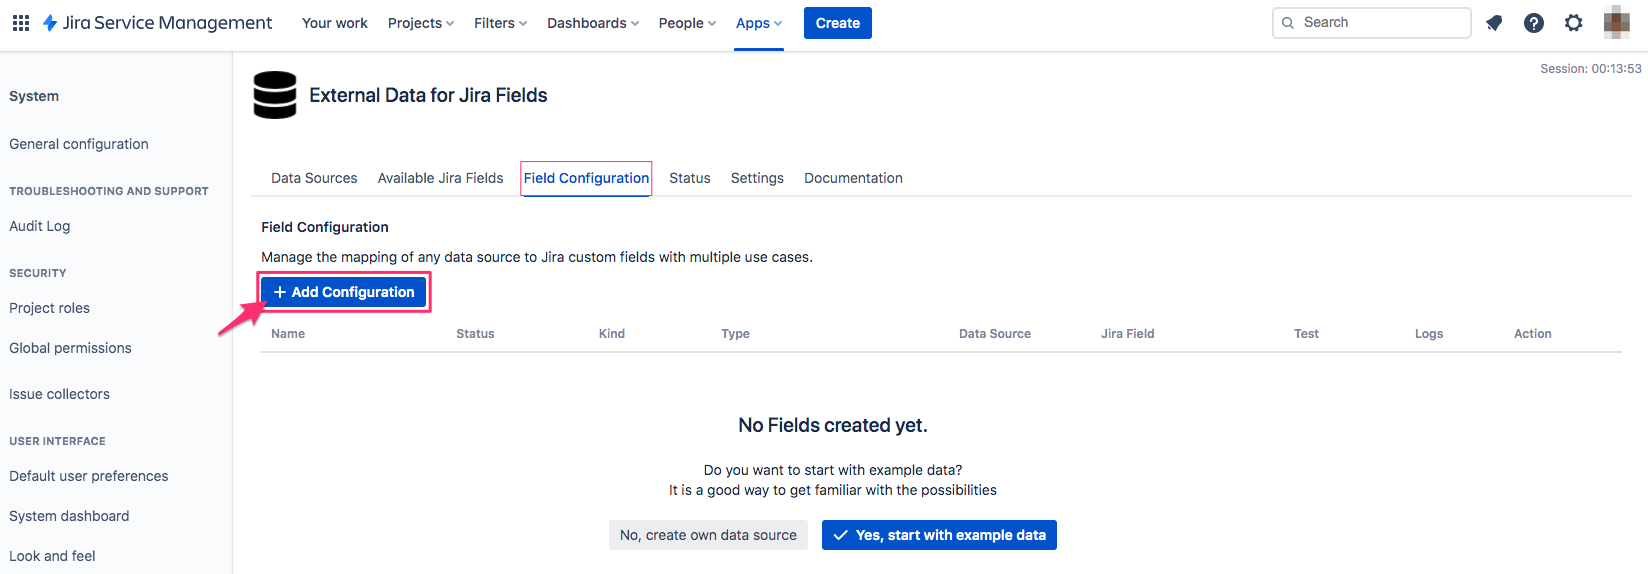
5. Open the tab 'Field Configuration'. Click +Add Configuration.
5.1. Configure the field 'Object Type'. Select 'Search Field' as a use case → Next.
Name: Object Type
Data Source: Org Metadata
Data source url: populated automatically
Context Filter: $.sobjects[?(@.name=~/^CA10__|CA10A1__|CA10AD__|CA10G1__|CA10GS__|CA10H__|CA10J__|CA10N__|CA10P__|CA10S__|CA10V__|CA10Z1__/g&&@.custom==true&&@.label=~/^(?!Deprecated:.$)./)]
This filter is used to eliminate deprecated and irrelevant default Salesforce objects.
Issue Content: populated automatically
Raw result: populated automatically
Select List Repository: $.[*]
ID Field: $.label
Search Field: $.label
Value Field: $.label
Value Label (optional): JsonPath
Jira Target Field: Object Type
Search Results will bring the list of available cloud objects. Click Save.
5.2. Configure the field 'Object Identifier'. Select 'Search Field' as a use case → Next.
Name: Object Identifier
Data Source: Web-service Data
Data source url: populated automatically
Context Filter: $.records[?(@.sObjectLabel=='{$.issue.fields.customfield_00000}')] - where customfield_00000 is Key of the field 'Object Type' (check the Key in the tab 'Available Jira Fields').
Issue Content: populated automatically
Raw result: populated automatically
Select List Repository: $.[*]
ID Field: $.cloudProviderId
Search Field: $.name
Value Field: $.cloudProviderId
Value Label (Optional): JsonPath
Jira Target Field: Object Identifier
Click Save.
5.3. Configure the field URL. Select 'Dependant Field' as a use case → Next.
Name: Url
Data Source: Web-service Data
Data source url: populated automatically
Context Filter: .records[?(@.cloudProviderId=='{$.issue.fields.customfield_11111}')] - where customfield_11111 is Key of the field 'Object Identifier' (check the Key in the tab 'Available Jira Fields').
Issue Content: populated automatically
Raw result: populated automatically
Value Type: Url
Select Value(s): https://cloudaware-0000.cloudforce.com/{{$.id}} - where 0000 is your Salesforce instance id (check the URL in step 3 of this article to insert the id) and {{$.id}} refers to the object's Salesforce Record ID and turns back a direct link to the object's page in Cloudaware CMDB (see 'Extracted Value').
Jira Target Field: Url
Click Save.
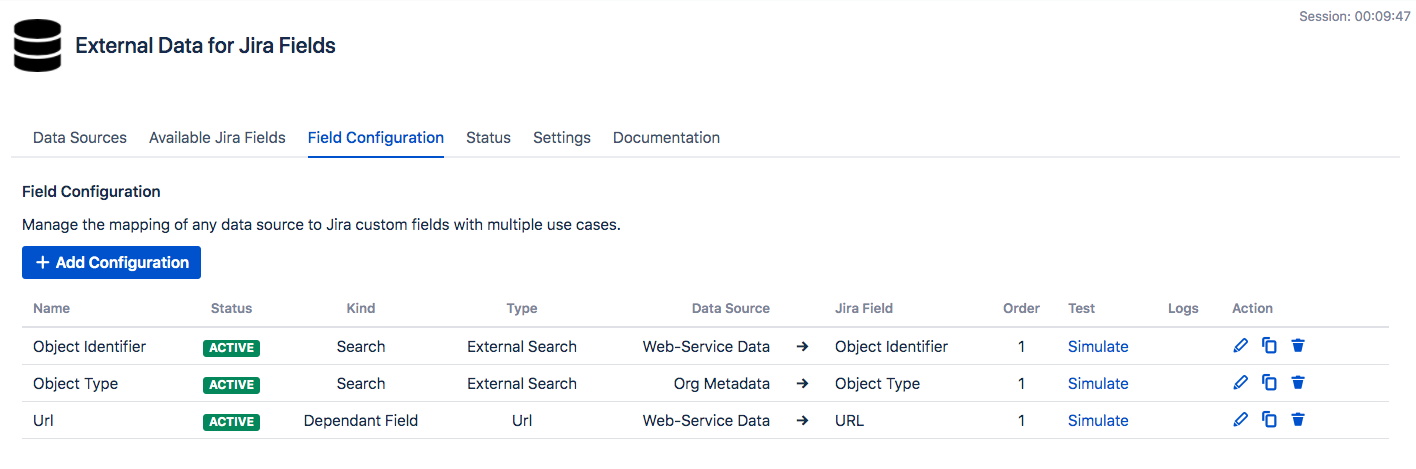
Ensure you have configured required fields the following way:
Testing
1. Create a test ticket.
2. Open the ticket and click External Data under the ticket name.