
CloudAware Application is a logical unit used to organize resources based on a naming convention, a tag, or any other custom logic.
Key features
-
Multi-cloud and non-cloud support
-
Cascades for attaching object hierarchies by linking a single object
-
Inventory automation with auto-attachment logic
-
Support for objects that are not taggable or exceed tag limits
Use cases
CloudAware Applications can be created to distinguish between:
-
Departments, teams, sites, or projects within an organization
-
Customers, for Managed Service Providers (MSPs)
-
Purchasers, for resellers
-
Other logical groupings as needed
Creating separate applications is especially useful when the customer’s infrastructure includes a mix of AWS, Azure, GCP, and physical servers, and one of the following applies in Cloudaware CMDB:
-
Access must be restricted to a specific cloud platform (e.g., AWS only).
-
Access needs to be limited to a specific resource, such as a single AWS instance.
Create applications as early as possible. Billing and cost data is not collected retrospectively – it is only available from the application’s creation date onward.
Prerequisites
-
Identify the resources that should be associated with the Cloudaware application.
-
Define the logic for assigning these resources to the appropriate tiers within the application.
Create a Cloudaware Application
Use case: The CloudOps team needs needs to create an application named AWS to group production AWS EC2 instances for quick access in the Cloudaware CMDB.
-
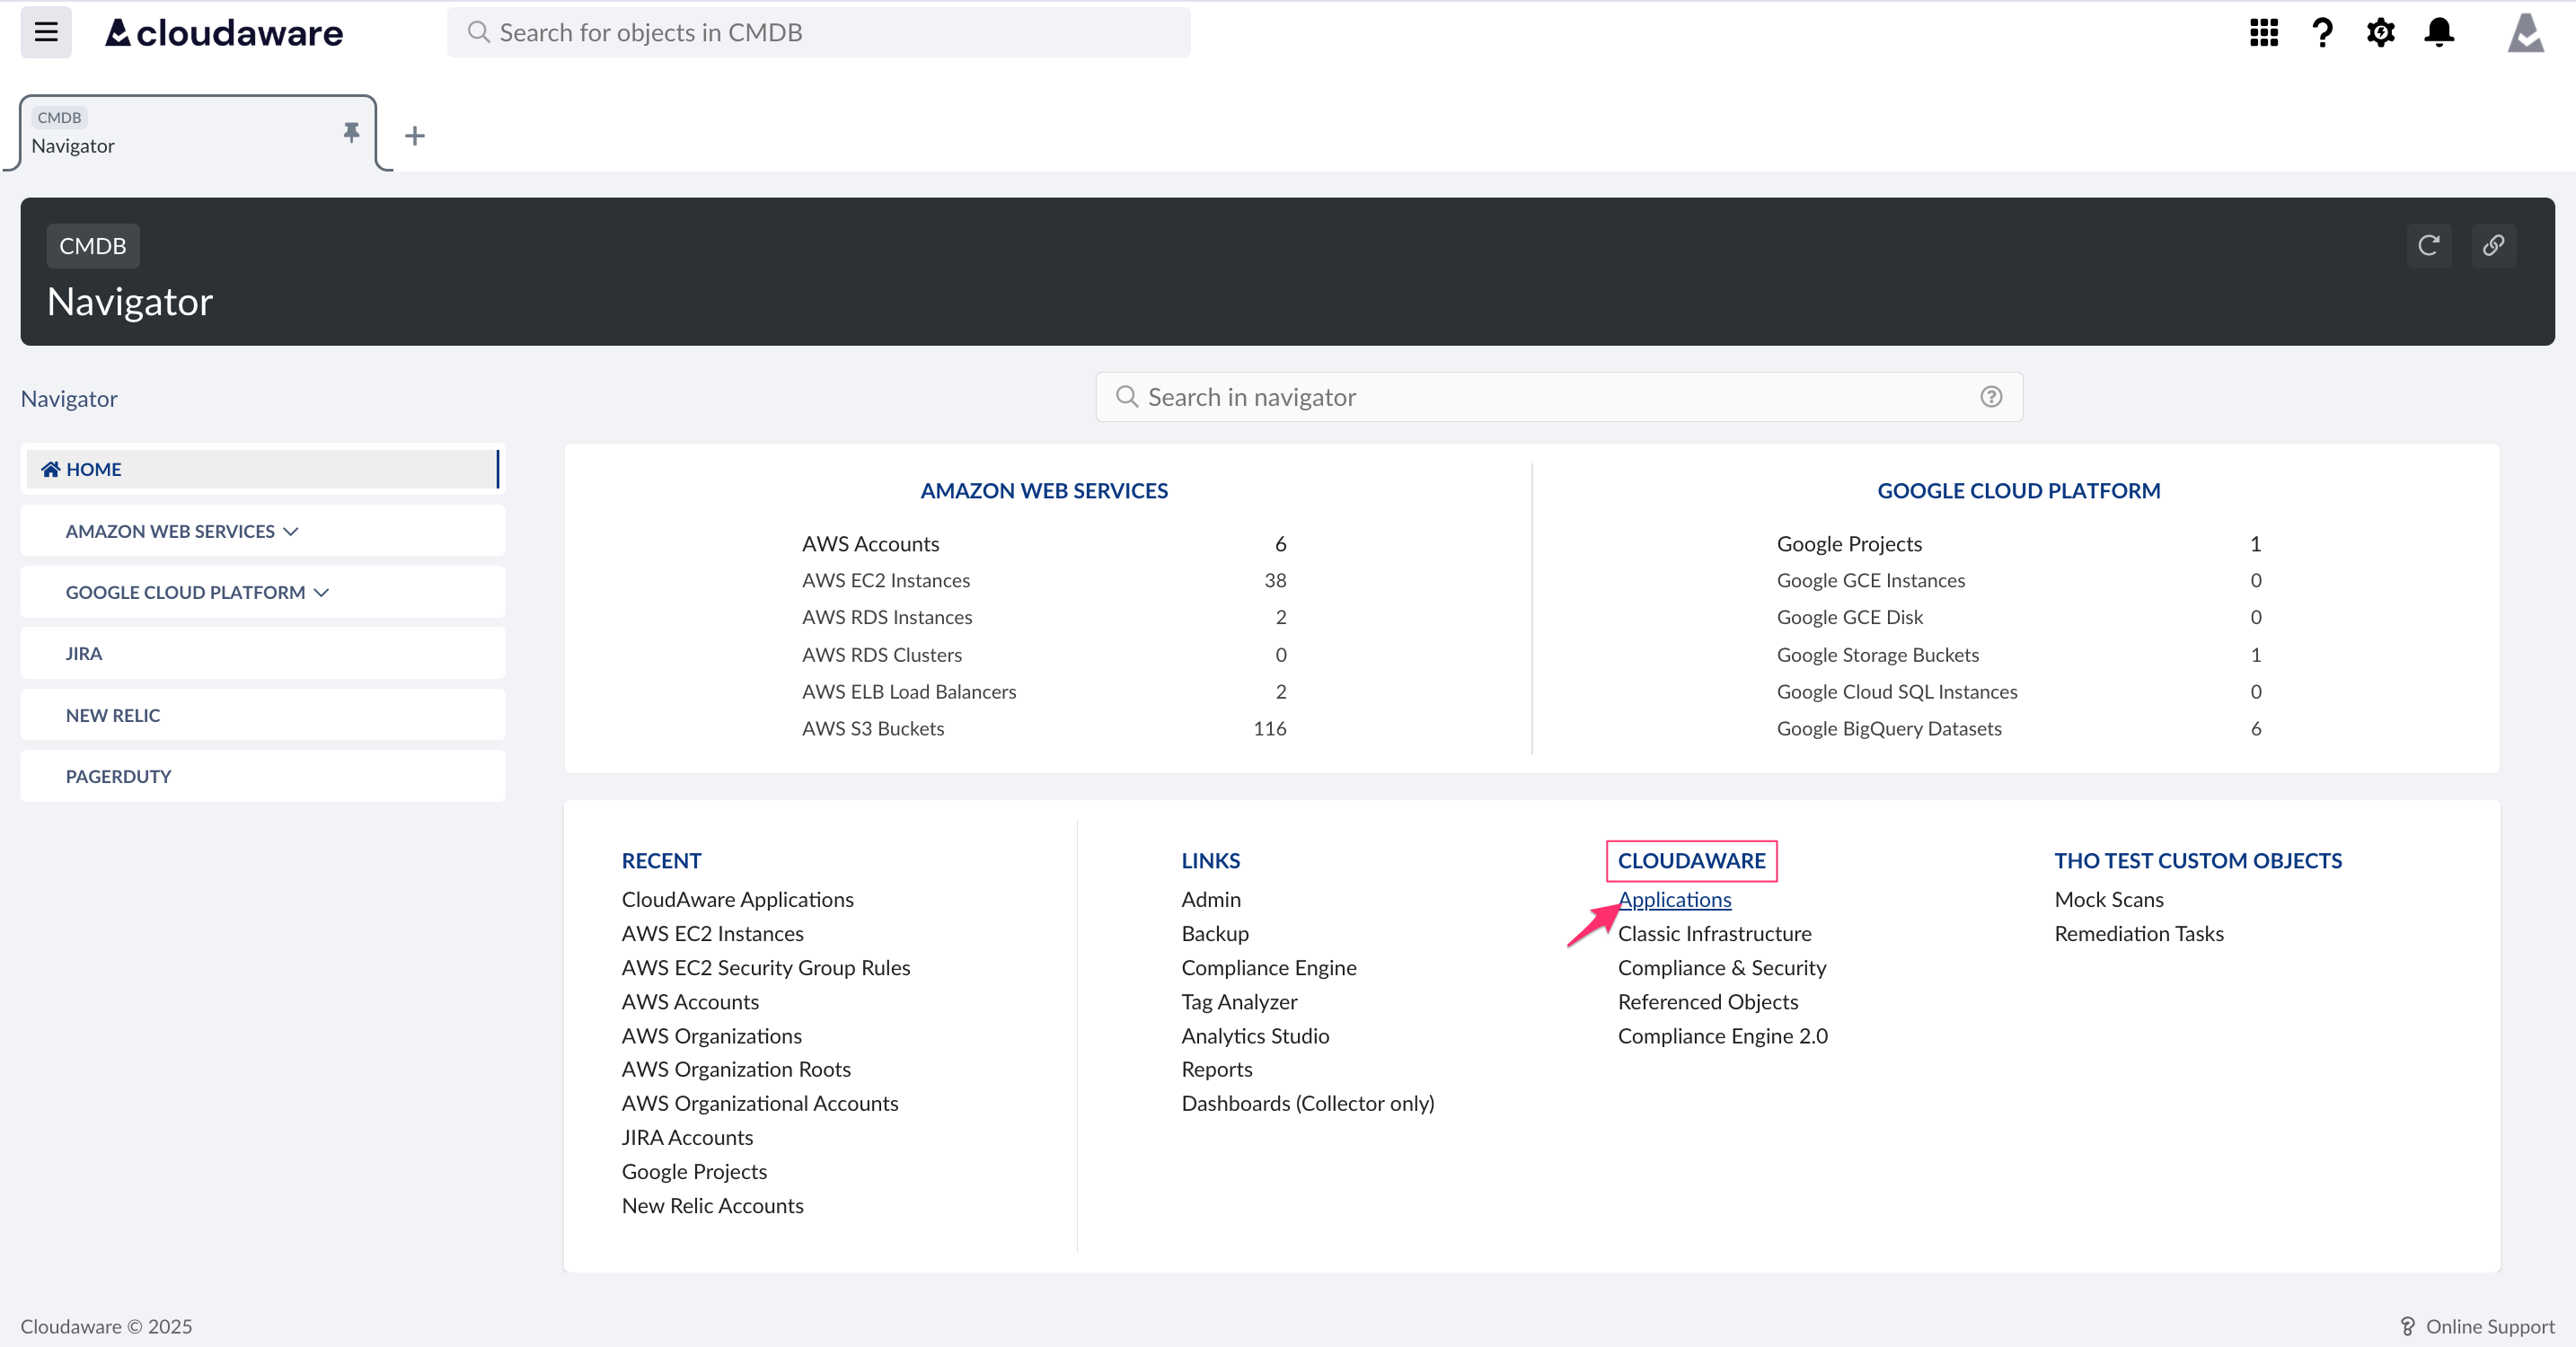
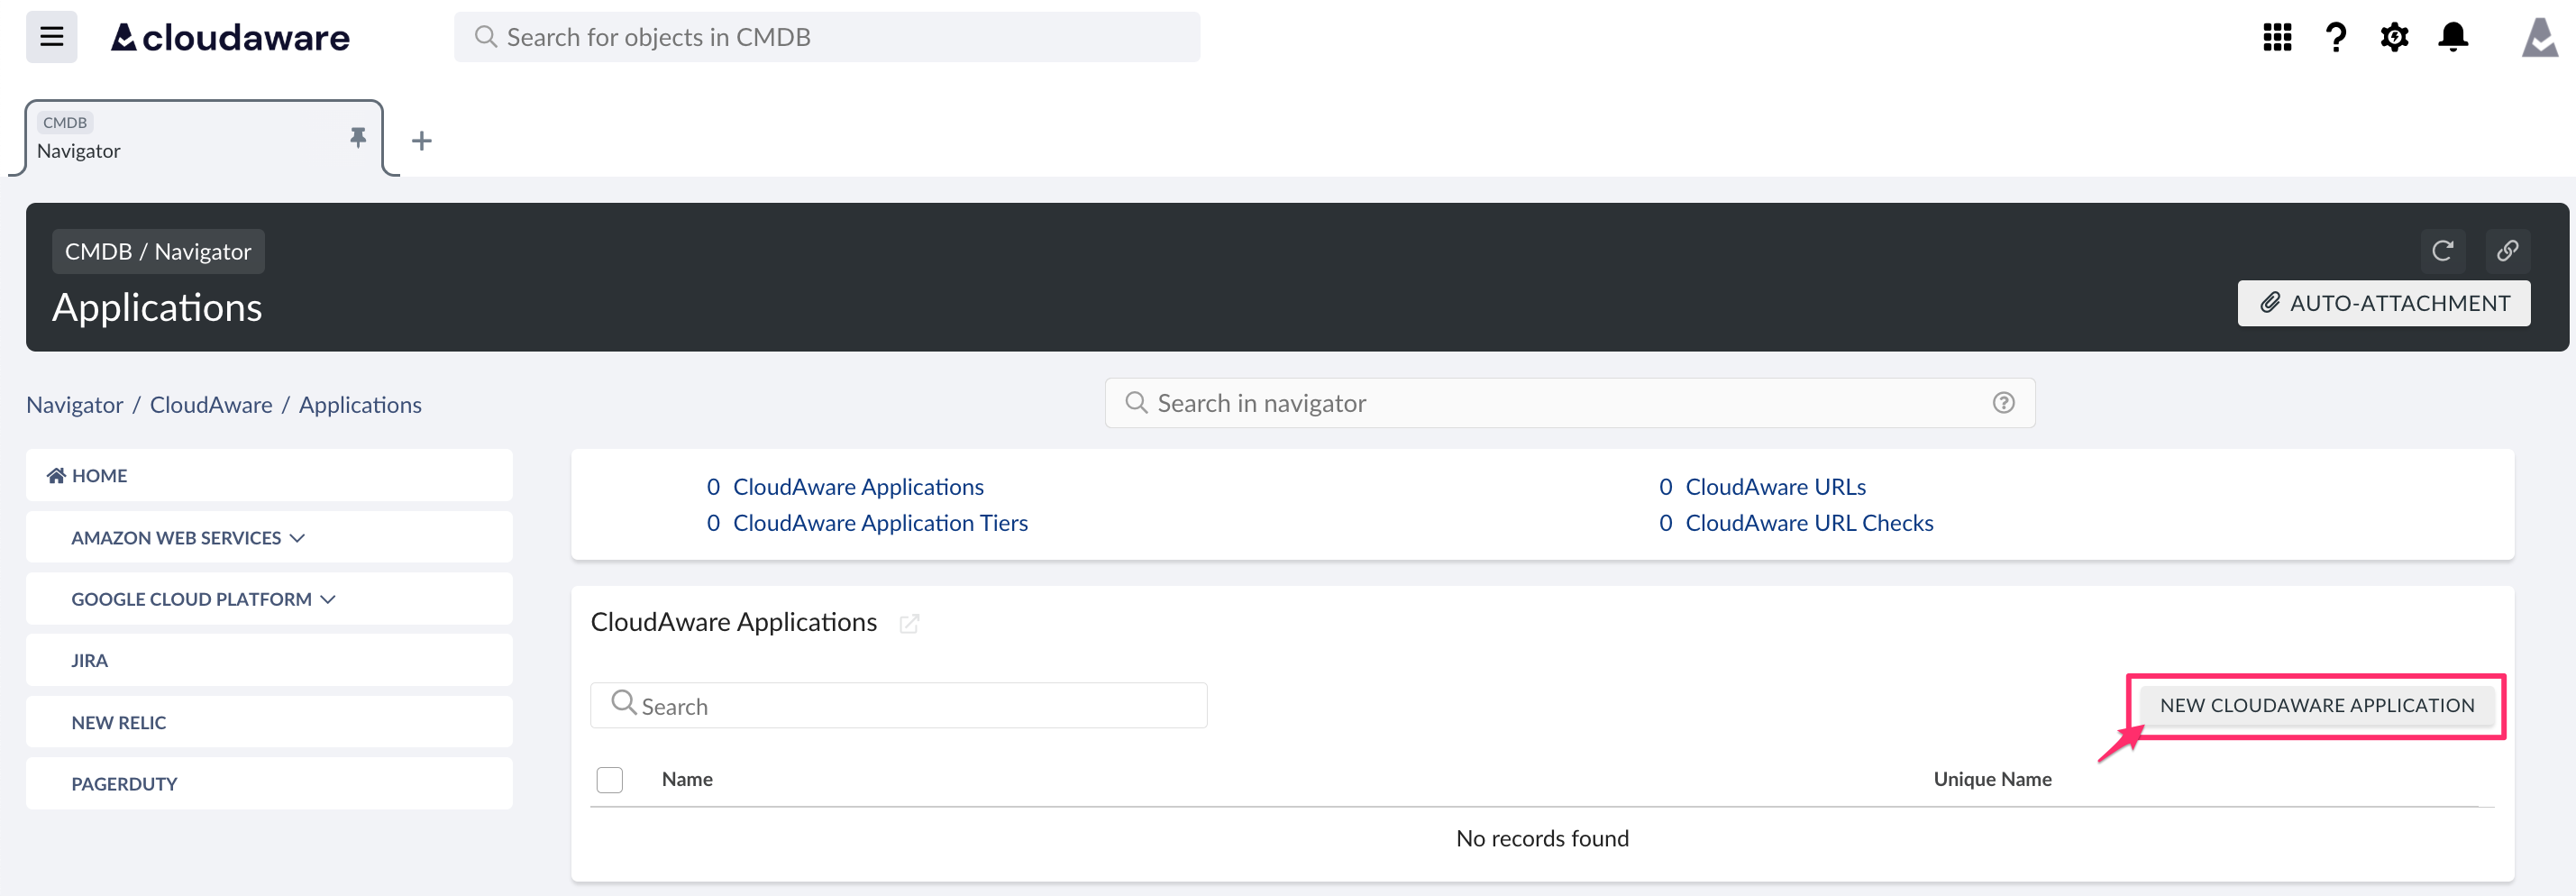
Log in to Cloudaware. In CMDB Navigator, go to the section CLOUDAWARE → Applications.
-
Click NEW CLOUDAWARE APPLICATION.
-
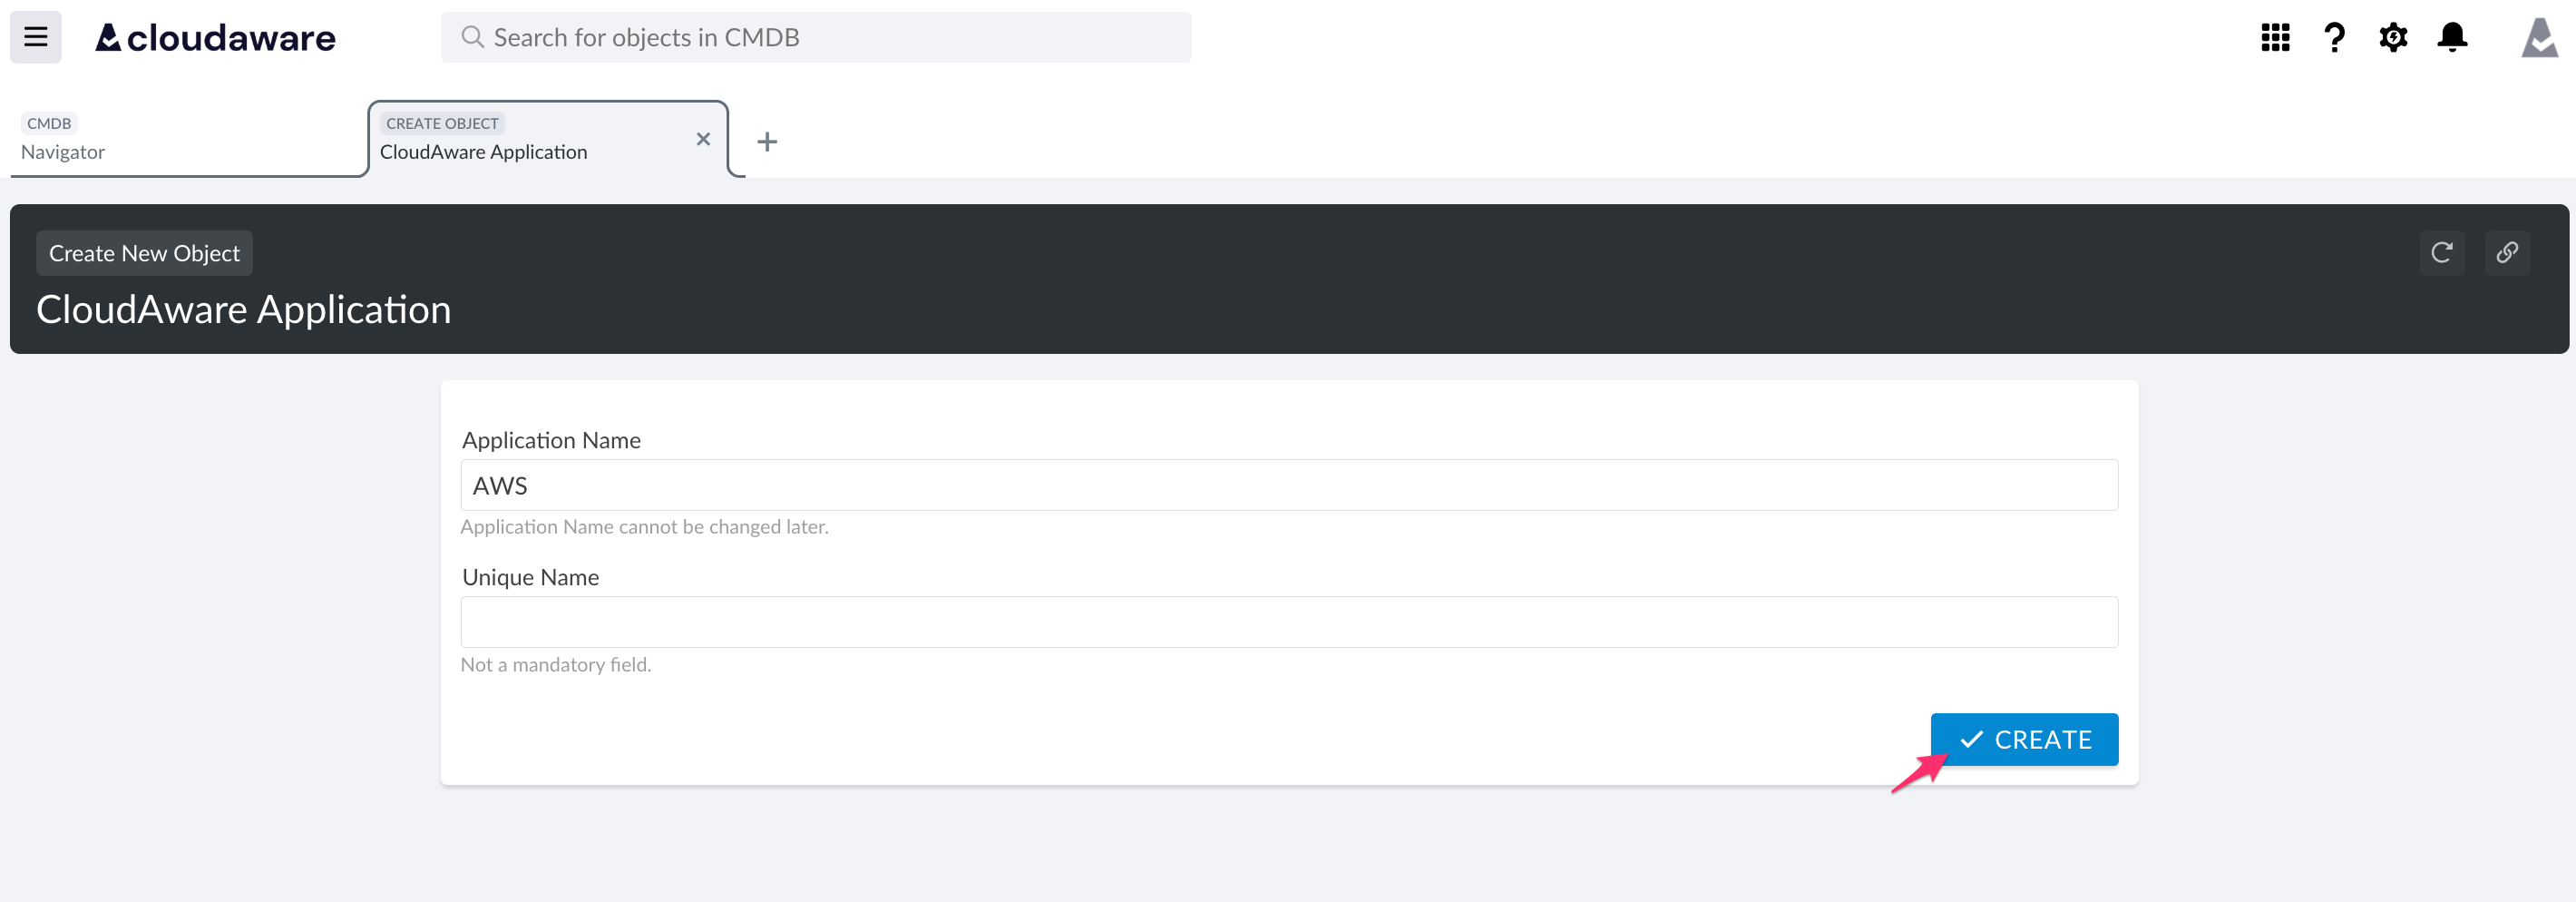
Enter a descriptive name for the application (in this example, AWS) → click CREATE.
-
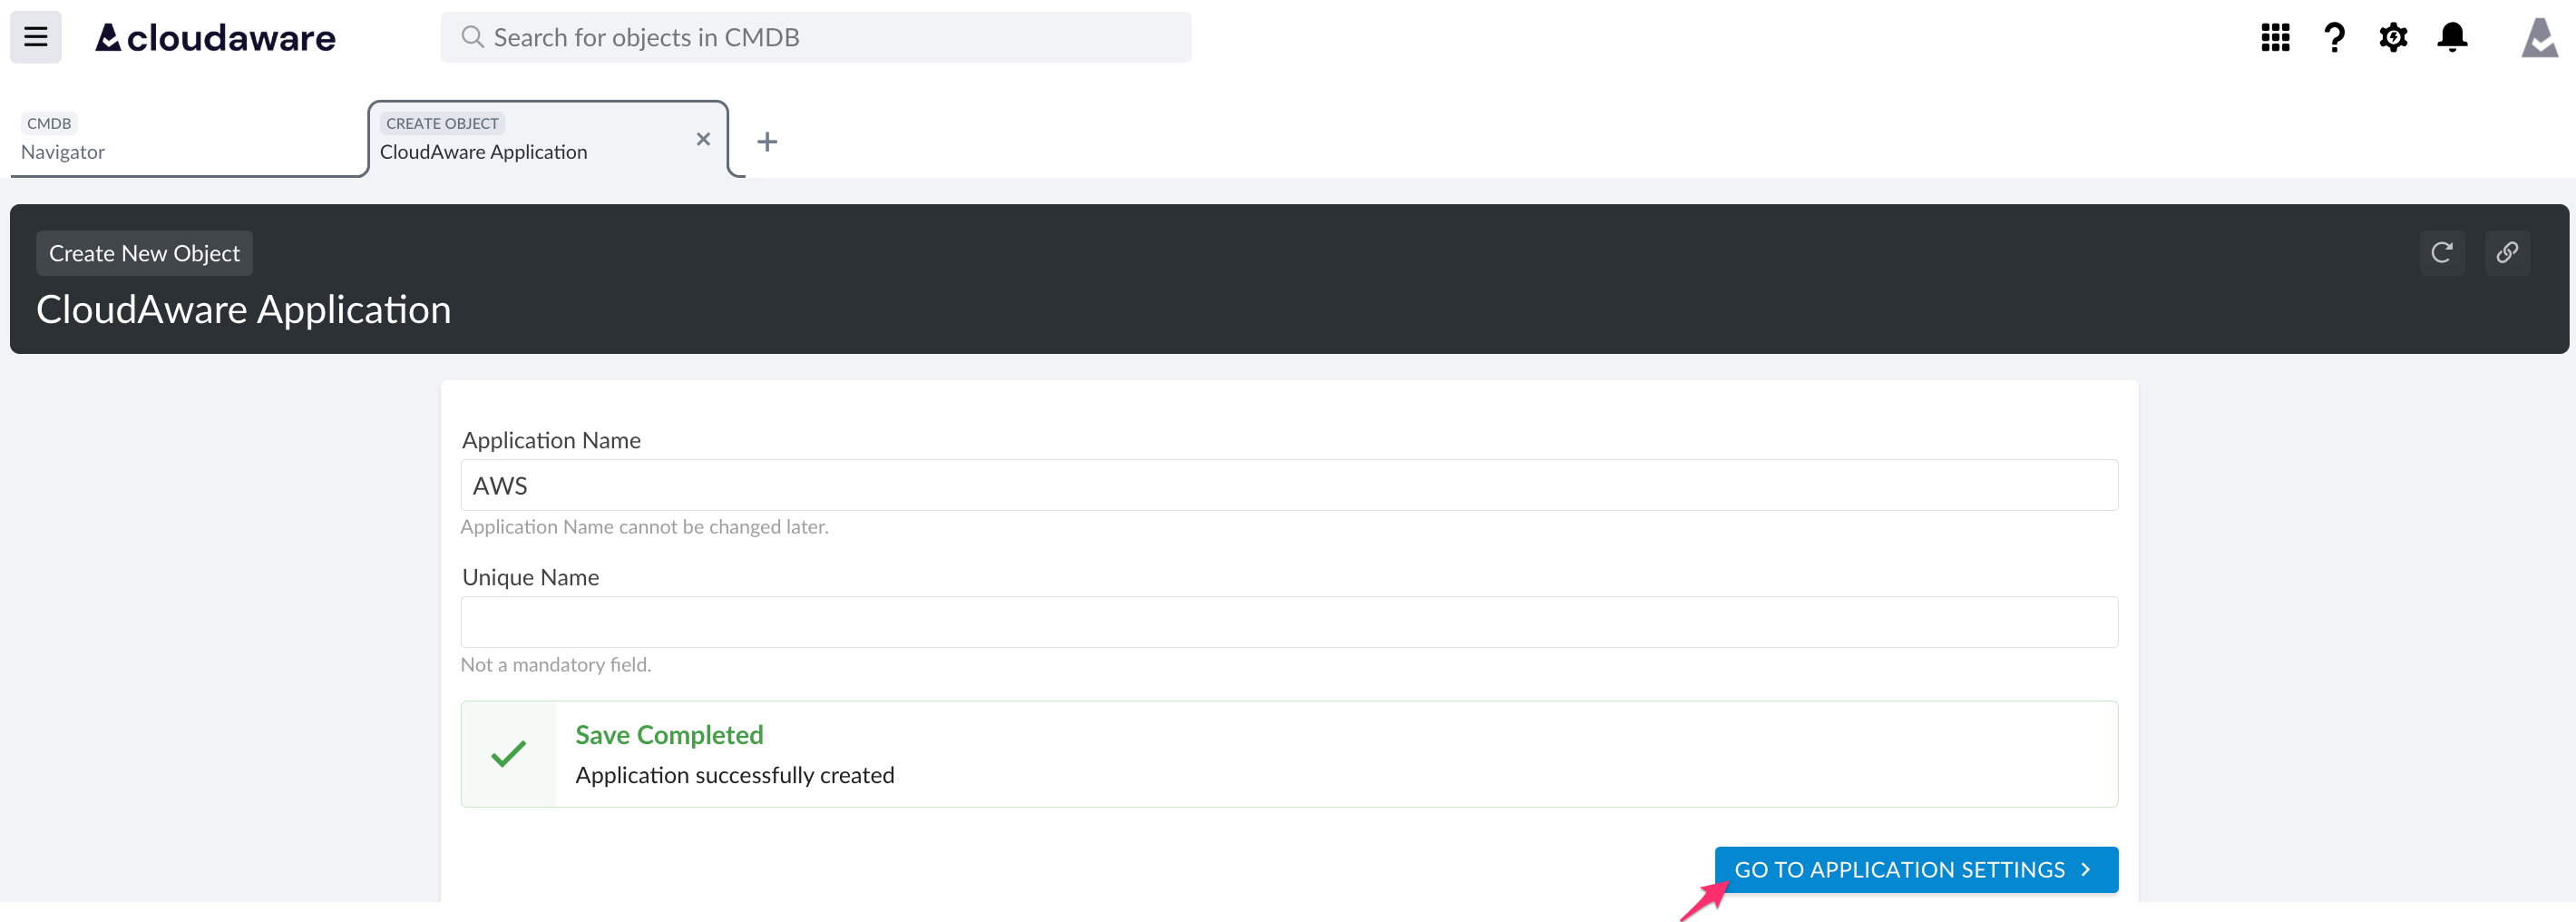
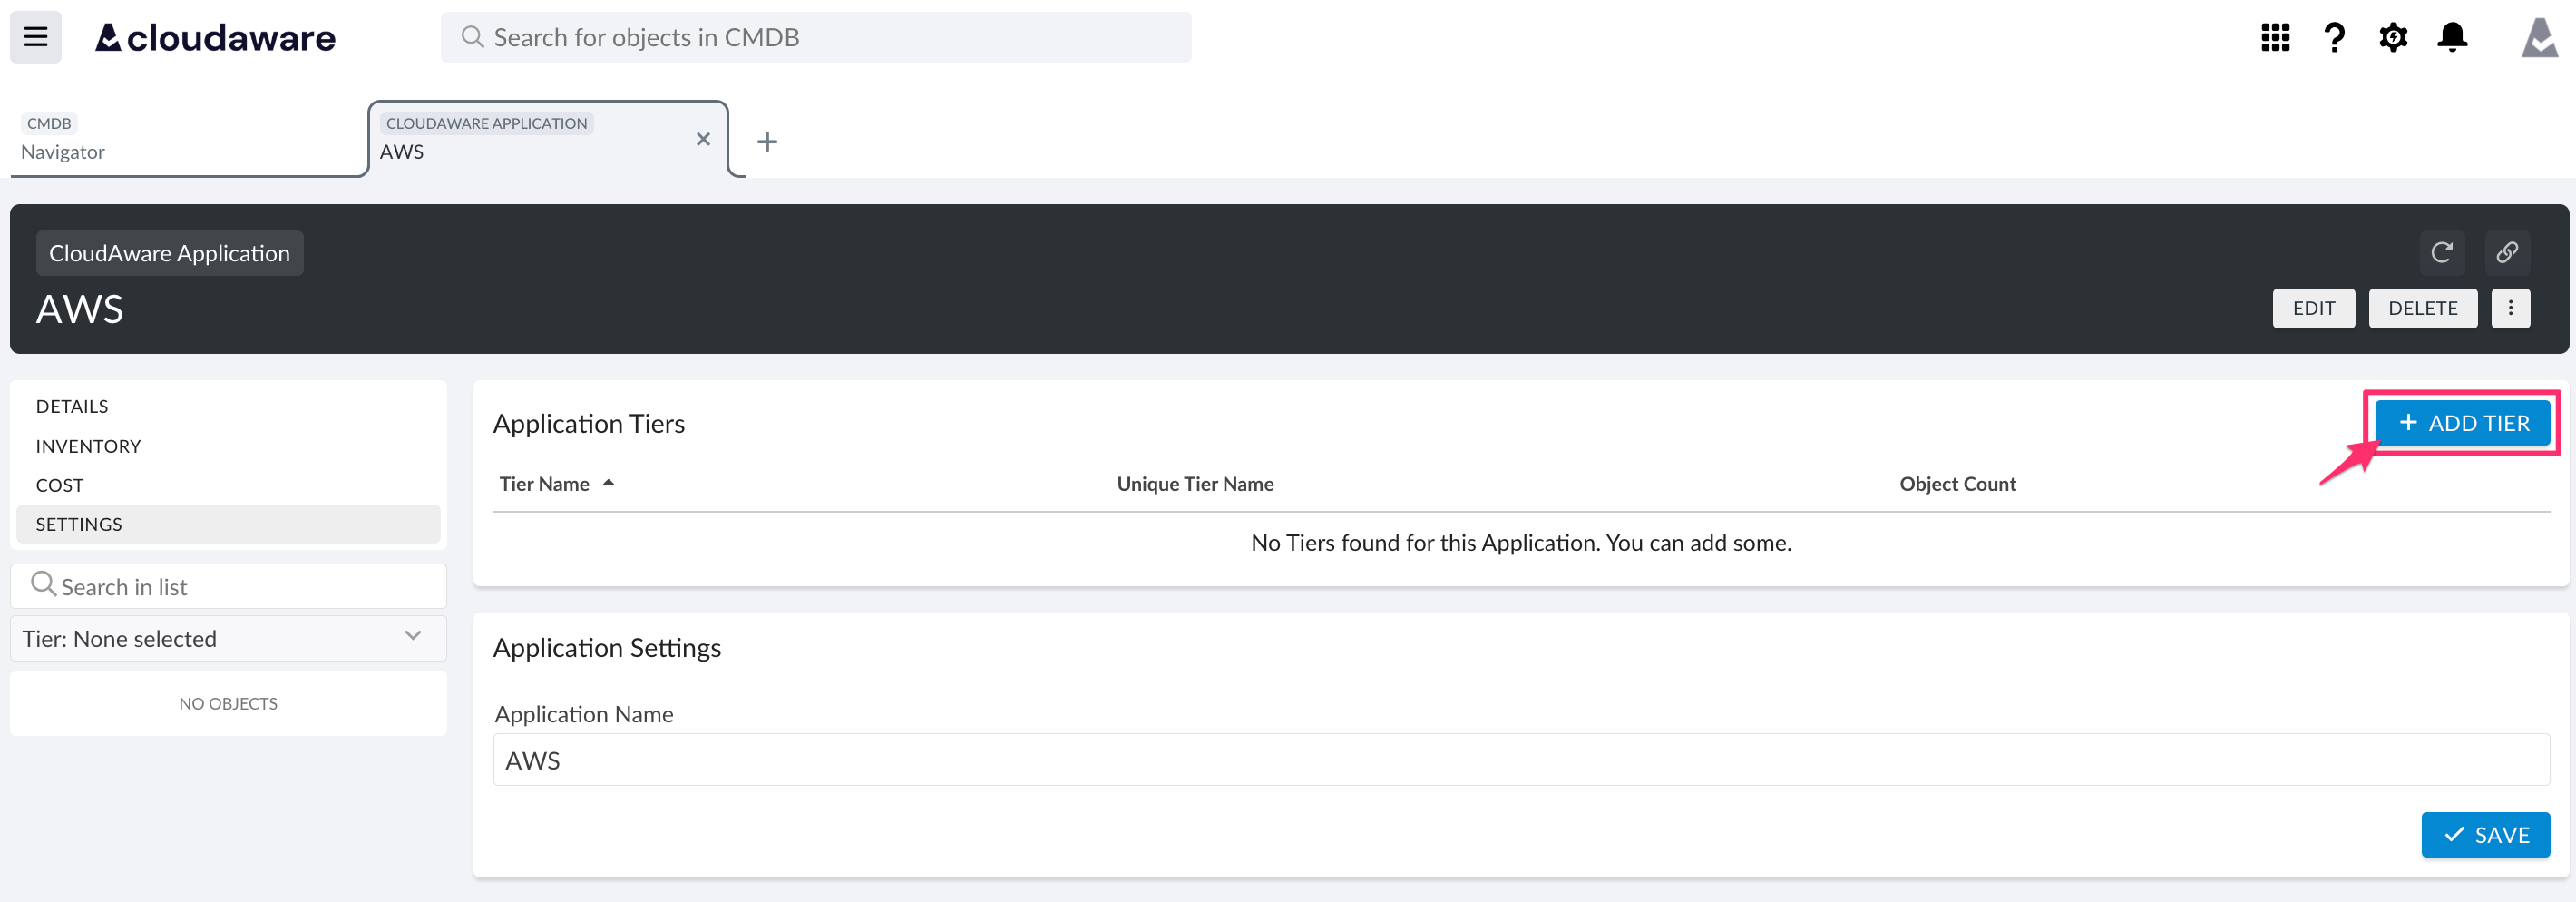
Click GO TO APPLICATION SETTINGS to configure tiers.
-
Click +ADD TIER.
Enter a descriptive tier name, e.g., Prod, and click ADD TIER to save.
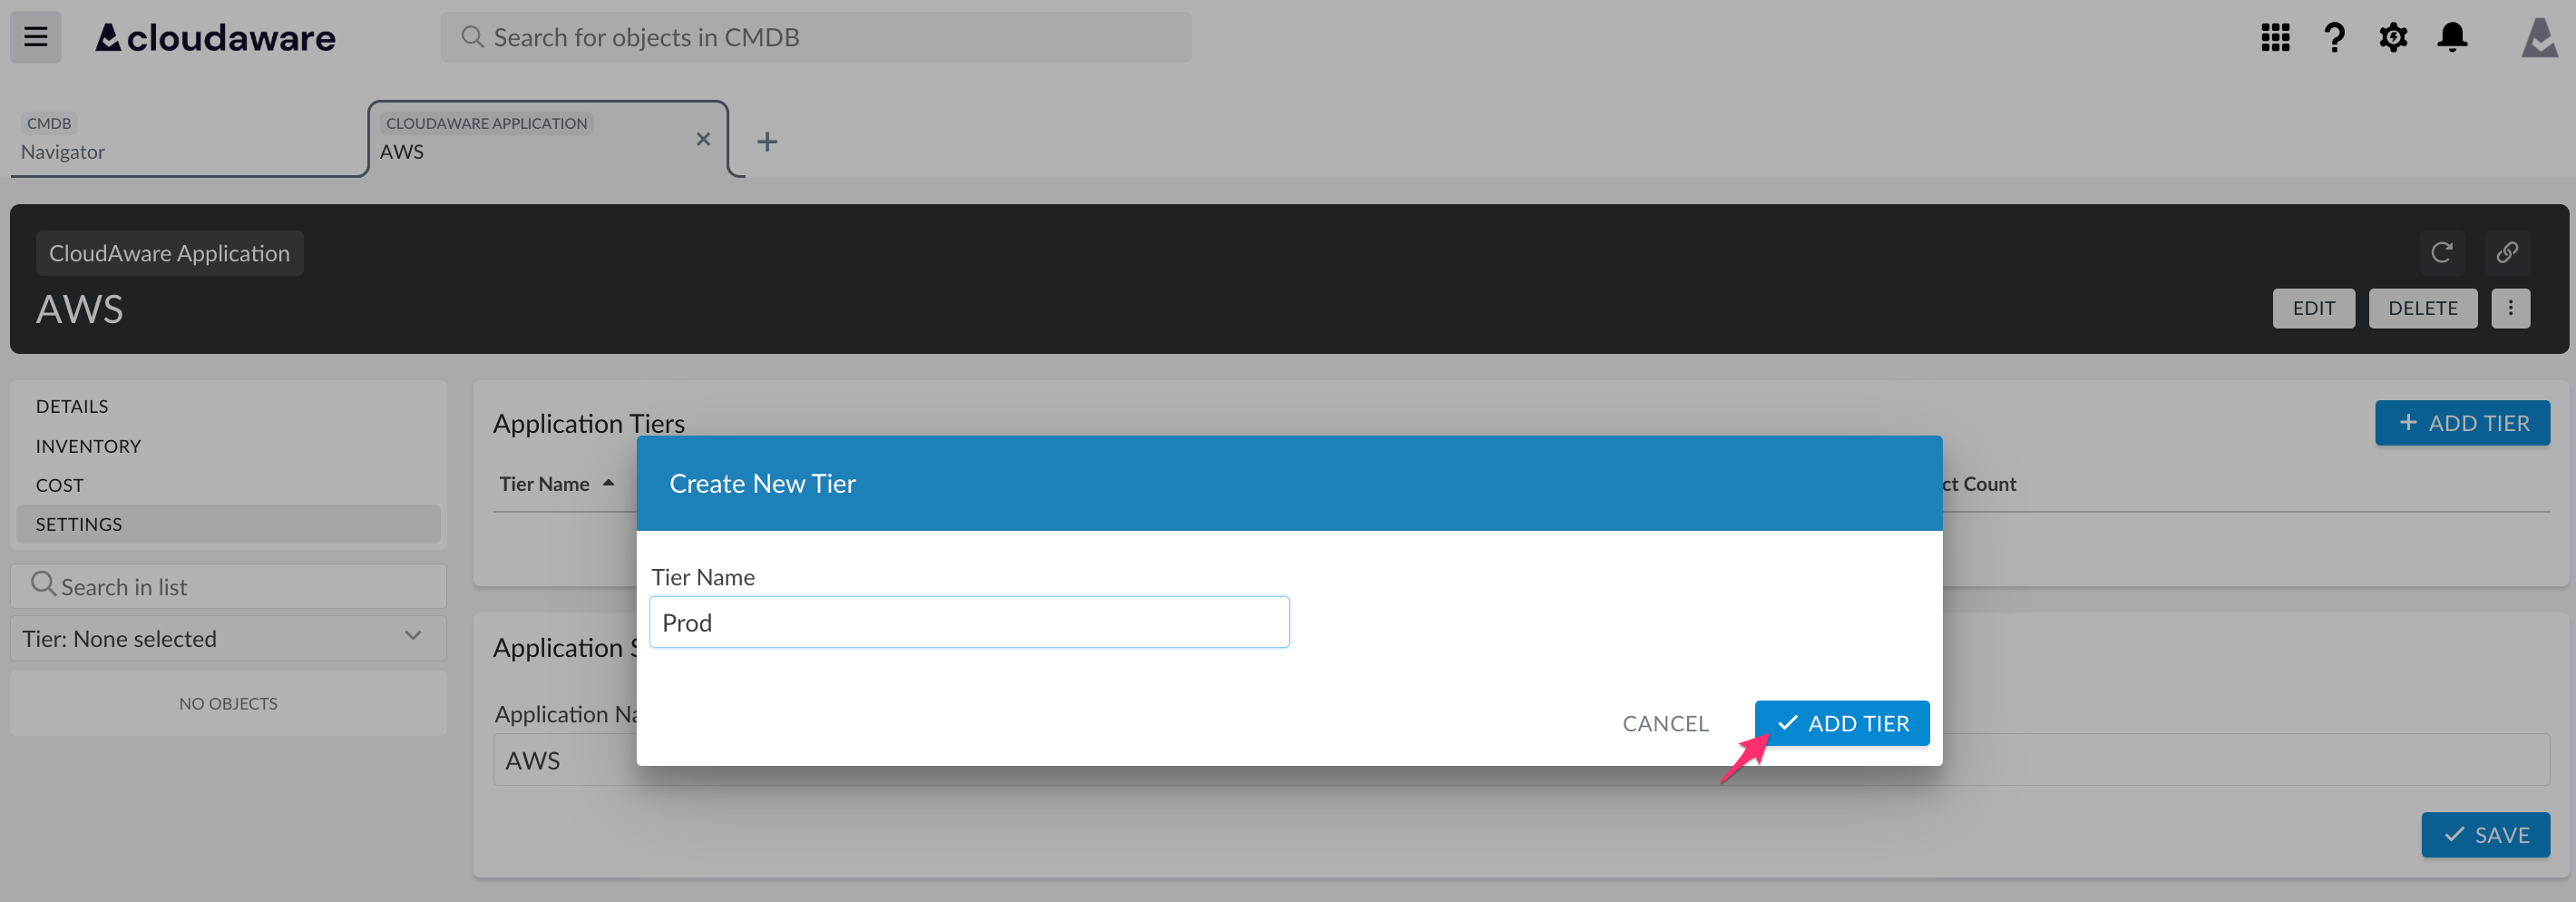
Click SAVE to save the application.

-
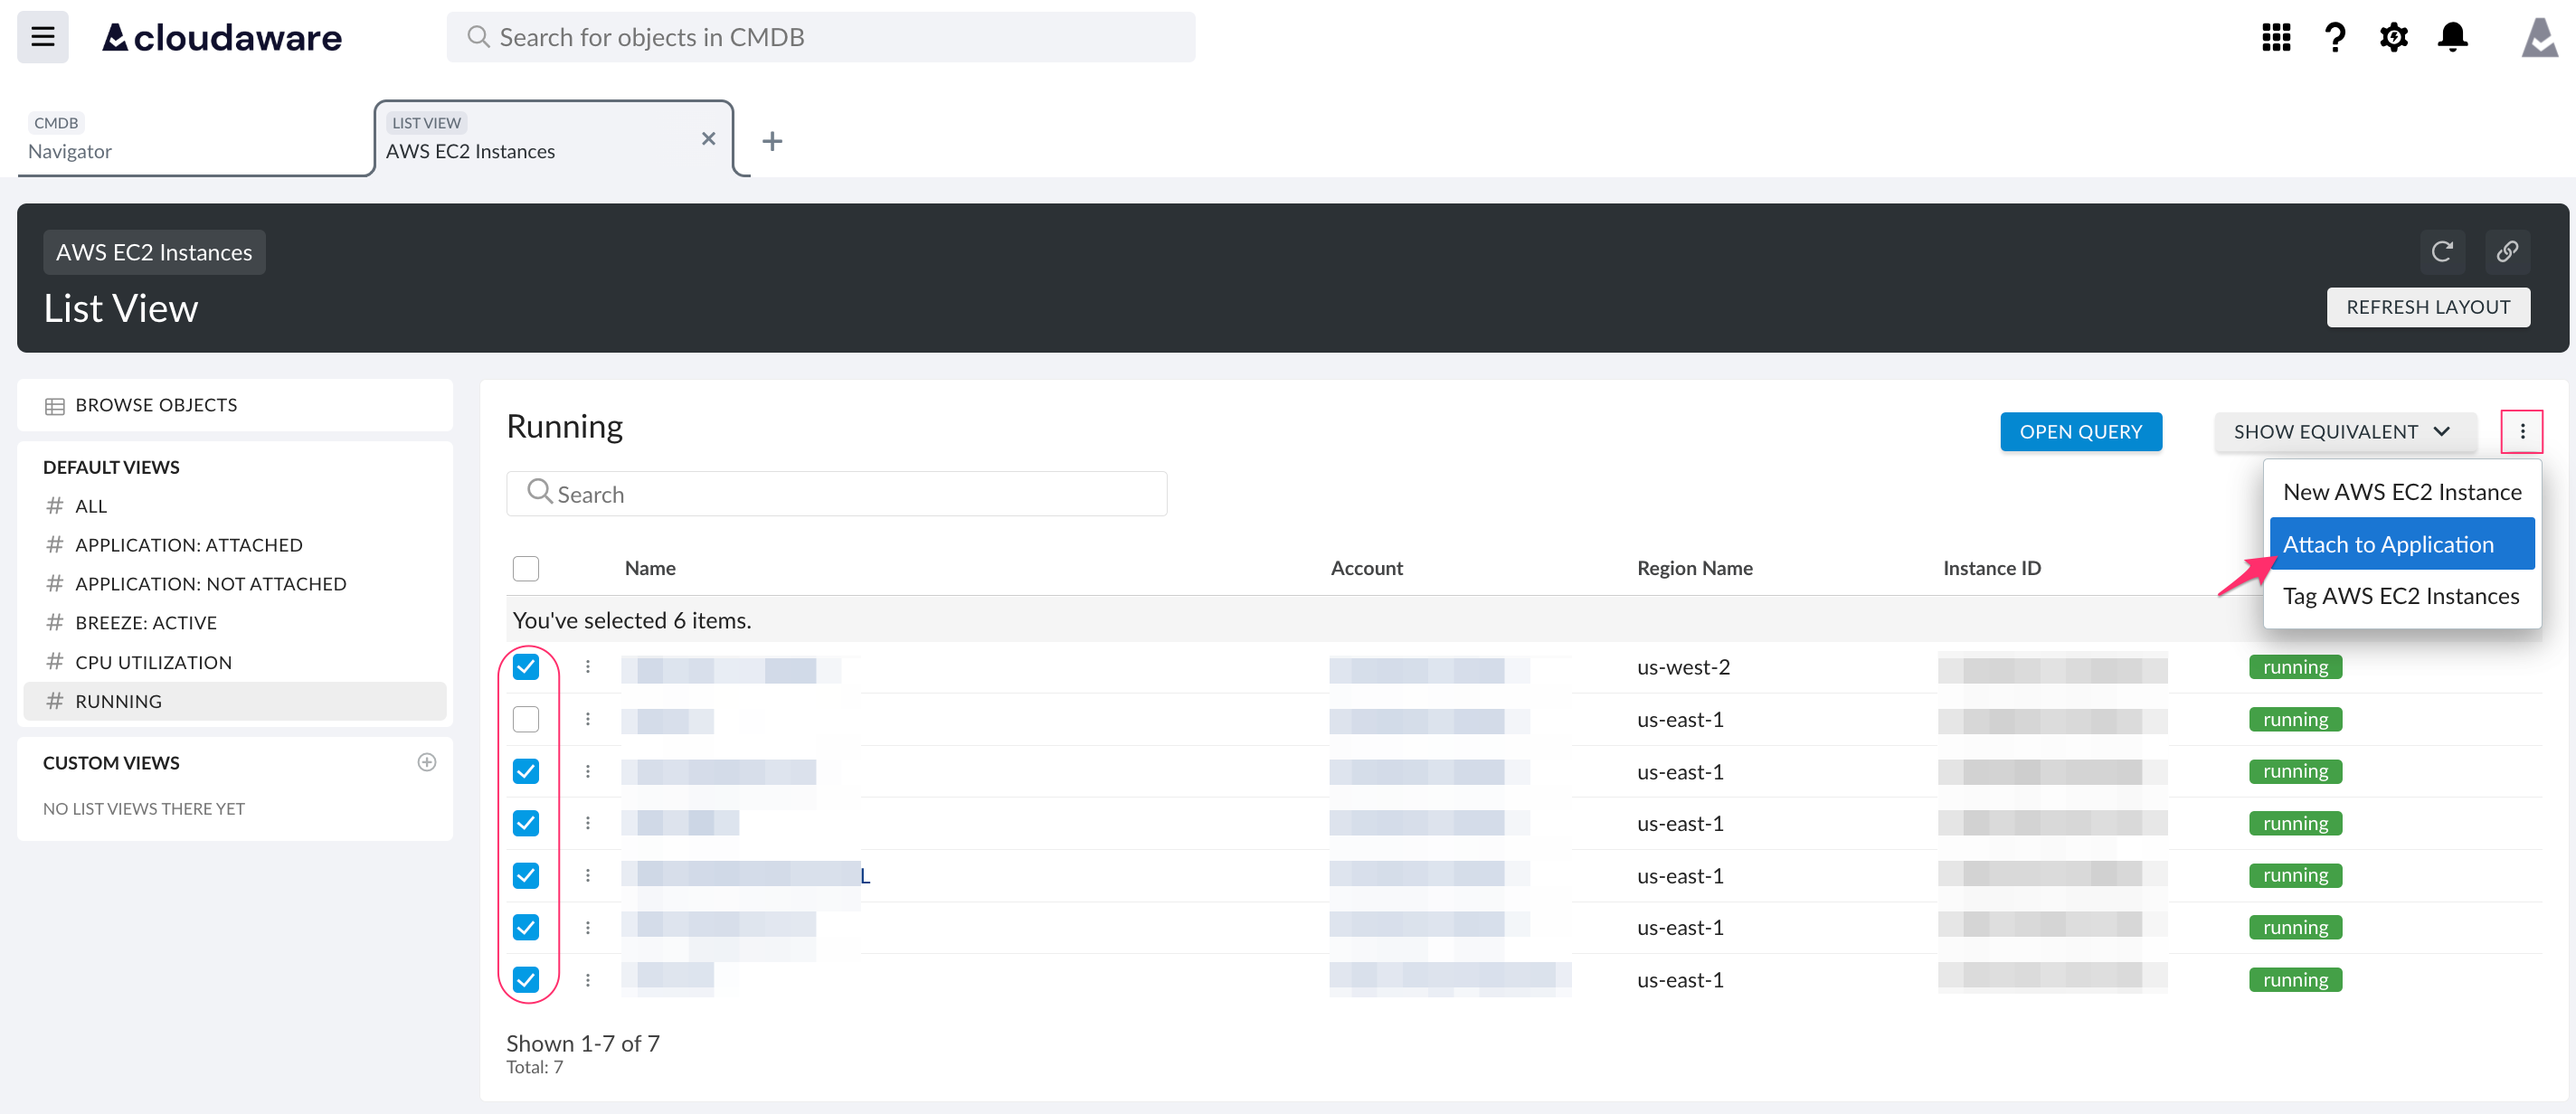
Go back to CMDB Navigator to select the resource type, e.g., AWS EC2 Instances.

-
Open a relevant list view, e.g. Running Instances. Select the instances for attachment.
-
Click the three-dot menu → Attach to Application.
-
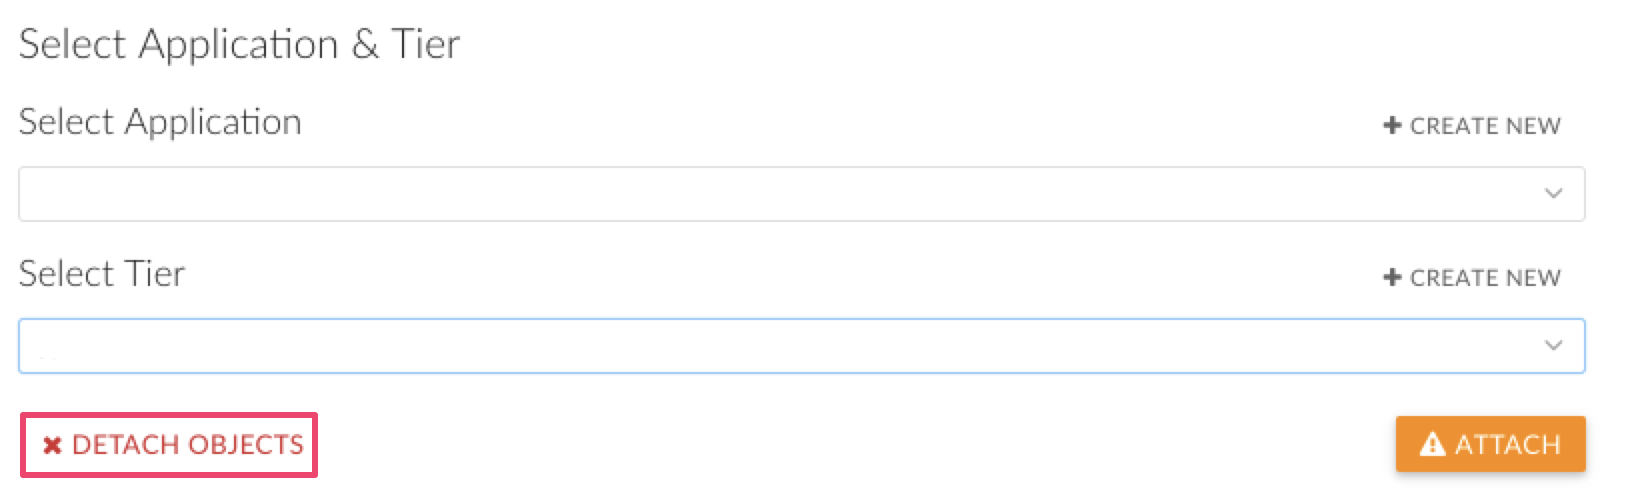
Select the appropriate application and tier.
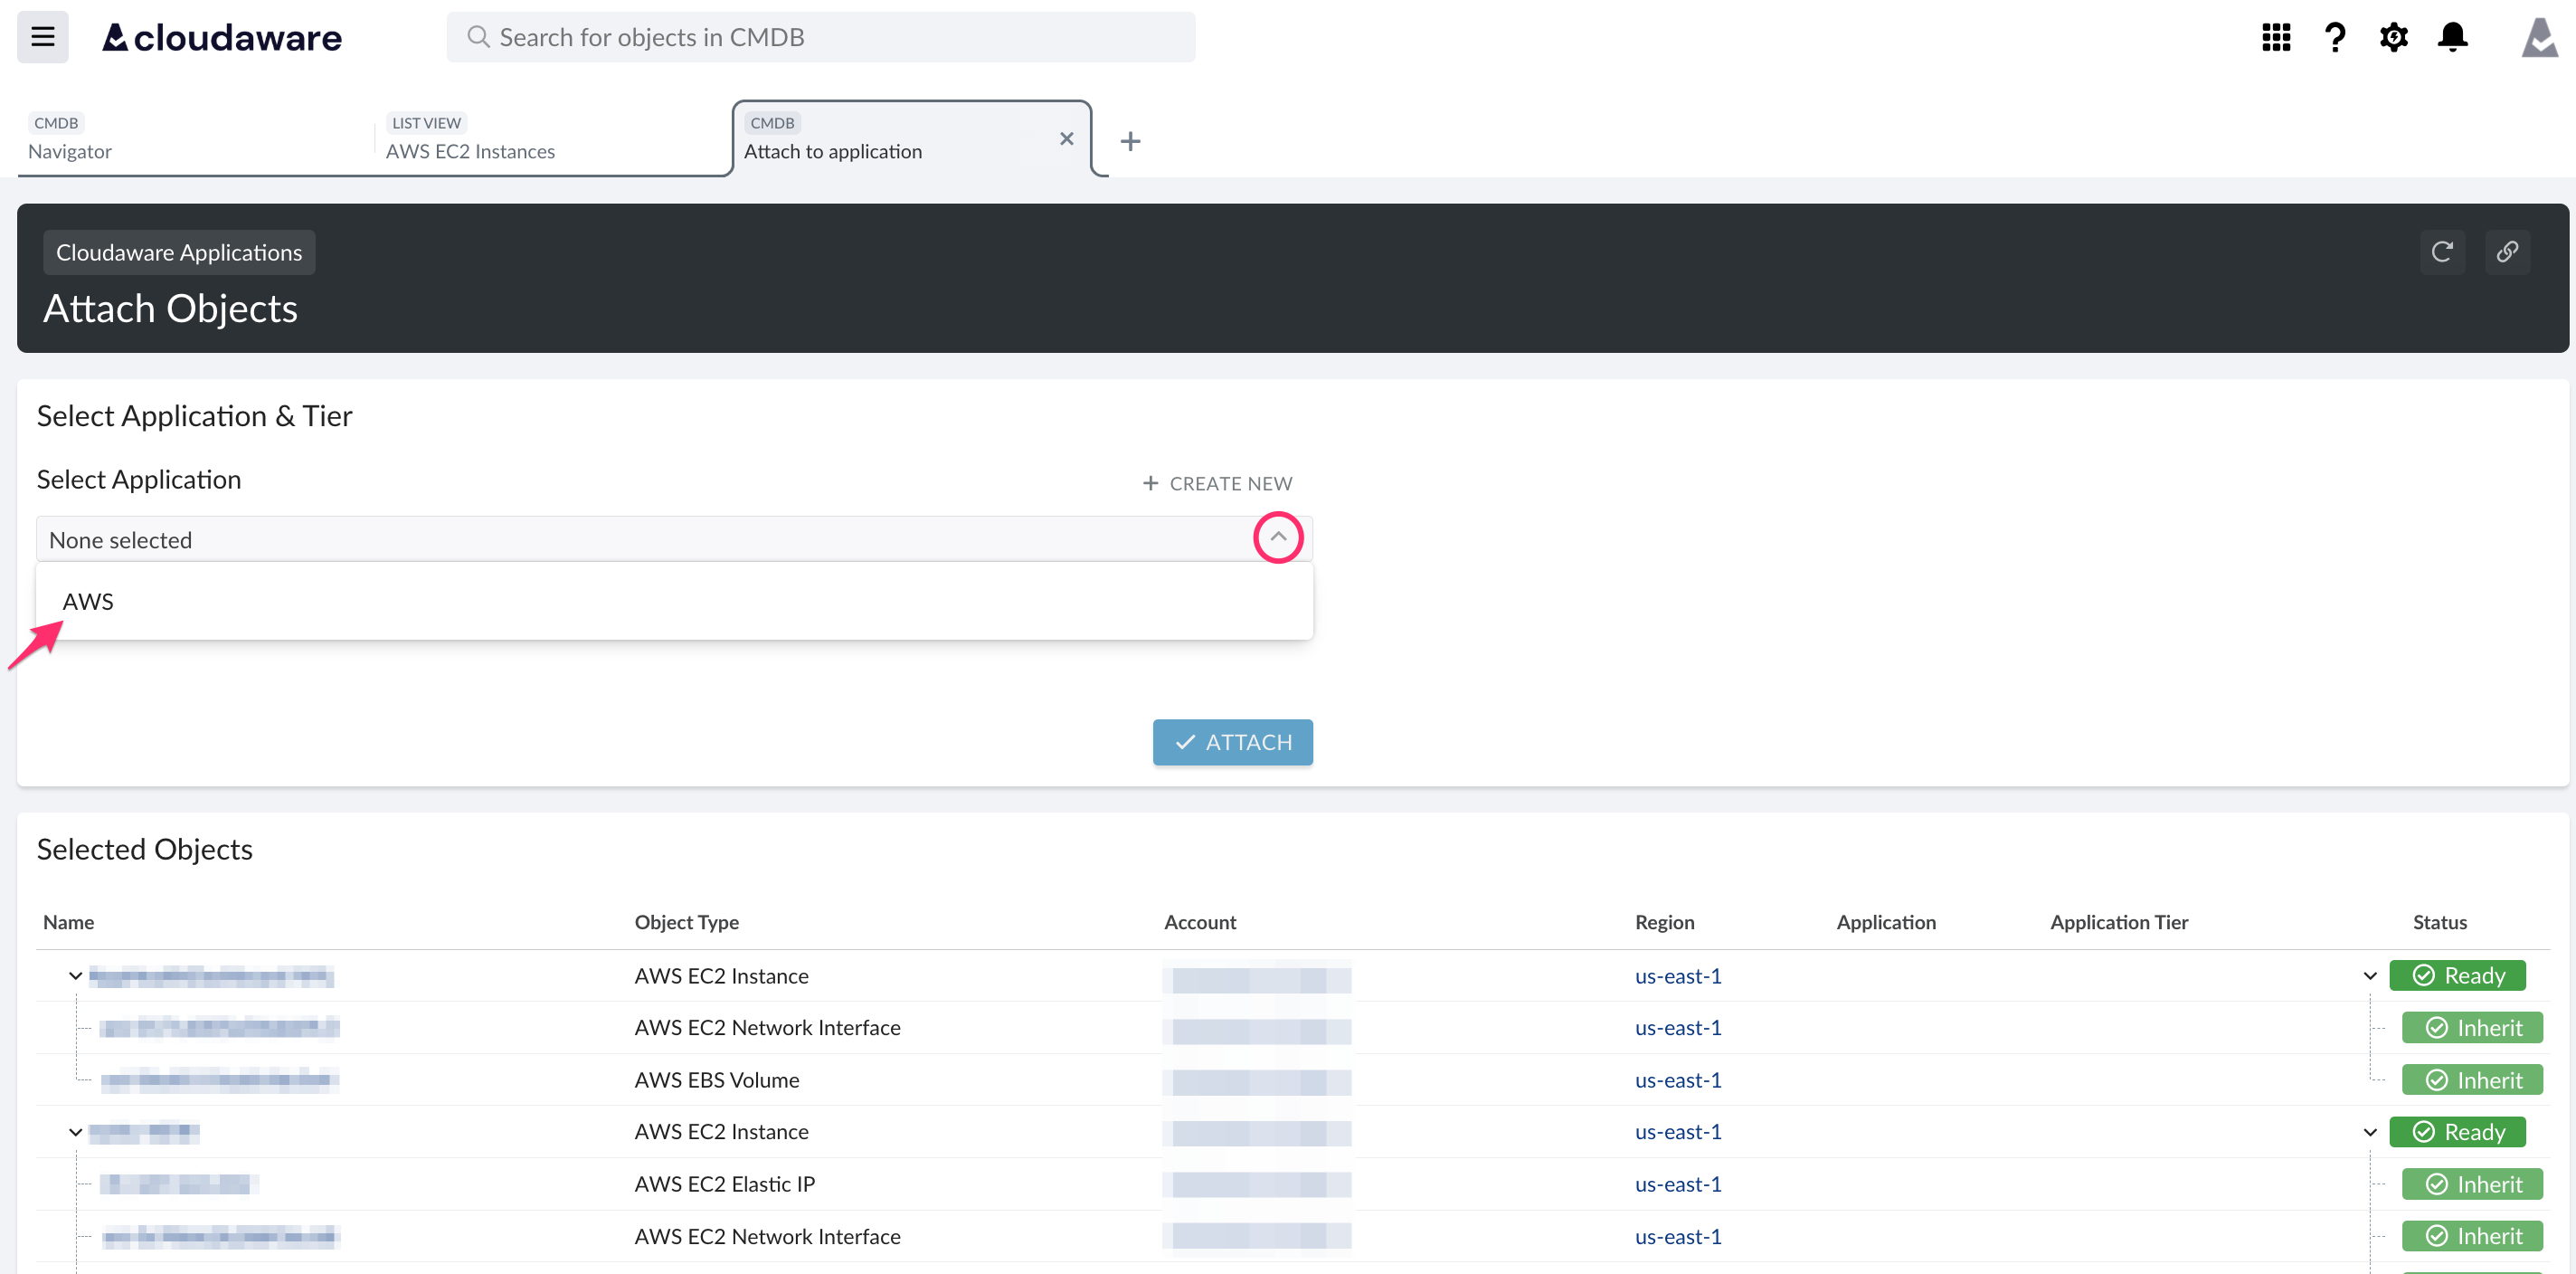
Review the resources to be attached and click ATTACH.
If a warning appears, one or more of the selected objects are already attached to another application.

Click YES, CONTINUE to proceed with attaching, or click DETACH OBJECTS to remove the selected objects from the existing application first.
-
Click DONE and proceed to review the application inventory.
Cascades
Cloudaware Applications support cascades. Cascades help maintain a consistent, automatically updated inventory by attaching related objects together.
When a resource is attached to an application, all related objects are automatically attached as well. For example, attaching an AWS EC2 Instance will also attach its associated EBS Volumes and Network Interfaces.
Considerations
-
Attach higher-level objects when possible.
Before selecting an object for attachment, consider whether a parent object in the hierarchy can be attached instead.-
Prefer attaching AWS ELB Load Balancers over individual EC2 instances.
-
Prefer attaching AWS Elastic Beanstalk Applications over individual components.
-
Always prefer attaching URLs, which serve as top-level identifiers in many configurations.
-
-
Minimize manual attachments.
If a logical pattern exists, implement it as an auto-attachment process. This ensures Cloudaware continuously tracks and attaches new resources that meet the criteria. Use manual attachment only for static resources that are not expected to change over time.
Cascades are most effective for complex services with many interconnected components.
For standalone or loosely connected resources, implement automated processes to evaluate each asset and assign it to the correct application.