
This guide explains how to import a new Cloudaware table into ServiceNow. The process includes defining the table structure, creating the table, adding columns, mapping fields, and configuring import settings to establish a seamless integration.
Prerequisites
Download and install the Cloudaware CMDB application from ServiceNow store. Read more
Summary
-
Install the Cloudaware CMDB application.
-
Prepare data and create a table in ServiceNow.
-
Add table columns and configure metadata import.
-
Enable the metadata import flow.
STEP 1. Select Data for Import
Identify the Cloudaware dataset that must be imported into ServiceNow. Coordinate with your dedicated Technical Account Manager to determine relevant tables and fields.
In this guide, the Azure Virtual Machine table is used as an example; however, the workflow applies to any Cloudaware table.
STEP 2. Create a Table in ServiceNow
-
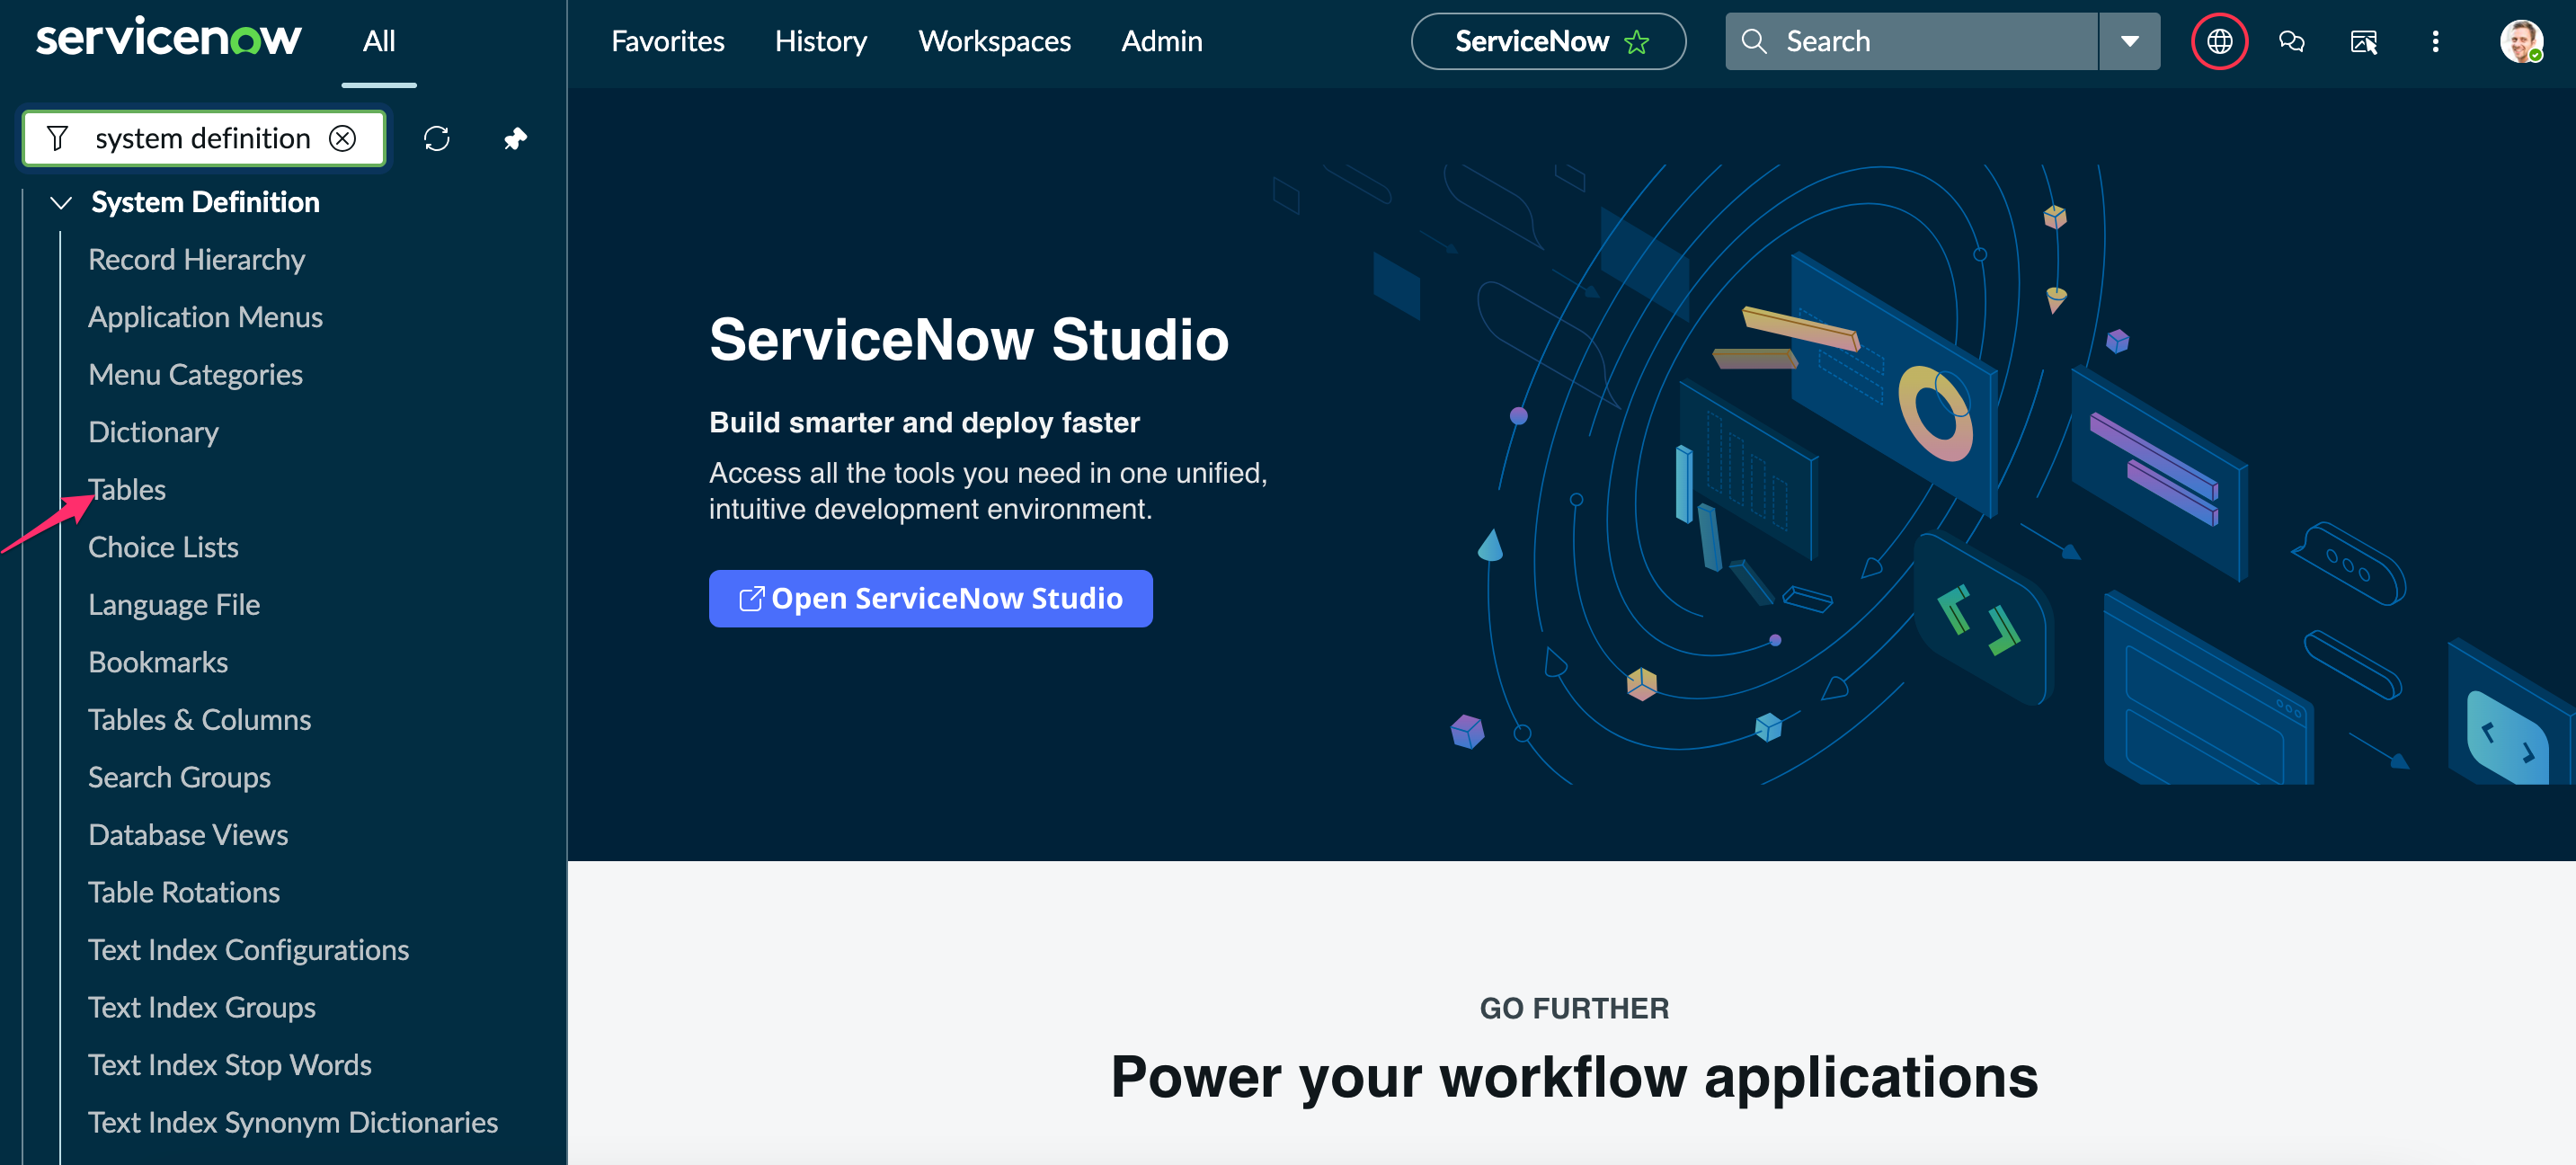
In ServiceNow, navigate to System Definition → Tables.
-
Create a new table record. Set the attributes, e.g., for Azure Virtual Machine:
-
Label: Azure Virtual Machine
-
Name:
x_ca_cmdb_azure_virtual_machine -
Extends table: Configuration Item (
cmdb_ci)
Extending thecmdb_citable ensures full usage of native Configuration Item (CI) capabilities within ServiceNow.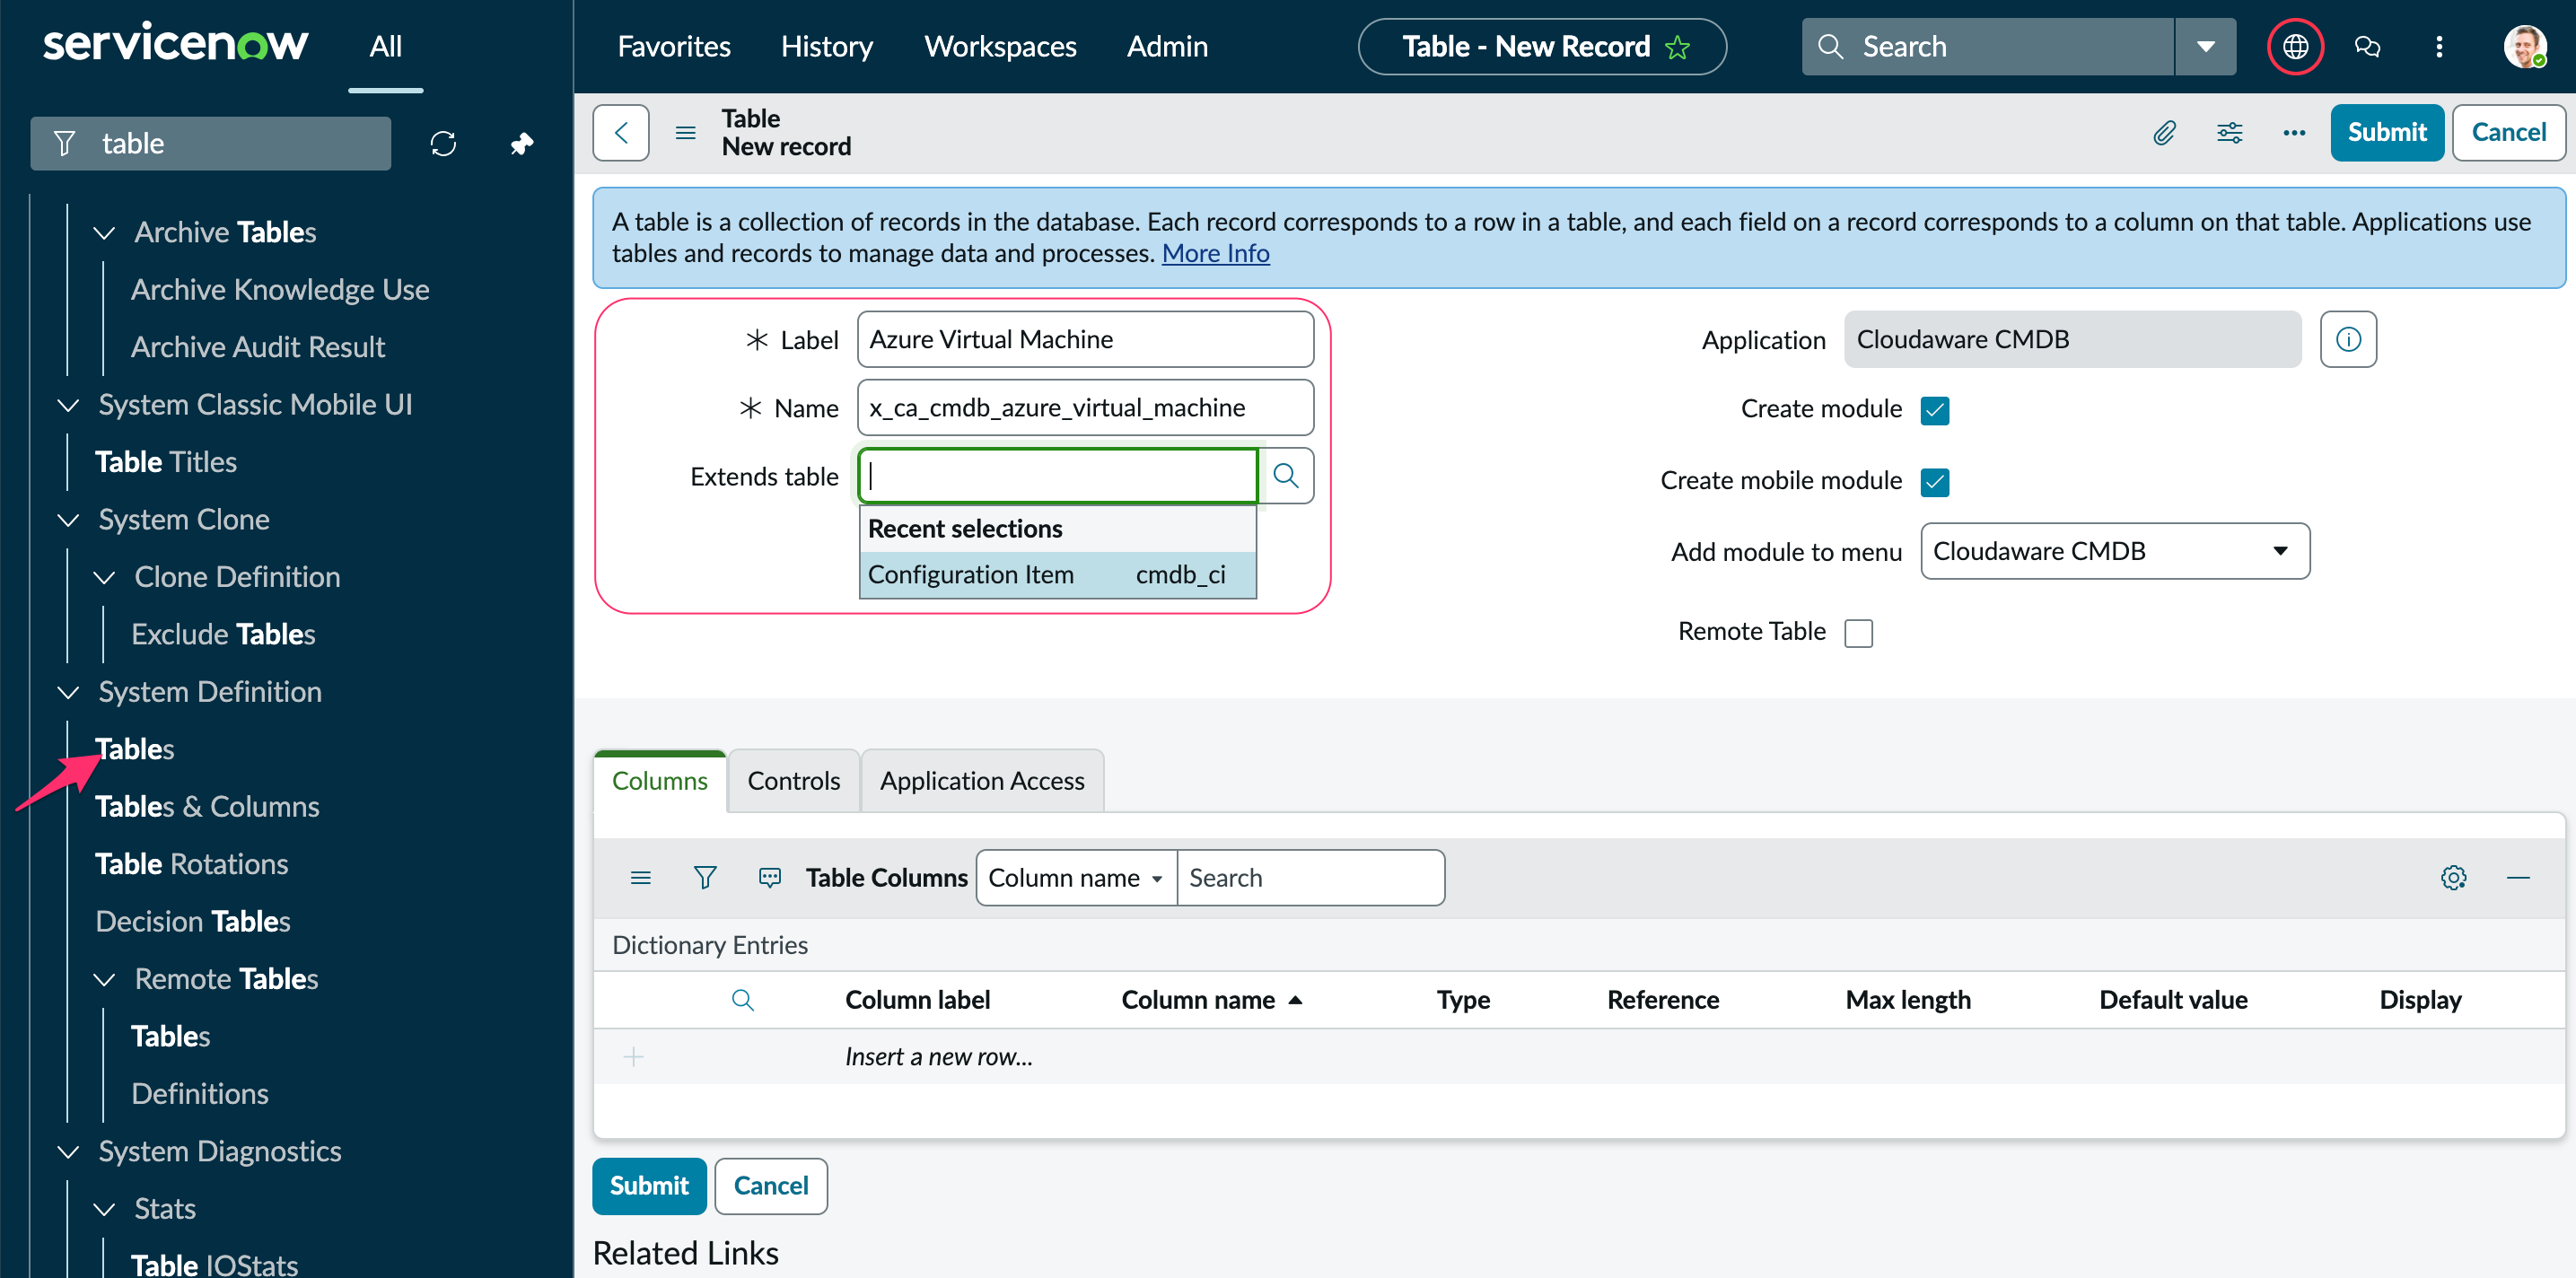
Click Submit.
-
-
Provide Cloudaware with the table label and name.
STEP 3. Add Columns to the Table
Columns may be added manually or populated using a custom script from Cloudaware.
Manual addition
In ServiceNow, navigate to System Definition → Tables. Select the created table Azure Virtual Machine (x_ca_cmdb_azure_virtual_machine). Click New.
Note that the following fields are mandatory:
-
Disappearance Time
-
Ca Uuid
-
Last Imported At
-
Outdated
  { label: 'Disappearance Time', name: 'x_ca_cmdb_ca10_disappearancetime_c', type: 'glide_date_time' },
  { label: 'Ca Uuid', name: 'x_ca_cmdb_ca10_cauuid_c', type: 'string' },
  { label: 'Last Imported At', name: 'last_imported_at', type: 'glide_date_time' },
  { label: 'Outdated', name: 'outdated', type: 'boolean' }
Using script
In ServiceNow, navigate to System Definition → Scripts - Background. Apply a custom script provided by Cloudaware:
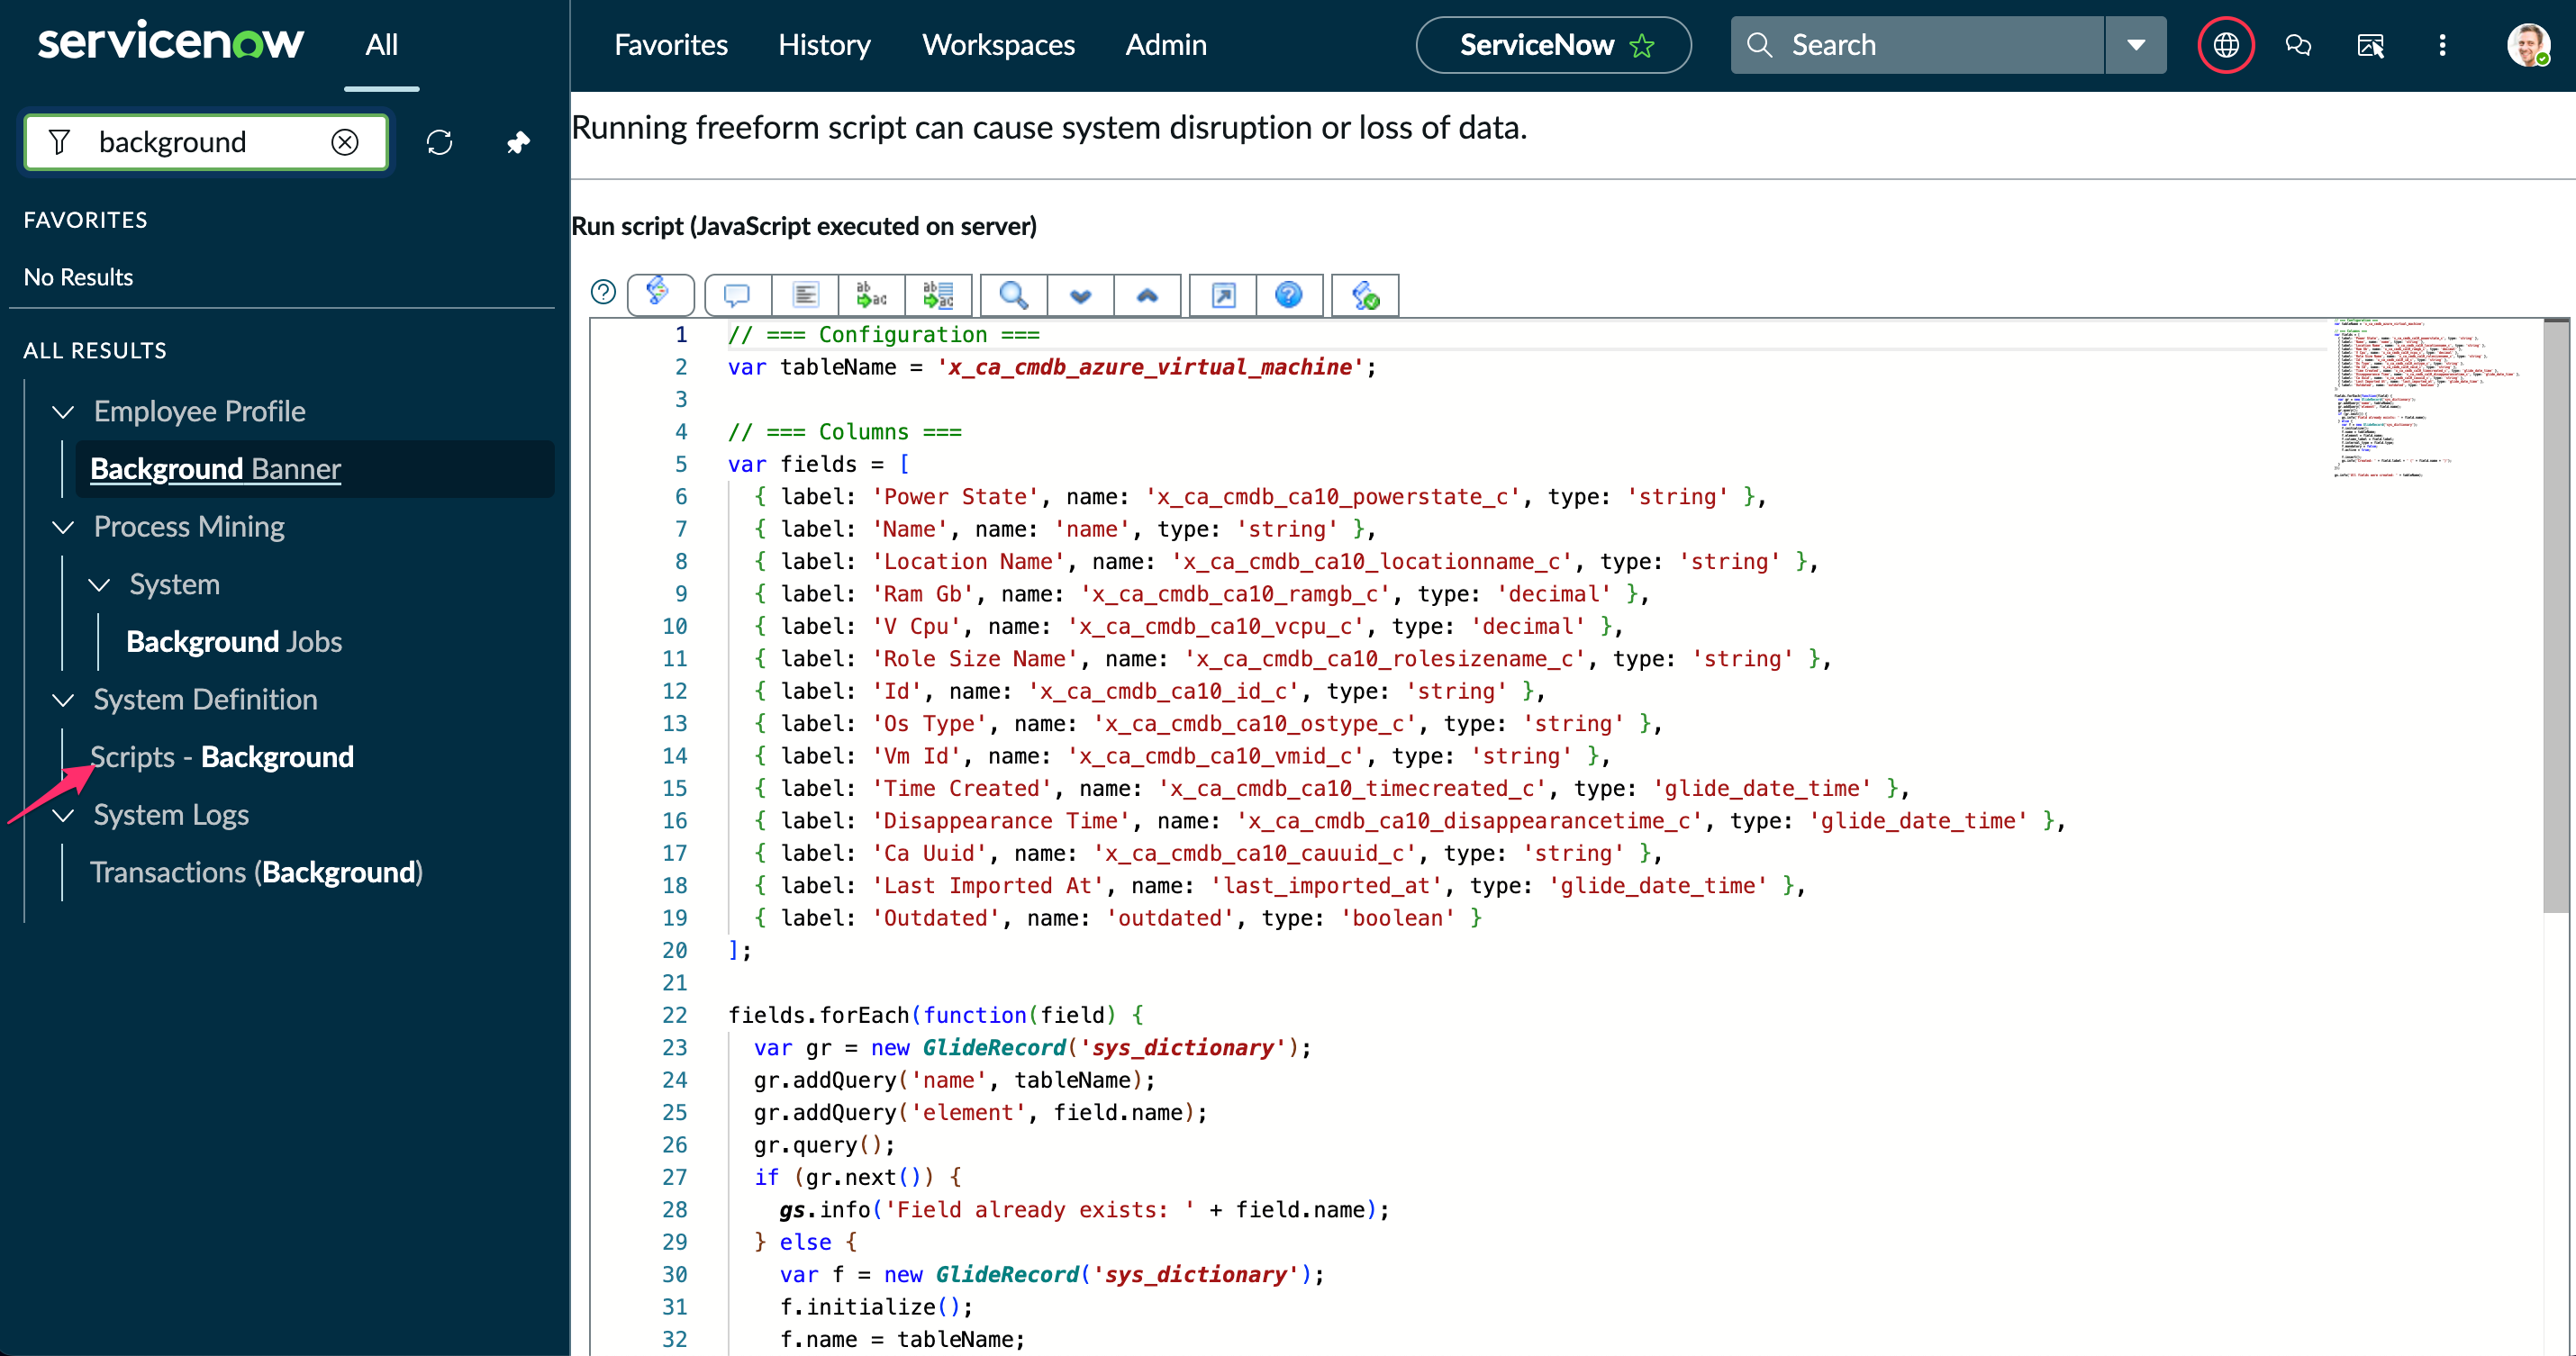
Script example: script.txt
This script example contains required fields for the selected table (Azure Virtual Machine) only.
STEP 4. Update Cloudaware Import Fields Mapping table
Add records to the Cloudaware Import Fields Mapping table (x_ca_cmdb_import_fields_mapping). Navigate to System Import Sets → Load Data and add a file generated by Cloudaware.
File example: Cloudaware Import Fields Mapping (CA10__CaAzureVirtualMachine__c).xlsx
STEP 5. Update Cloudaware Import Settings table
Add records to the Cloudaware Import Settings table (x_ca_cmdb_ci_class_import_settings). Navigate to System Import Sets → Load Data and add a file generated by Cloudaware.
File example: Update Cloudaware Import Settings (CA10__CaAzureVirtualMachine__c).xlsx
STEP 6. Update CI Class Import table
Add records to the CI Class Import table (x_ca_cmdb_ci_class_import). Navigate to System Import Sets → Load Data and add a file generated by Cloudaware.
File example: Update CI Class Import (CA10__CaAzureVirtualMachine__c).xlsx
STEP 7. Enable Import All CI Data from Cloudaware Flow
-
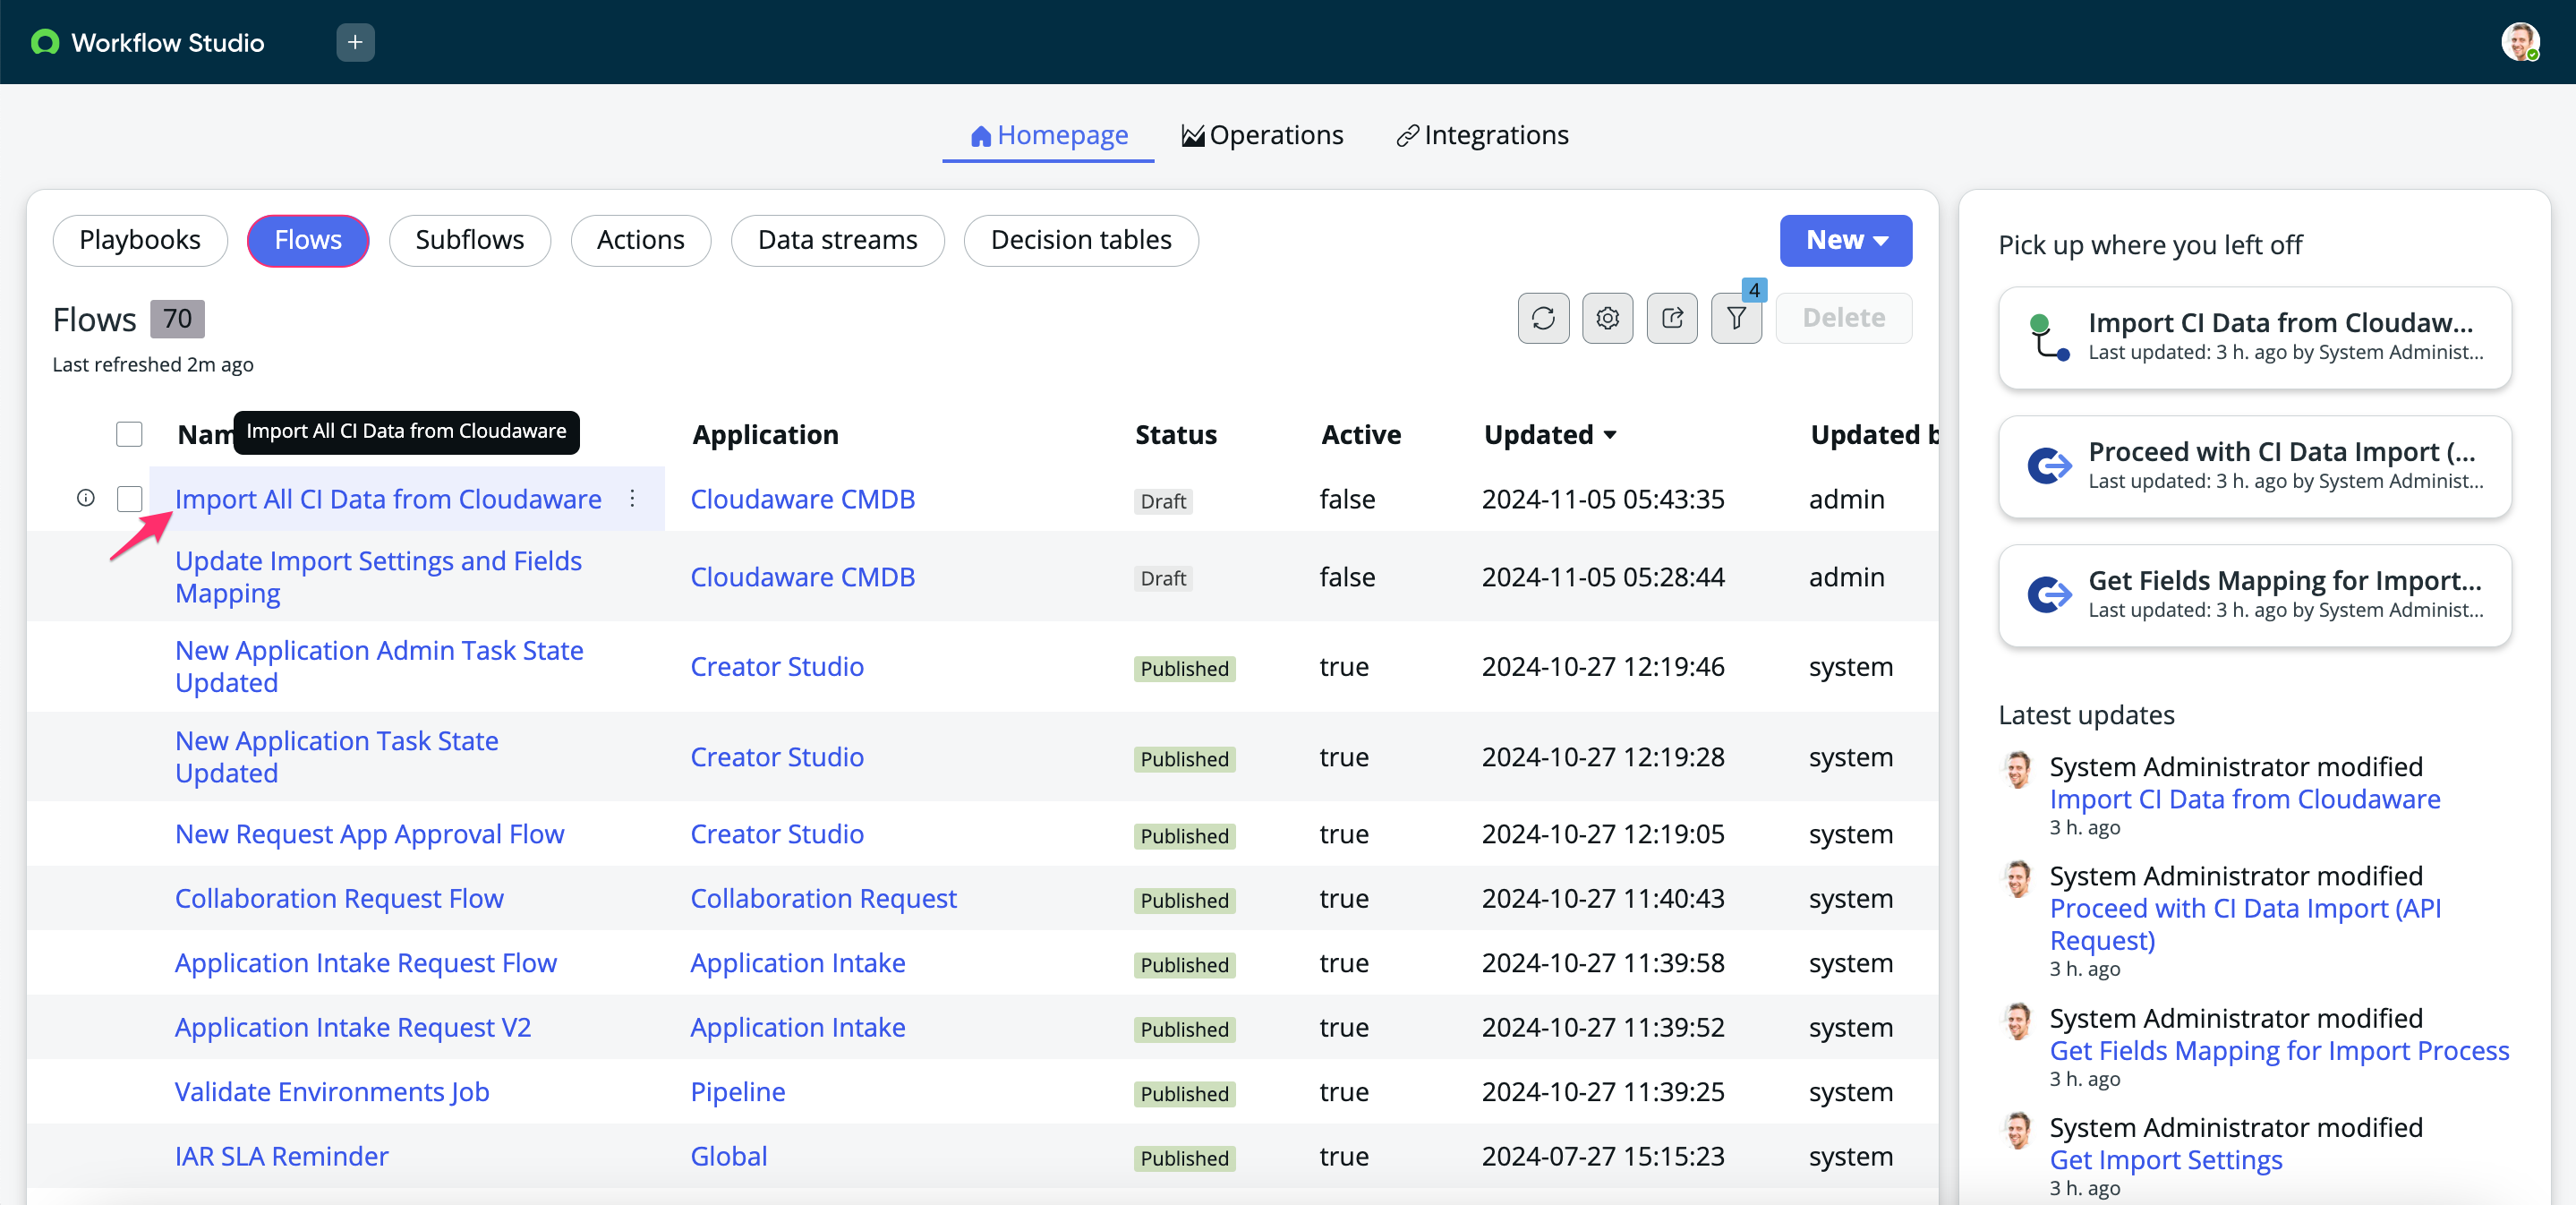
Navigate to Process Automation → Workflow Studio.
-
Open ‘Flows’. Select the Import All CI Data from Cloudaware flow from the list.
-
In TRIGGER, click on the section to schedule a trigger. Select ‘Scheduled’ → Daily* → set the time:
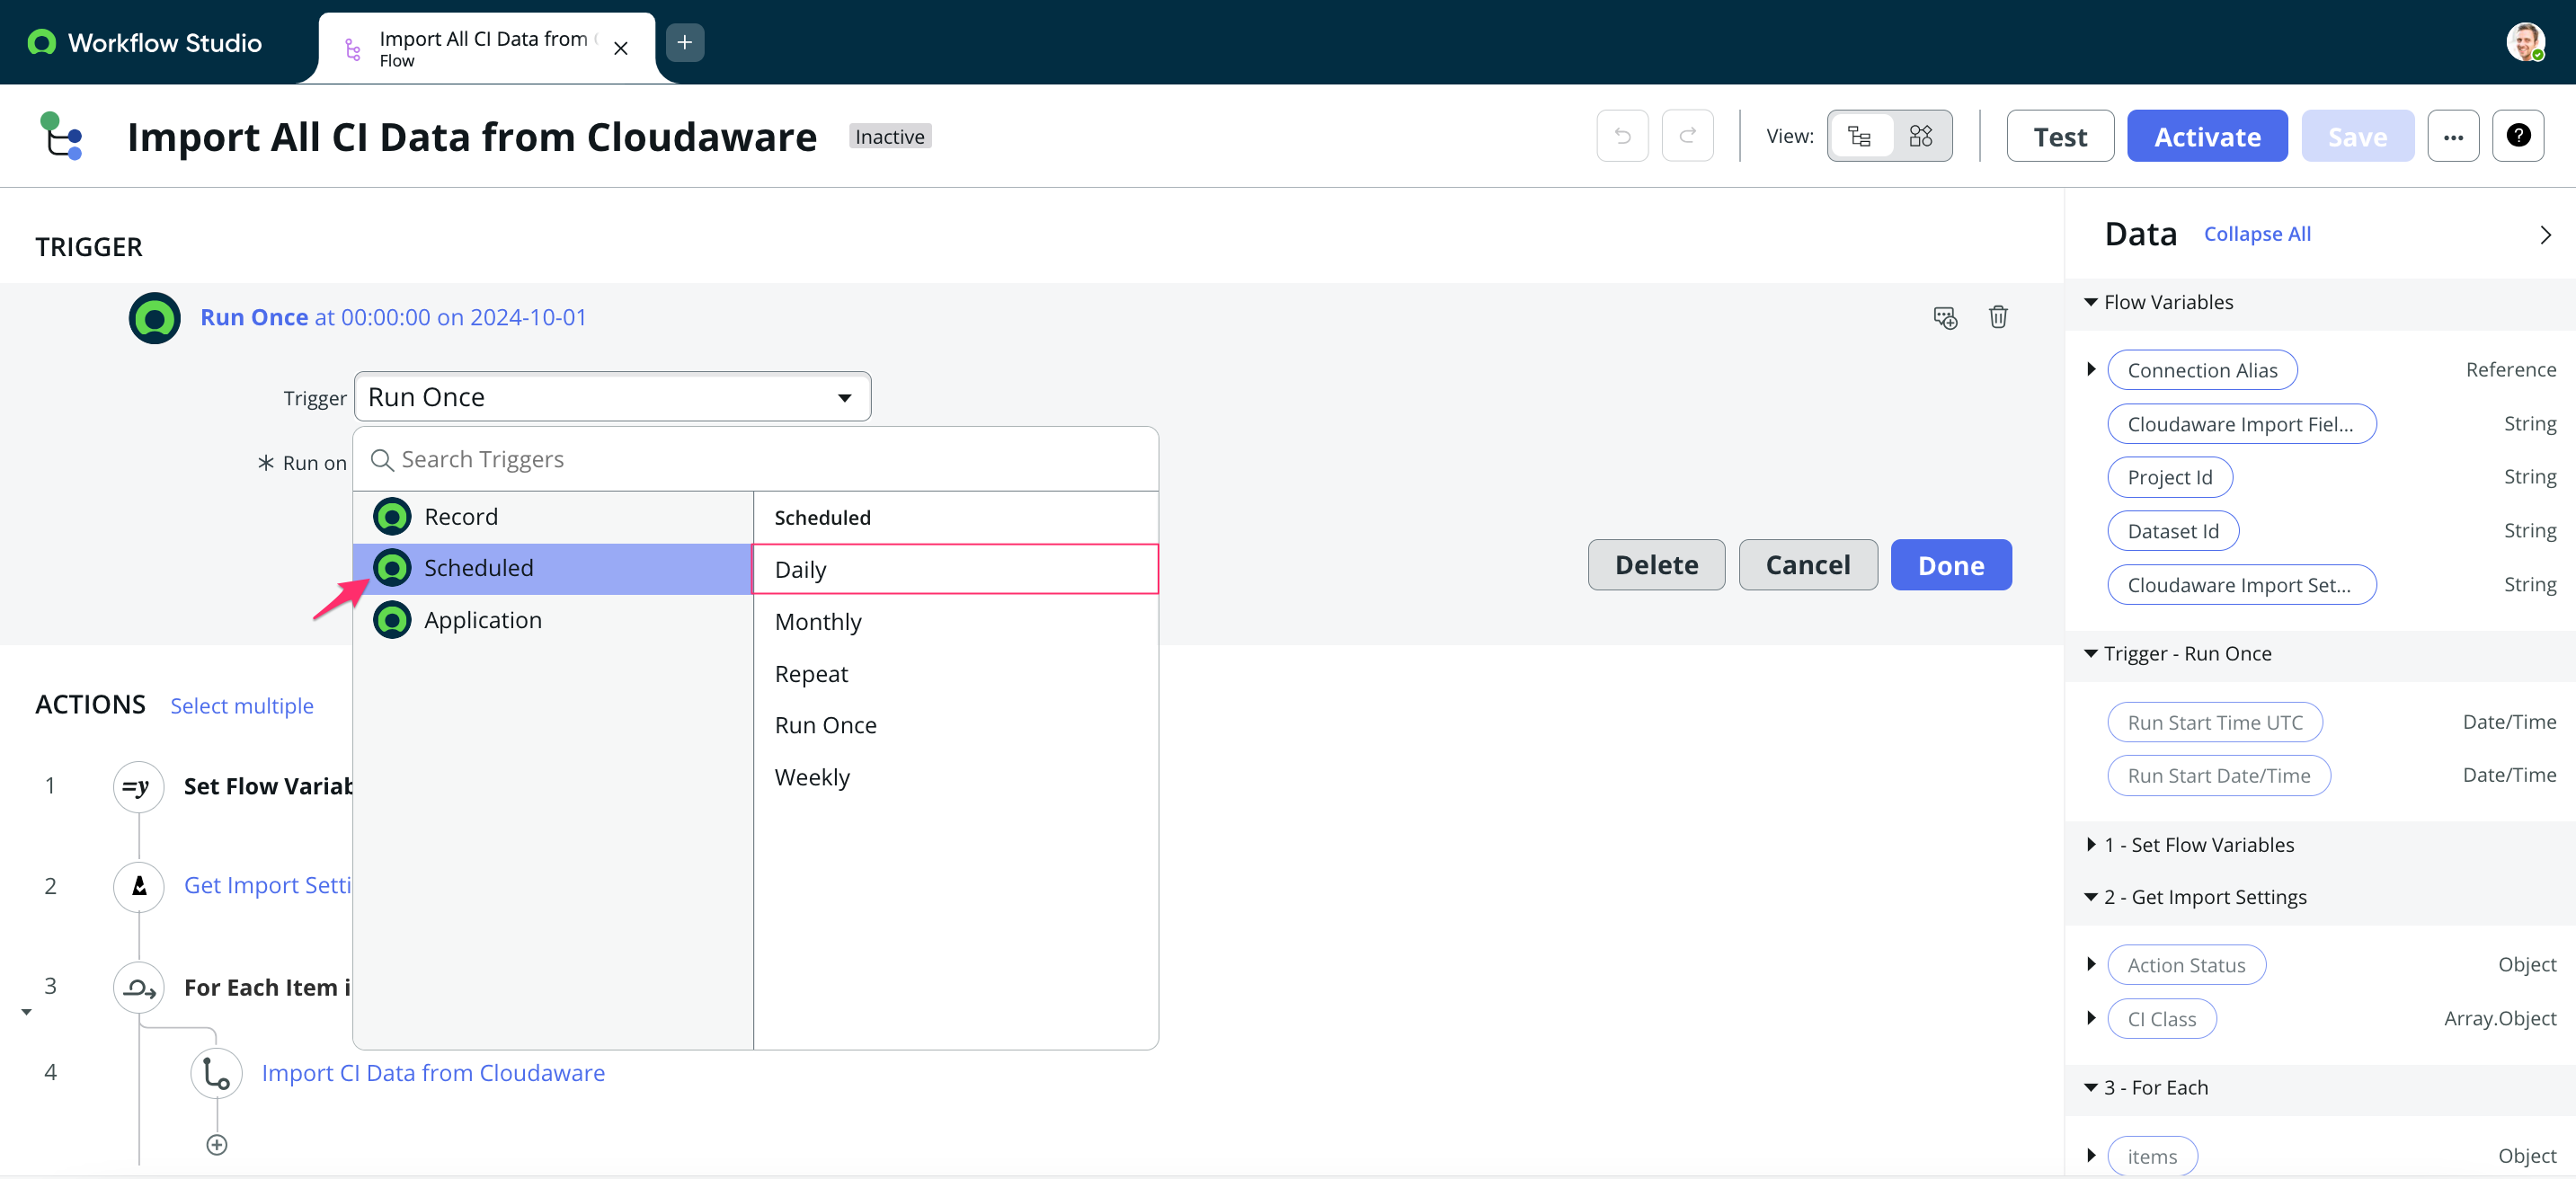
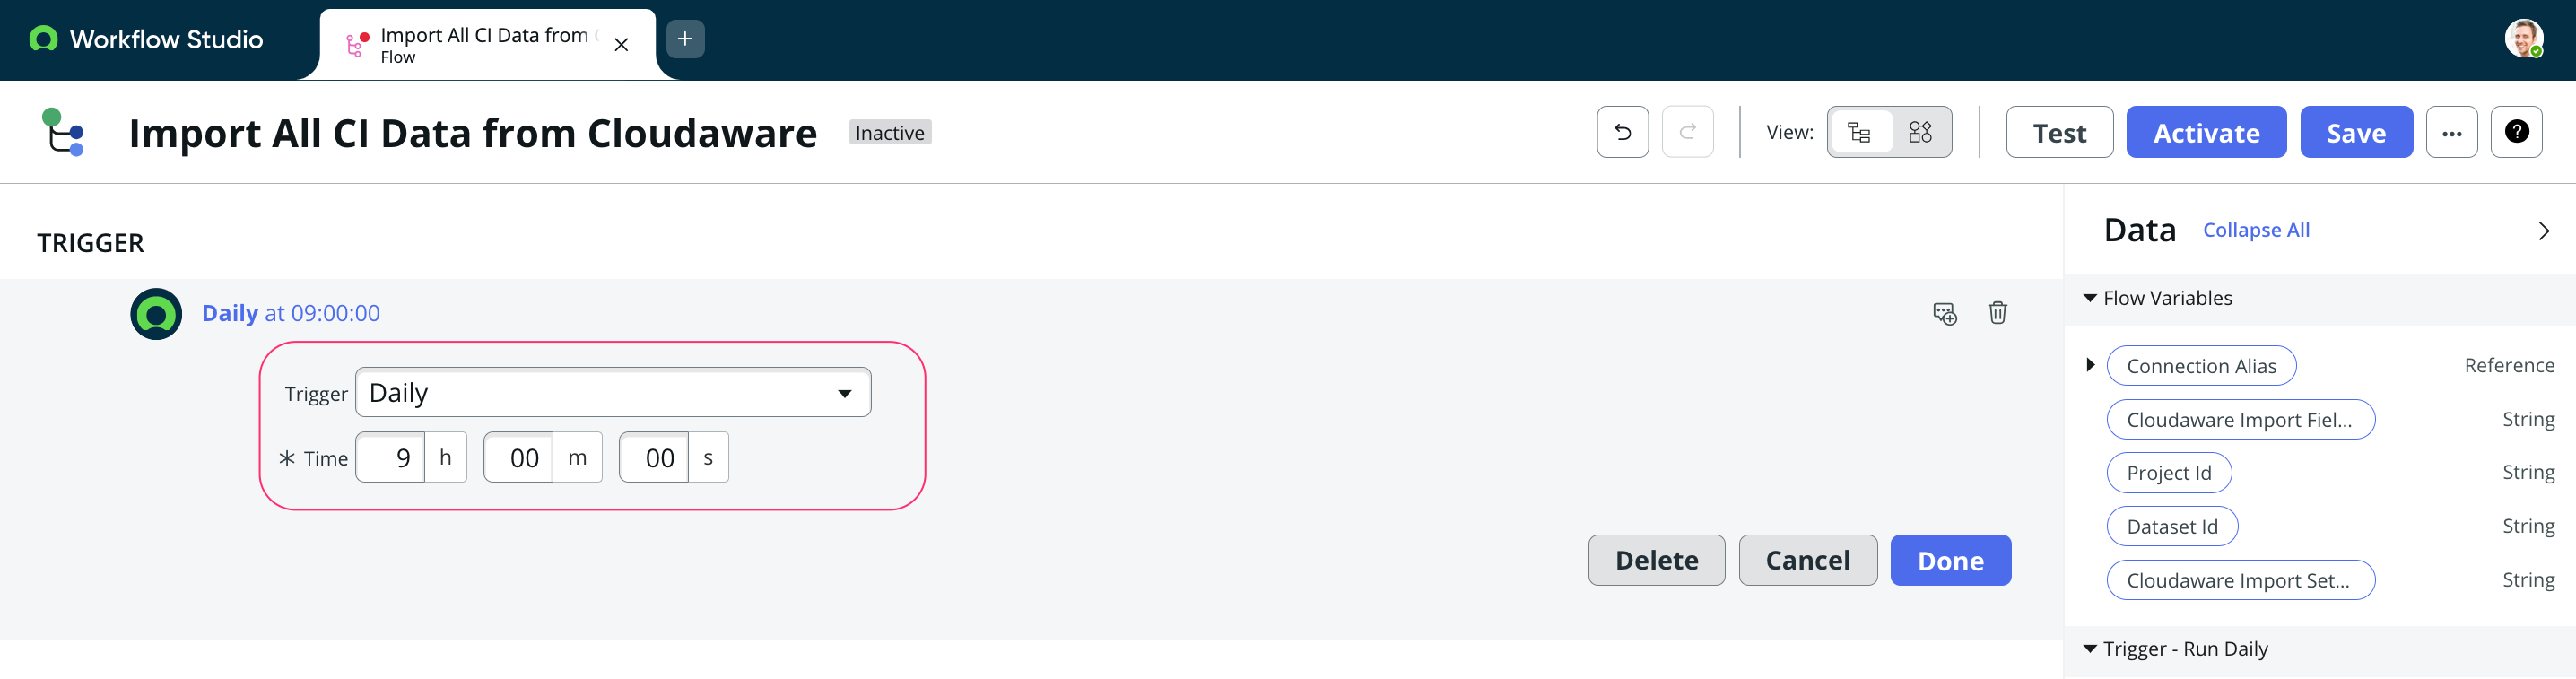
Click Done.
*The recommended frequency is once per day.
-
In ACTIONS, click Set Flow Variables to select:
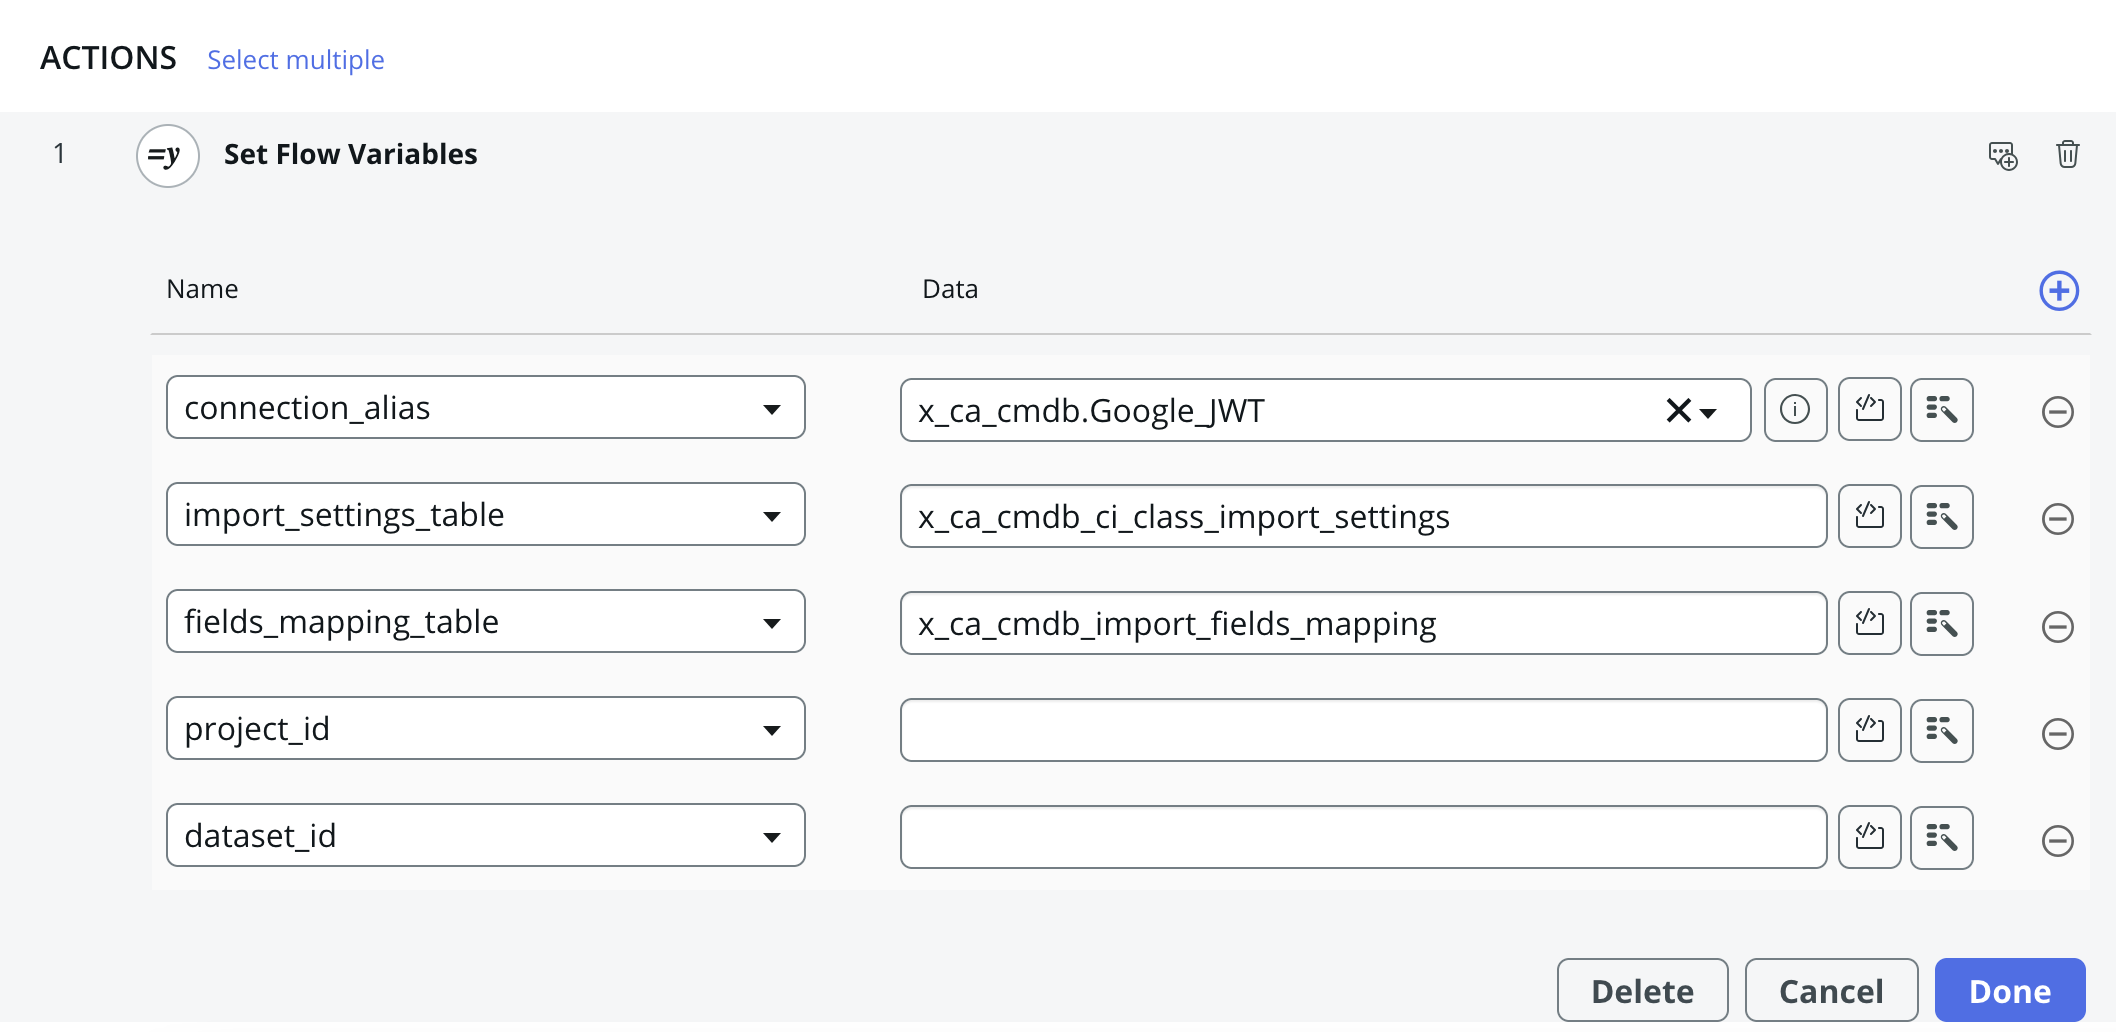
WHERE
Connection Alias – select the Connections & Credentials Aliases configured during Cloudaware CMDB app setup (in this example, Google JWT)
Cloudaware Import Settings Table – the value is auto-populated as this is a system table
Cloudaware Import Fields Mapping Table – the value is auto-populated as this is a system table
Project Id – the Import Project Id provided by Cloudaware
Dataset Id – the Import Dataset Id provided by Cloudaware
Click Done. -
Save and activate the workflow.