
Create List Views
This guide explains how to use the Cloudaware Visual Builder to customize default list views or create a new list view from scratch.
Start
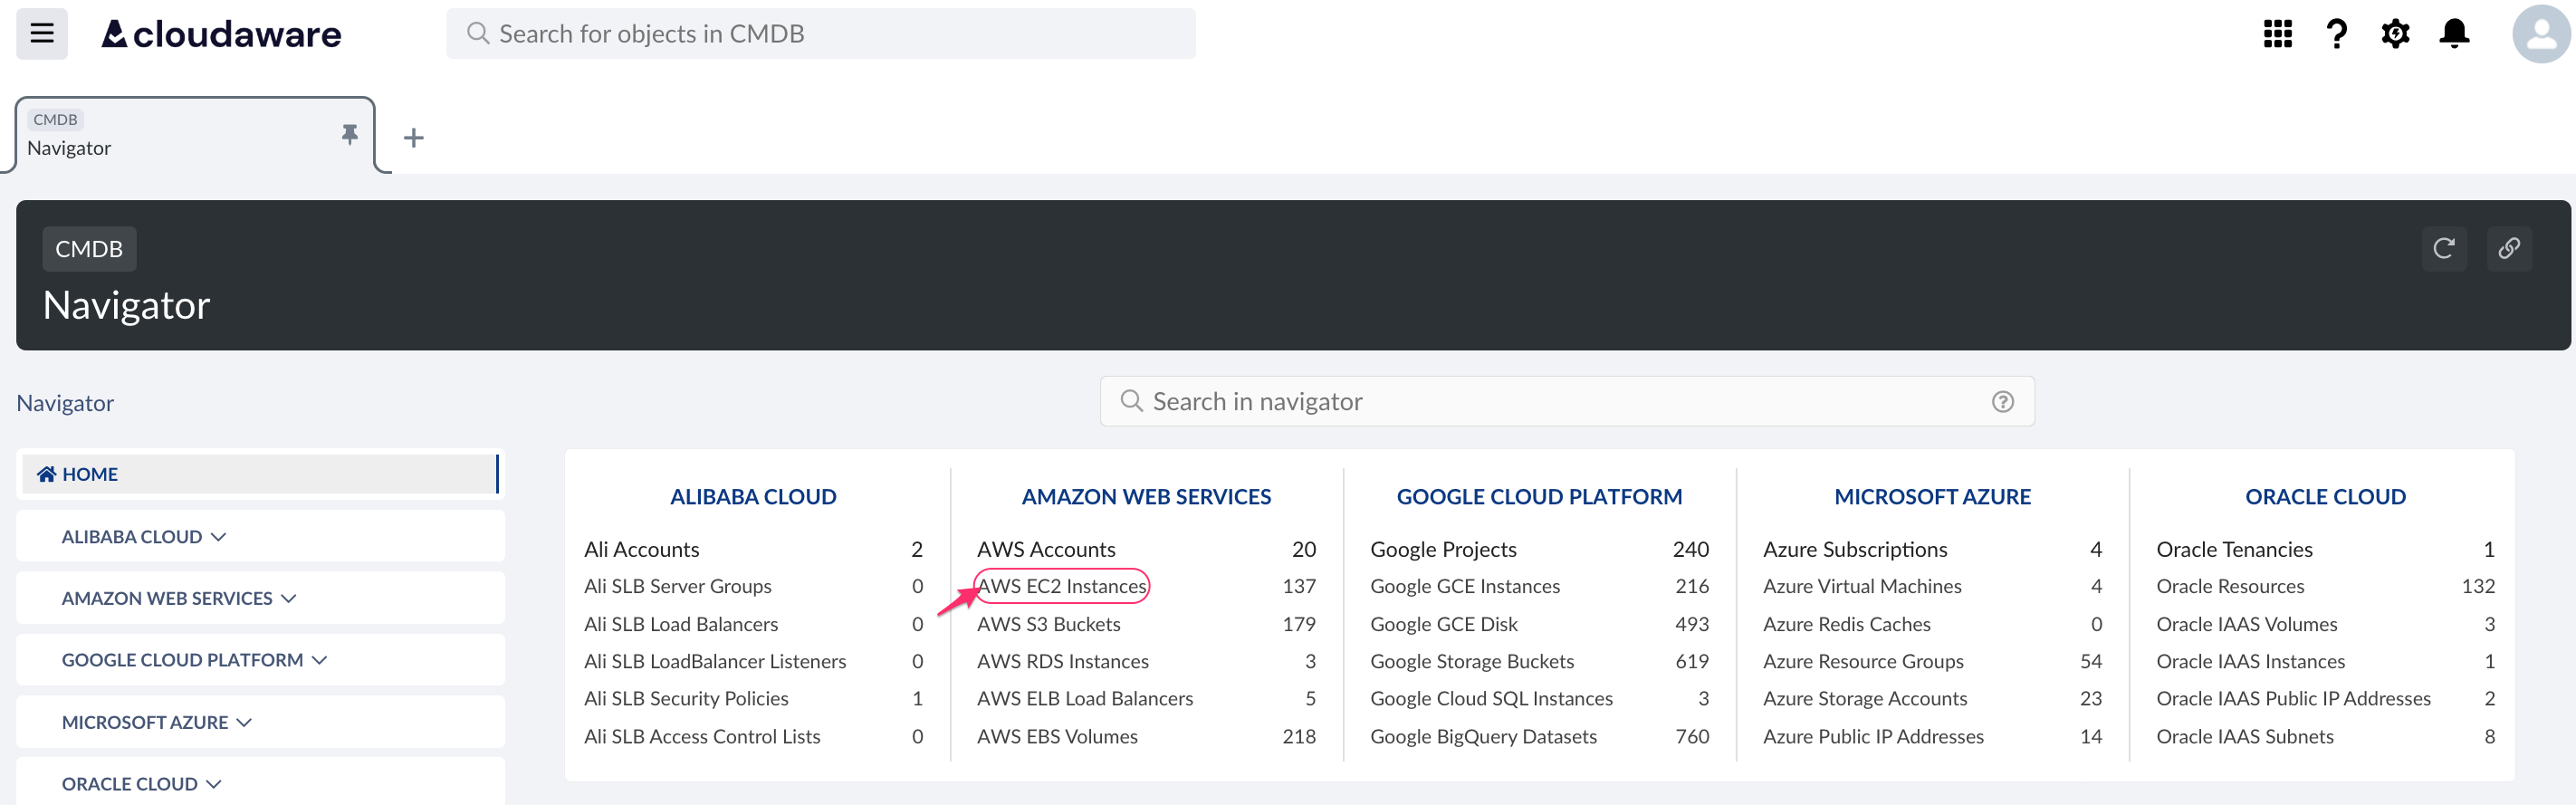
Log in to the Cloudaware account → CMDB Navigator. Select the resource type, e.g. AWS EC2 Instances:
Standard List Views
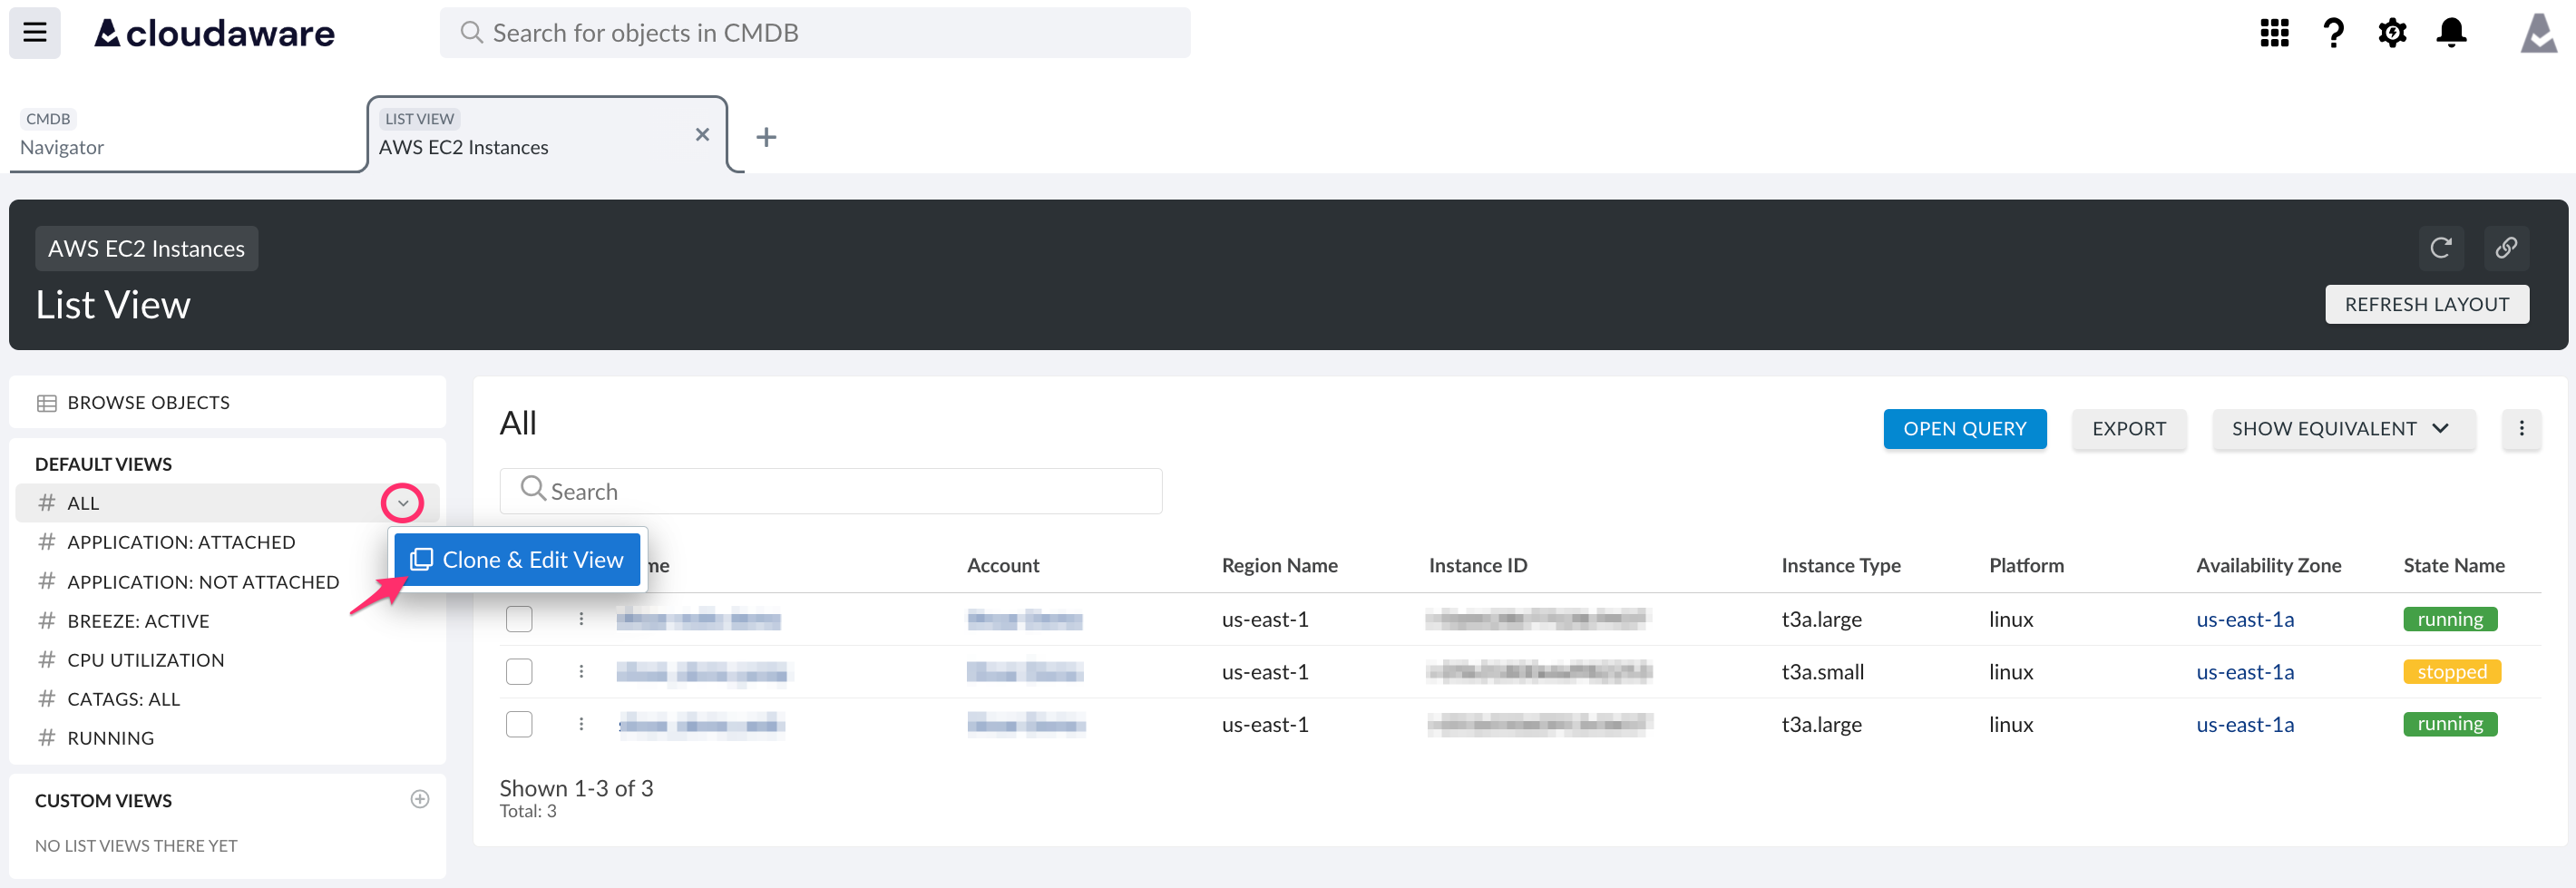
The DEFAULT VIEWS section contains all standard pre-built list views managed by Cloudaware. These views are not editable.
To create a custom version of a standard list view, select the view and click the arrow-down sign → Clone & Edit View.
Custom List Views
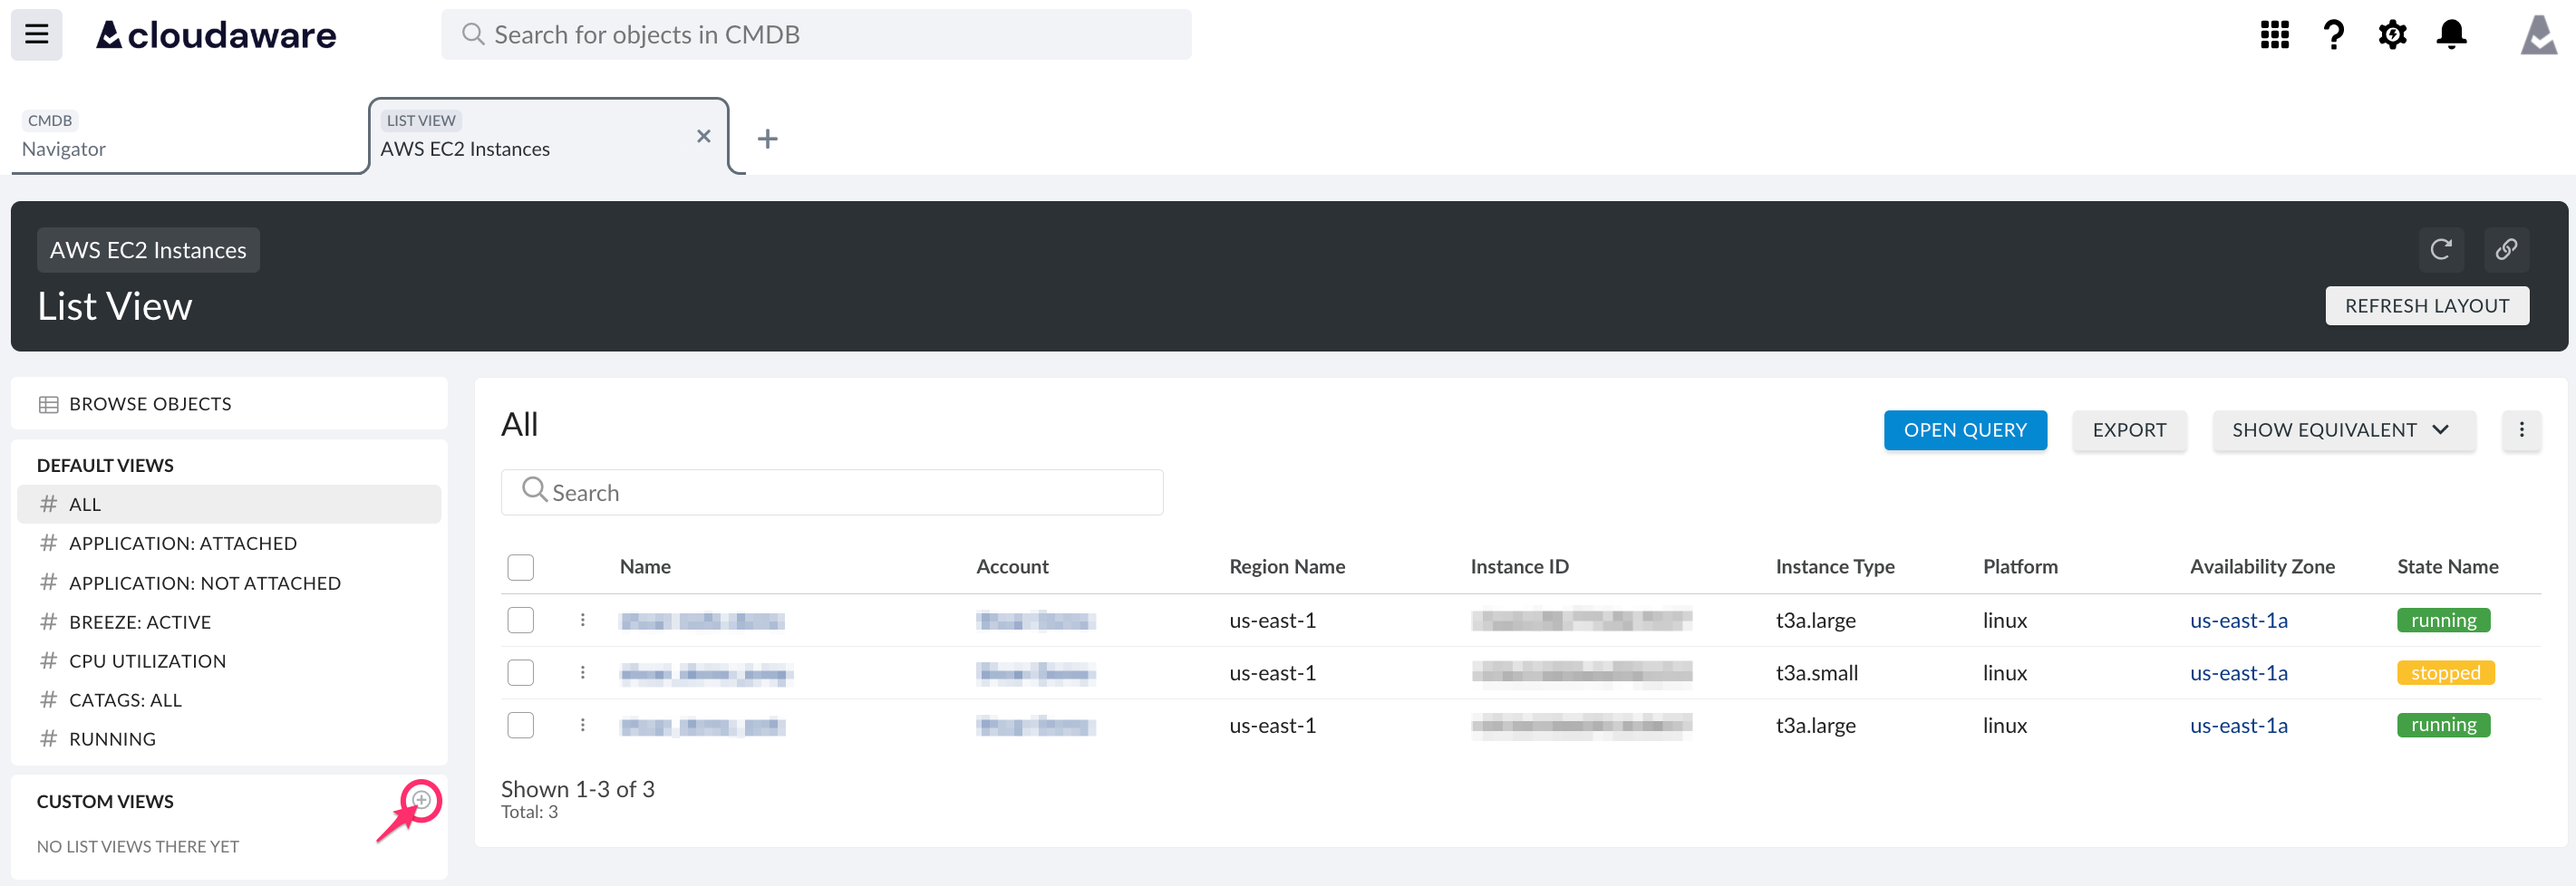
The CUSTOM VIEWS section contains all custom list views created by users within the Cloudaware account. To create a custom list view:
Сopy a standard list view by clicking the arrow-down icon → Clone & Edit View to edit and customize it
Click + icon to start creating a custom list view from scratch
Access Restriction
The 'Private view' mode is selected by default for each list view created from scratch in the section CUSTOM VIEWS. Click the arrow-down icon to select 'Public view':
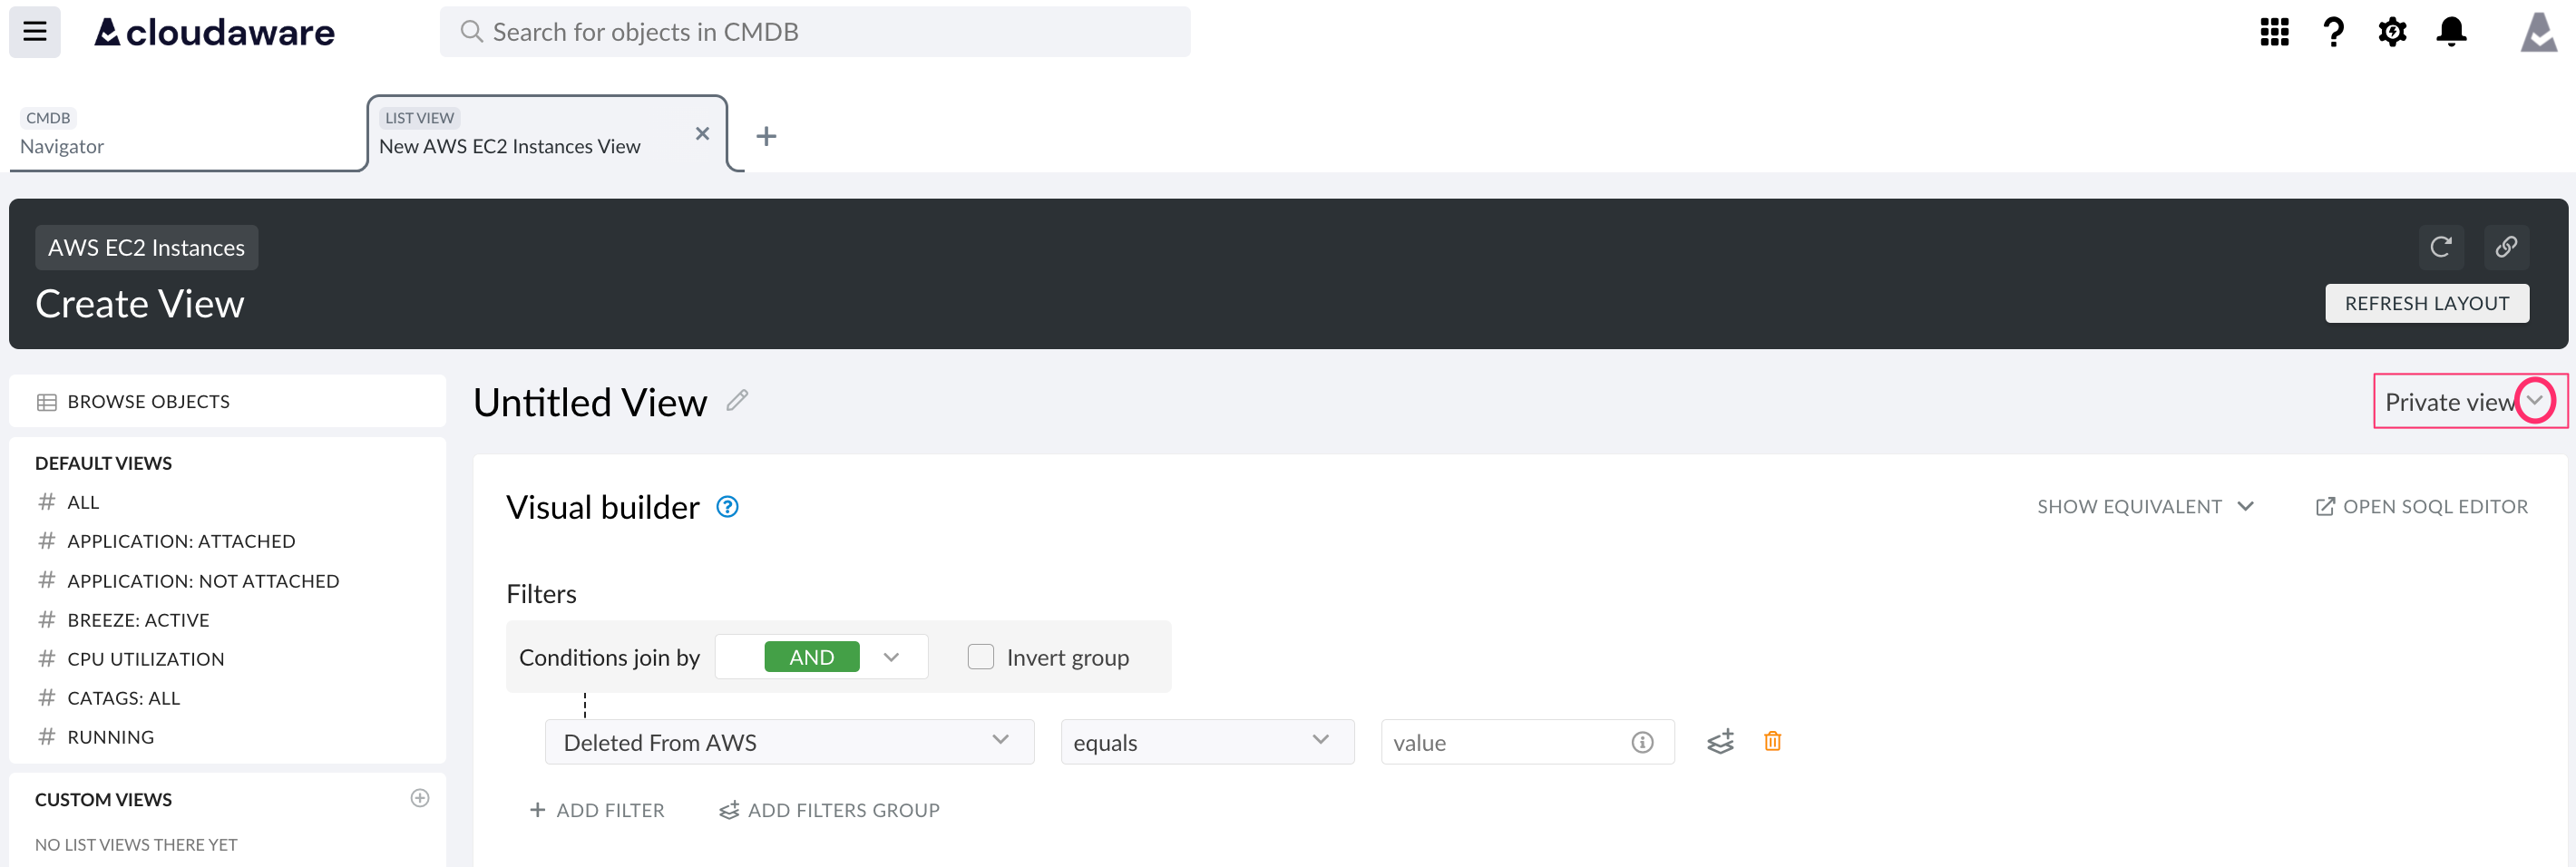
Control access to the creation of public list views. By default, users with CloudAware Administrator and CloudAware Collector Only, or a user with custom permission listViewEditor can create public list views visible to all users in the organization. The rest are able to create private list views only.
Filter Criteria
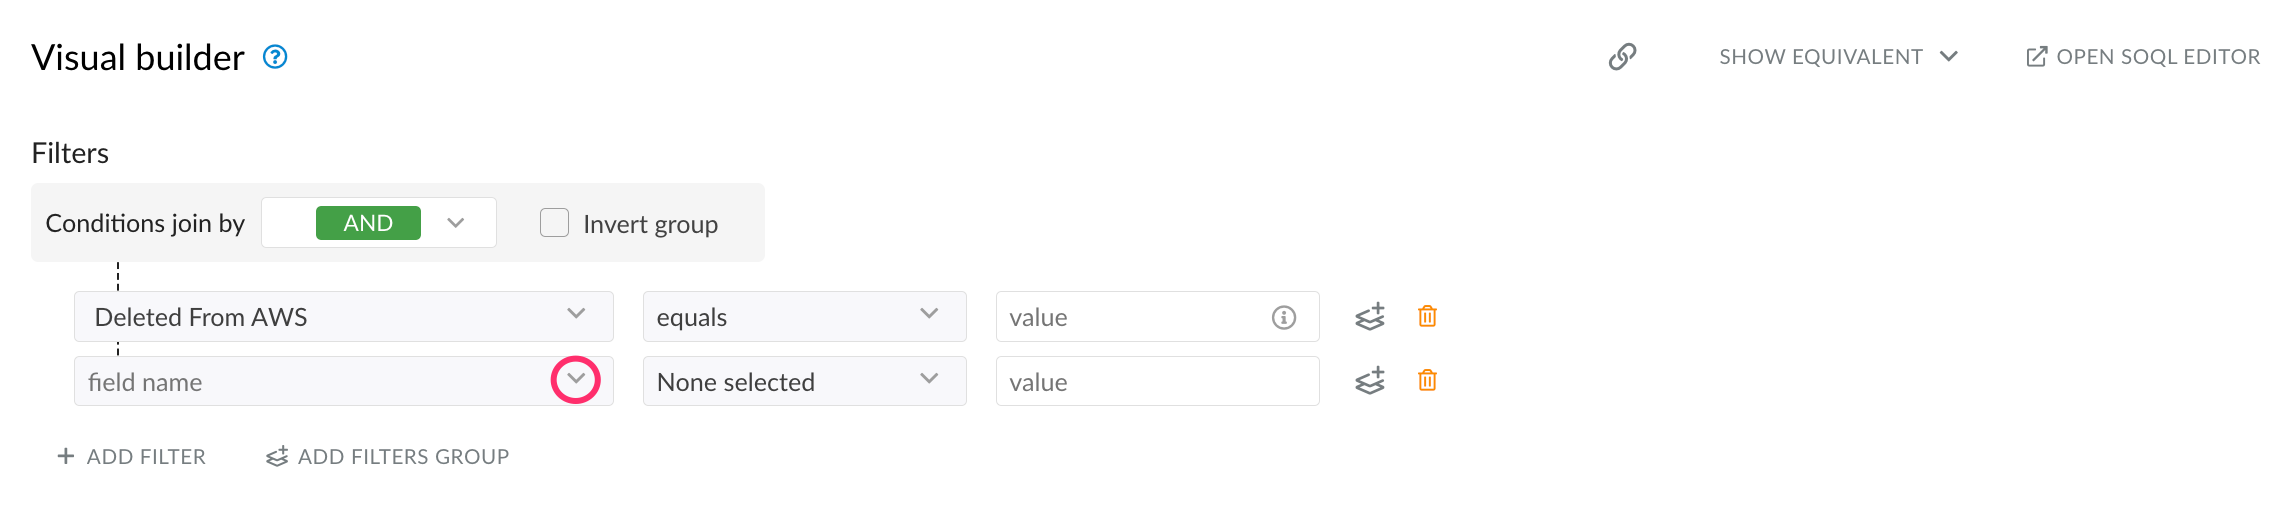
This section allows users to set filters for data in a list view. Click +ADD FILTER to add a new filter criteria:

Each filter criteria includes a field, a logical operator and a value.
Fields
Select a field name from the drop-down list or type the name in the search bar:
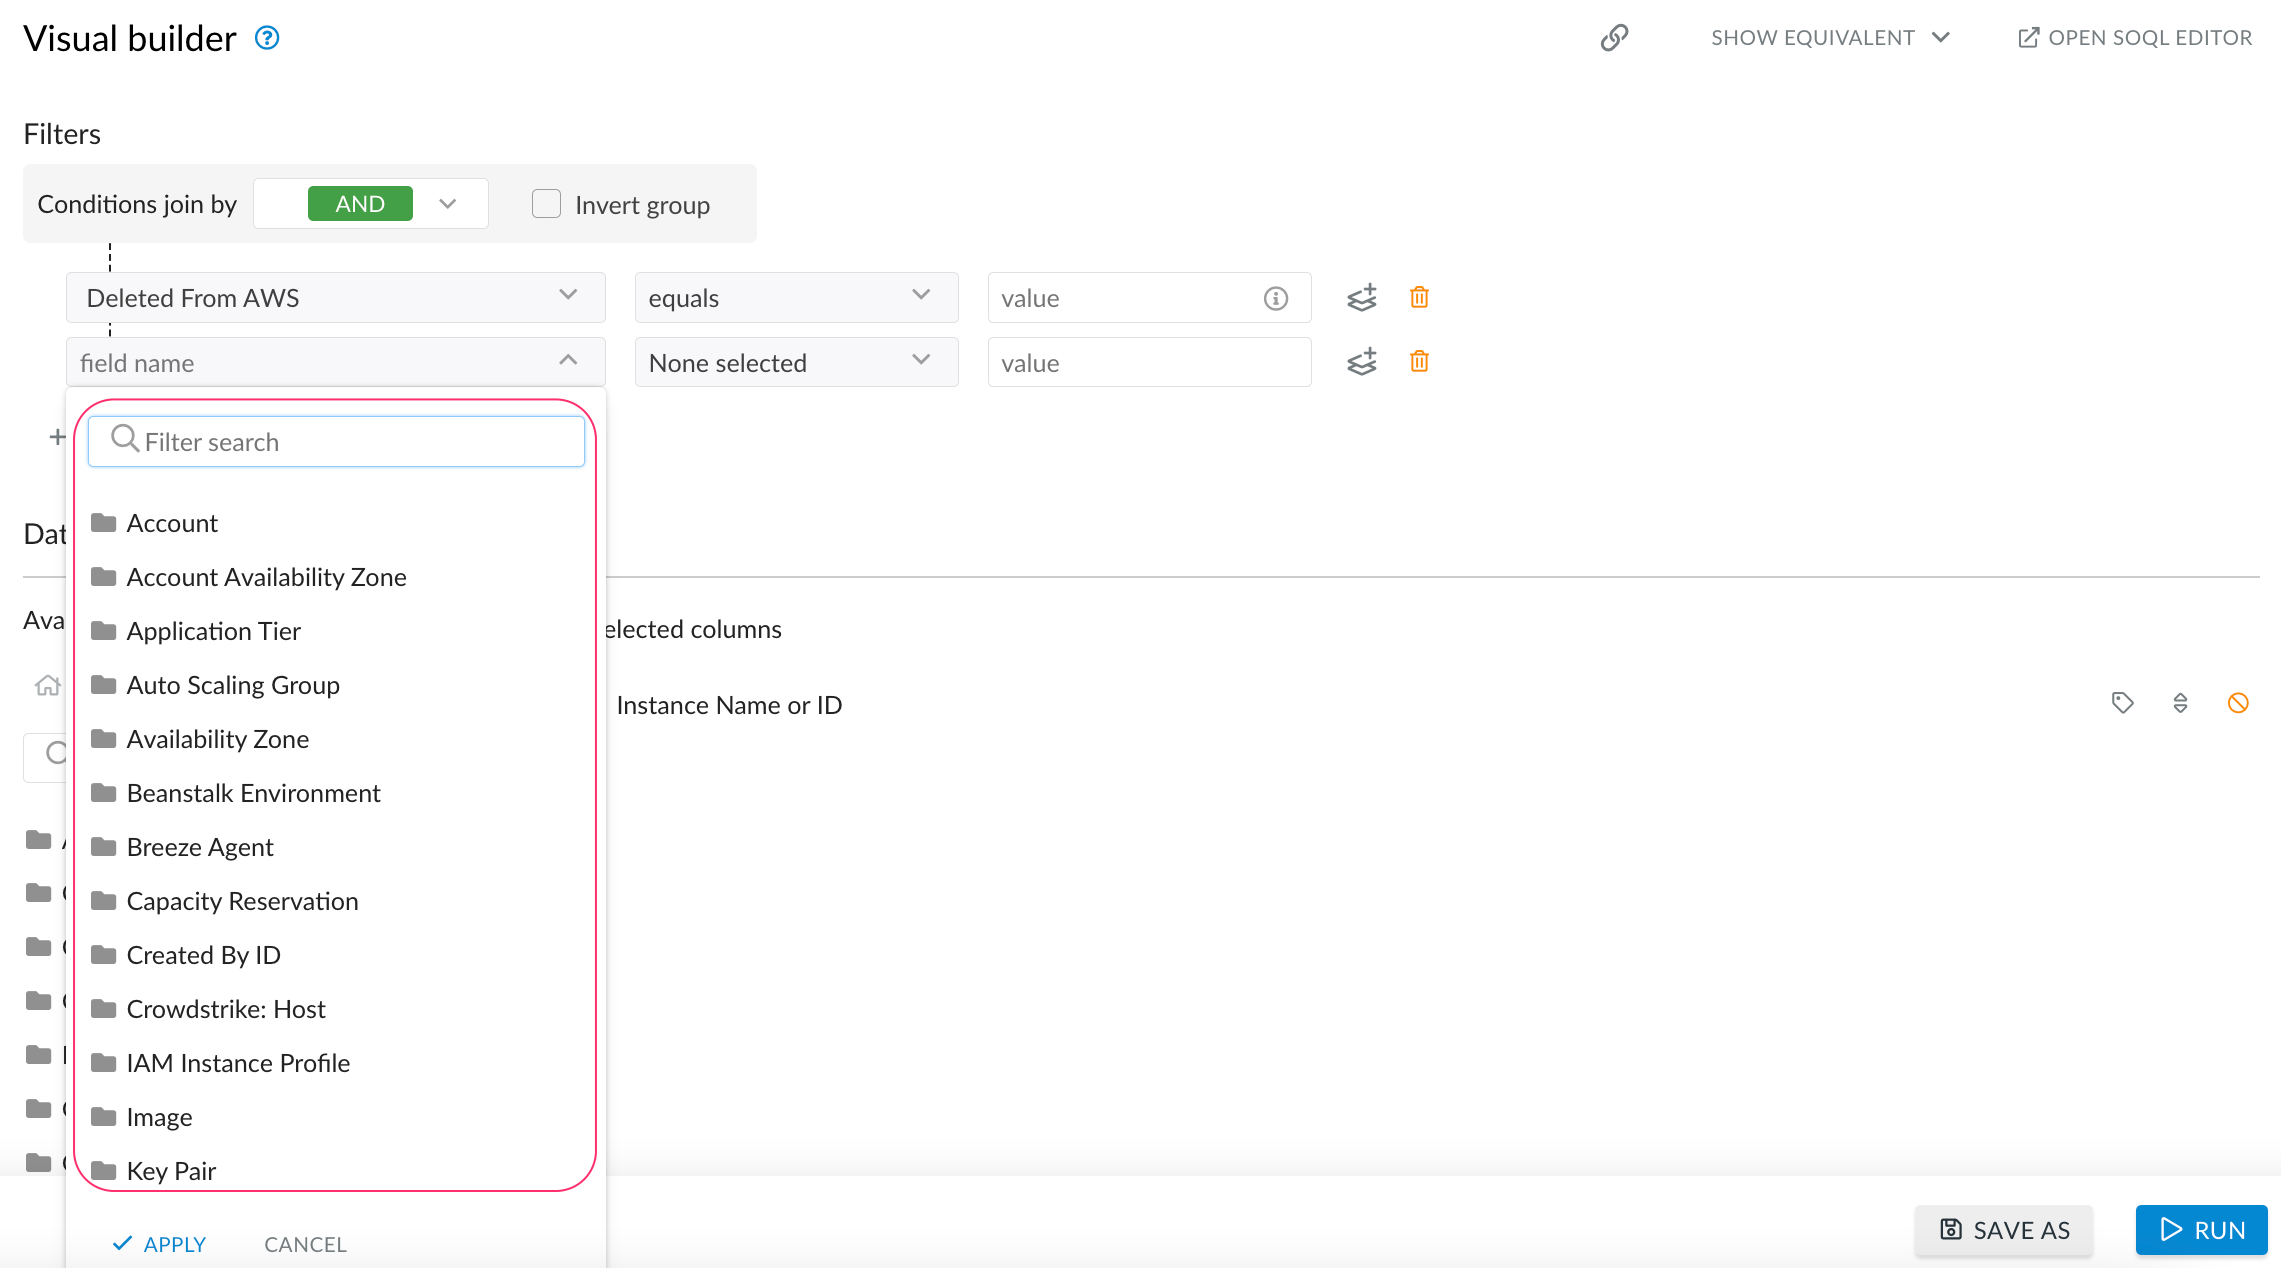
Once the field is selected, click APPLY to add it to filters. To return to the general list of fields, click the 'home' icon.
Fields marked with a folder icon contain a list of related fields that can be expanded. Use related fields of a parent object to narrow down the search by setting specific criteria:
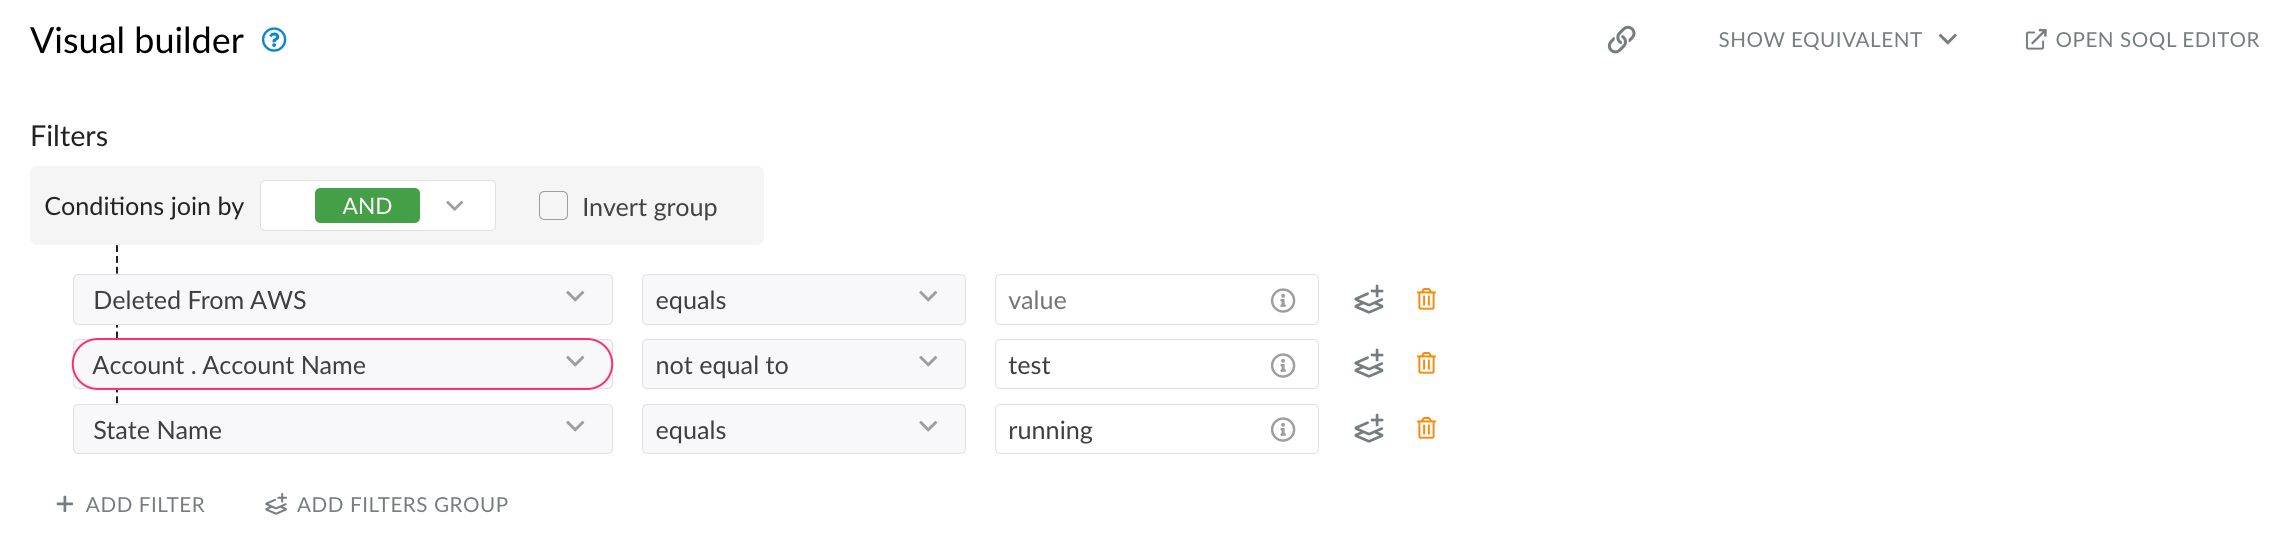
Example: In this example, the goal is to view all running AWS EC2 instances that are not associated with accounts whose names contain
test. To achieve this, select the AWS Account object, which is the parent object for AWS EC2 Instances. Then, drill down to the field Account Name and set its value to test. Next, add the State Name field with the operator equals and the value running to complete the filter criteria.
Fields marked with a {} icon contain JSON data. Specify the value using JSON expressions in the following formats:
a) $.Fieldname
b) $.Fieldname[0].Fieldname or $["fieldname"][0]["fieldname"],
WHERE
Fieldname or fieldnameare placeholders for the actual name of the field, e.g., $.Name or $["Cost Center Code"]
[0] refers to the index of an element in the array, e.g., $.owner[1]["jira_project"]. To refer to all elements, replace the element number by the wildcard symbol *: $[“Fieldname with whitespaces”][*]
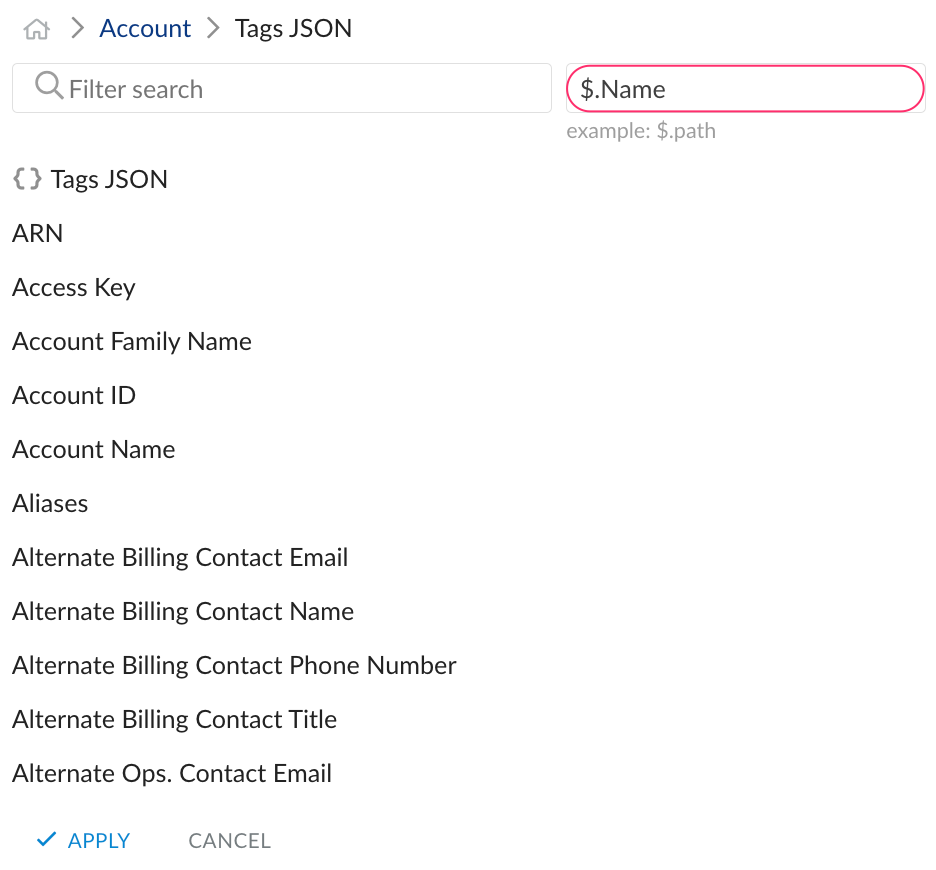
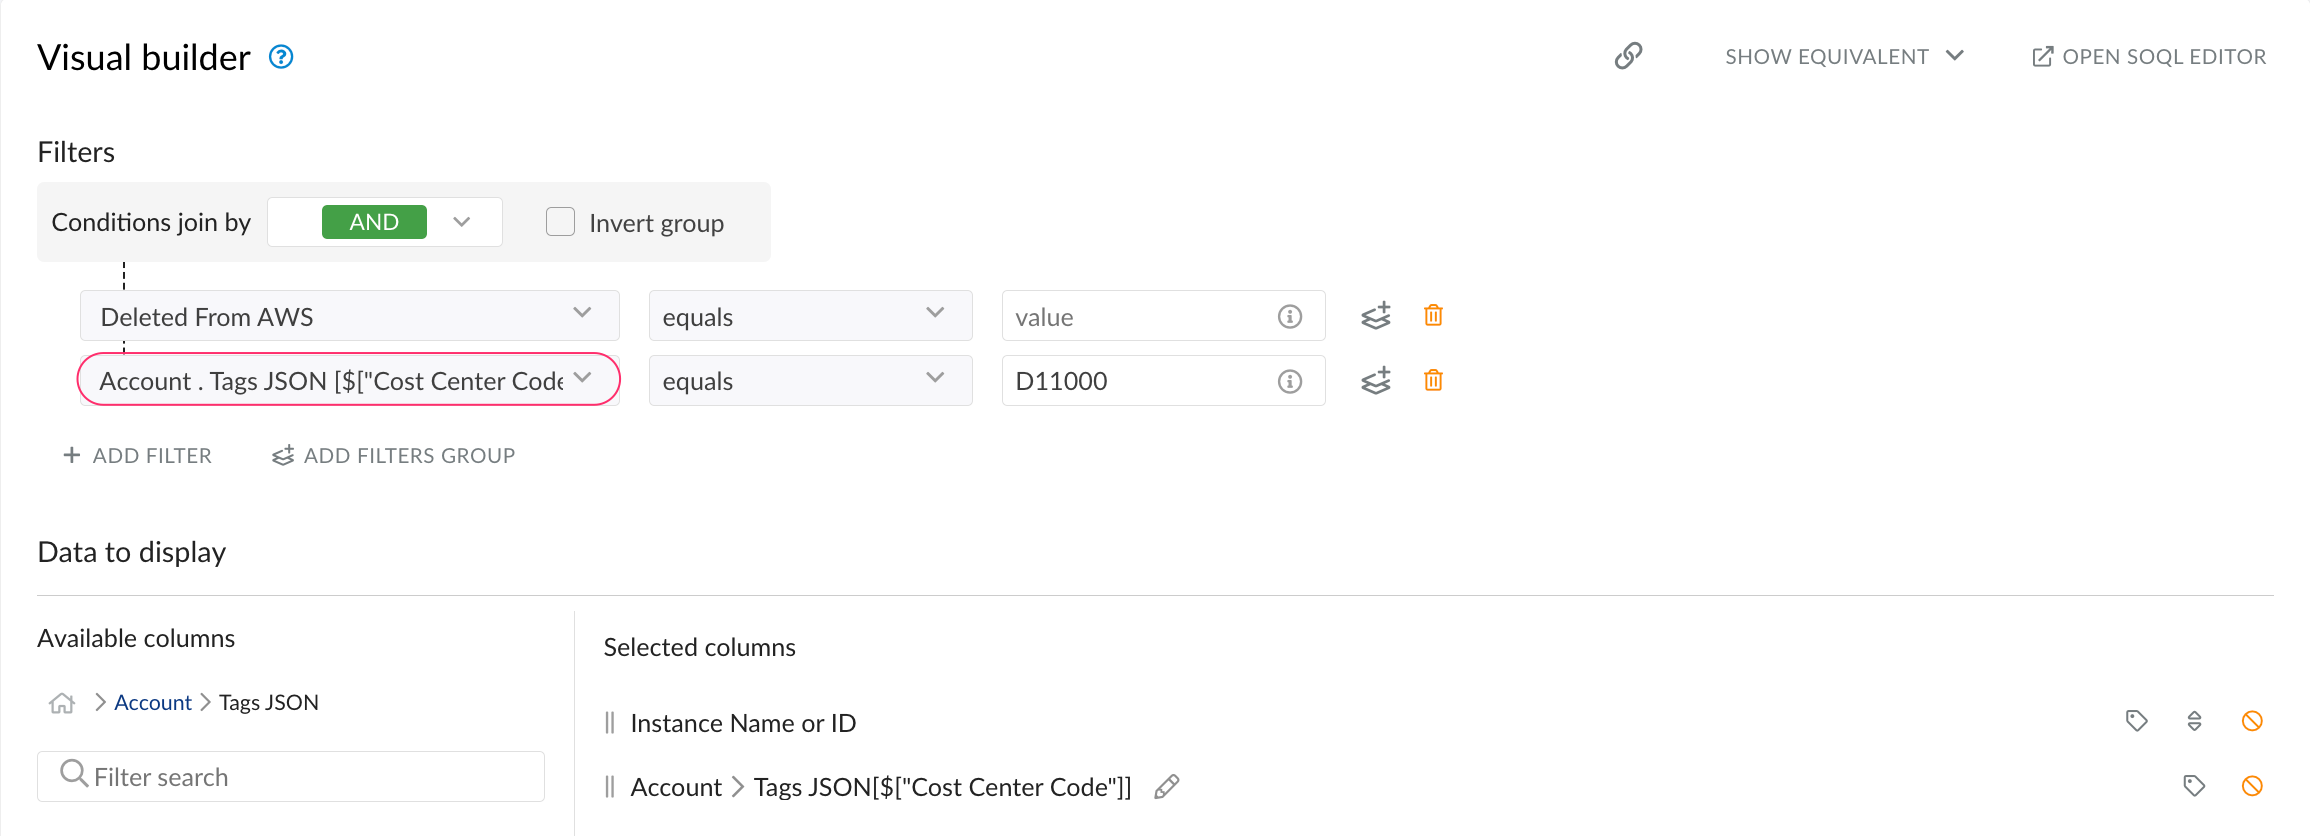
Example: In this example, the goal is to view all instances associated with accounts that tagged with
Cost Center Codetag and have the valueD11000for this tag. To configure the filter, select the parent object 'AWS Account' from the list of fields, drill down to the related field 'Tags JSON', and set value as$["Cost Center Code"]. The key name is placed in in square brackets because it contains spaces. Set the operator to equals and the value to D11000. Add the column Tags JSON.$["Cost Center Code"] to verify the results in the Preview.
Logical operators
equals | Use for an exact match |
not equal | Use for an exact match with a certain value excluded |
greater than | Use to return results that exceed the specified value |
greater or equal | Use to return results that match or exceed the specified value |
less than | Use to return results less than the specified value |
less or equal | Use to return results that match or are less than the specified value |
contains | Use for fields that contain the specified search string |
not contains | Use to exclude records that do not contain the specified value |
like | Use to find records that match the exact value specified, or use |
not like | Use to find records that do not match the specified value, or use |
starts with | Use to return results that begin with the specified value |
Grouping filters
Click +ADD FILTERS GROUP to create a group of filters:

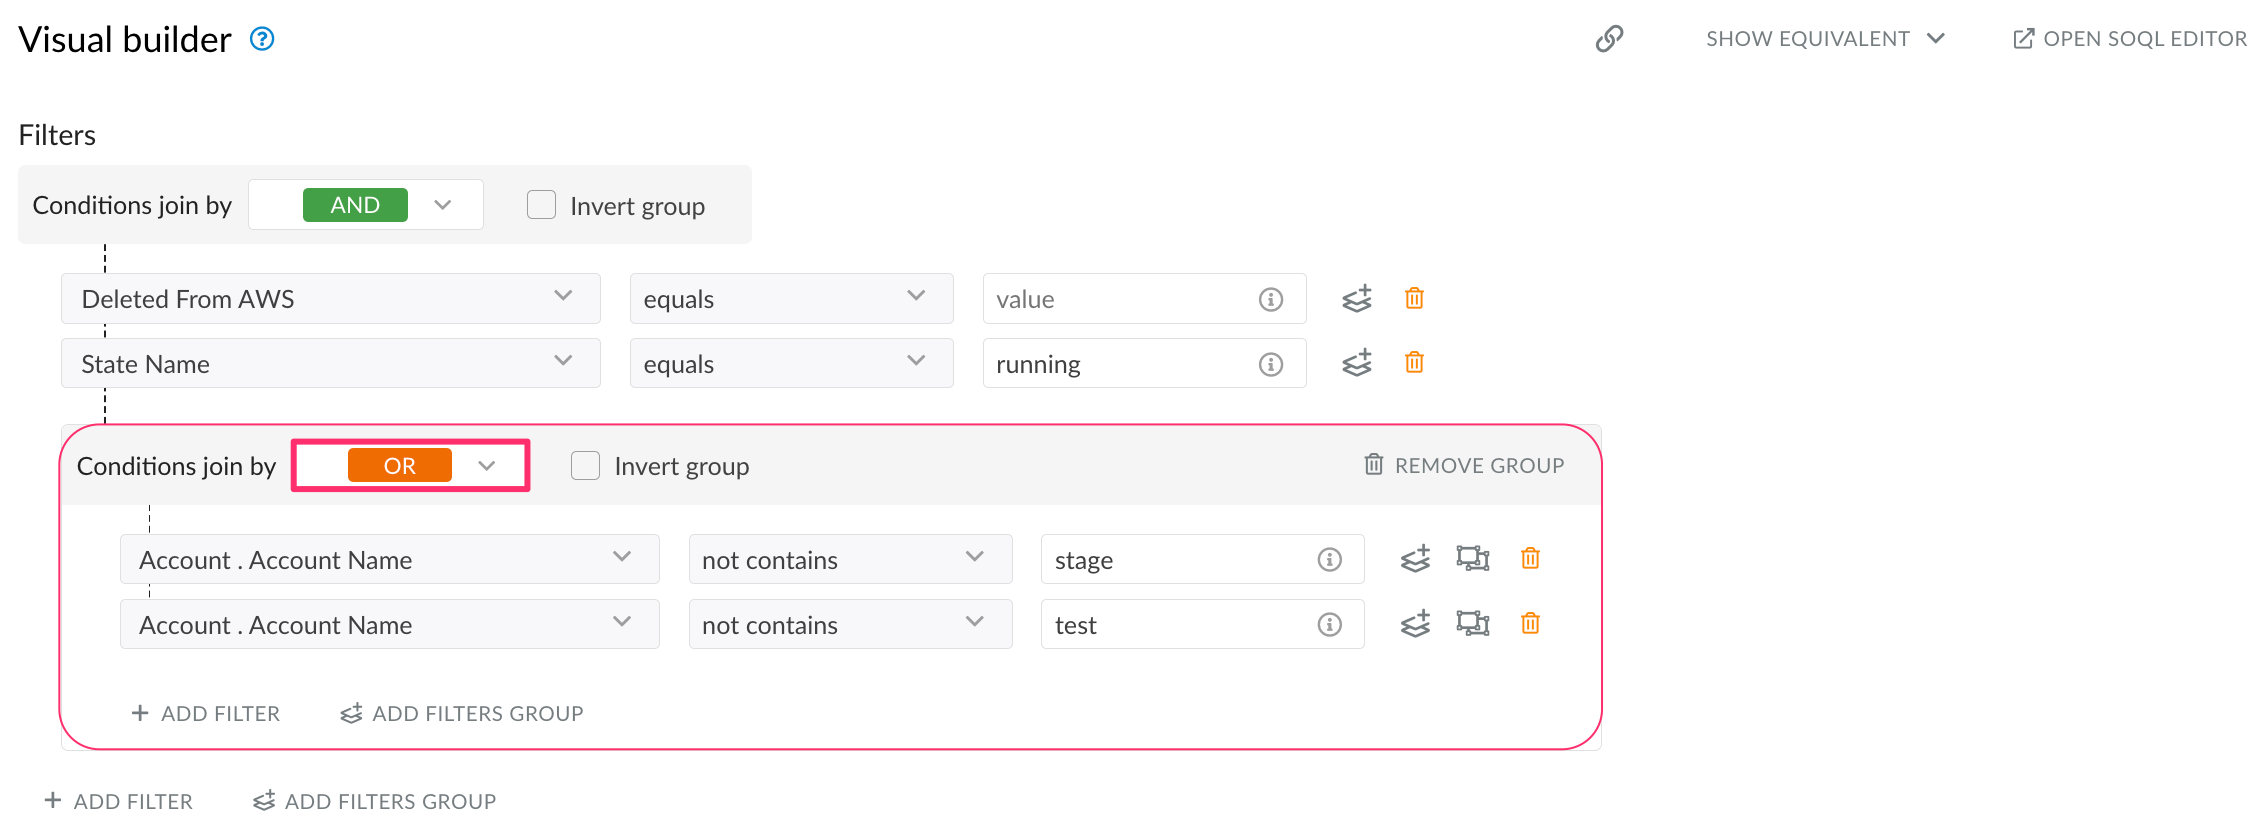
Select operators AND (=all conditions are true) or OR (=any of conditions are true):
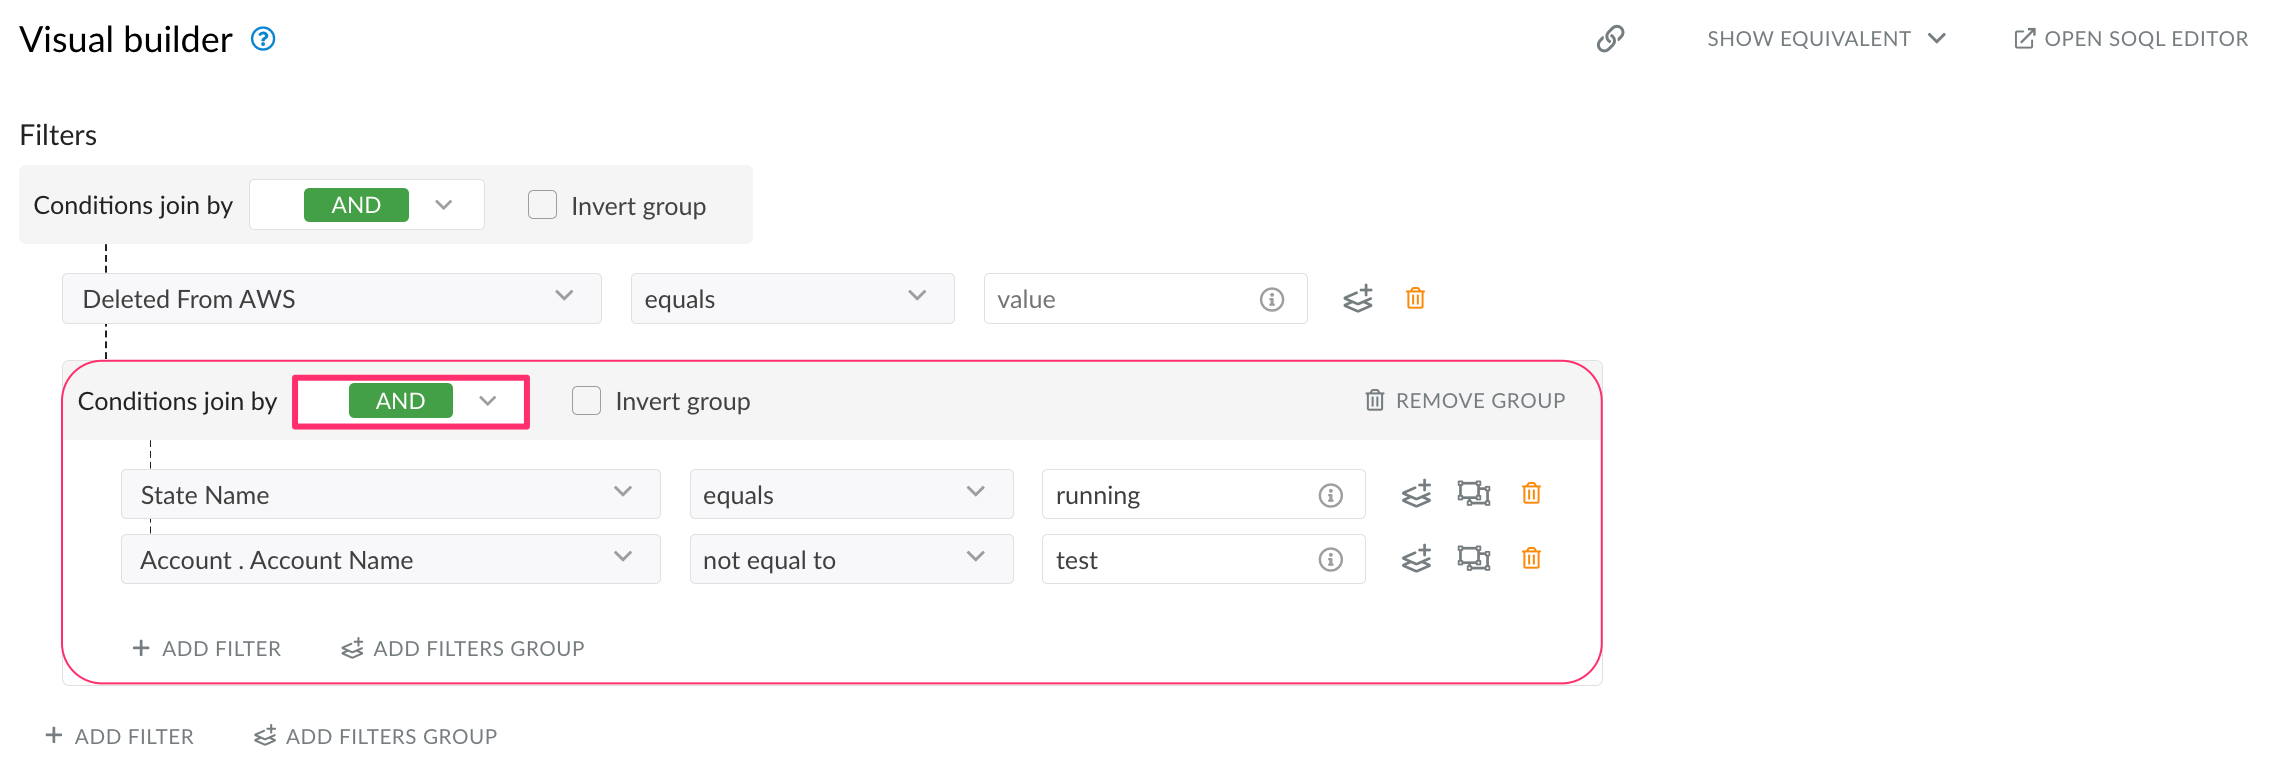
Click Create group with this condition to create a new group of filters based on a selected filter:
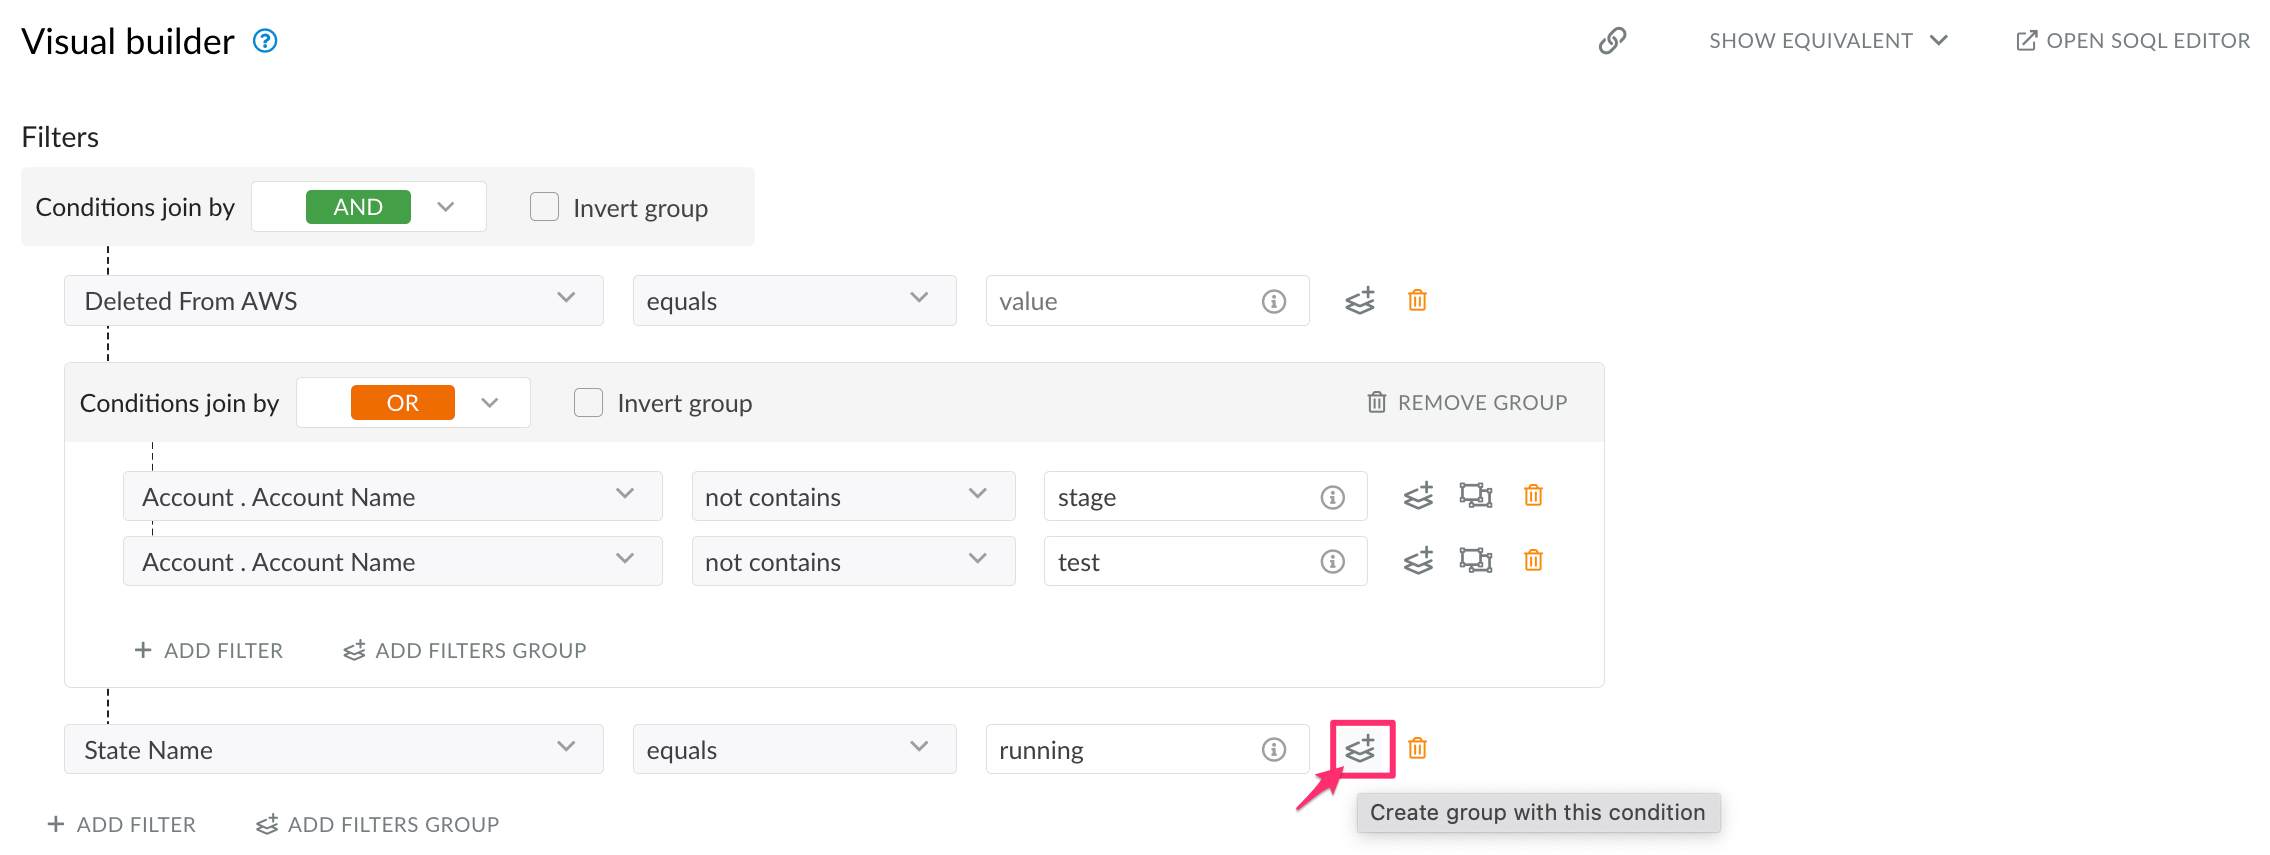
Click Extract from group to exclude a filter from the group of filters under question:
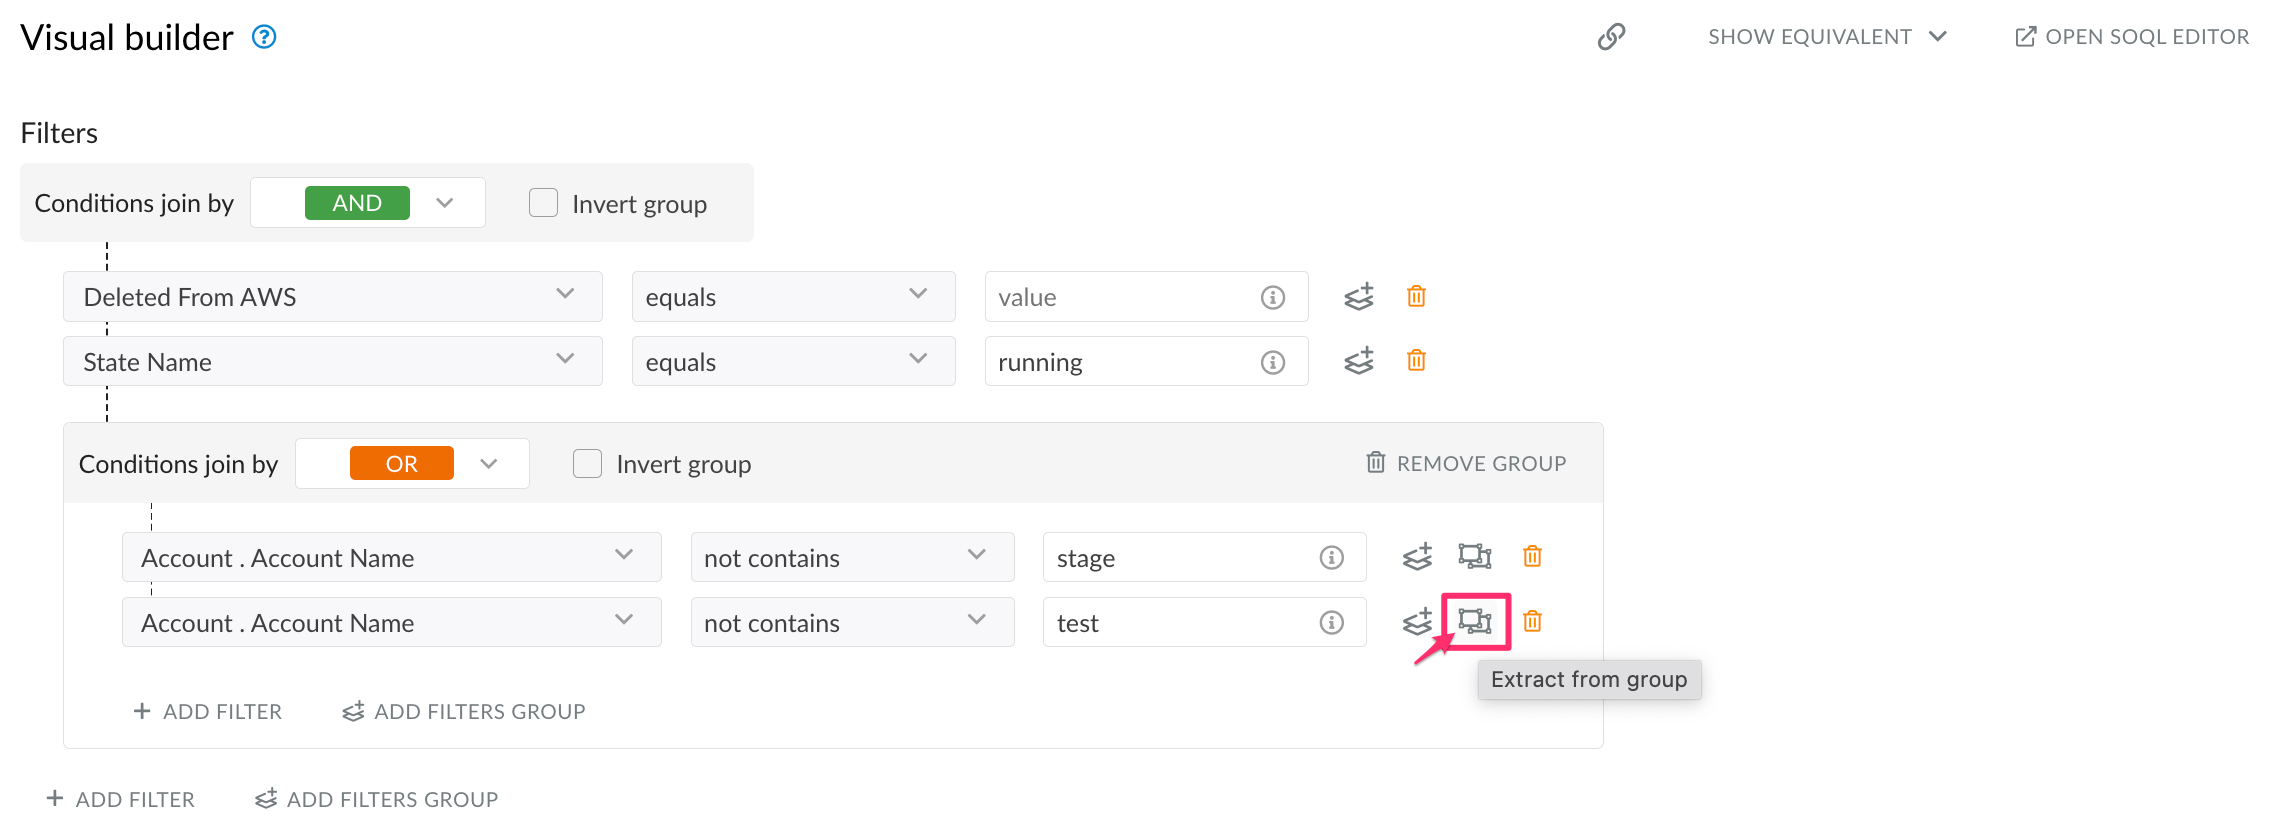
Using groups of filters and condition operators AND/OR, you can set up complex conditions, for example:
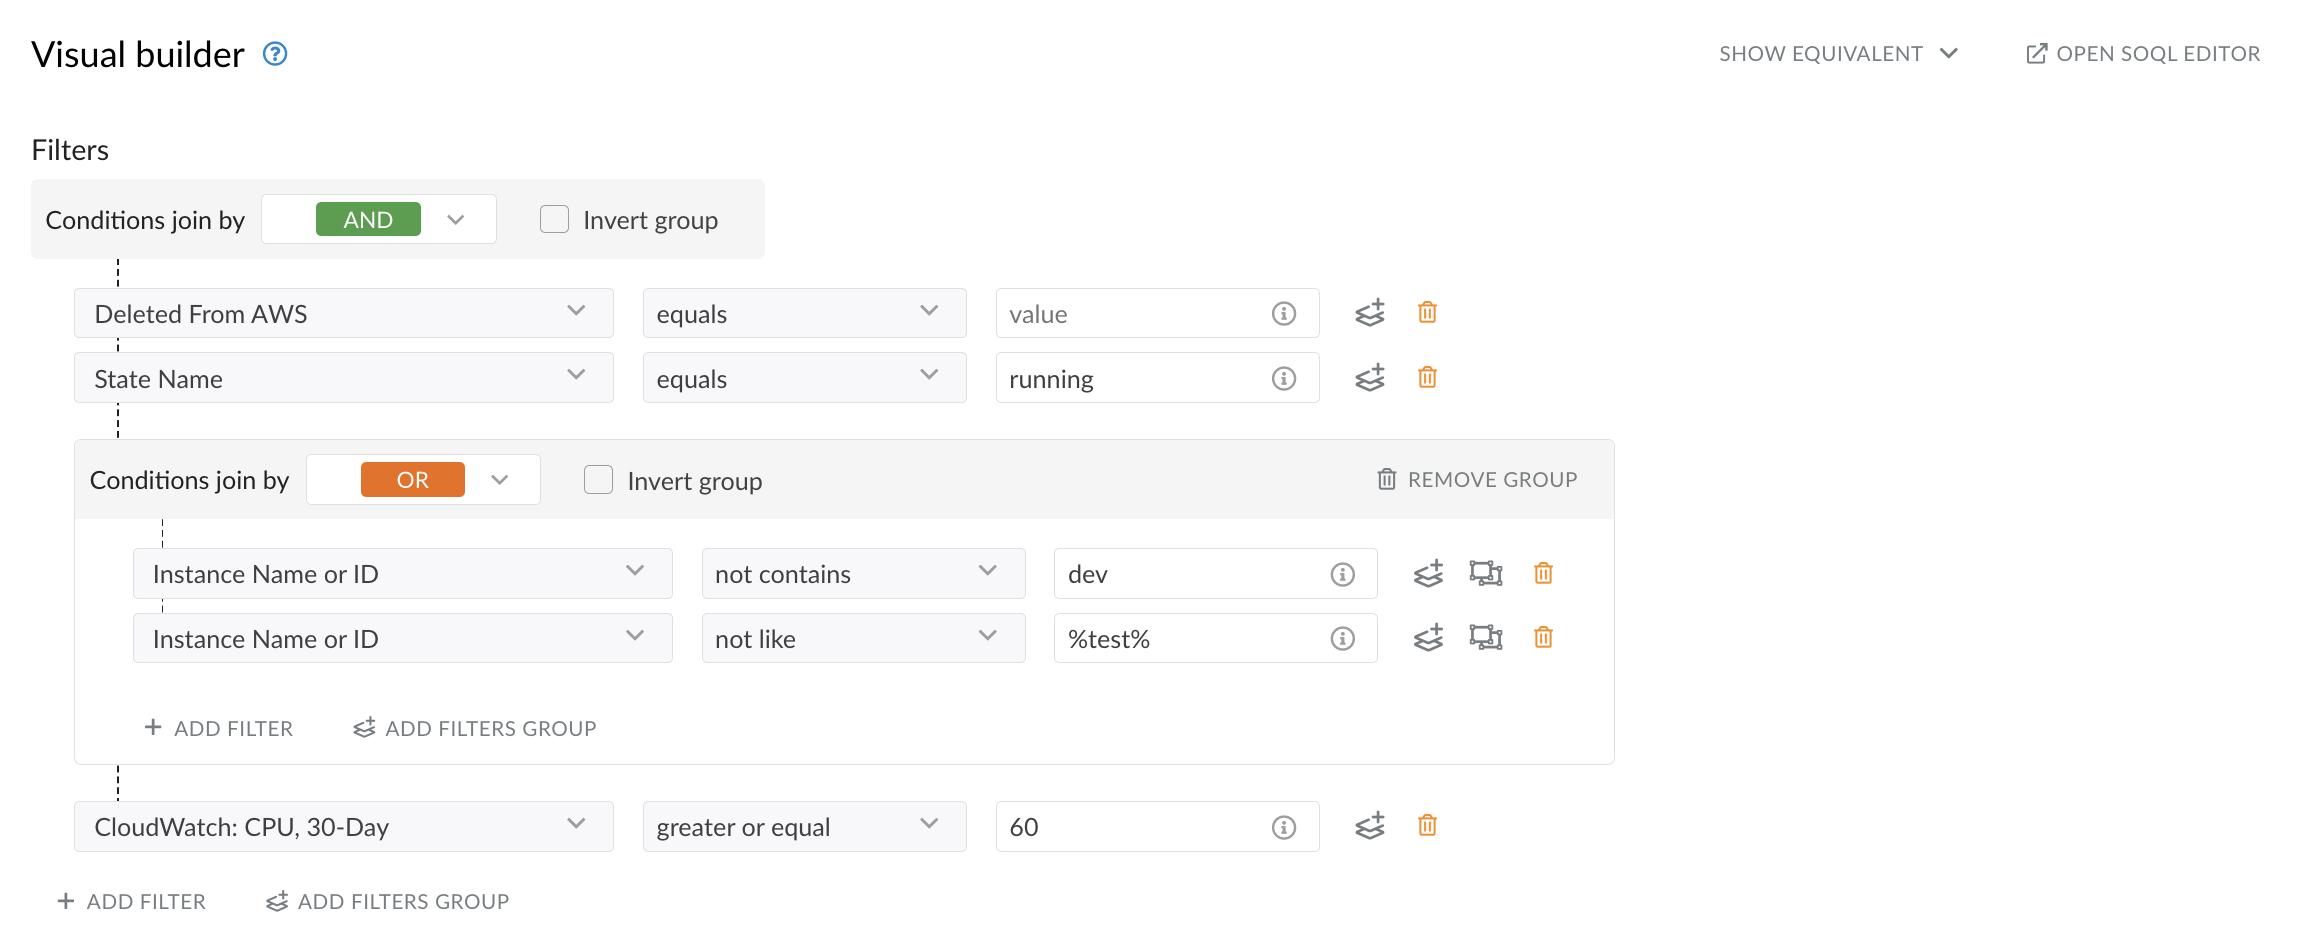
Example: In this example, the goal is to display all running AWS EC2 instances whose names do not contain the exact value
devor do not include the valuetestin any form. The instances must also have a 30-day CPU usage greater than or equal to60. To configure the filter:
1. Add a filter for the 'State Name' field with the operator equals and the value running.
2. Create a filter group with the OR condition. Within this group:
Add a filter for the 'Instance Name or ID' field with the operator not contains and the value dev.
Add another filter for the 'Instance Name or ID' field with the operator not like and the value %test%.
3. Add a filter for the 'CloudWatch CPU, 30-Day' field with the operator greater or equal and the value 60.
Inverting filters
Check the box Invert group to input a negation to the meaning of all filters in the group:
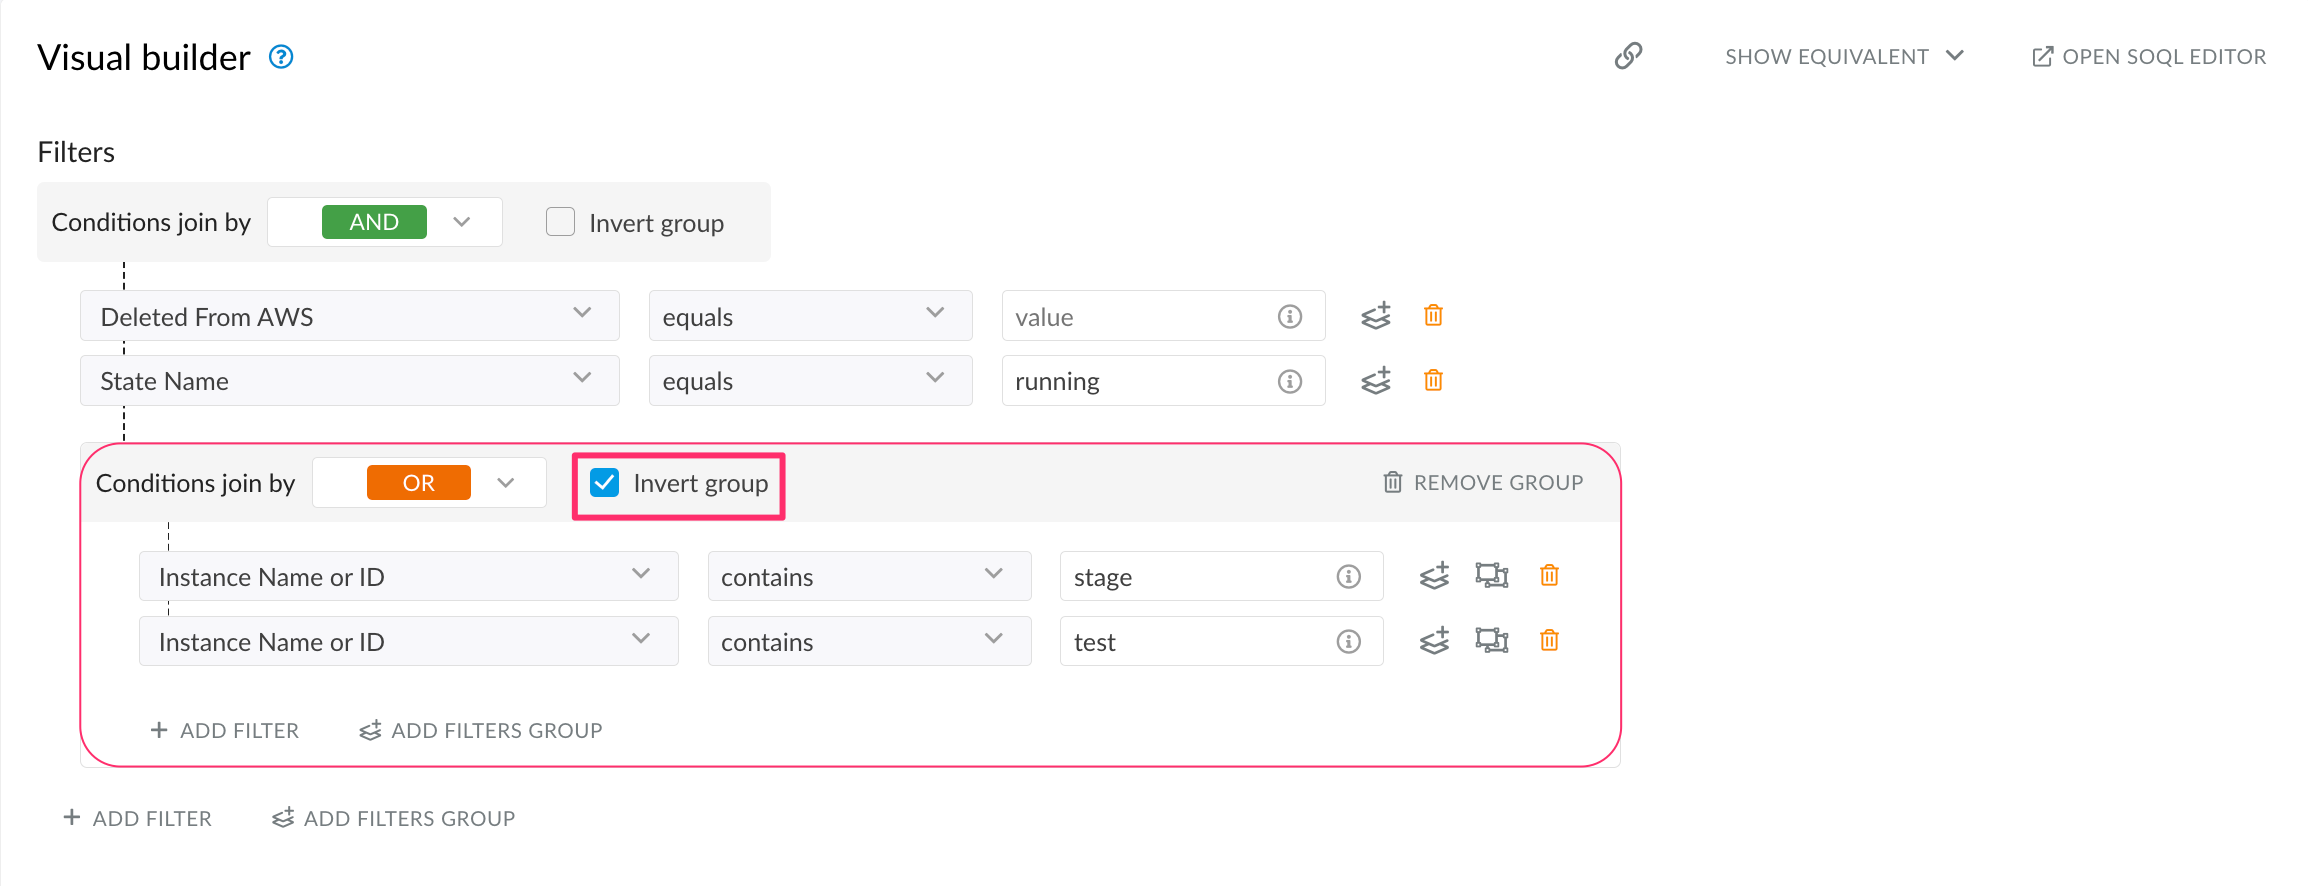
Example: In this example, the goal is to view all running AWS instances, excluding those associated with accounts whose names contain test or dev. Instead of applying a negative operator to each individual filter, create a filters group using the contains operator with relevant values. Check the box 'Invert group' to apply a NOT condition to the entire group.
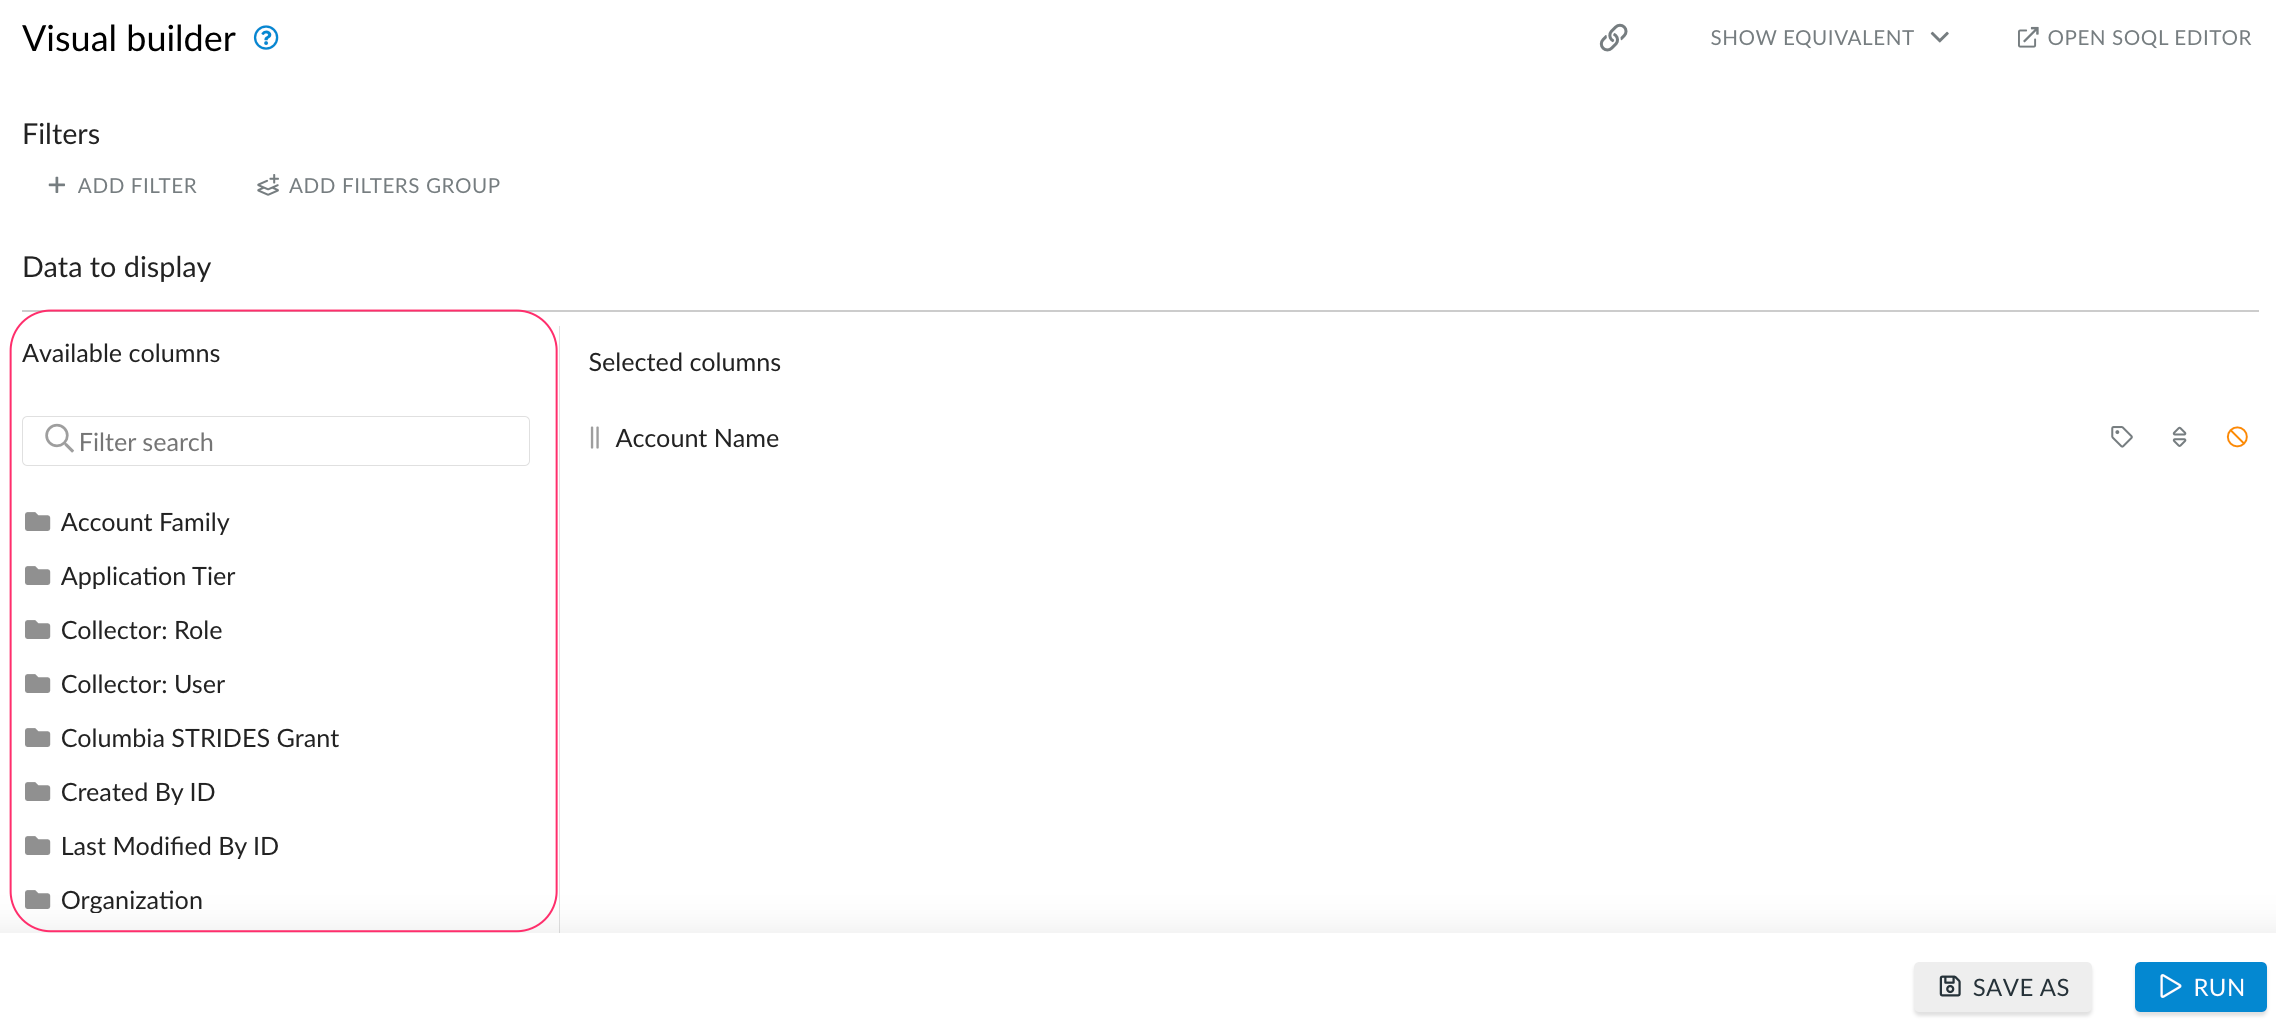
Data to display
This section allows users to select columns that will be displayed in a list view.
Columns
Select columns from the list of available columns.
To change the column name in resulting view, click Add label:


Example: In this example, a label name of the 'Instance Name or ID' field is changed to AWS EC2 Instance ID.
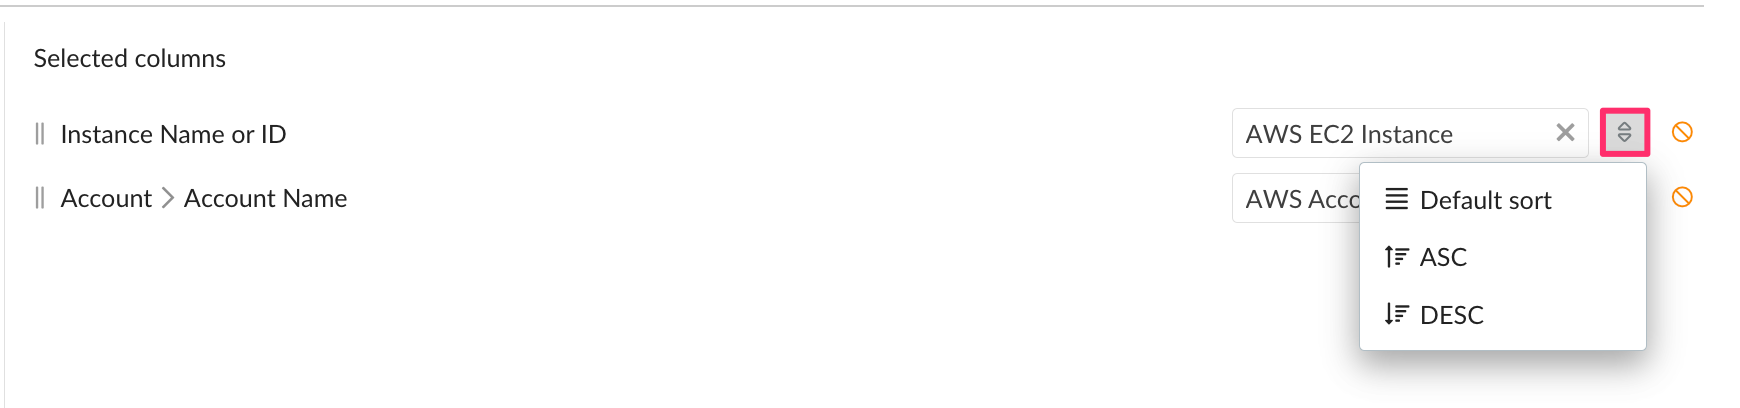
To set up a sorting order for assets in a column, click Add order, and select ASC for ascending or DESC for descending.
Sorting order for columns
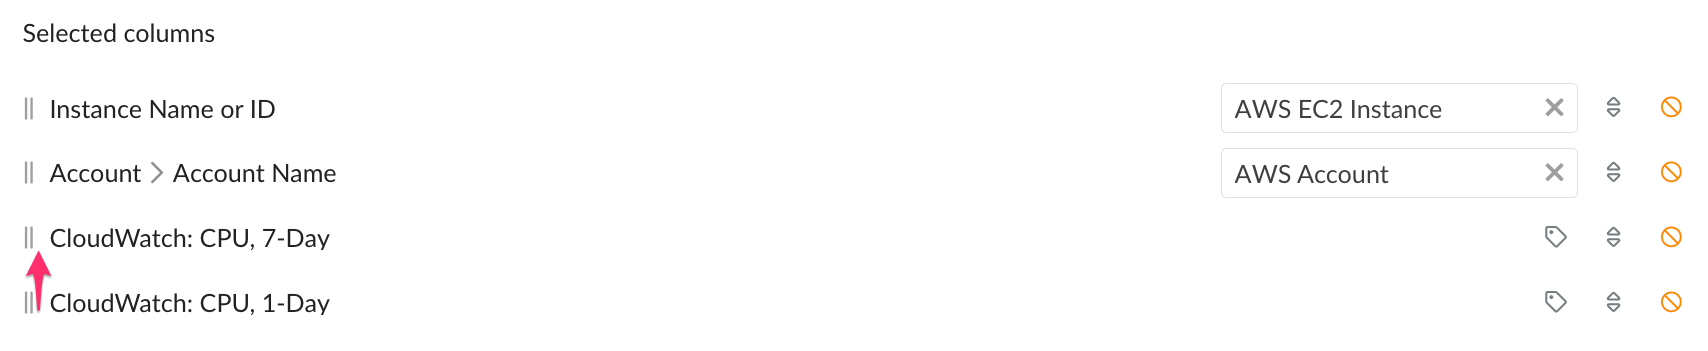
Hover over two strips to drag a column up or down to manage the order of columns in the list of results:
Preview
This section provides a preliminary list of results based on the defined filters and columns. Click Run to display the results.
Click Save to create a custom CMDB list view and manage access permissions.
Other options
The following options are also available - check the buttons:
Copy link to this query - to save a web link to the view with selected filter criteria & columns
Show Equivalent CURL/SOQL - to export the view with selected filter criteria & columns in
.csvformat.Open SOQL Editor - to open the view with selected filter criteria & columns in built-in SOQL Editor