
Using IAM Role (Recommended)
Use this guide to add an AWS account from the Cloudaware Admin panel using an AWS IAM role.
Prerequisites
Before you begin, ensure that:
The AWS account allows CloudFormation stack creation.
The AWS user performing the setup has administrator or IAM admin permissions.
Setup
Start in Cloudaware
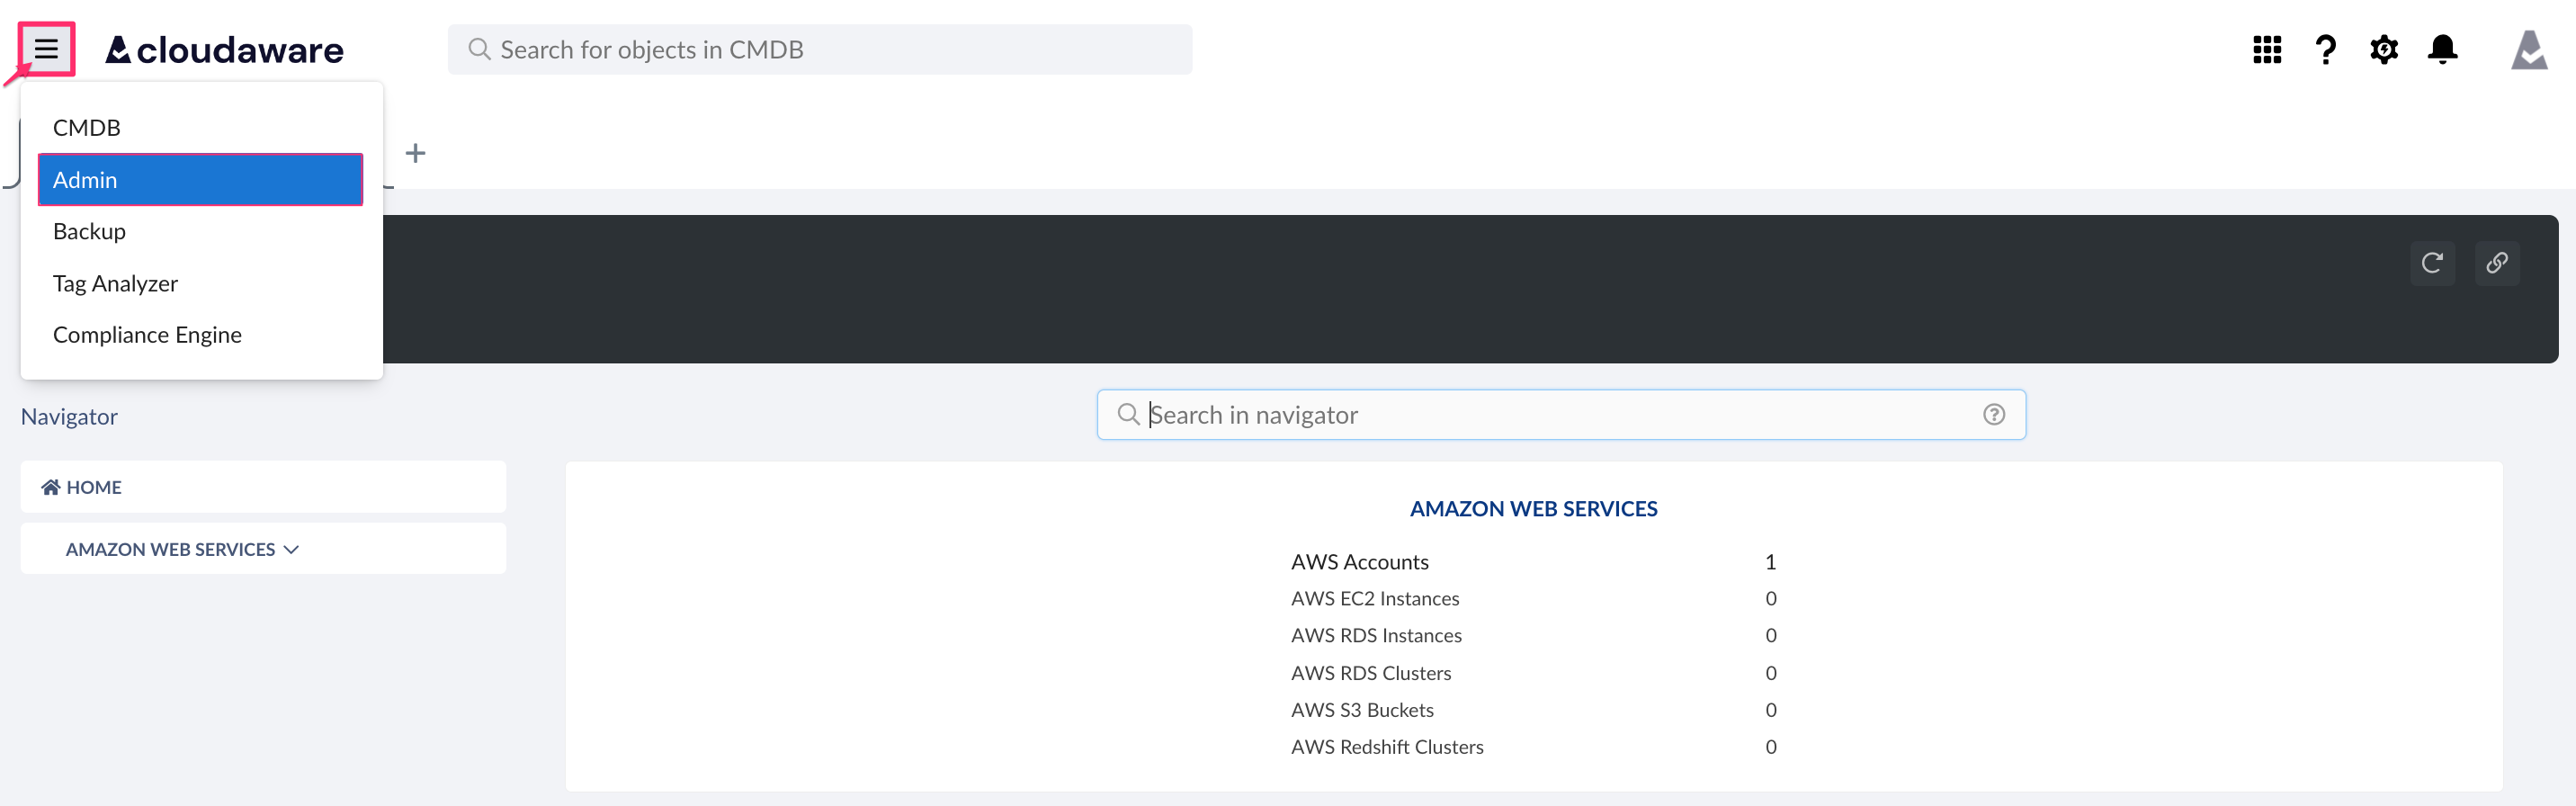
Log in to Cloudaware → Admin.
Find Amazon Web Services. Click + ADD and proceed to the setup form in 3.
If an AWS account has been added earlier, click CONFIGURED and select the tab ‘Accounts' → +ADD AWS ACCOUNT.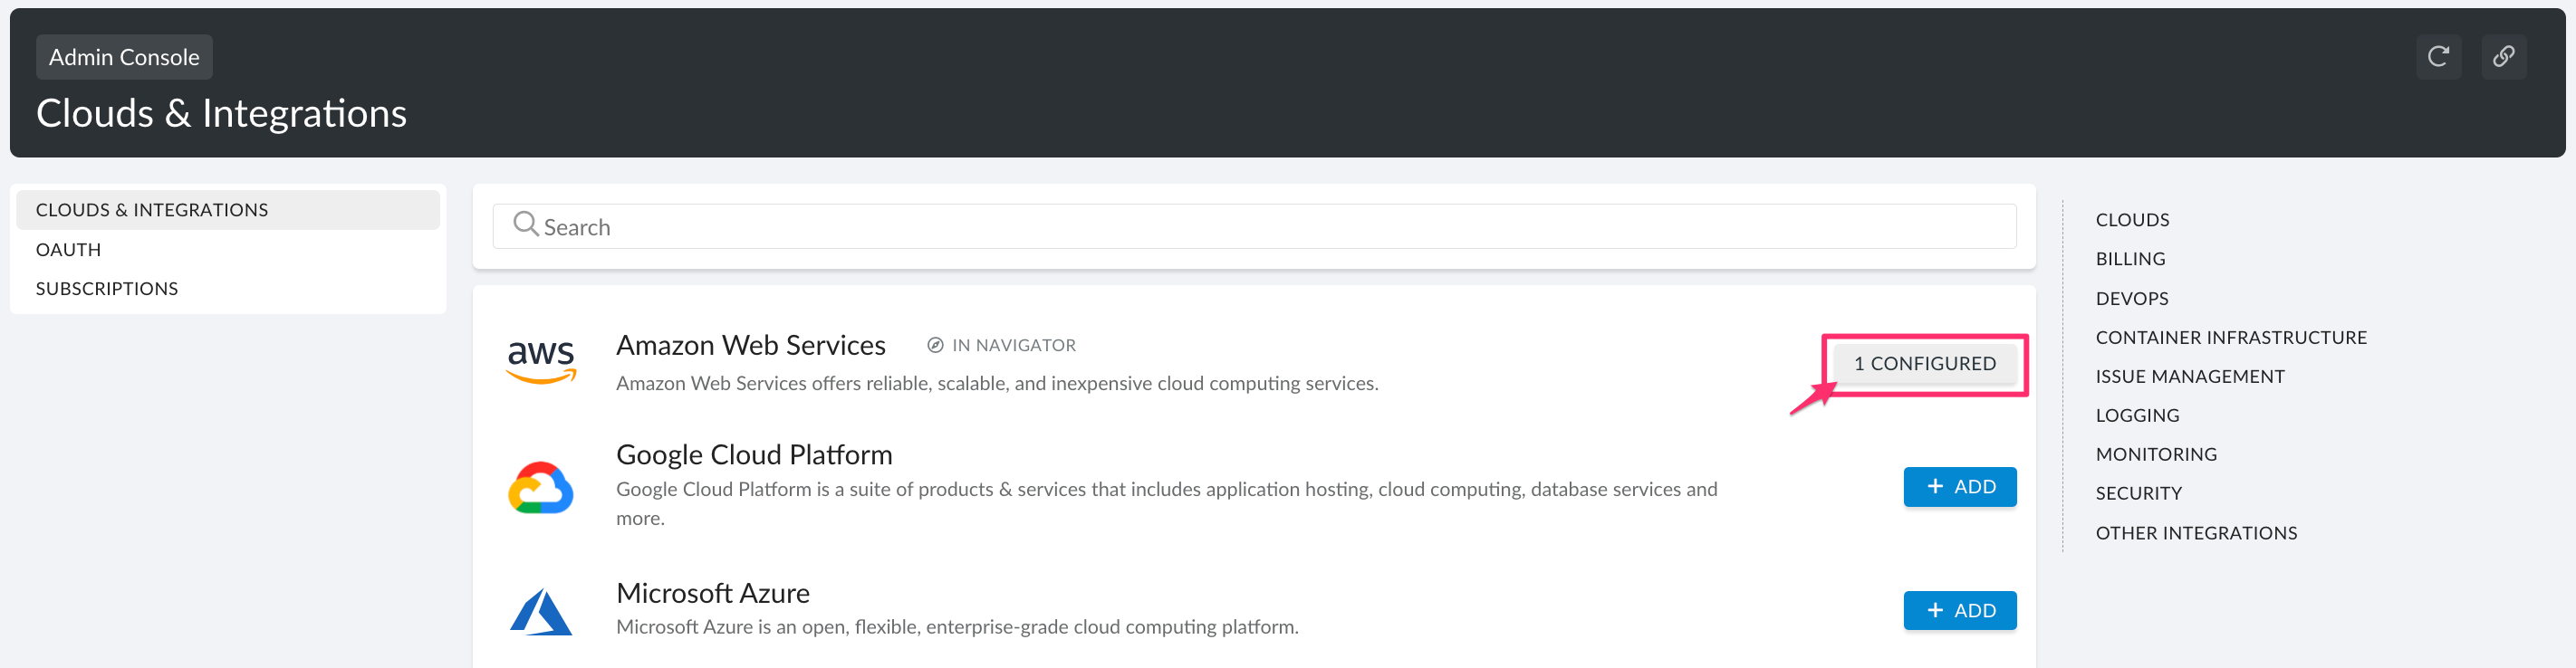

Fill out the form:
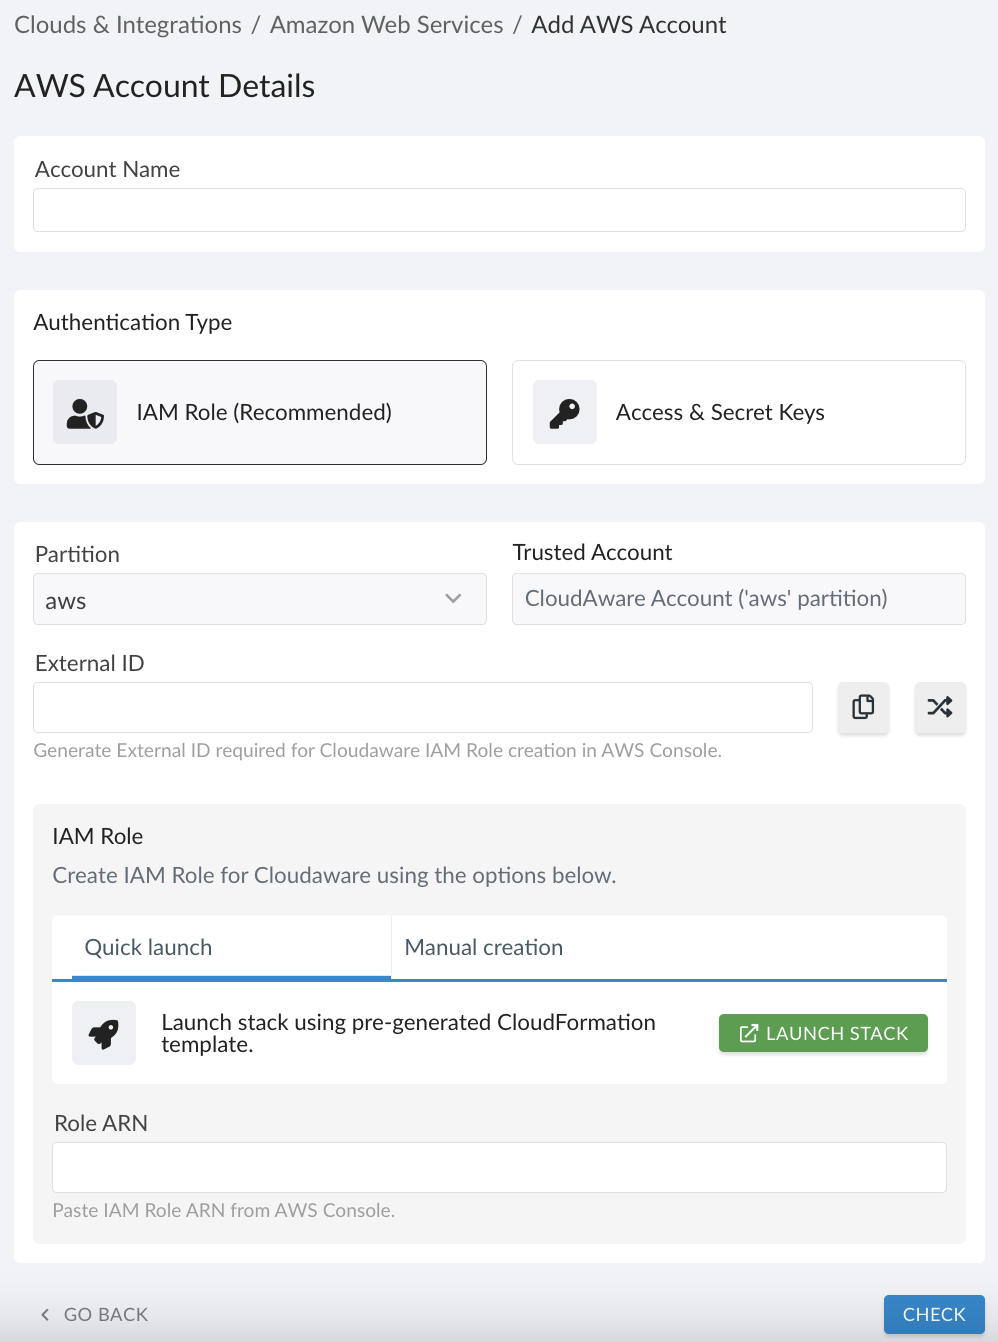
Account Name: Enter AWS account name
Authentication Type: Select IAM Role (Recommended)
Partition:aws(public AWS cloud) oraws-us-gov(public AWS cloud); for AWS China, use Access & Secret Keys
Generate External ID: copy and save the value as it is required for Cloudaware IAM Role creation in the AWS consoleIAM Role: Select the option for CloudFormation stack creation
Quick launch
This option allows you to launch an AWS CloudFormation stack using a pre-generated Cloudaware CloudFormation template.
Click LAUNCH STACK to be redirected to the AWS Console.
Manual creation
This option allows the manual creation of AWS CloudFormation stack.
Click TEMPLATE to download the Cloudaware CloudFormation template:
- Download populated with account data: Downloads a template pre-filled with AWS account values, such as S3 bucket names.
- Download with placeholders: Downloads a template that contains placeholders to be populated manually.
The template JSON file is also available here.
Deploy the stack in AWS
Log in to the AWS Console to continue the configuration.
Quick launch
On the 'Create stack' page, review the template details. The Amazon S3 URL is pre-selected as the template source.
Click Next to proceed to stack parameters.
Specify the stack parameters.
Stack name: Enter a descriptive stack name.
CloudAware Role ARN: Enter
CloudAware.aws.CloudAware Role Name: Enter a descriptive role name, for example,
CloudawareRole.External ID: Paste the External ID generated in Cloudaware.
Optional. Configure tags, stack failure options, and additional settings,
Acknowledge IAM resource creation and click Next.
Review the stack settings, then click Submit to create the stack.
After the stack deployment completes, open the stack Outputs tab.
Copy the IAM Role ARN.
Manual creation
Use this option if you downloaded the CloudFormation template and want to create the stack manually.
In AWS Console, navigate to CloudFormation.
Click Create stack → With new resources (standard).
In Specify template, choose Upload a template file and upload CloudFormation template downloaded from Cloudaware.
Click Next to proceed to stack parameters.
Specify the stack parameters.
Stack name: Enter a descriptive stack name.
CloudAware Role ARN: Enter
CloudAware.aws.CloudAware Role Name: Enter a descriptive role name, for example,
CloudawareRole.External ID: Paste the External ID generated in Cloudaware.
Optional. Configure tags, stack failure options, and additional settings.
Acknowledge IAM resource creation and click Next.
Review the stack settings, then click Submit to create the stack.
After the stack deployment completes, open the stack Outputs tab.
Copy the IAM Role ARN.
Save the IAM Role ARN in Cloudaware
Return to the setup form in Cloudaware:
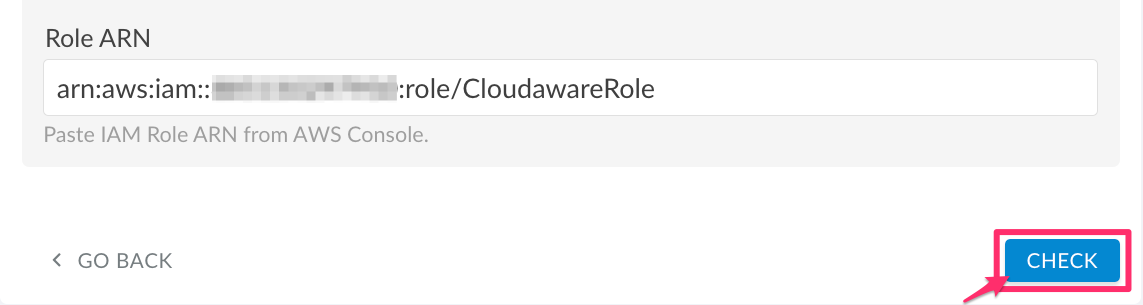
Paste the IAM Role ARN into the form.
Click CHECK to validate the credentials.
After validation succeeds, click SAVE.
Allow some time for Cloudaware to collect AWS data.
Verify AWS data collection
Cloudaware collects AWS inventory based on the permissions granted to the IAM role. Data appears gradually as the collection completes.
Check AWS account status
In Cloudaware, select Admin → Amazon Web Services → Configured.
Locate the account in the list.
Check the status:
A green light indicates successful configuration.
If the light is red, re-check the IAM role and policies. Contact support@cloudaware.com if the issue persists.
Check discovered AWS resources in CMDB
In Cloudaware, open CMDB Navigator → Home. In the left menu, select AMAZON WEB SERVICES to browse discovered AWS resources.