
Add AWS accounts from the Admin panel with access and secret access keys. Ensure you have the necessary permissions in AWS.
Prerequisites
Before you begin, ensure that:
-
The AWS account is accessible in the AWS Console.
-
The AWS user performing the setup can manage IAM users and permissions.
-
If the AWS account is managed through AWS Organizations, service control policies (SCPs) do not block the read actions required by Cloudaware.
Setup
Start in Cloudaware
-
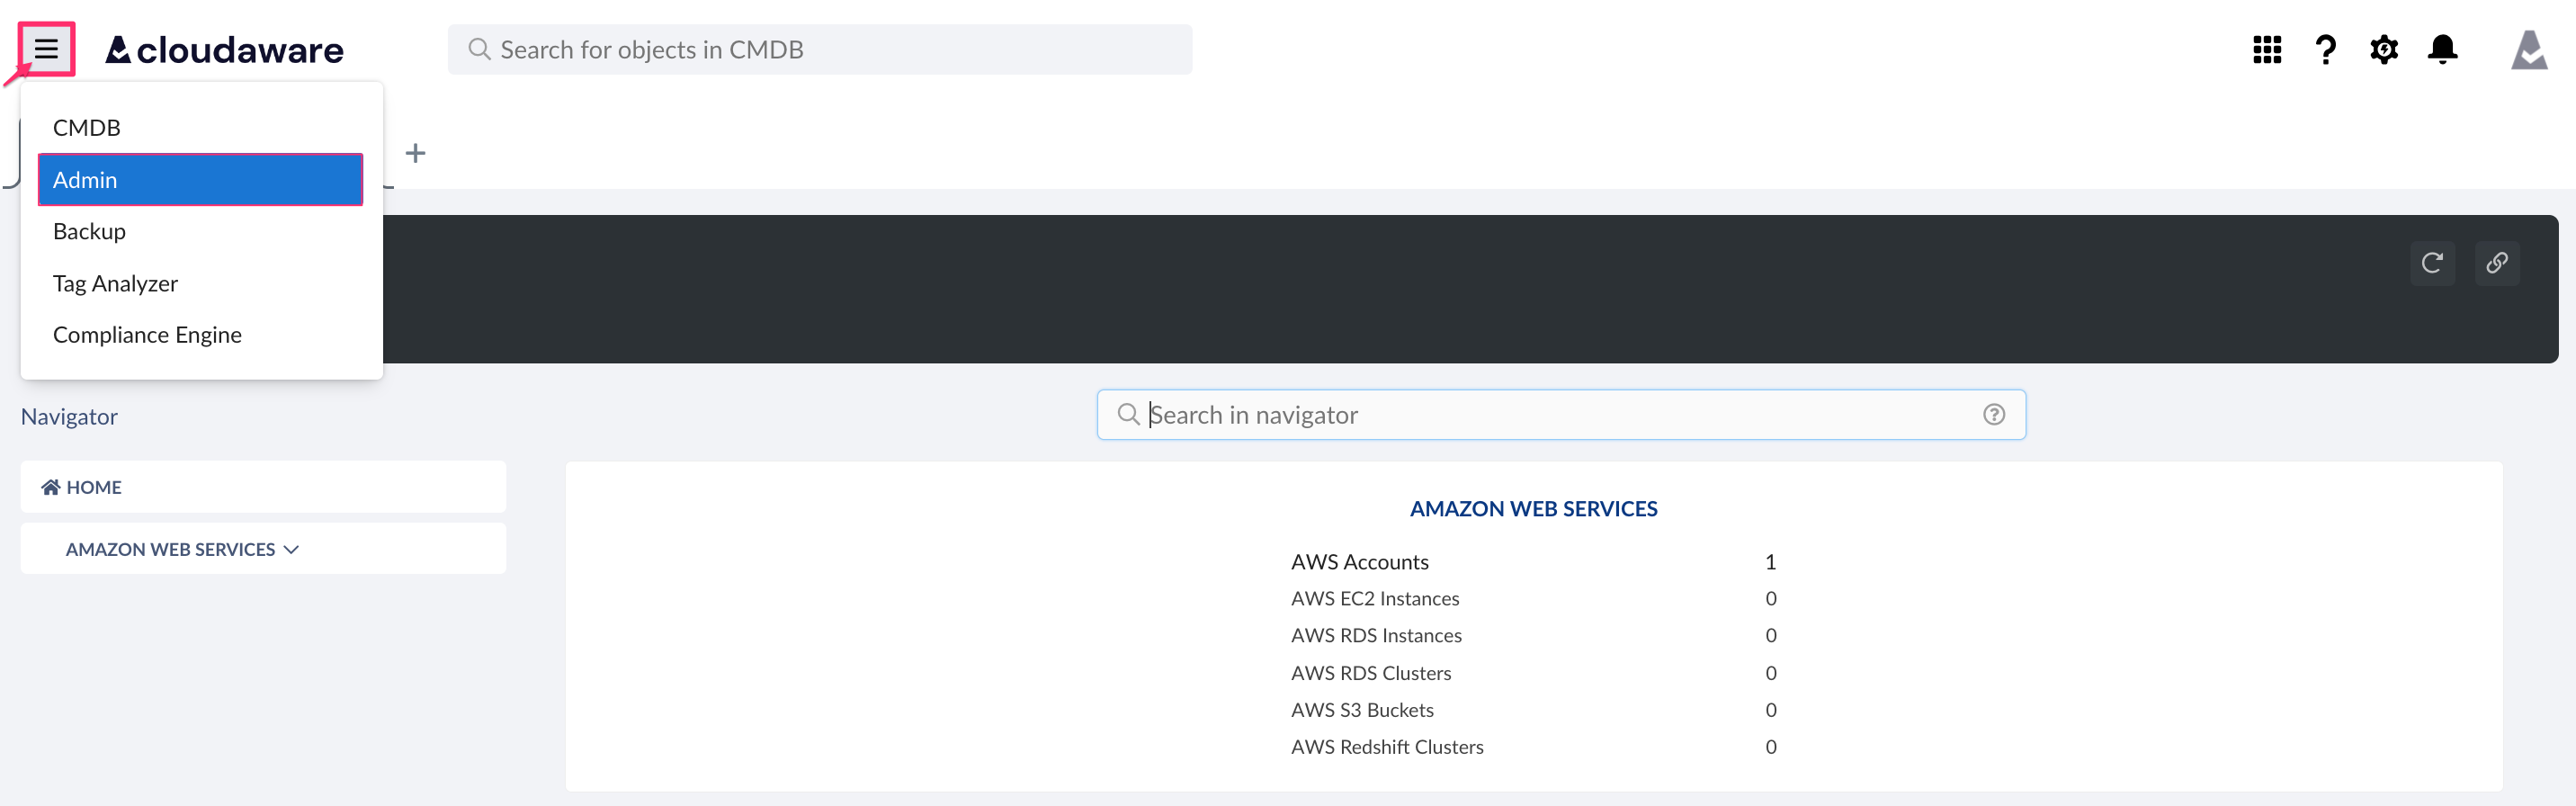
Log in to Cloudaware → Admin.
-
Find Amazon Web Services. Click + ADD and proceed to the setup form in 3.
If an AWS account has been added earlier, click CONFIGURED and select the tab ‘Accounts' → +ADD AWS ACCOUNT.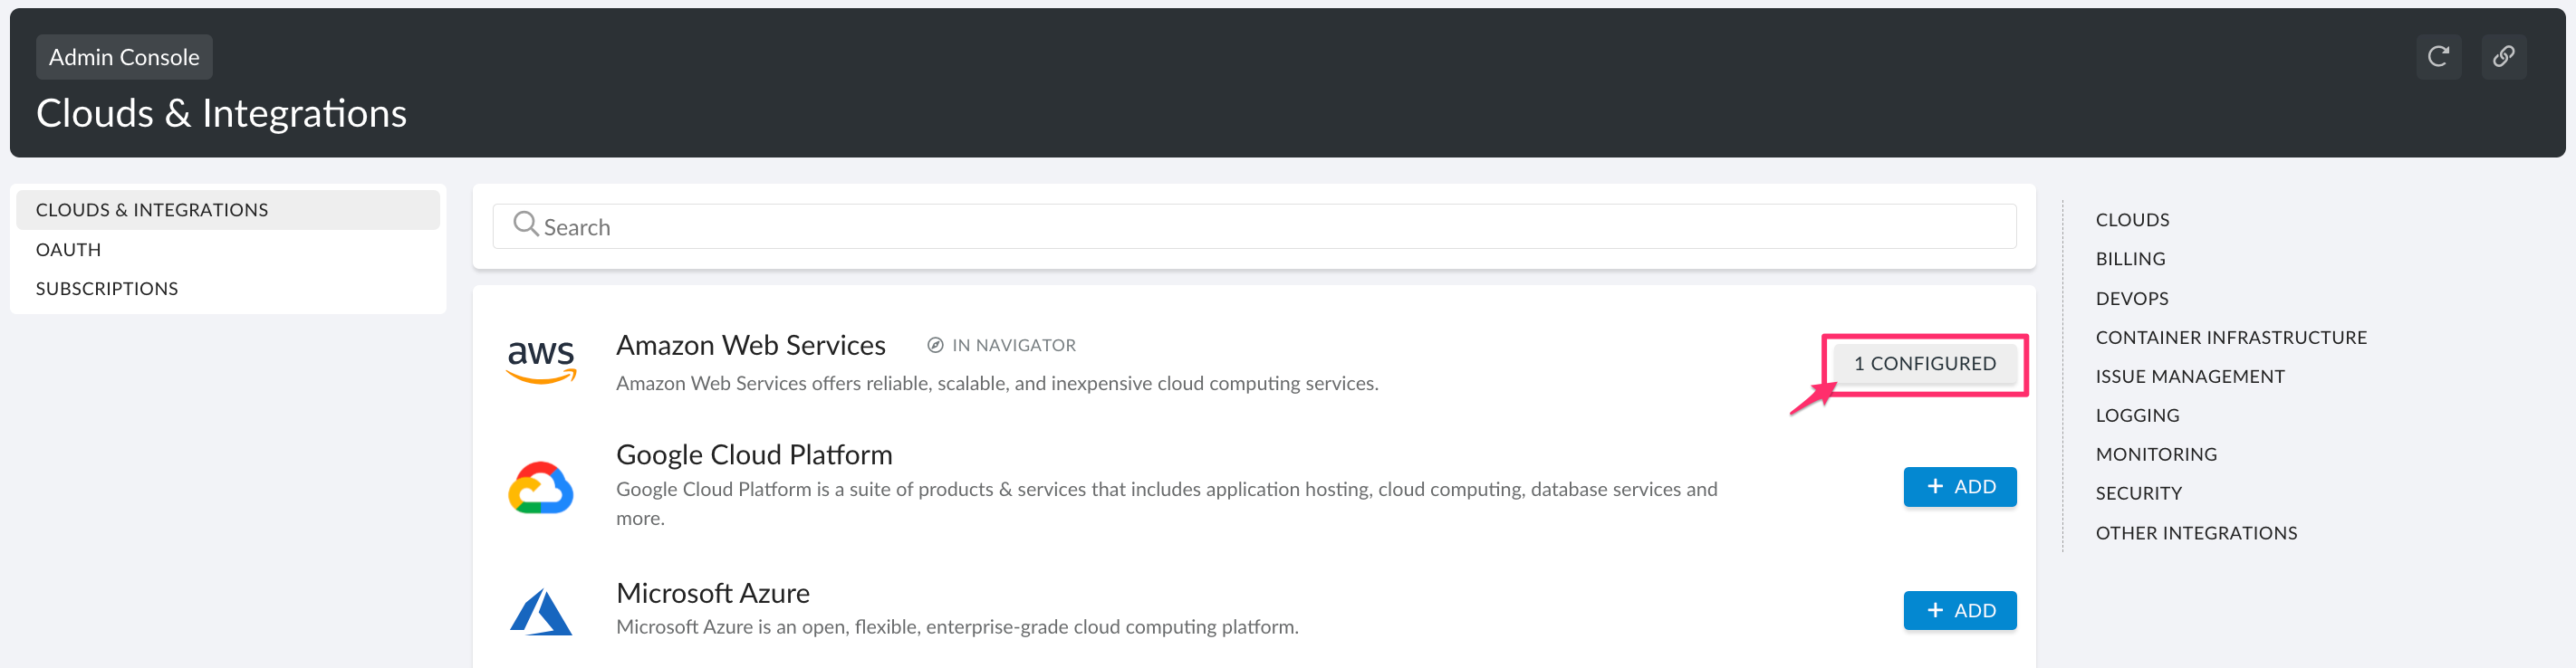

-
Fill out the form:
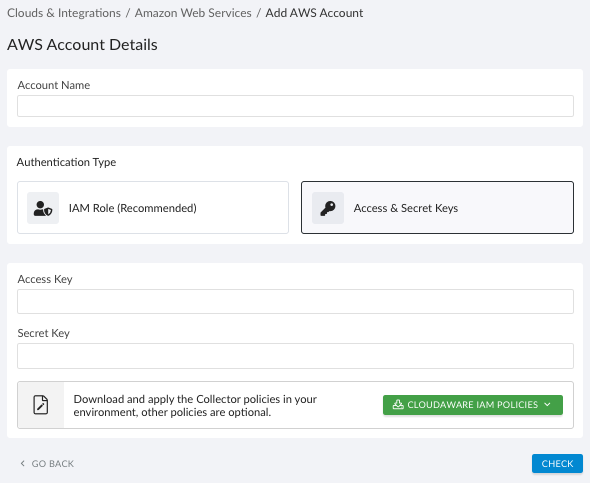
Account Name: Enter the AWS account name.
Authentication Type: Select Access & Secret Keys.
Click CLOUDAWARE IAM POLICIES to download and save Collector* policies (Part #1-5).
*The rest of the IAM Policies are optional:
-
CloudTrail (all accounts)
-
Billing (all accounts)
-
CloudAware Monitoring
-
Backups
-
Tagging (Part #1)
-
Instance Scheduler
-
Conflux
Review the Cloudaware Collector (IAM) Policies.
Configure IAM user policies and keys in AWS
Log in to the AWS Console to continue the configuration.
Create custom policies
-
Go to IAM → Policies.
-
Click Create Policy.
-
Switch to the JSON tab.
-
Paste the collector policy Part #1 JSON from the downloaded file.
-
Save the policy.
-
Repeat these steps for each collector policy file, creating a total of 5 policies.
Create an IAM user
-
Go to IAM → IAM Users.
-
Create a new user, e.g., Cloudaware.
-
In Set Permissions, select Attach policies directly.
-
Filter policies by Customer managed to locate the newly added collector policies.
-
Attach the collector policies to the user, then click Next.
-
Review the user settings. Click Create User.
To learn how to create an IAM user from scratch, read more in AWS Documentation.
Generate access keys
-
Open the Security credentials tab for thre IAM user.
-
Create an Access key (select Third-party service).
-
Copy and save the Secret access key. Note: The Secret access key cannot be retrieved after this step.
Save access keys in Cloudaware
Go back to Cloudaware.
-
Paste the access key and the secret access key into the form.
-
Click CHECK to check the credentials.
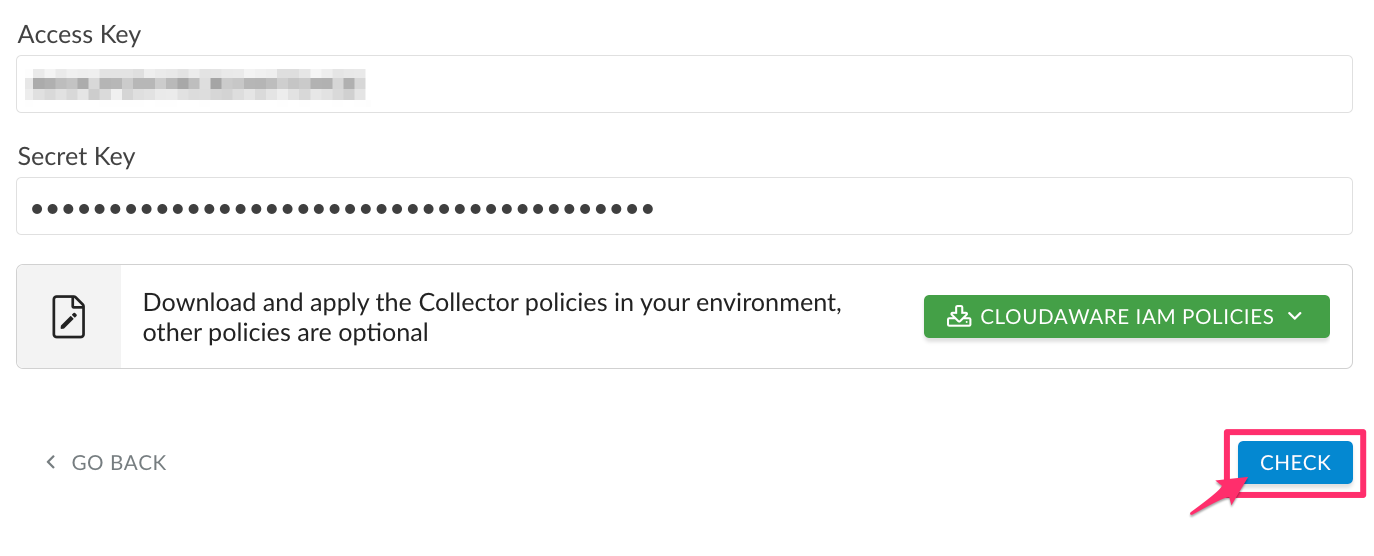
Once validation is passed, click SAVE.
Allow some time for Cloudaware to collect AWS data.
Verify AWS data collection
Cloudaware collects AWS inventory based on the permissions granted to the IAM user. Data appears gradually as the collection completes.
Check AWS account status
-
In Cloudaware, select Admin → Amazon Web Services → Configured.
-
Locate the account in the list.
-
Check the status:
-
A green light indicates successful configuration.
-
If the light is red, re-check the IAM role and policies. Contact support@cloudaware.com if the issue persists.
-
Check discovered AWS resources in CMDB
In Cloudaware, open CMDB Navigator → Home. In the left menu, select AMAZON WEB SERVICES to browse discovered AWS resources.