
This guide describes the integration types supported by Cloudaware and provides brief configuration steps.
Direct connection
The external IP address is in place and is publicly accessible.
-
Log in to Cloudaware → Admin.
-
Find the integration. Click +ADD.
-
Fill out the integration form. Click CHECK to test the connection → SAVE.
-
A green light in the ‘Status’ column indicates successful configuration. If the light is red, contact support@cloudaware.com.
Static IP-to-Static IP connection
The external IP address is in place but not publicly* accessible.
Use case: A customer-managed SolarWinds server must be integrated with Cloudaware.
-
Contact support@cloudaware.com to get a static IP address of the host Cloudaware uses for outbound traffic to specific hosts.
-
Provide the static IP address to Cloudaware so that it can be allowlisted and configured.
-
After configuration is confirmed by Cloudaware, use the static IP address as the URL in the integration form.
-
Click CHECK to test the connection → SAVE.
-
A green light in the ‘Status’ column indicates successful configuration. If the light is red, contact support@cloudaware.com.
*Cloudaware cannot access resources that are behind an internal firewall or lack their own static static IP address, such as Azure Key Vaults.
Tunneling (proxy connection)
The access to the integration is limited due to its location in a private network.
Use case: Jira is hosted in a private network that should not be exposed externally. To set up the Jira integration in Cloudaware, tunneling must be preconfigured and operational.
-
Log in to Cloudaware → Admin.
-
Find Breeze in the list of DevOps integrations. Click 1 Configured.
-
Select the installer file for Linux.
-
Install Breeze on a server* that may communicate both with Jira and Cloudaware.
*Server requirements:-
OS: Linux only (Ubuntu 14+, CentOS/Red Hat/Oracle Linux 6–9, Debian 9+, Amazon Linux; Amazon Linux 2023 is not supported)
-
CPU: 1 core
-
Memory: 256–512 MB
-
Storage: 200 MB
-
Ports:
-
outbound TCP 443 for Breeze agent (destination:
breeze-server.cloudaware.com) -
outbound TCP 1194 for Tunnel (destination:
tunhub.cloudaware.com)
-
-
-
Provide Cloudaware with the following information:
-
Breeze instance ID
-
IP address and the port Breeze can use to access your Jira API
-
-
Request the integration URL to be generated by Cloudaware.
-
Go back to Cloudaware -> Admin. Find Jira Accounts & Actions in integrations. Click +ADD.
-
Fill out in the integration form:
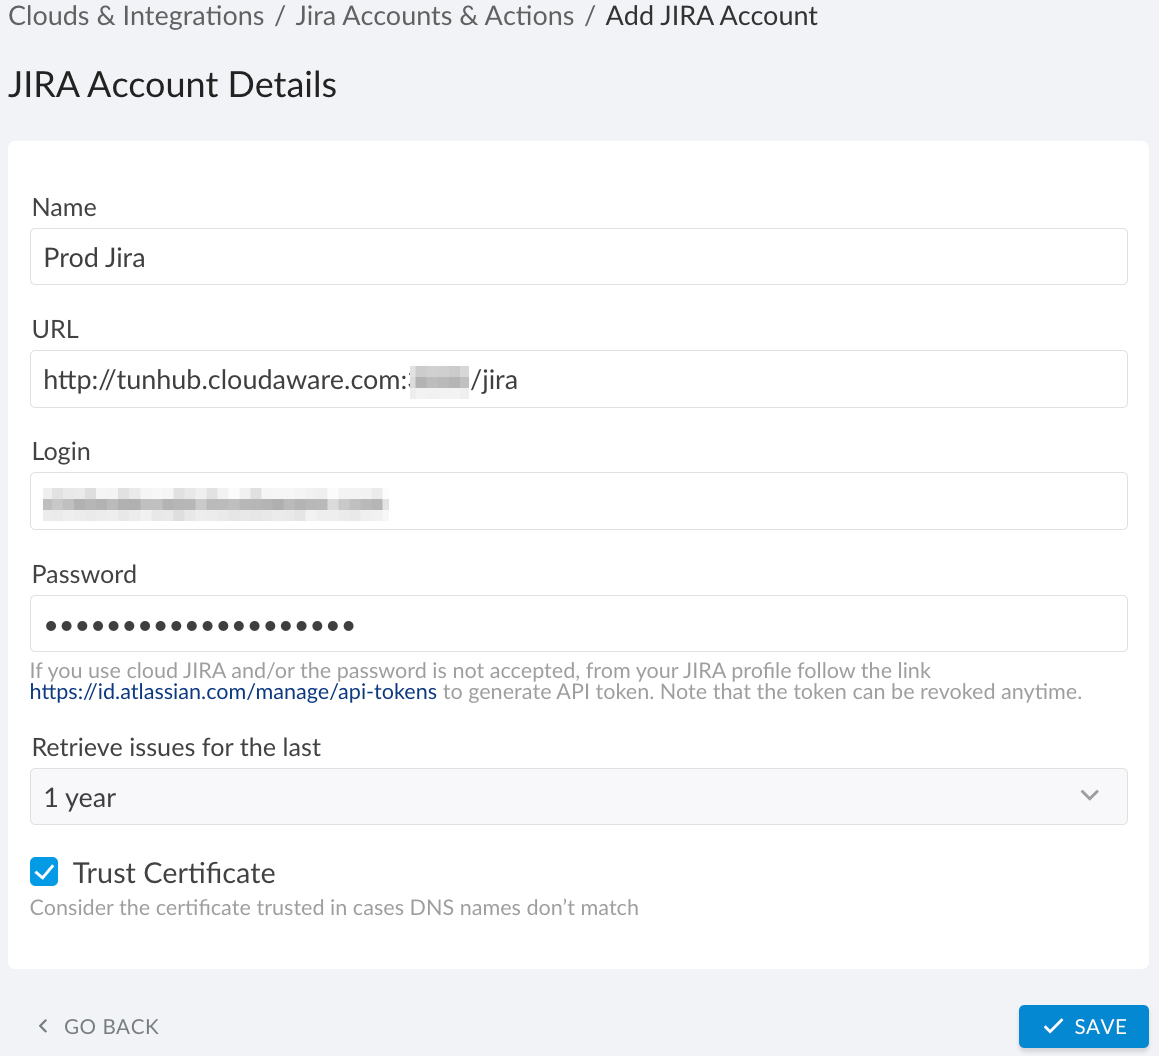
WHERE
Name – a name for this integration, e.g., Prod Jira
URL – the URL provided by Cloudaware instead of your company’s Jira URL
Login – the Jira username
Password – the Jira account password (for cloud Jira, use an API token)
Retrieve issues for the last – select the desired time range from the drop-down menu
Trust Certificate – check this box as the FQDN in the URL does not match the certificate domain name in case of tunneling
Click SAVE. -
A green light in the ‘Status’ column indicates successful configuration. If the light is red, contact support@cloudaware.com.
Read more about TunHub