
Okta SSO provides a single, unified login experience for users to access multiple applications without re-entering their credentials for each service. This guide explains how to add Cloudaware as an external application in a customer-managed Okta.
Prerequisites
Ensure you have one of the following roles to create applications in Okta:
-
Super Admin
-
Org Admin
-
App Admin
-
Custom role with required application permissions
Setup in Okta
Create the app integration
-
Sign in to the Okta Admin Console.
-
Navigate to Applications -> Applications.
-
Click Create App Integration. Select SAML 2.0 as the Sign-in method:
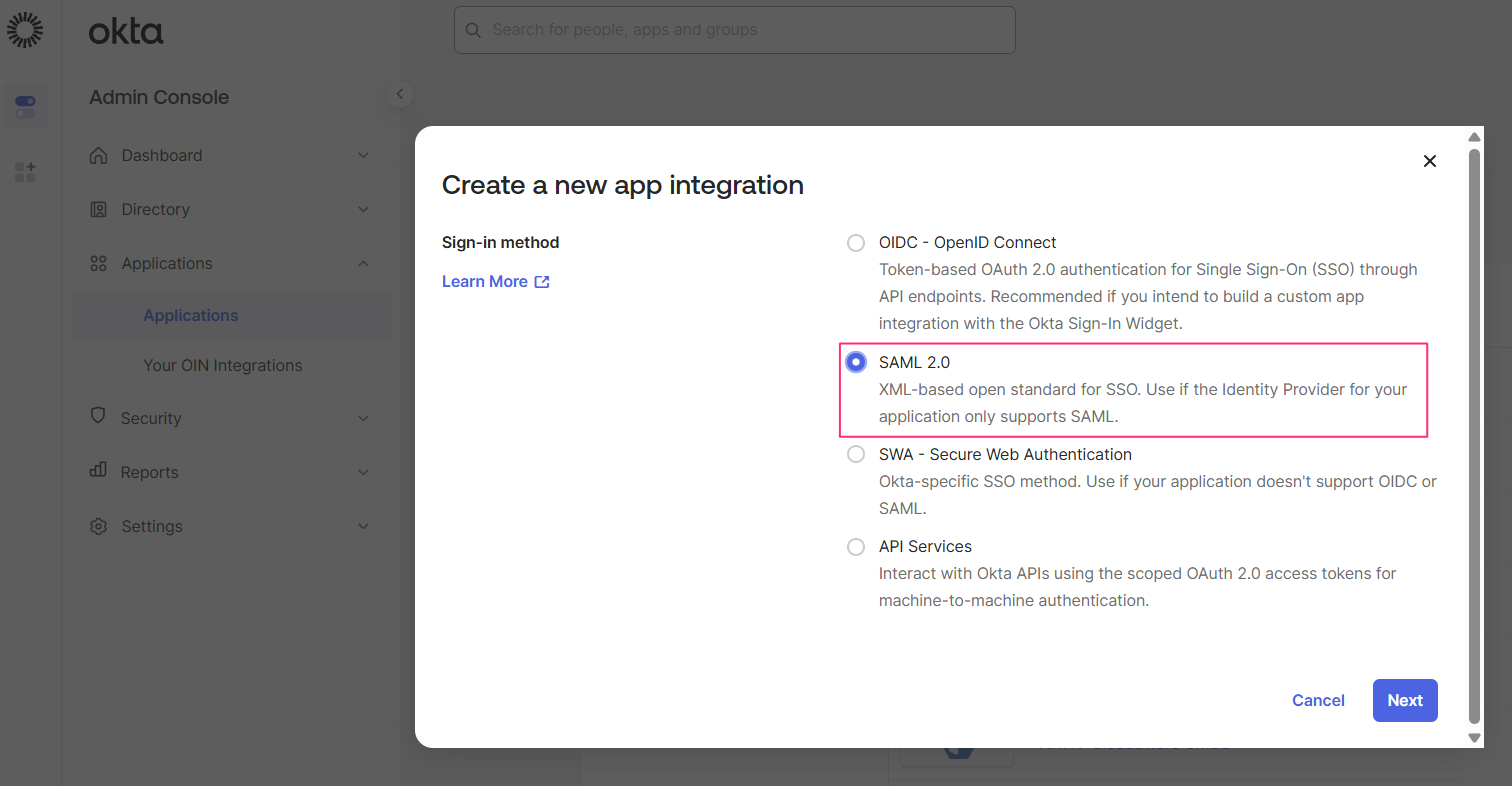
Click Next.
-
Enter a name for the app:
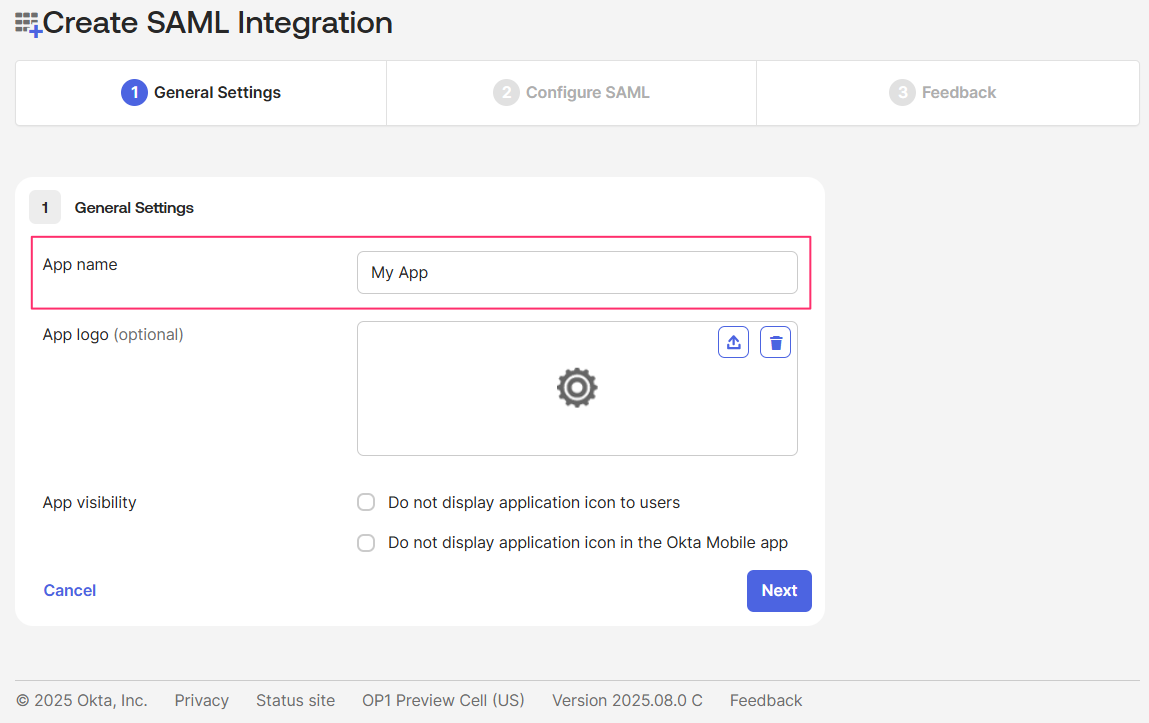
Click Next.
Configure SAML settings
In the General Settings section, provide the values:
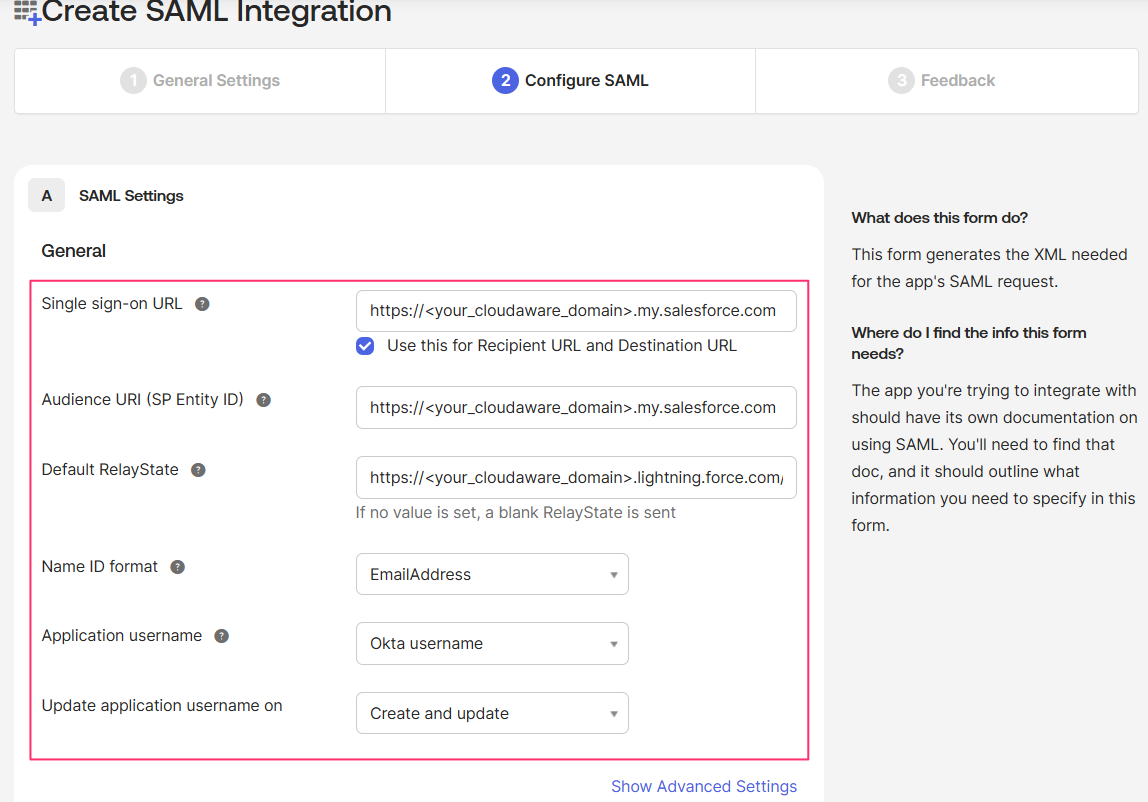
WHERE
Single sign-on URL: https://<your_cloudaware_domain>.my.salesforce.com. Ensure that the Use this for Recipient URL and Destination URL checkbox is selected.
Audience URI (SP Entity ID): https://<your_cloudaware_domain>.my.salesforce.com
Default RelayState: for a better user experience, use https://<your_cloudaware_domain>.lightning.force.com/CA10UI/lca.app to ensure that users land on the CMDB main page.
Name ID format: EmailAddress
Application username: Okta username
Update application username on: Create and update
Add attribute statements for JIT provisioning
For Just-In-Time (JIT) user provisioning, provide the values:
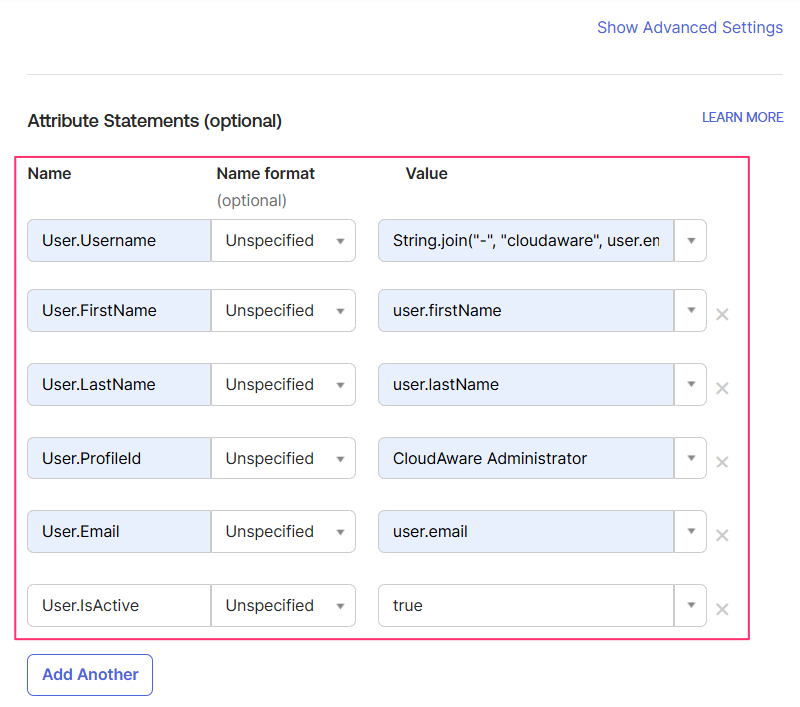
WHERE
User.Username: Cloudaware runs on top of the Salesforce platform, where usernames must be globally unique. Using Okta expressions is recommended to specify a username format. For example, cloudaware-<user_email>: String.join("-", "cloudaware", user.email
User.FirstName: user.firstName
User.LastName: user.lastName
User.ProfileId: select one of the Cloudaware Profiles, such as CloudAware Administrator, CloudAware User, etc.
User.Email: user.email
User.IsActive (optional): If you have an automation that deactivates users in Cloudaware after a set period of inactivity (no logins), add this attribute statement and set it to true to ensure that a deactivated user is reactivated and able to log in.
Scroll down, click Next -> Finish.
Assign users and save Metadata URL
-
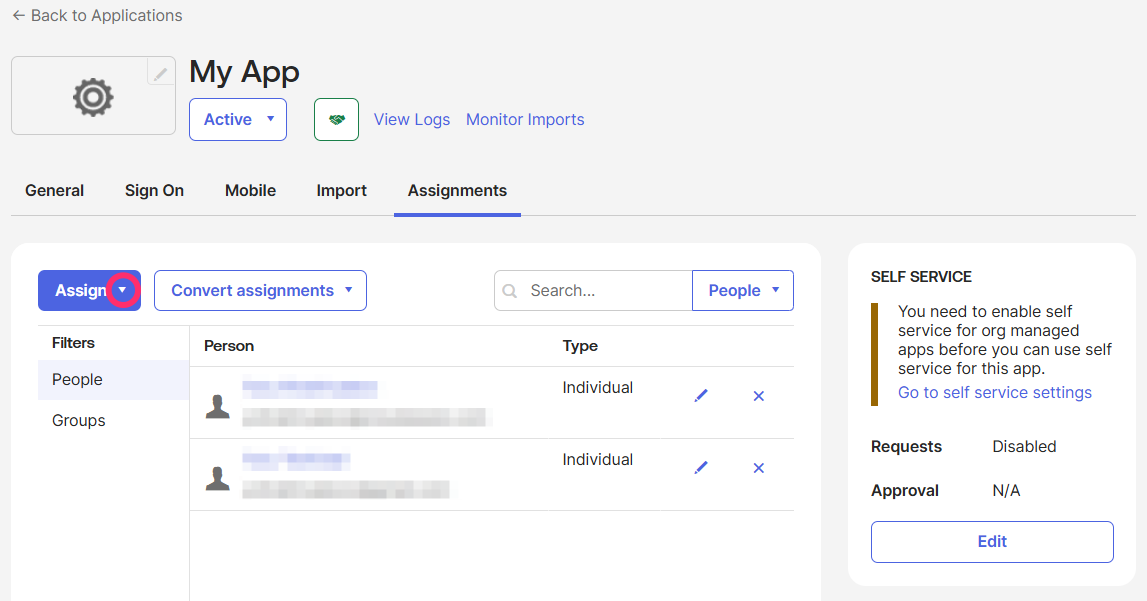
Open the ‘Assignments’ tab. Assign users/groups to the app:
-
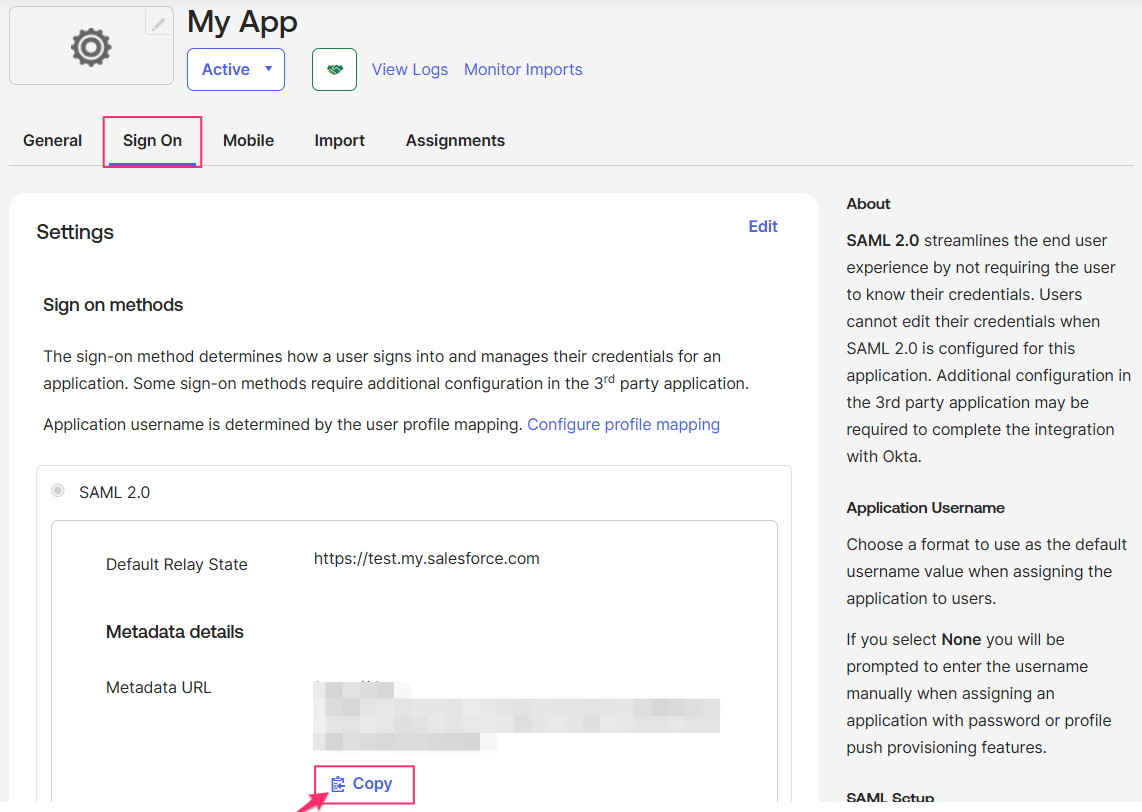
Open the Sign On tab. Copy the Metadata URL.
You can either use the URL directly or open it in a browser and save the page as XML. Both options are valid when setting up SSO in Cloudaware (see the next section).
Setup in Cloudaware
-
Log in to Cloudaware → Setup.

-
Type Single in the Quick Find bar. Under Identity, select Single Sign-On Settings. Ensure that the SAML Enabled checkbox is checked.
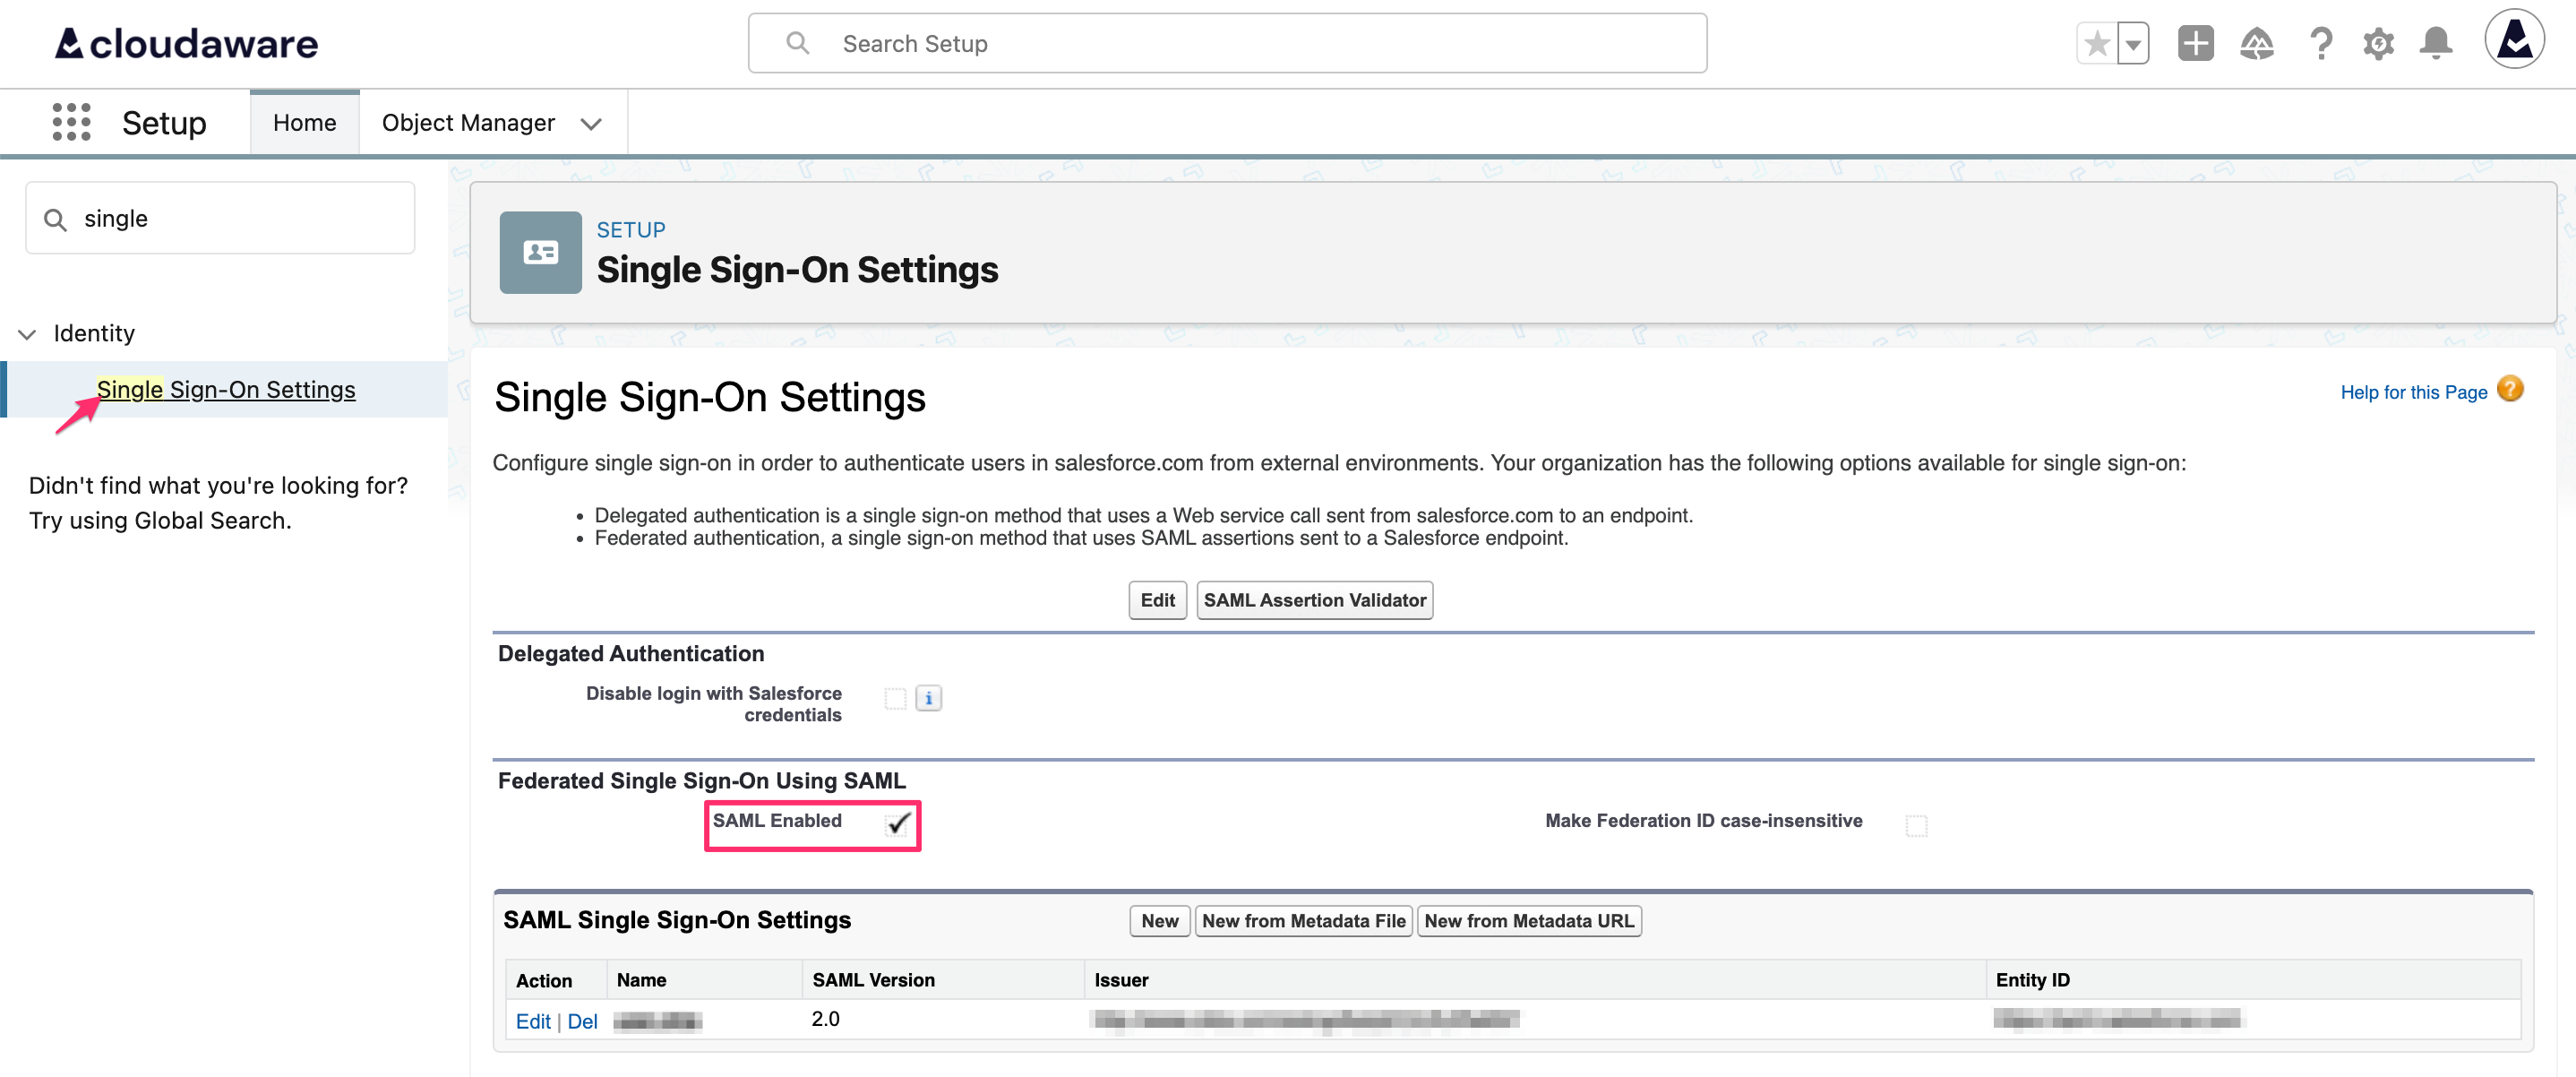
Otherwise, click Edit, check the box and save the changes.
By default, the Federation ID required for SSO setup is case-sensitive. If required, make the setting case-insensitive by selecting the Make Federation ID case-insensitive checkbox: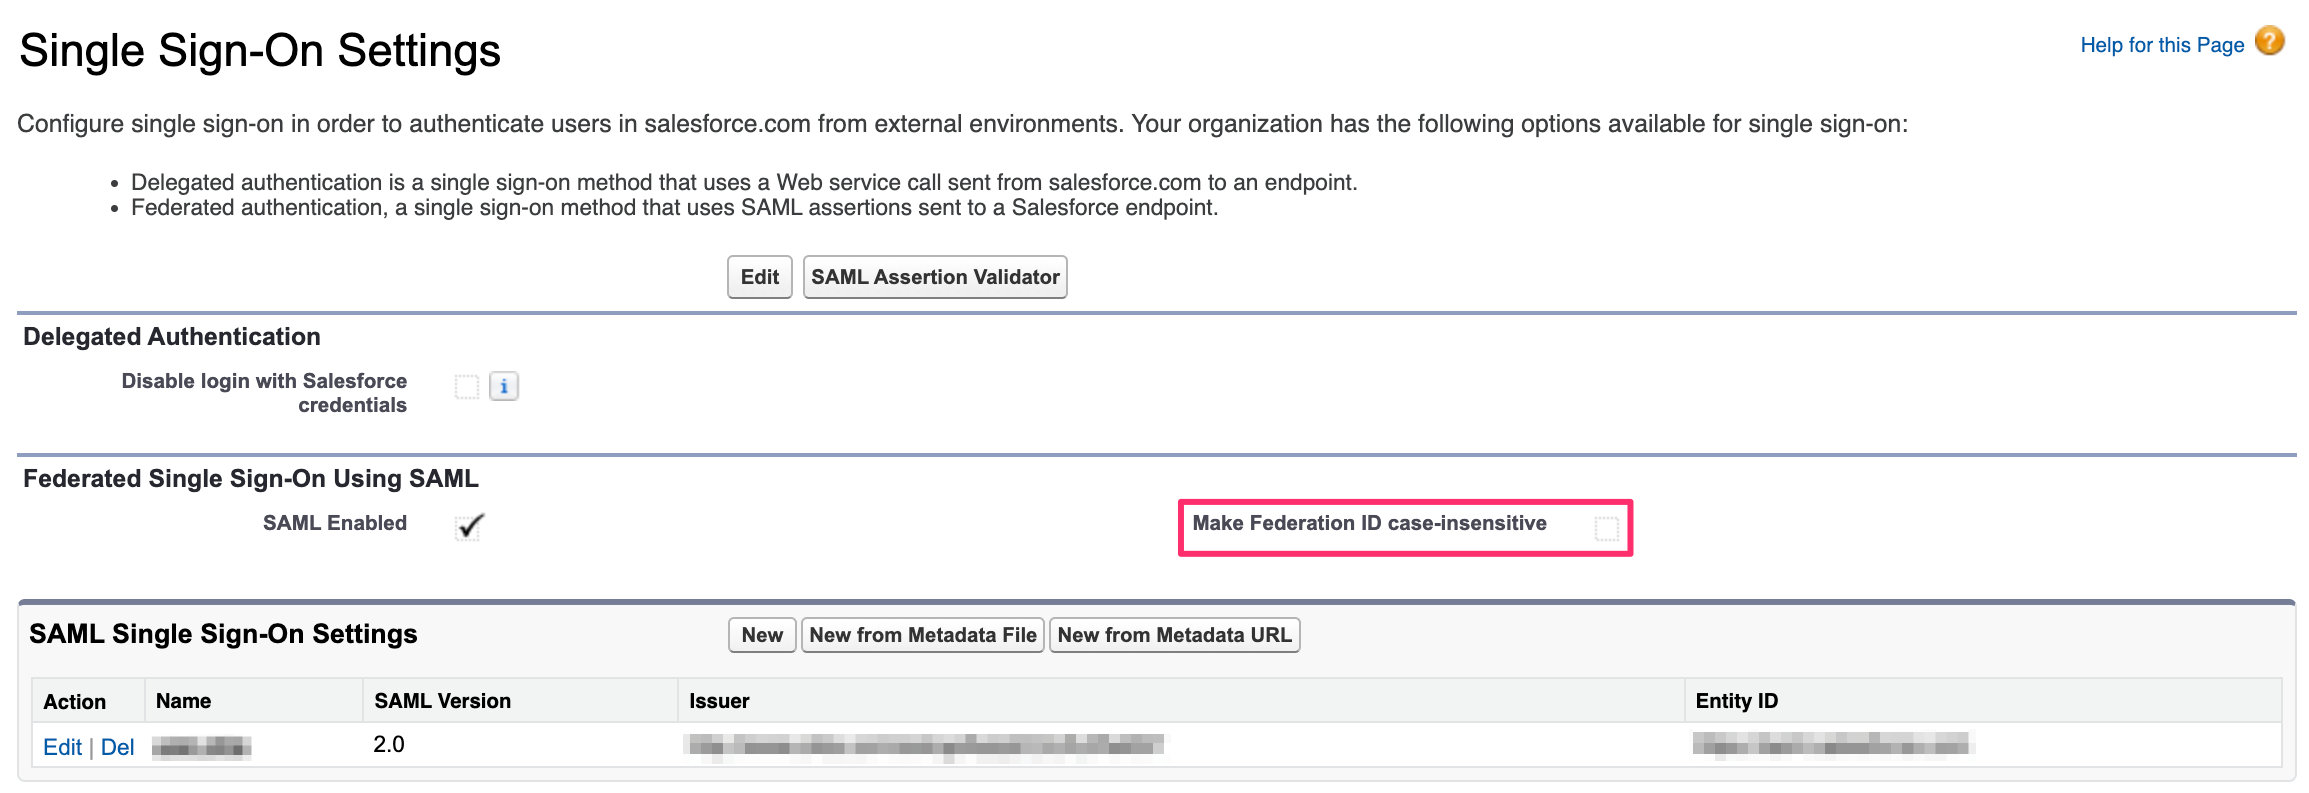
-
Create a new SSO setting using one of the options below:
Option 1 – Metadata URLTo use this option, add Okta Metadata URL domain to the Remote Site Settings first:
Type Remote in the Quick Find bar. Under Security, select Remote Site Settings → New Remote Site.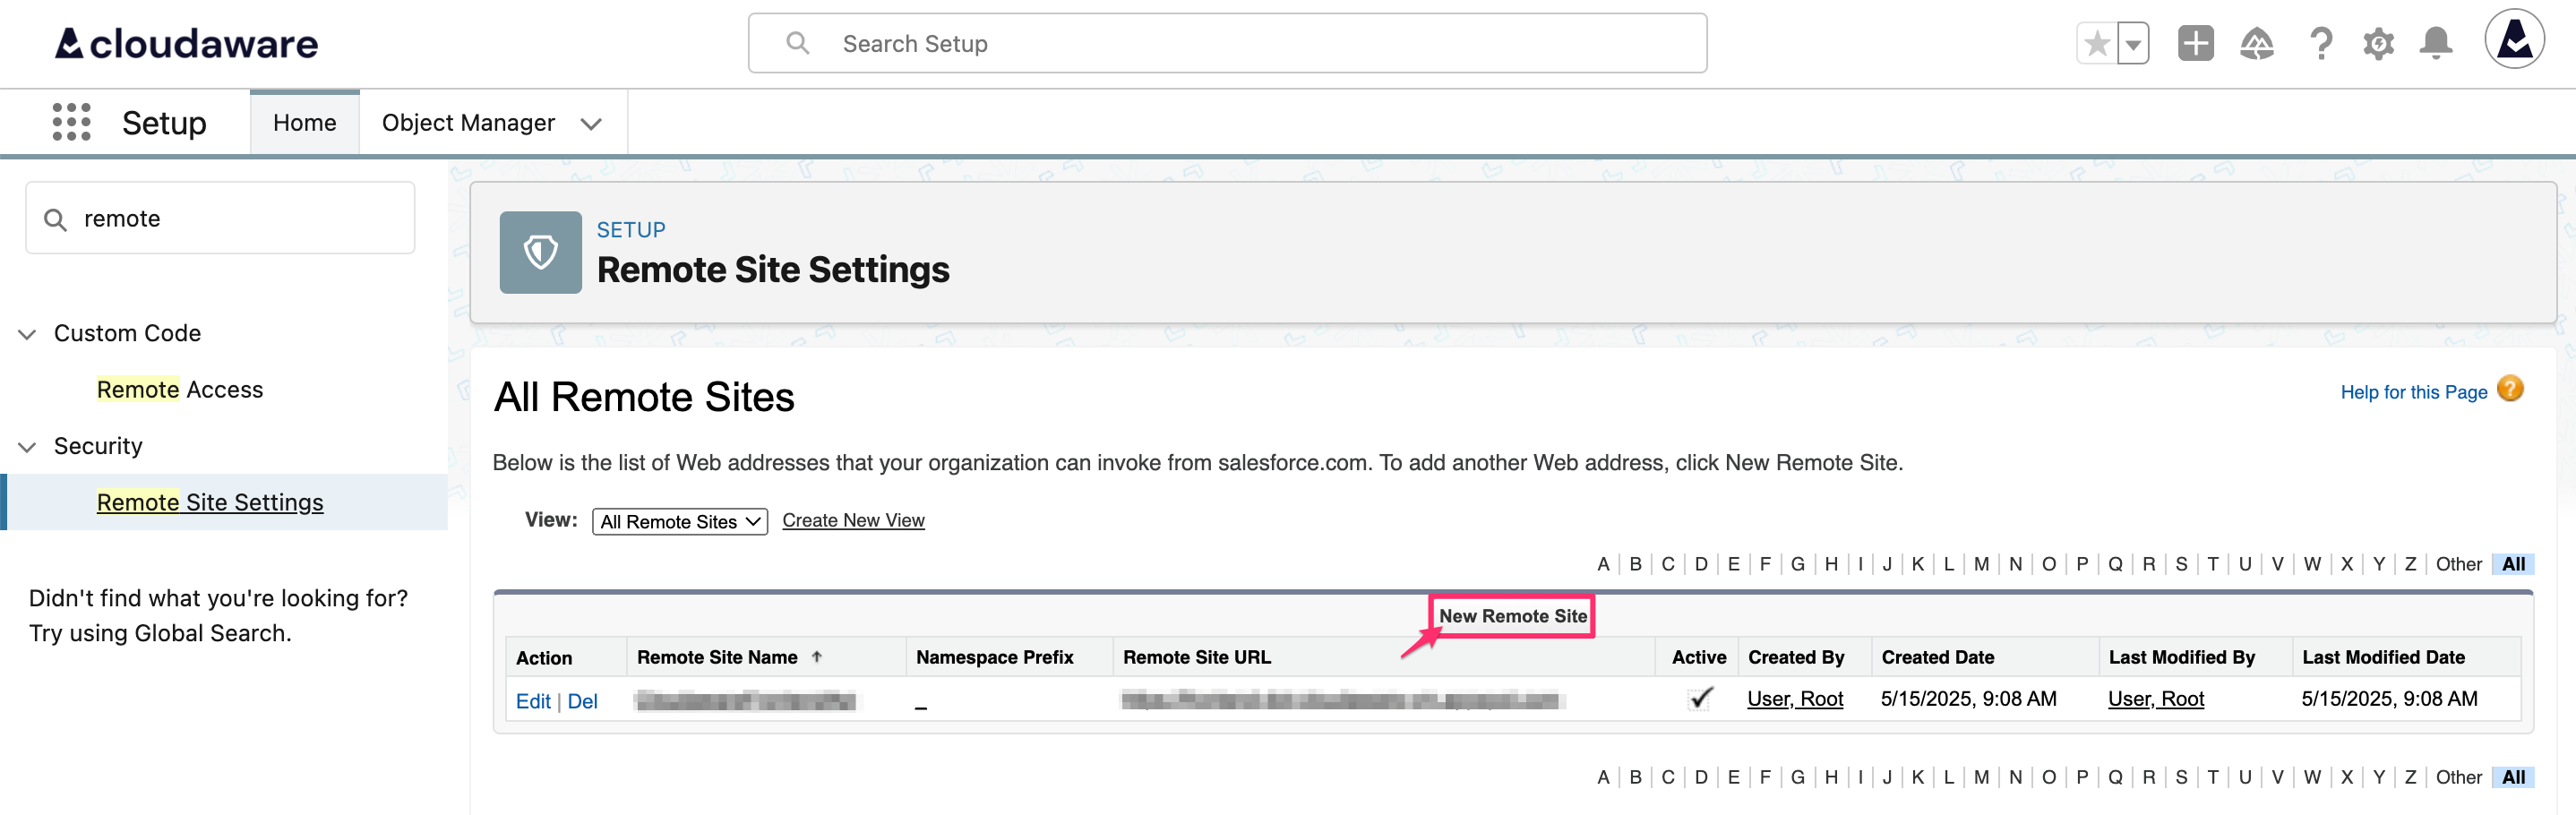
Set a name for the remote site and paste the Metadata URL:
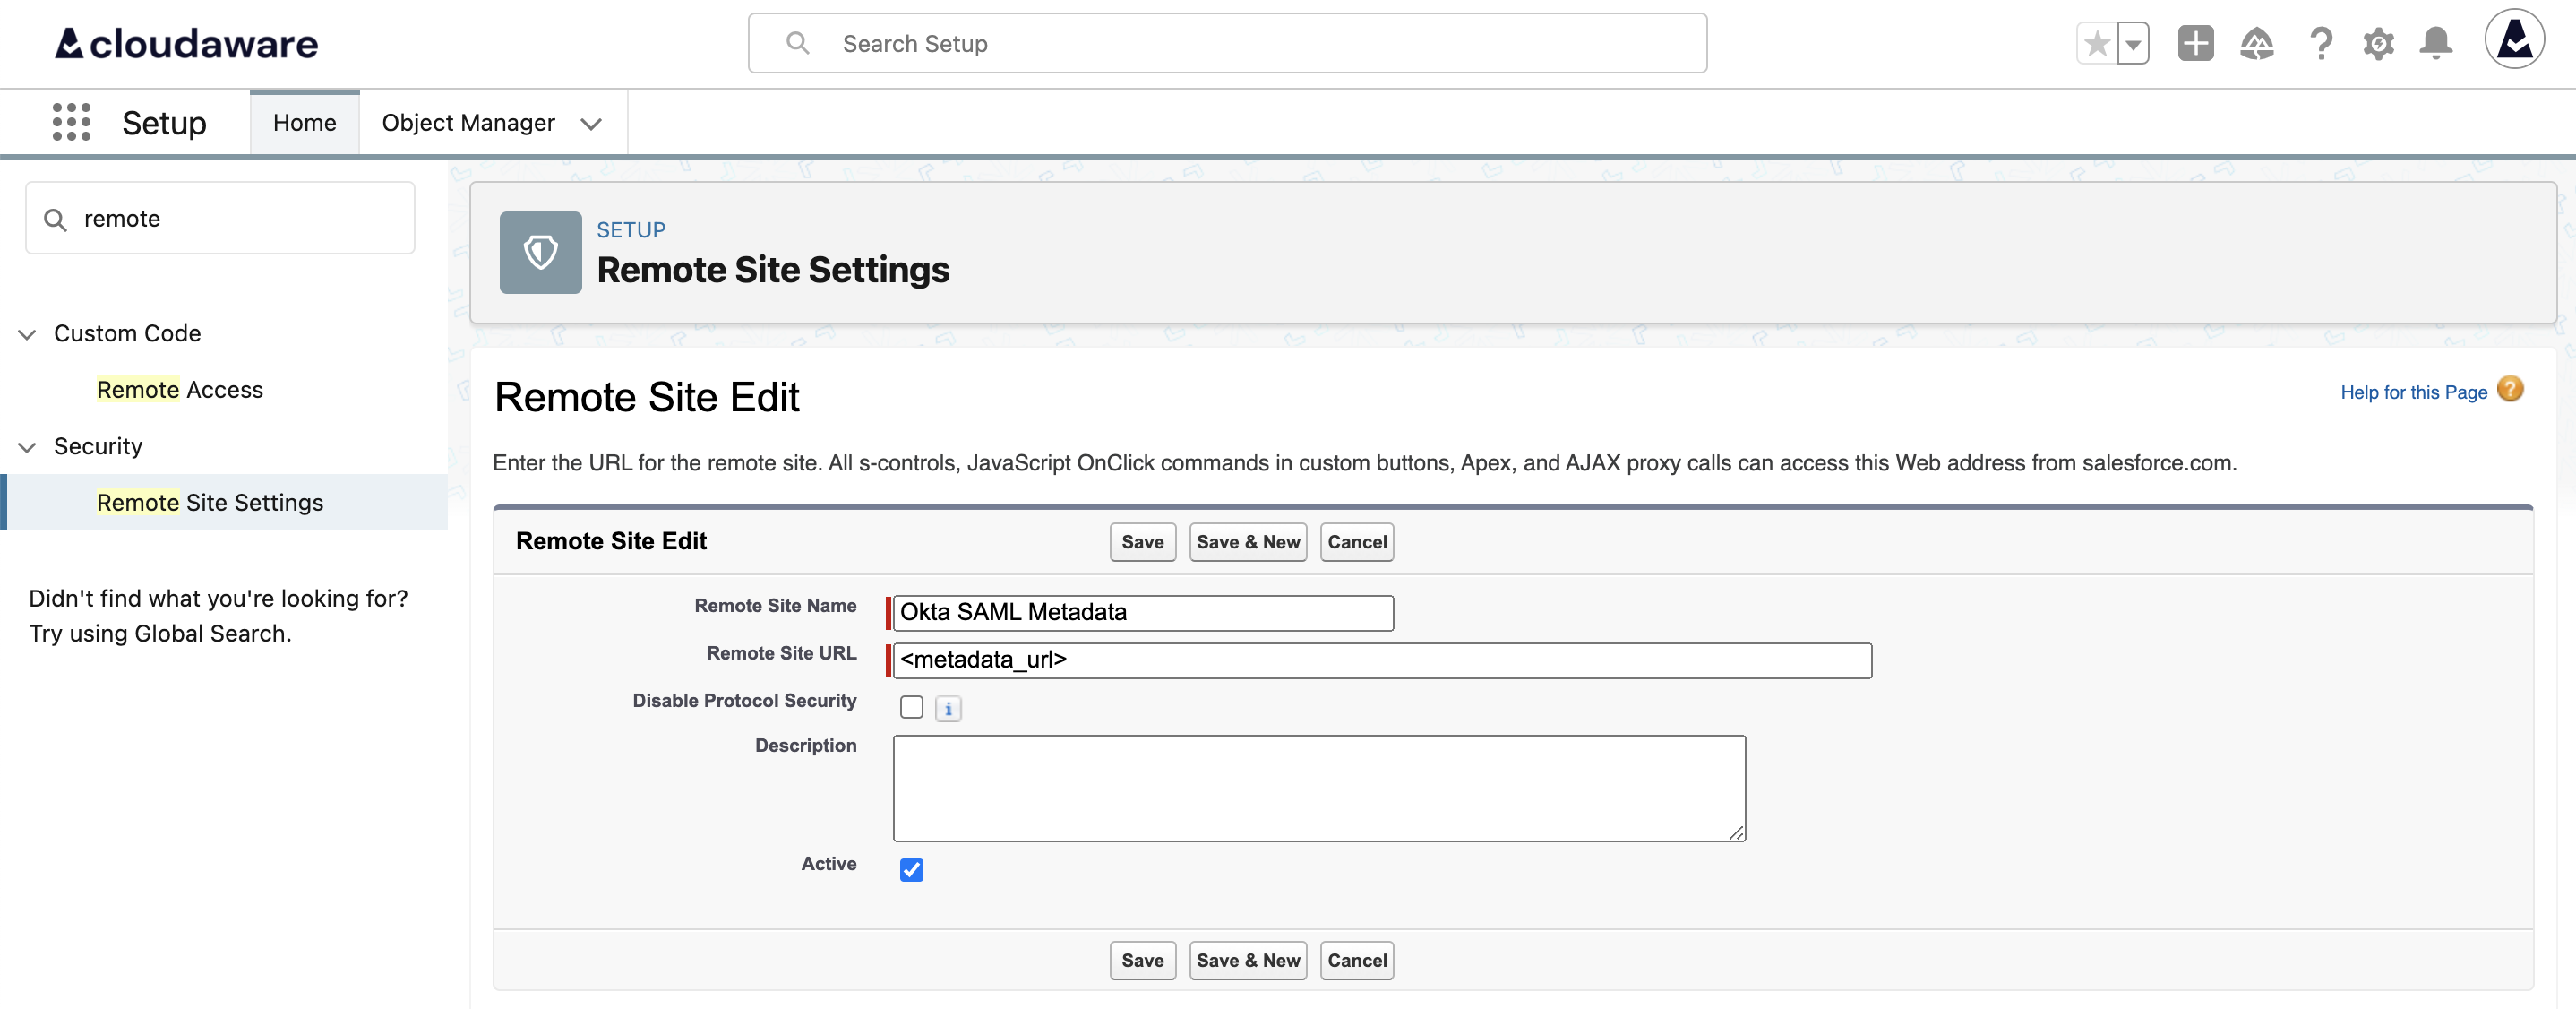
Click Save.
Go back to the Single Sign On Settings page -> click New from Metadata URL.
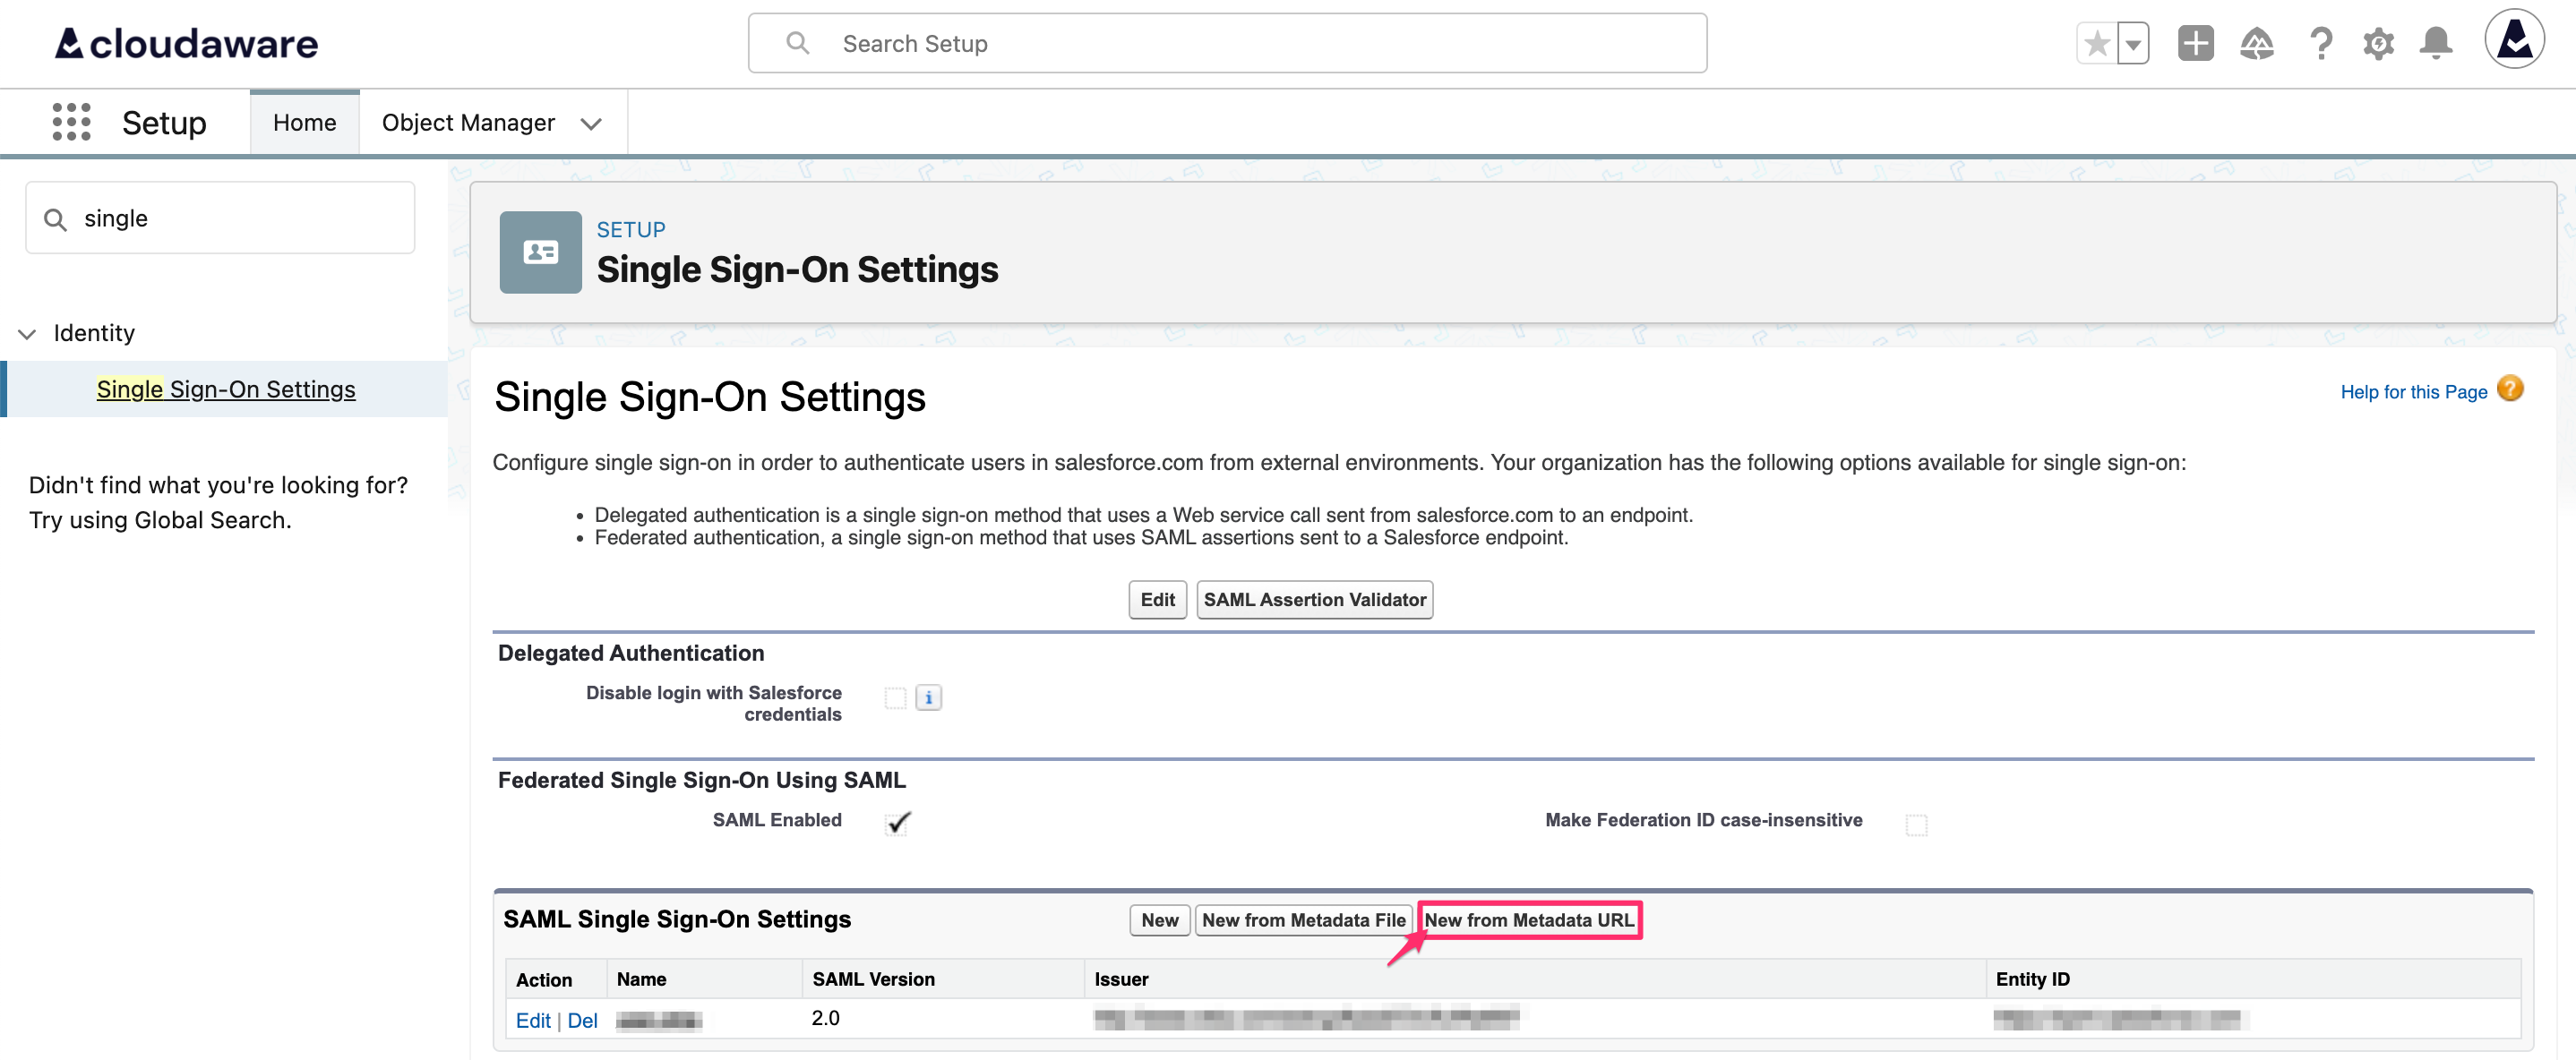
Paste the Metadata URL and click Create.
Option 2 – Metadata File (XML)
On the Single Sign-On Settings page, click New from Metadata File.
%20-%20click%20New%20from%20Metadata%20File.png?cb=4d8ca2addb56fbfa2e6aba6c685891a0)
Upload the XML file and click Create.
-
Configure SAML Single Sign-On settings:
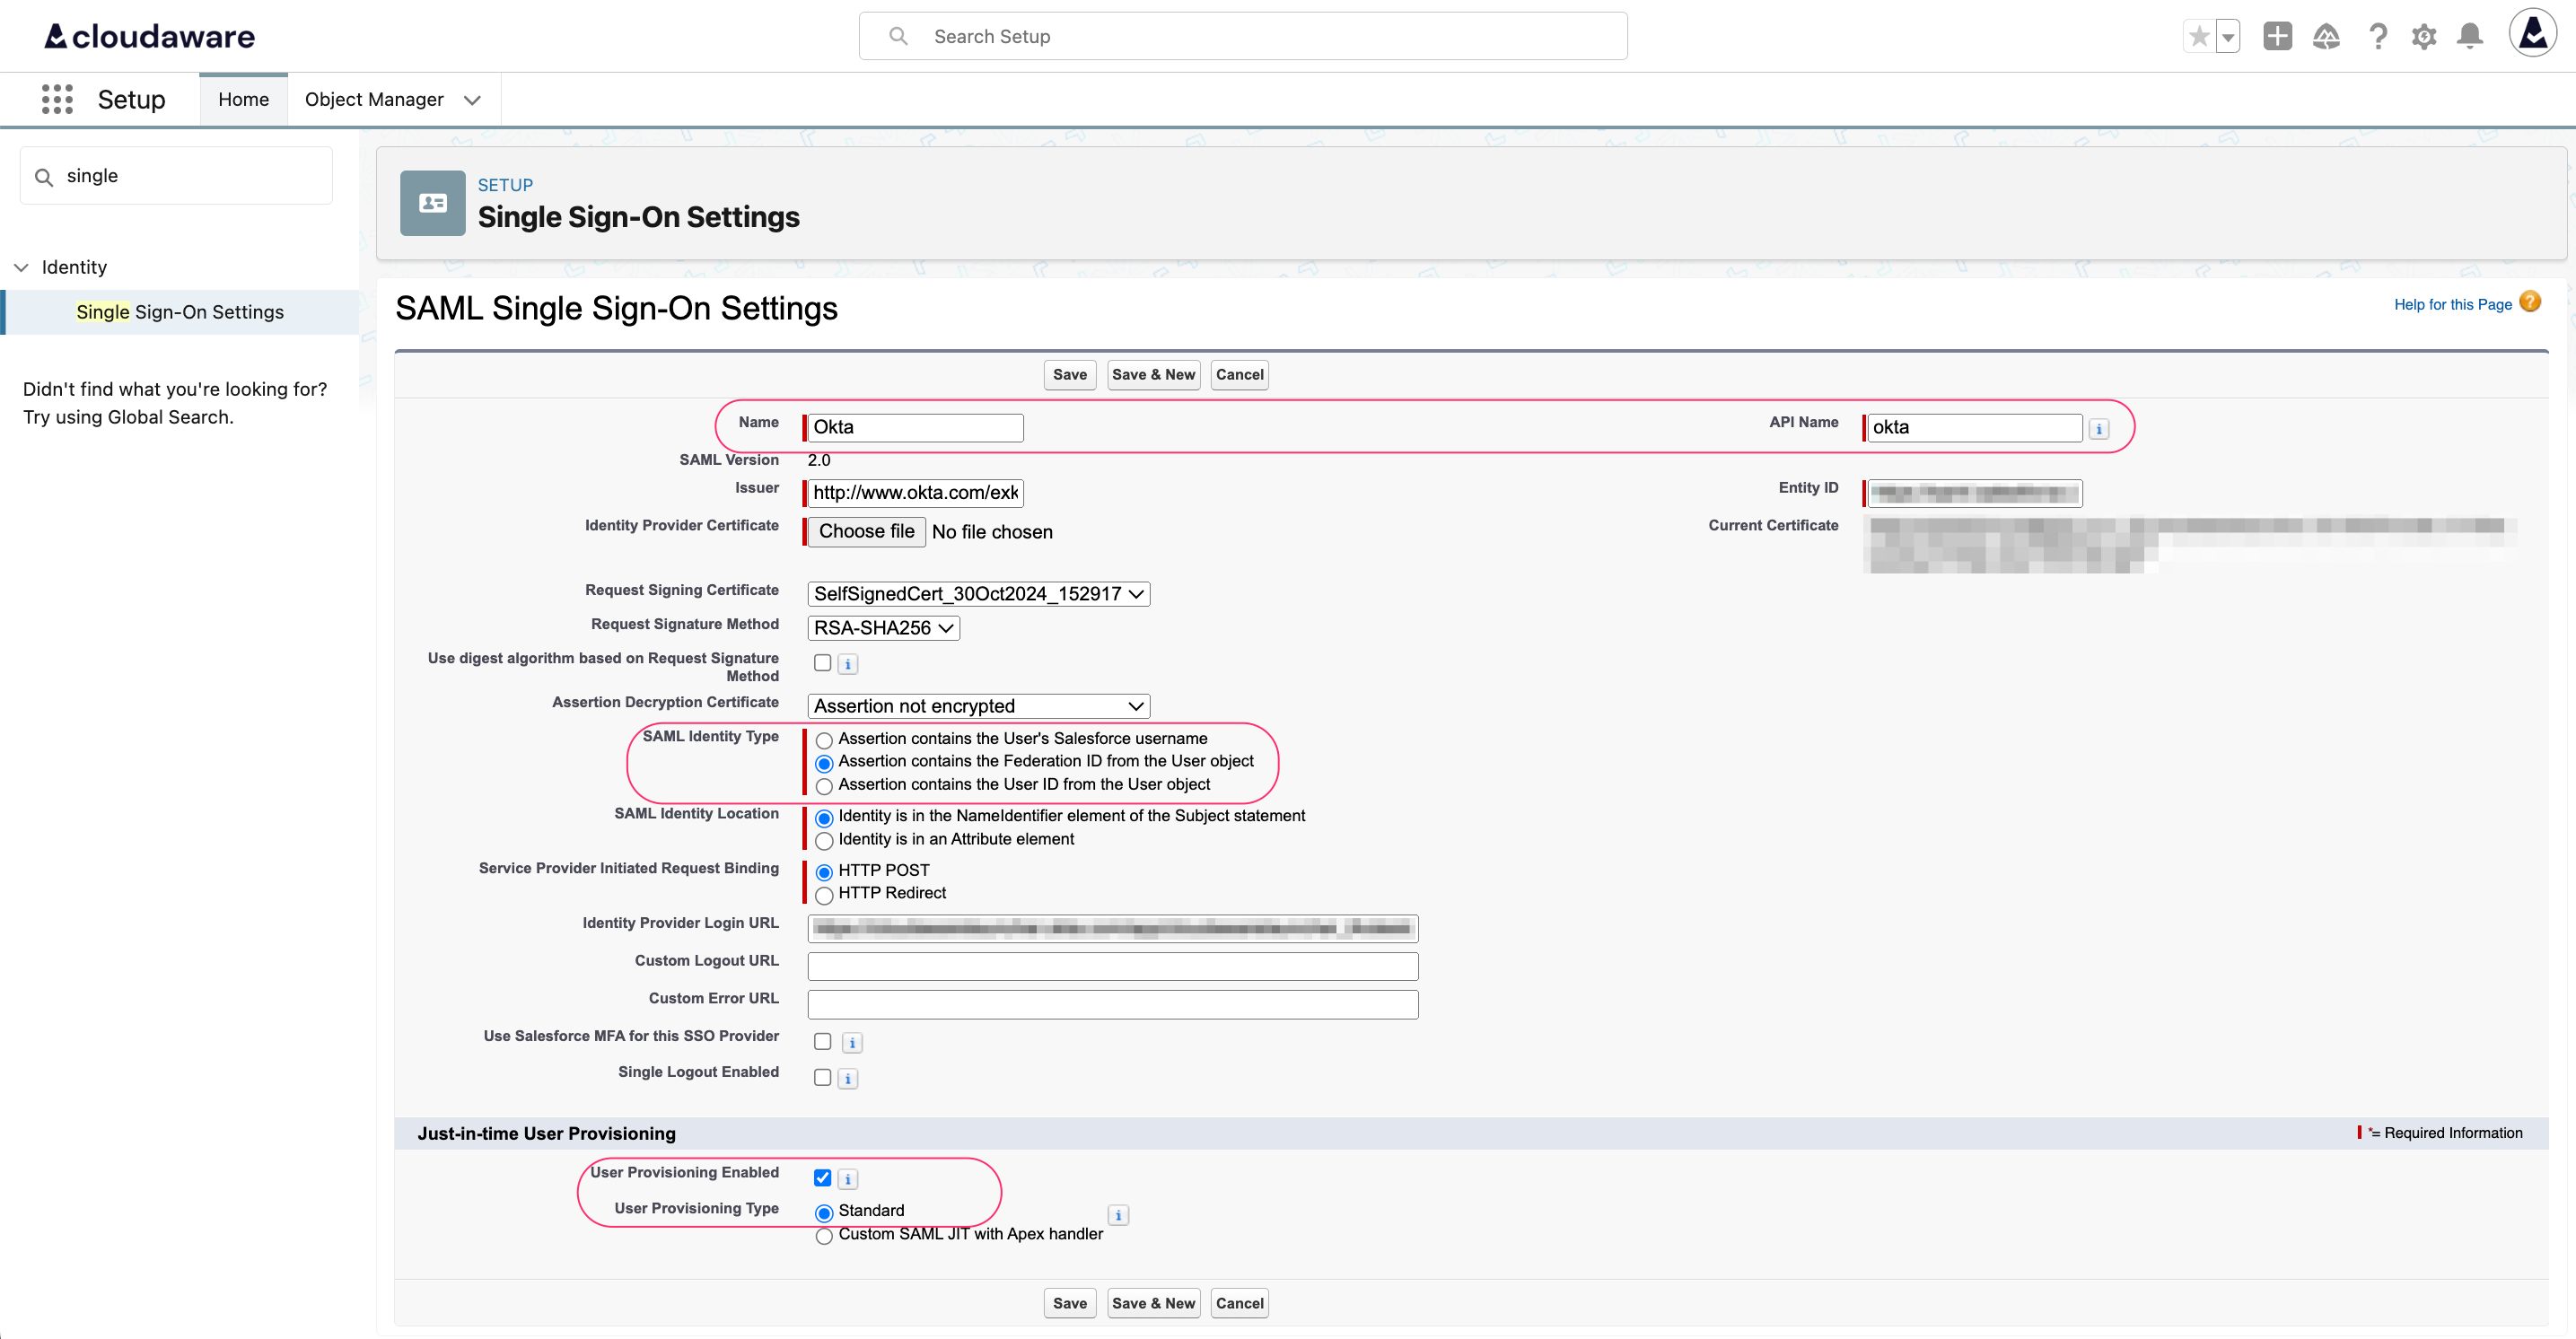
WHERE
Name: set a descriptive name for the SSO setting name
API Name: auto-populated
SAML Identity Type: if JIT is required, select Assertion contains the Federation ID from the User Object
Just-in-time User Provisioning: if JIT is required, check the User Provisioning Enabled box and select Standard in User Provisioning TypeClick Save.
-
Configure Okta as an authentication service:
Type My domain in the Quick Find bar. Select My Domain. Scroll down to the Authentication Configuration section and click Edit.
Select the checkbox near the name of the recently created SSO configuration (in this example, okta):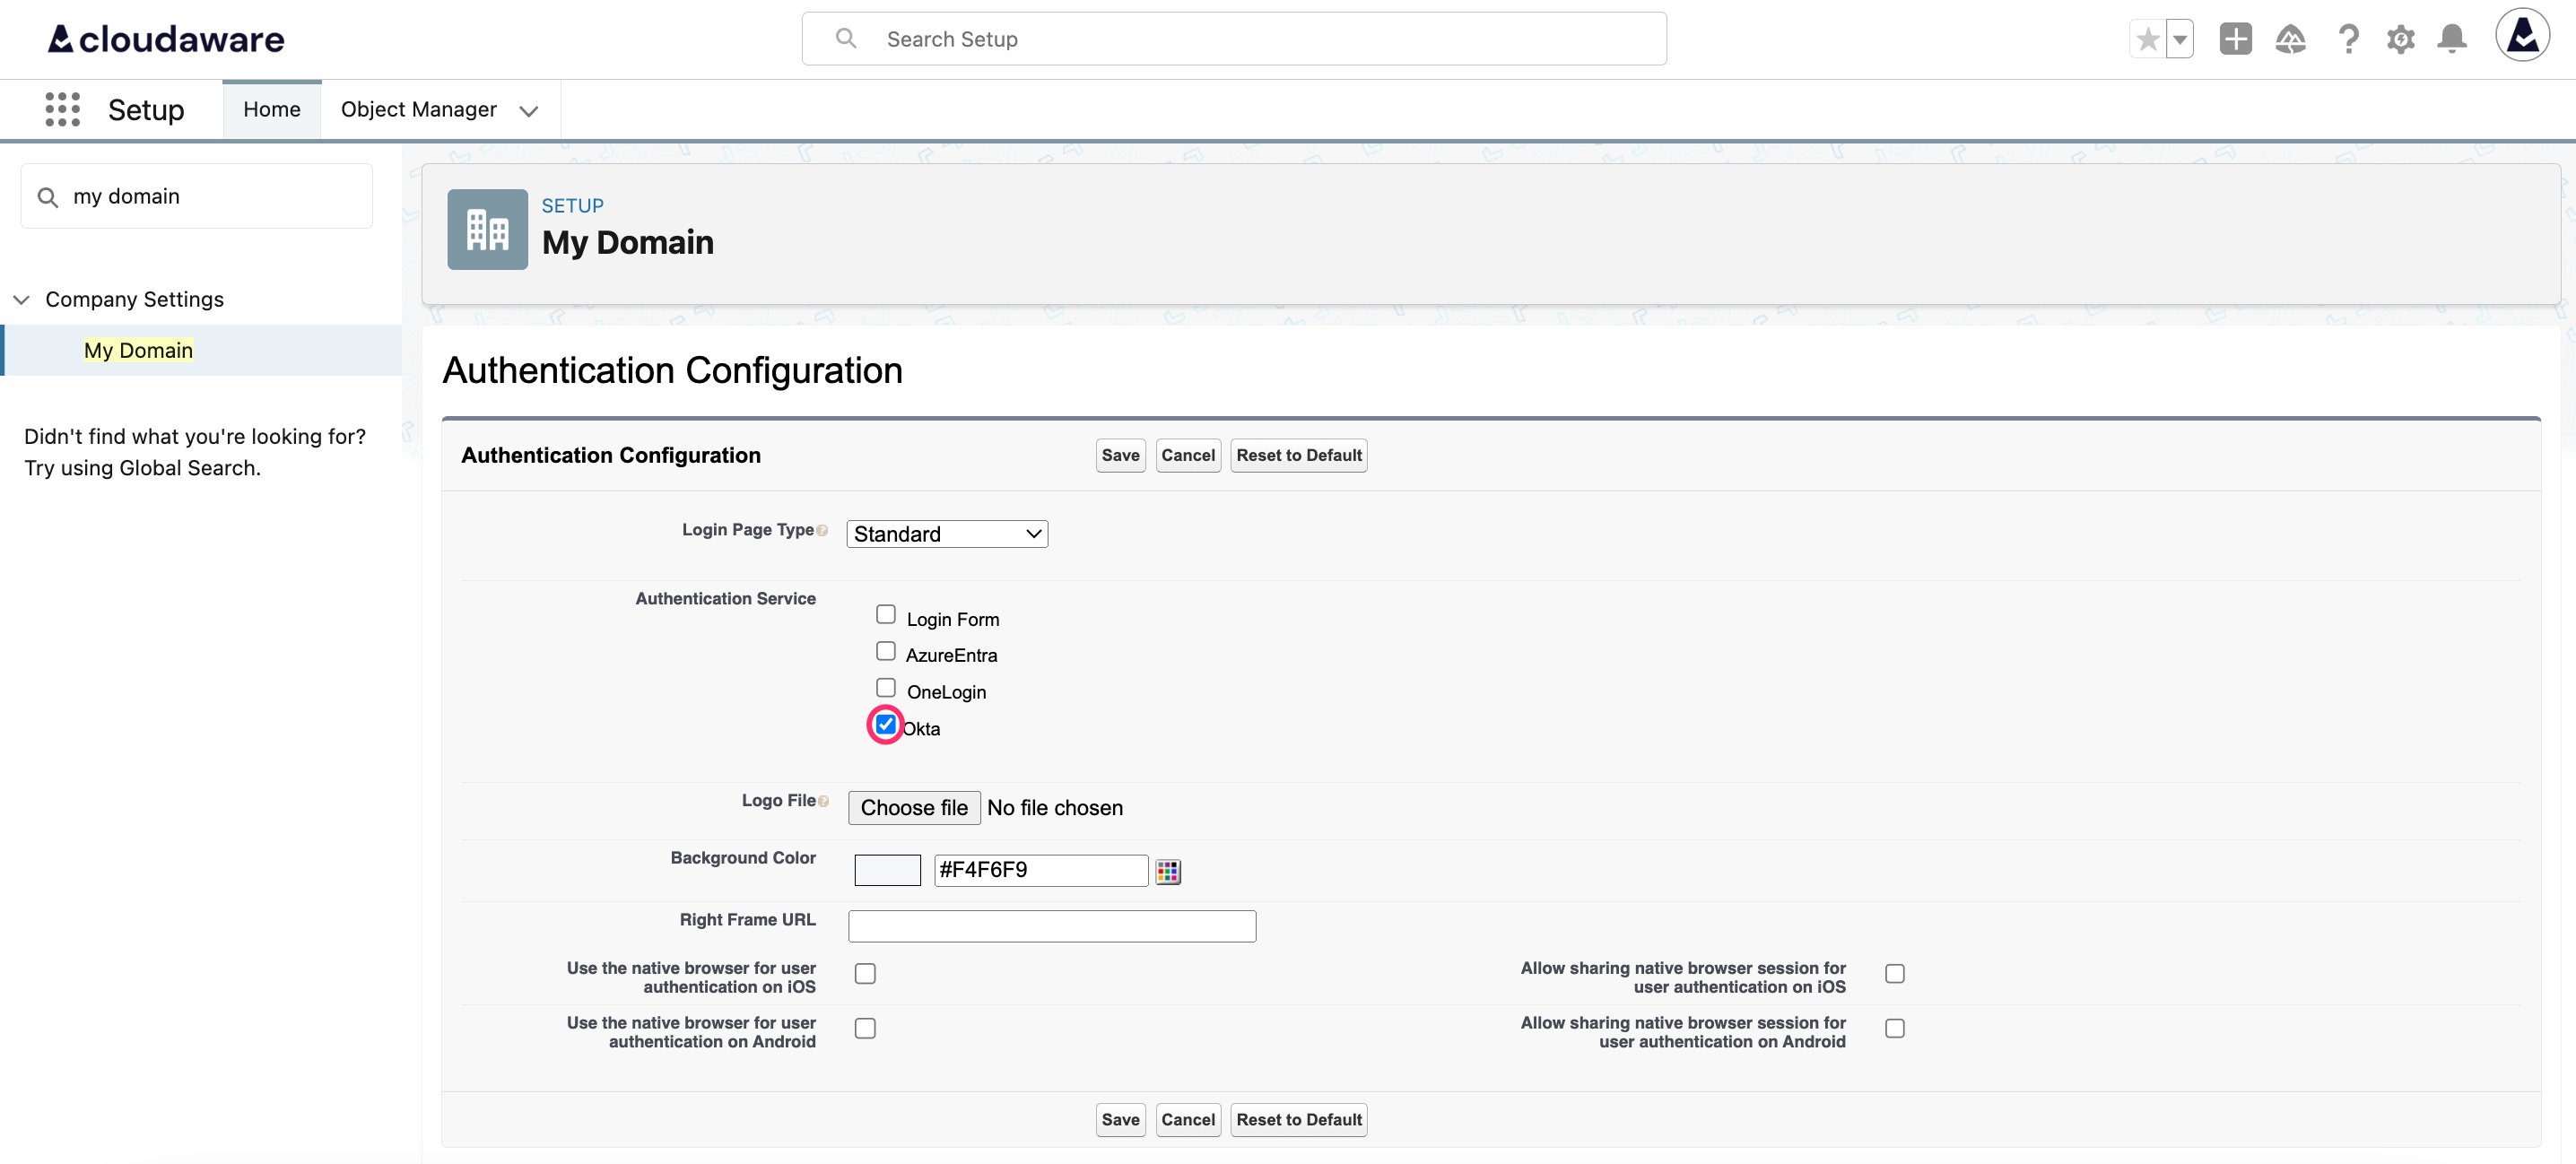
Click Save.