
Azure Entra ID, formerly Azure Active Directory (Azure AD), is a cloud-based identity and access management (IAM) service that manages identities and permissions across cloud and on-premises environments. This guide explains how to configure SAML for Cloudaware in a customer’s Azure Enterprise Application and set up SSO.
Setup in Azure
-
Sign in to the Azure Portal. Navigate to Enterprise Applications -> + New Application.
-
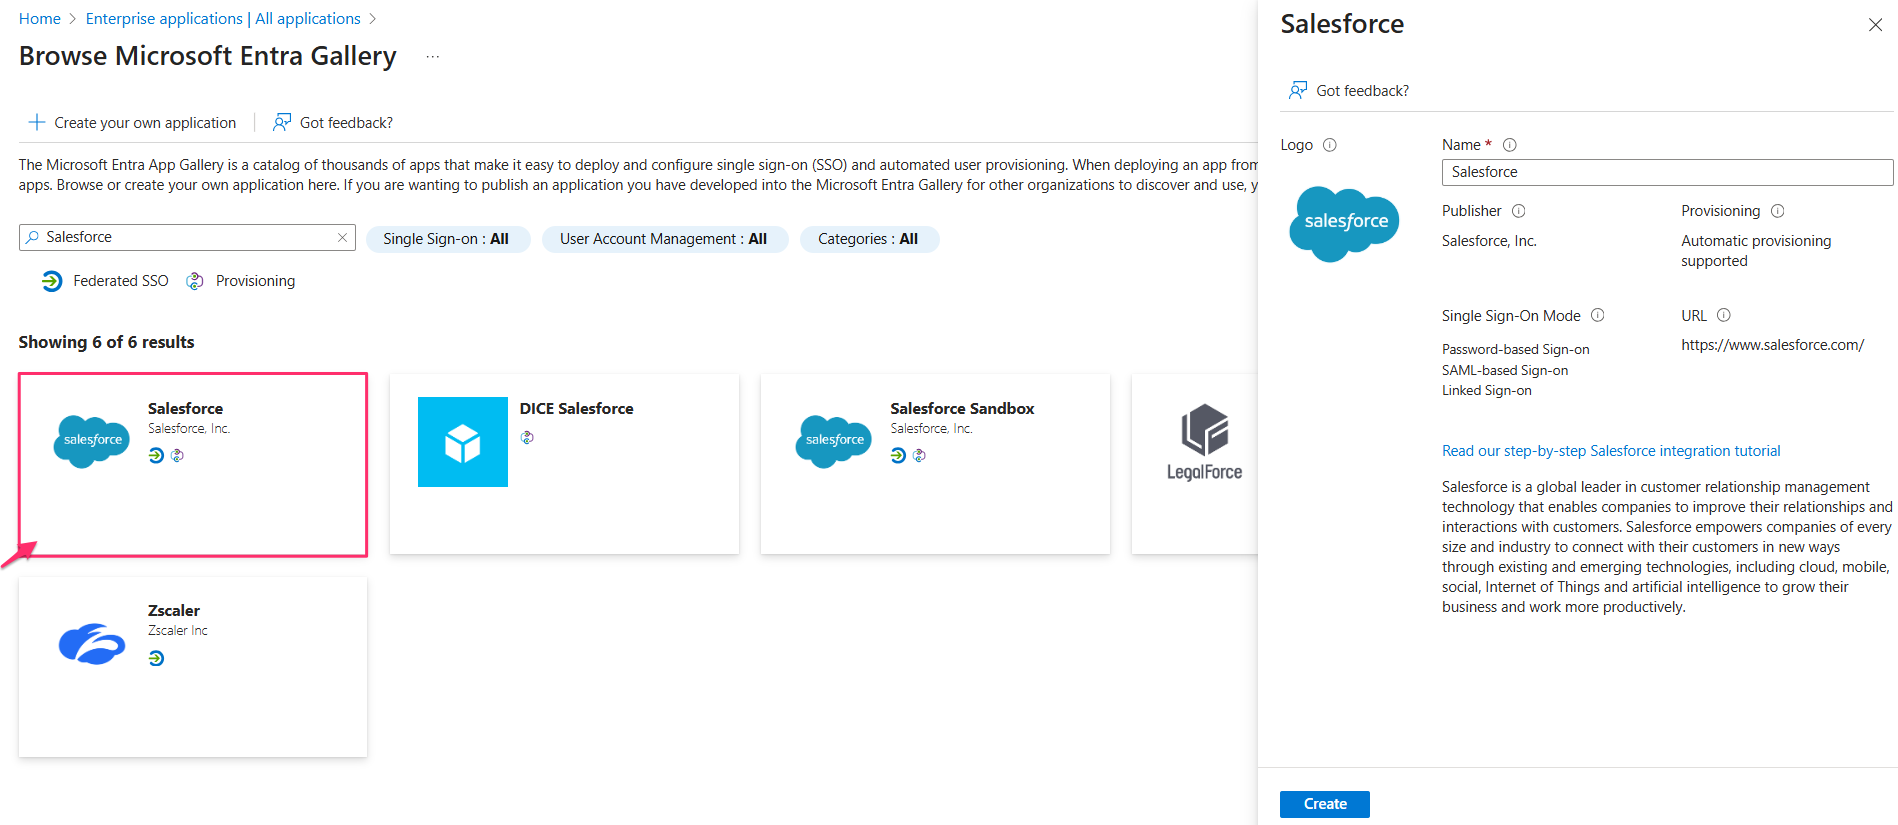
Search for the Salesforce App in the Microsoft Entra Gallery. Enter a name for your app and select Create.
-
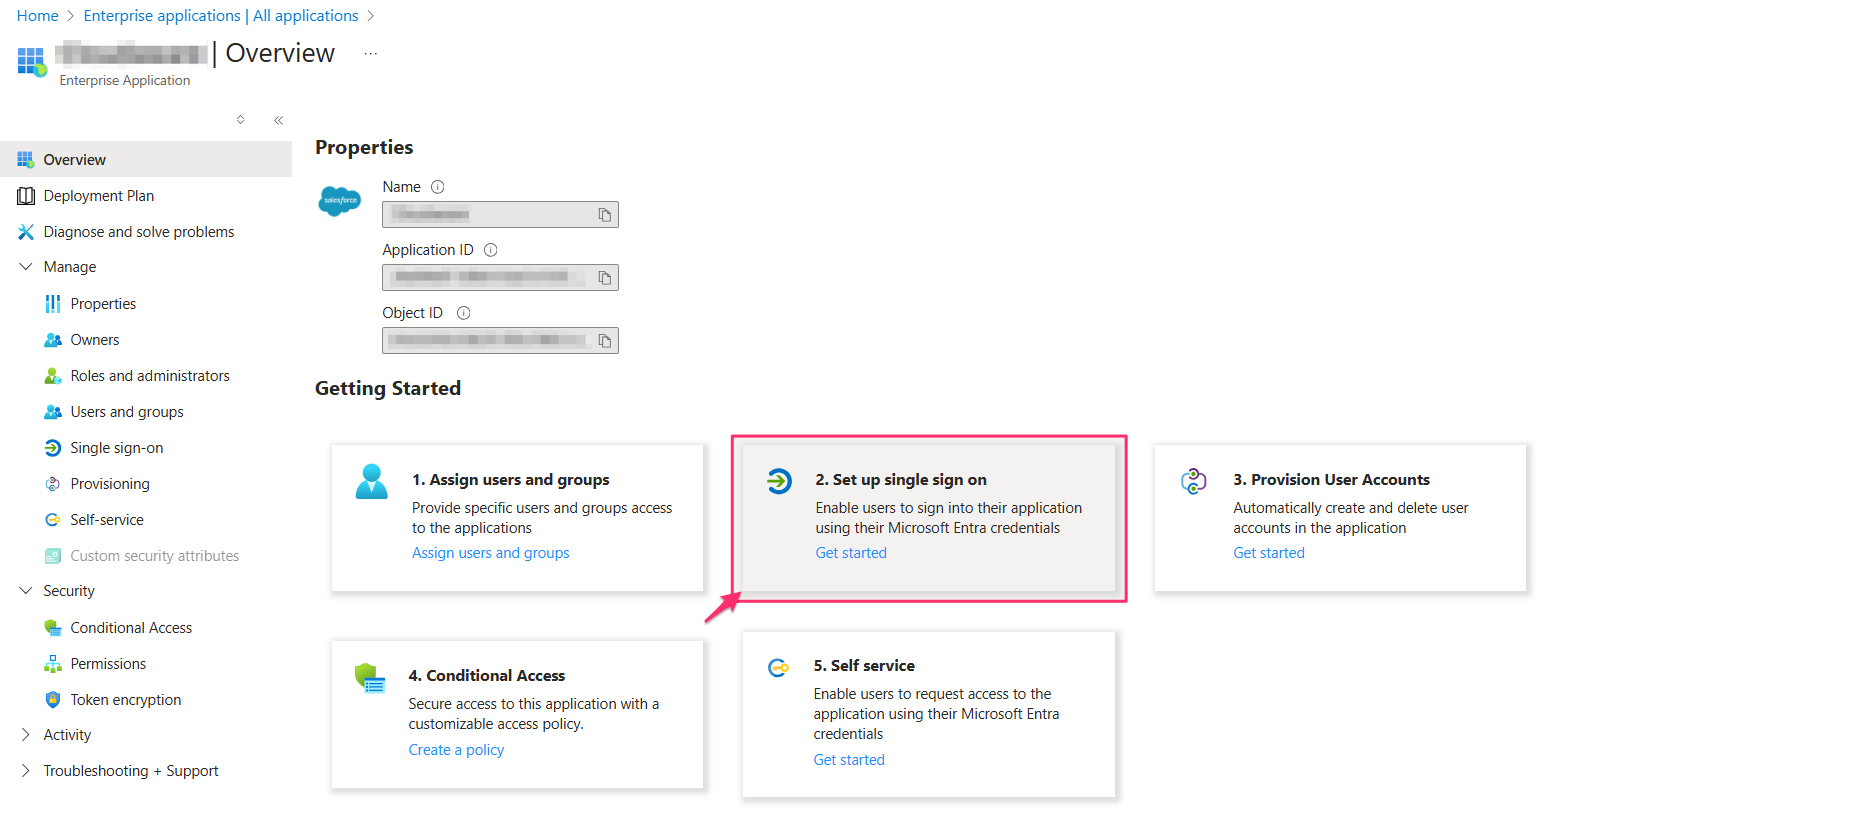
In the app’s ‘Overview’ section, select Set up single sign-on and click Get started.
-
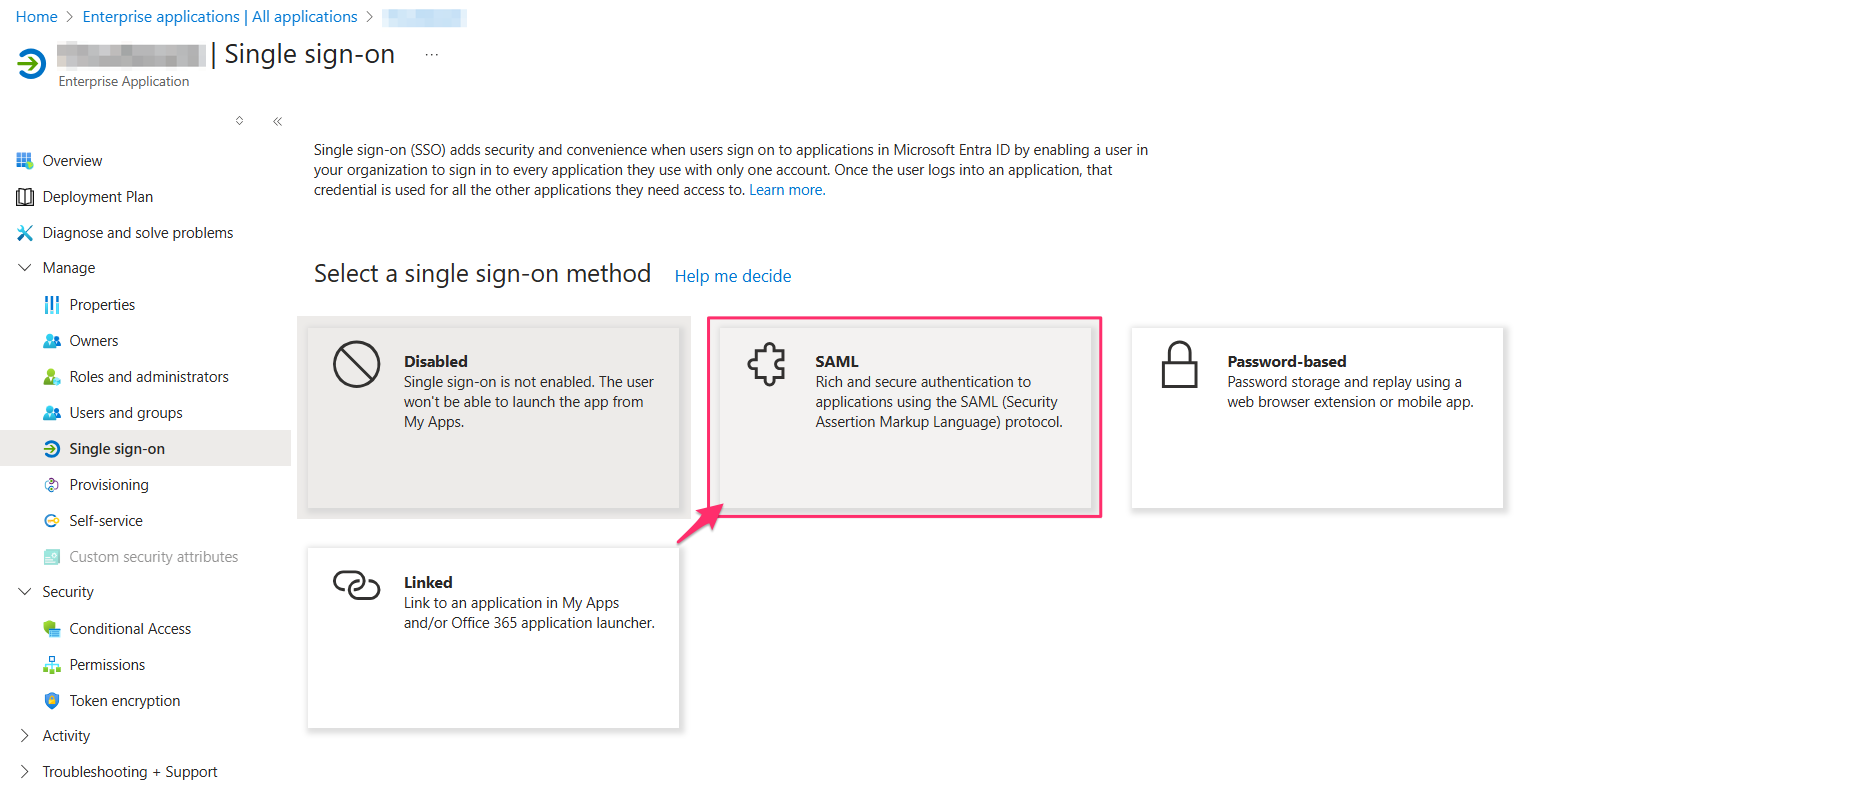
Choose SAML as the single sign-on method.
-
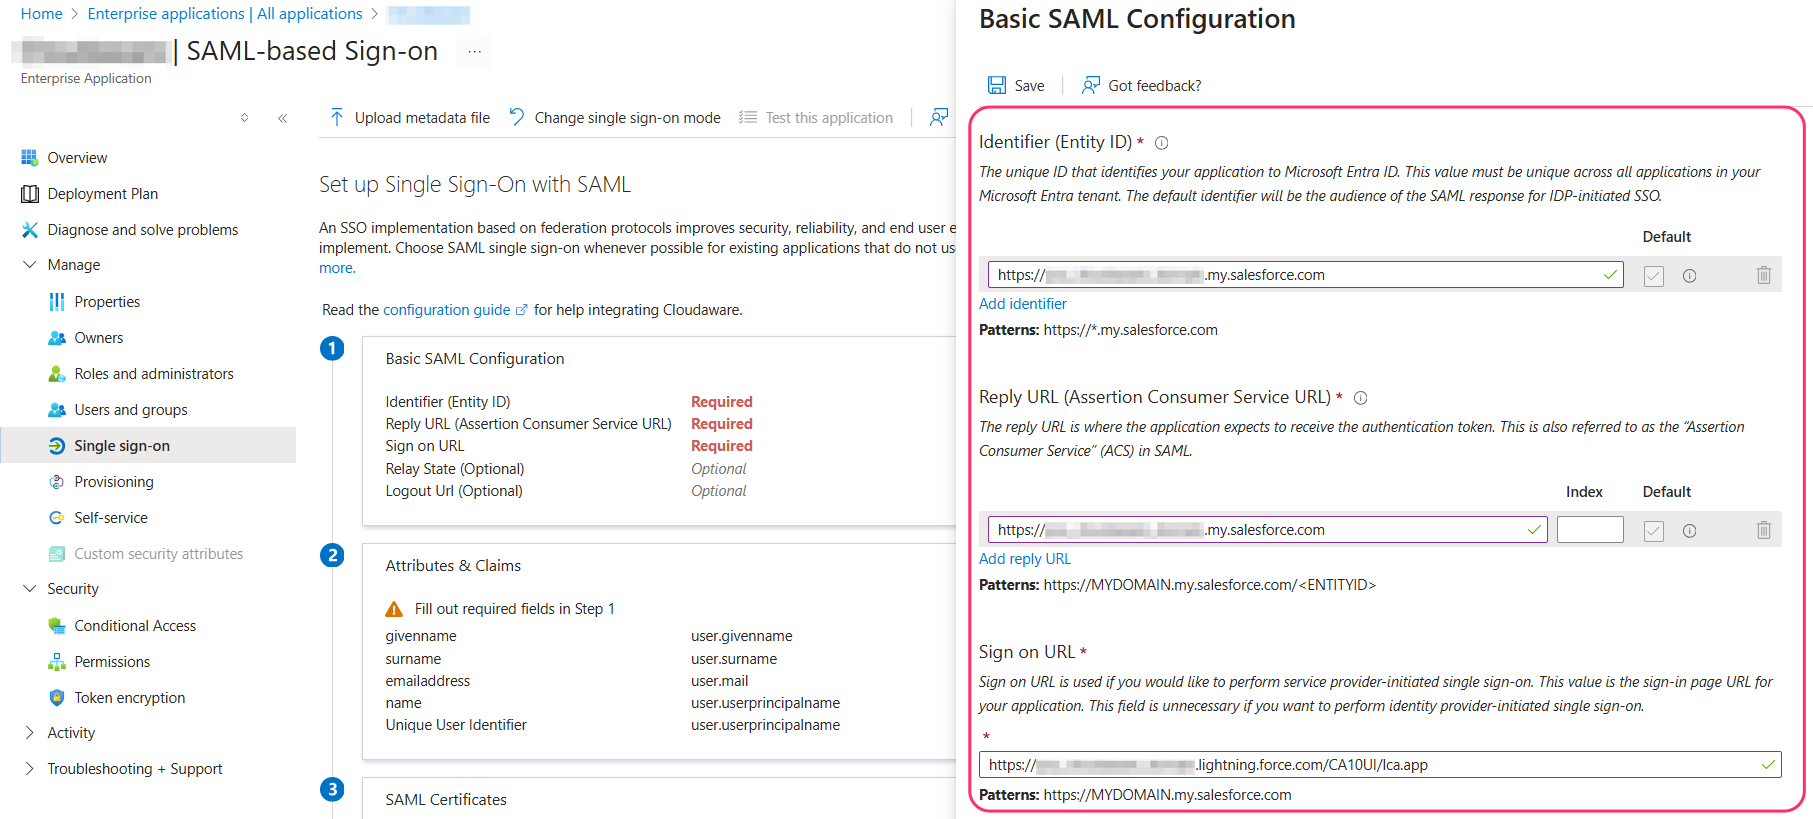
In Basic SAML Configuration, specify the values:
WHERE
Identifier (Entity ID):https://<your_cloudaware_domain>.my.salesforce.comwhere<your_cloudaware_domain>is a placeholder for the unique Cloudaware instance ID (use the Cloudaware instance’s web address)Reply URL (Assertion Consumer Service URL):
https://<your_cloudaware_domain>.my.salesforce.comwhere<your_cloudaware_domain>is a placeholder for the unique Cloudaware instance ID (use the Cloudaware instance’s web address)
Sign-on URL:https://<your_cloudaware_domain>.lightning.force.com/CA10UI/lca.appwhere<your_cloudaware_domain>is a placeholder for the unique Cloudaware instance ID (use the Cloudaware instance’s web address)
Select Save.
Attributes & Claims:By default, the Unique User Identifier (Name ID) is set to the
user.userprincipalnameEntra ID attribute. Adjust the value format if needed.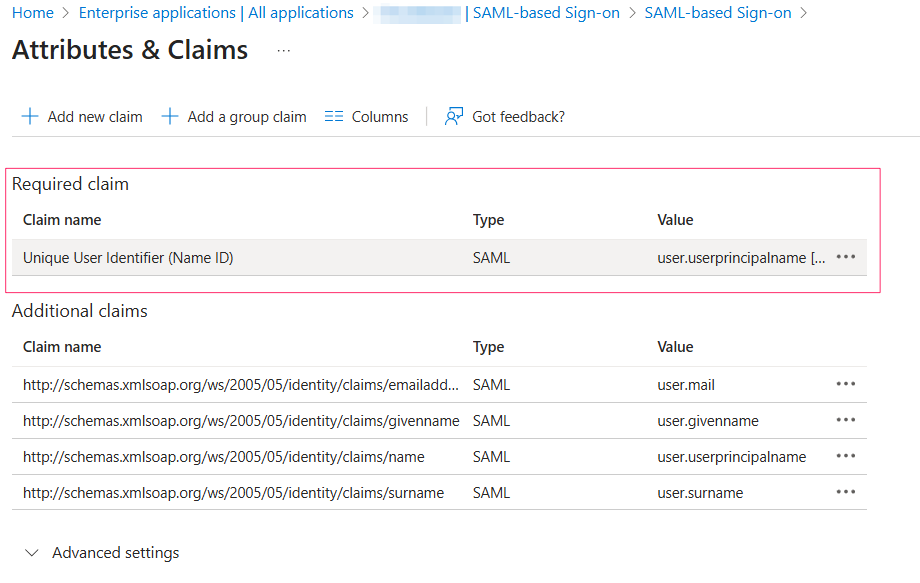
If required, enable JIT provisioning in Cloudaware by creating the following claims in the Additional claims section:
User.Username: Cloudaware runs on Salesforce, where usernames must be globally unique. In the Transformation field, selectJoin()to specify the attribute values. Under Parameter 1, in the Attribute name field, type cloudaware (without quotes) and select the suggested option (in this example, “cloudaware”). Under Parameter 2, in the Attribute name field, selectuser.mail. Click Add.
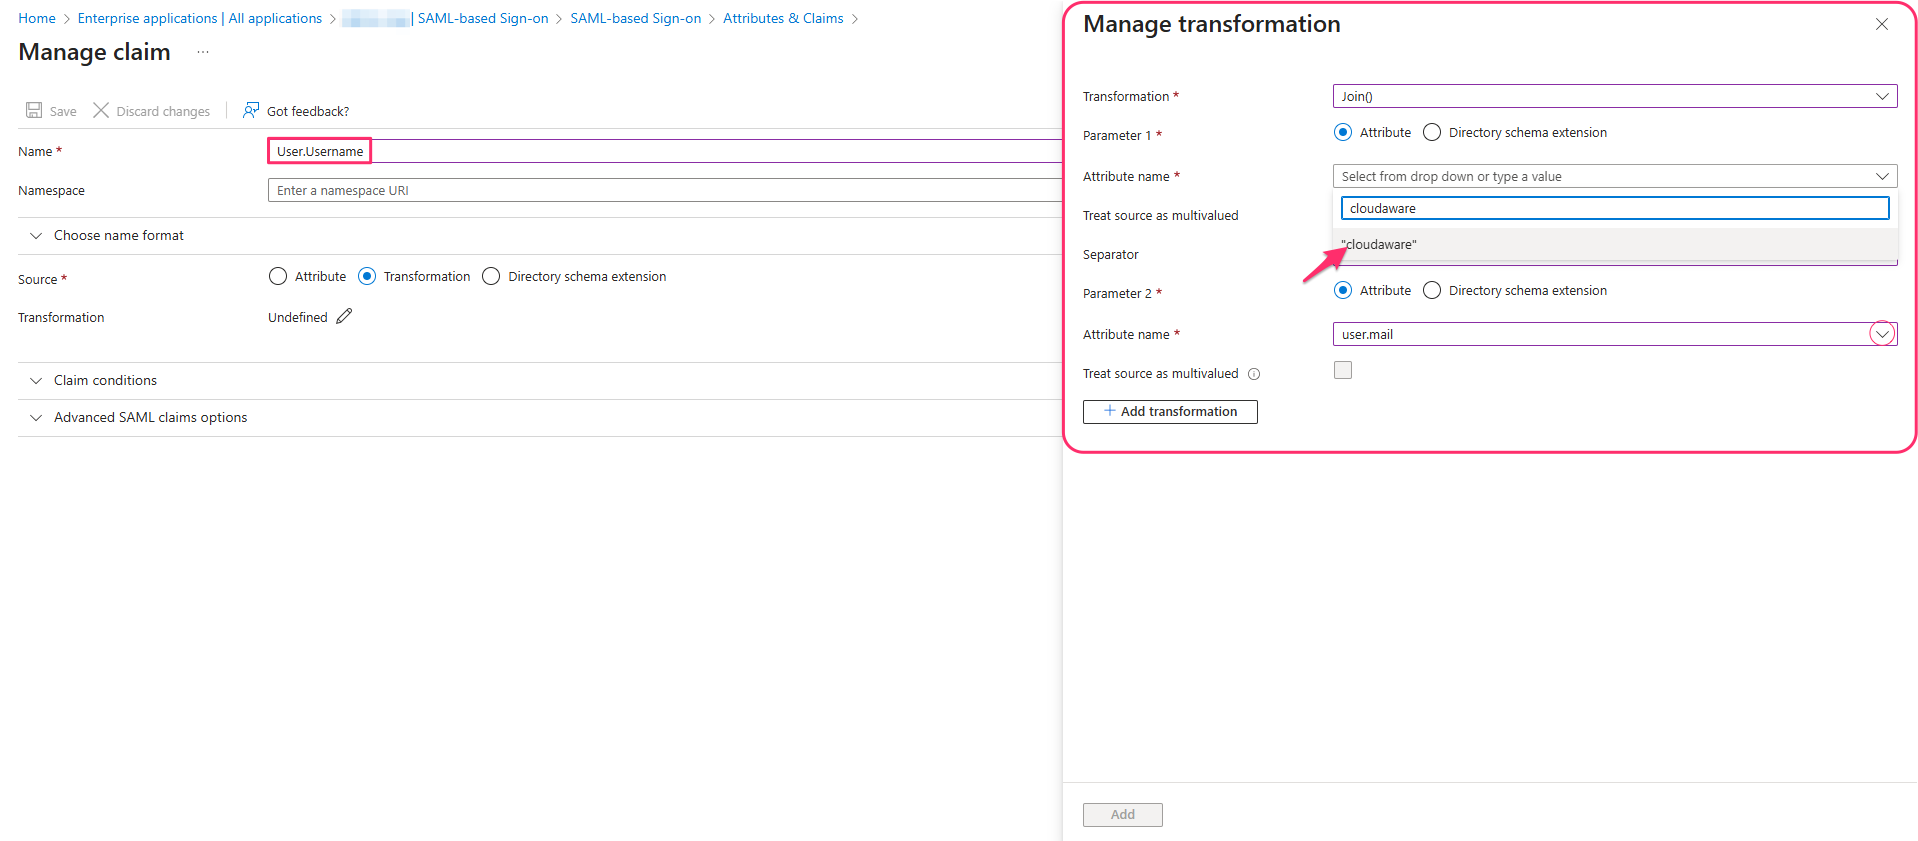
The resulting Transformation parameters should look as follows:
.png?cb=eb427401fcd655b4b7b1cc912a201576)
User.FirstName:user.givenname
User.LastName:user.surname
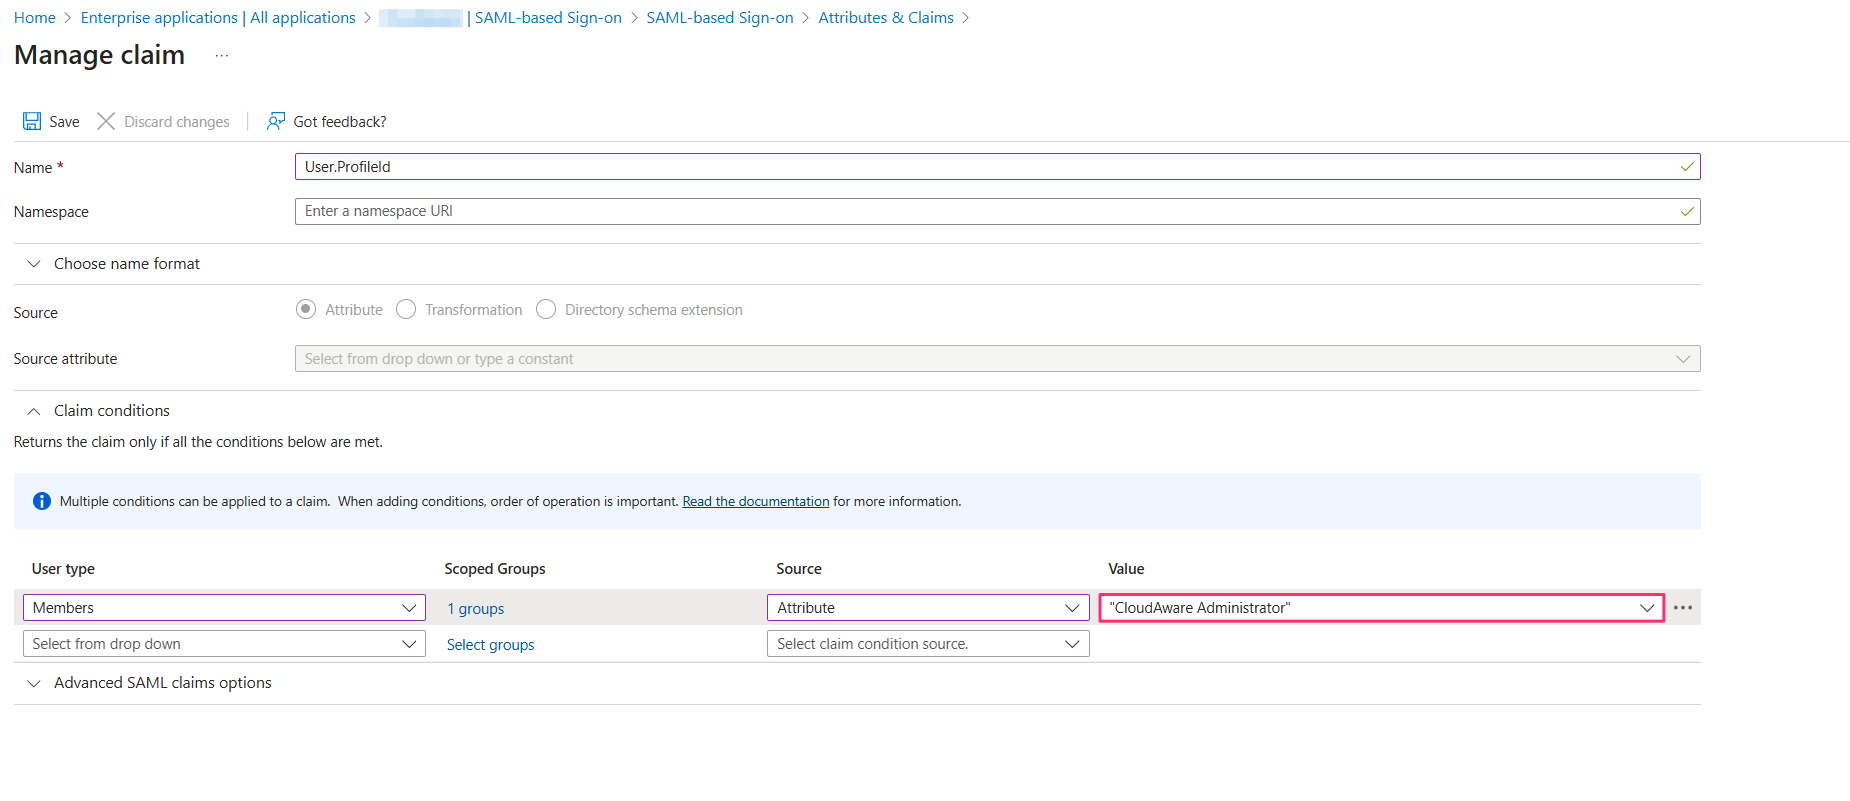
User.ProfileId: Must match one of the Cloudaware profile names (for example, CloudAware Administrator, CloudAware User)
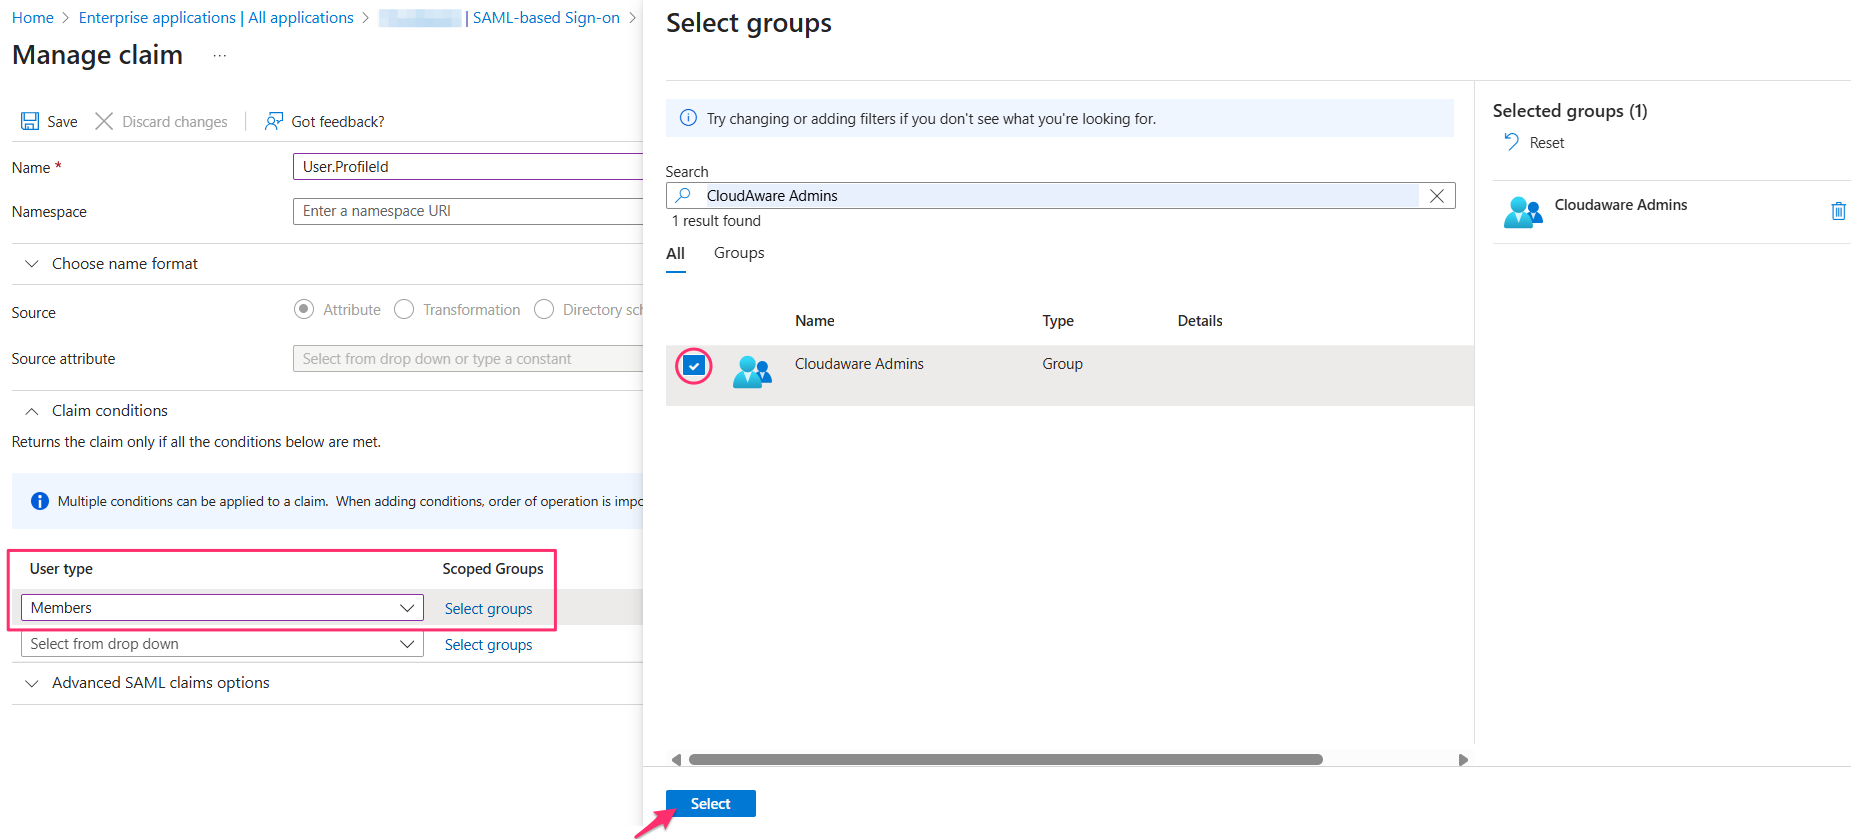
You can use claim conditions to assign the attribute value based on group membership. For example, if the user belongs to the Admins group → set to CloudAware Administrator.
User.Email:user.email
User.IsActive (Optional): If automation is in place to deactivate users in Cloudaware after a defined period of inactivity (no logins), this attribute statement can be added and set to true. Doing so ensures that a deactivated user is reactivated and able to log in.
-
Assign users or groups to the app.
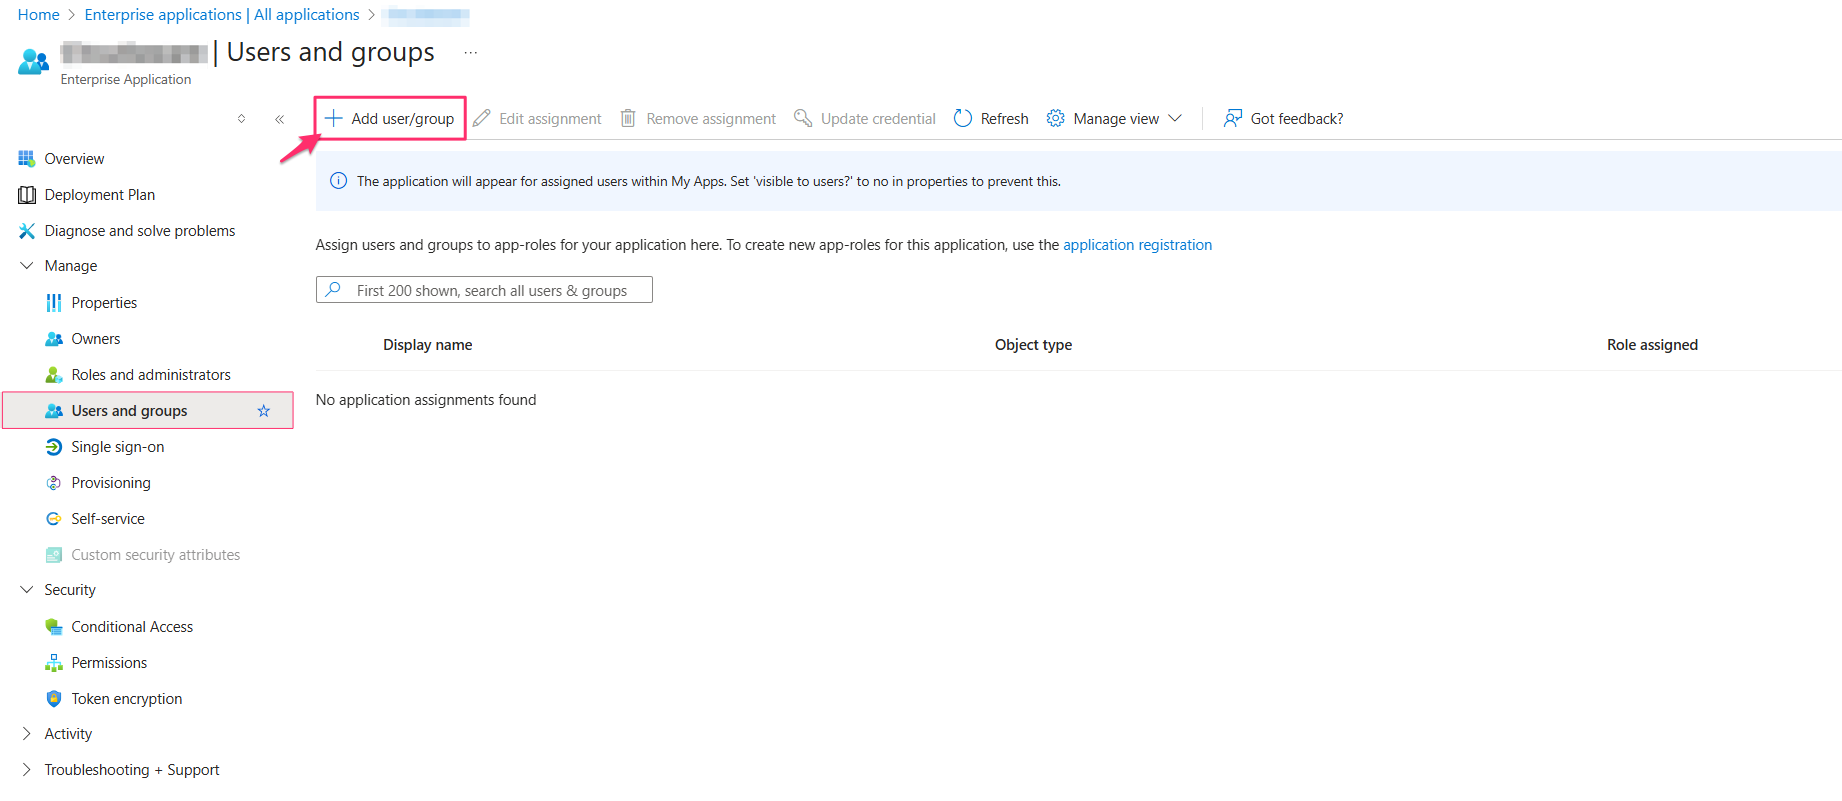
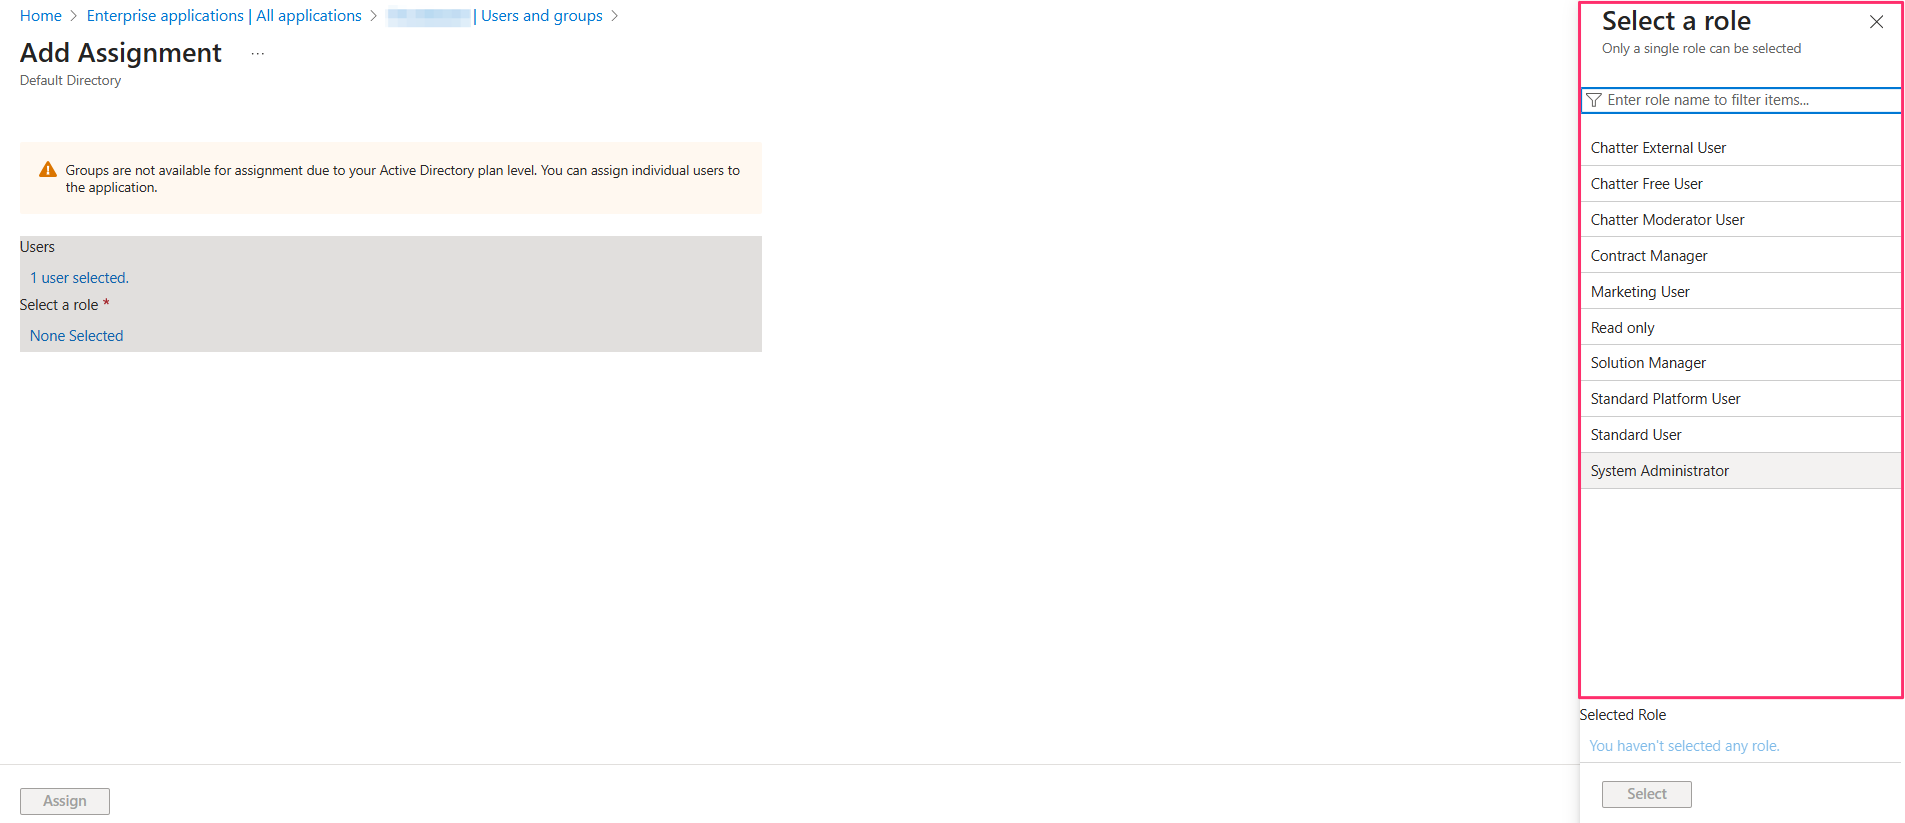
When assigning an individual user, you will be prompted to select a role. Choose any role – the selection does not affect the actual Cloudaware role or profile.
-
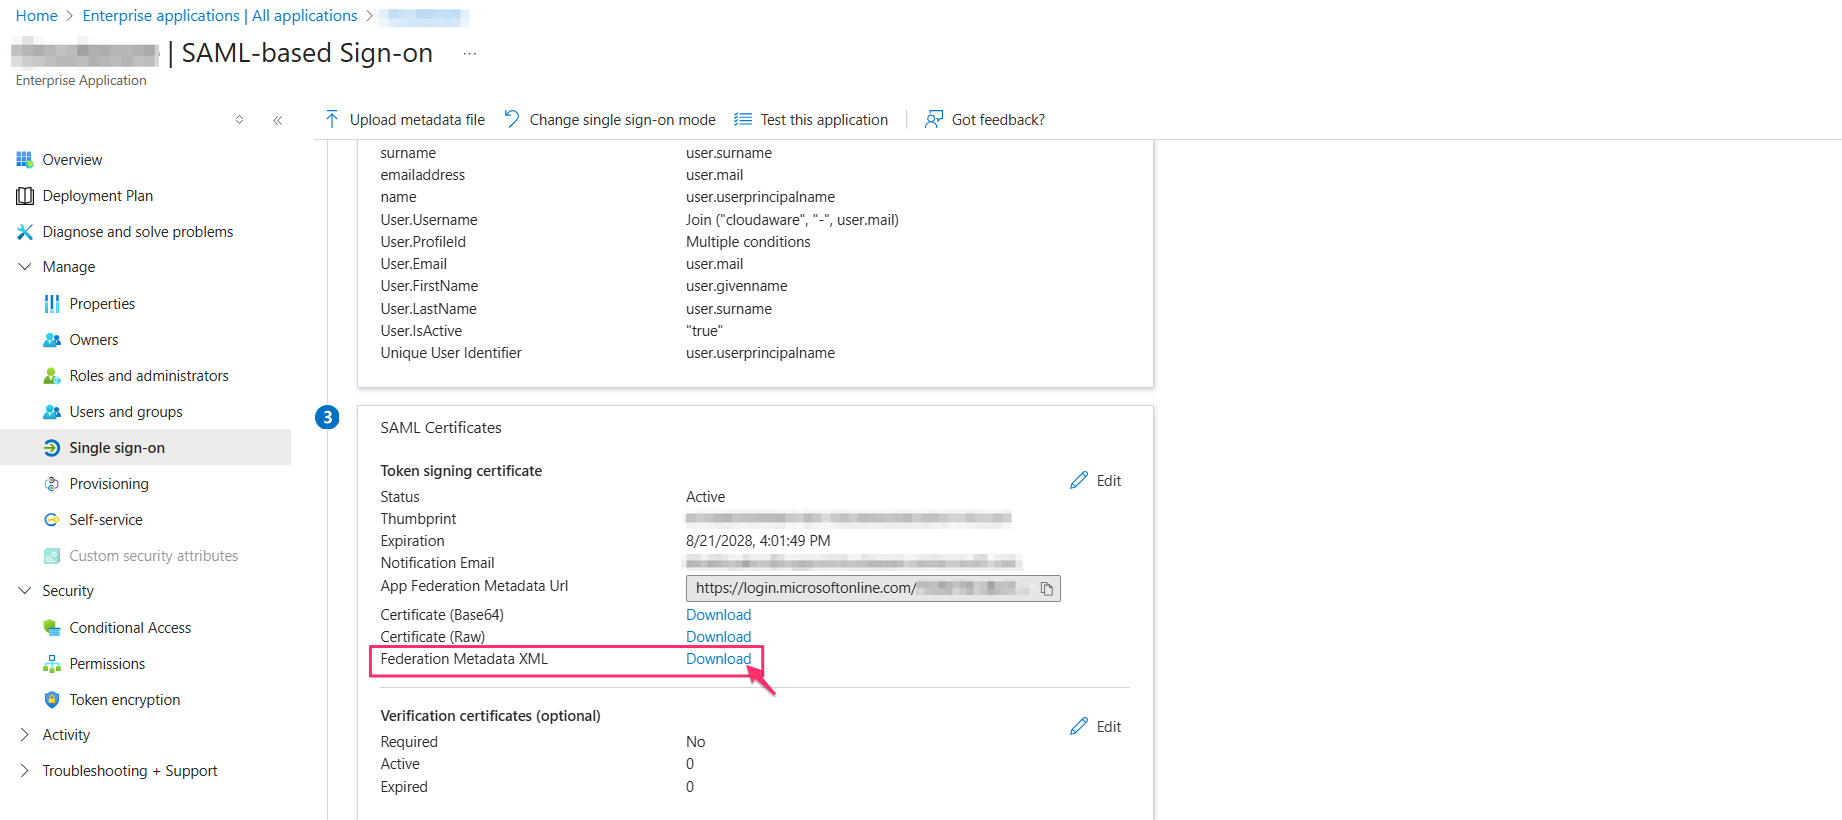
Download and save the Federation Metadata XML file. You can find it in the ‘Single sign-on’ section of your app.
Setup in Cloudaware
-
Log in to Cloudaware → Setup.

-
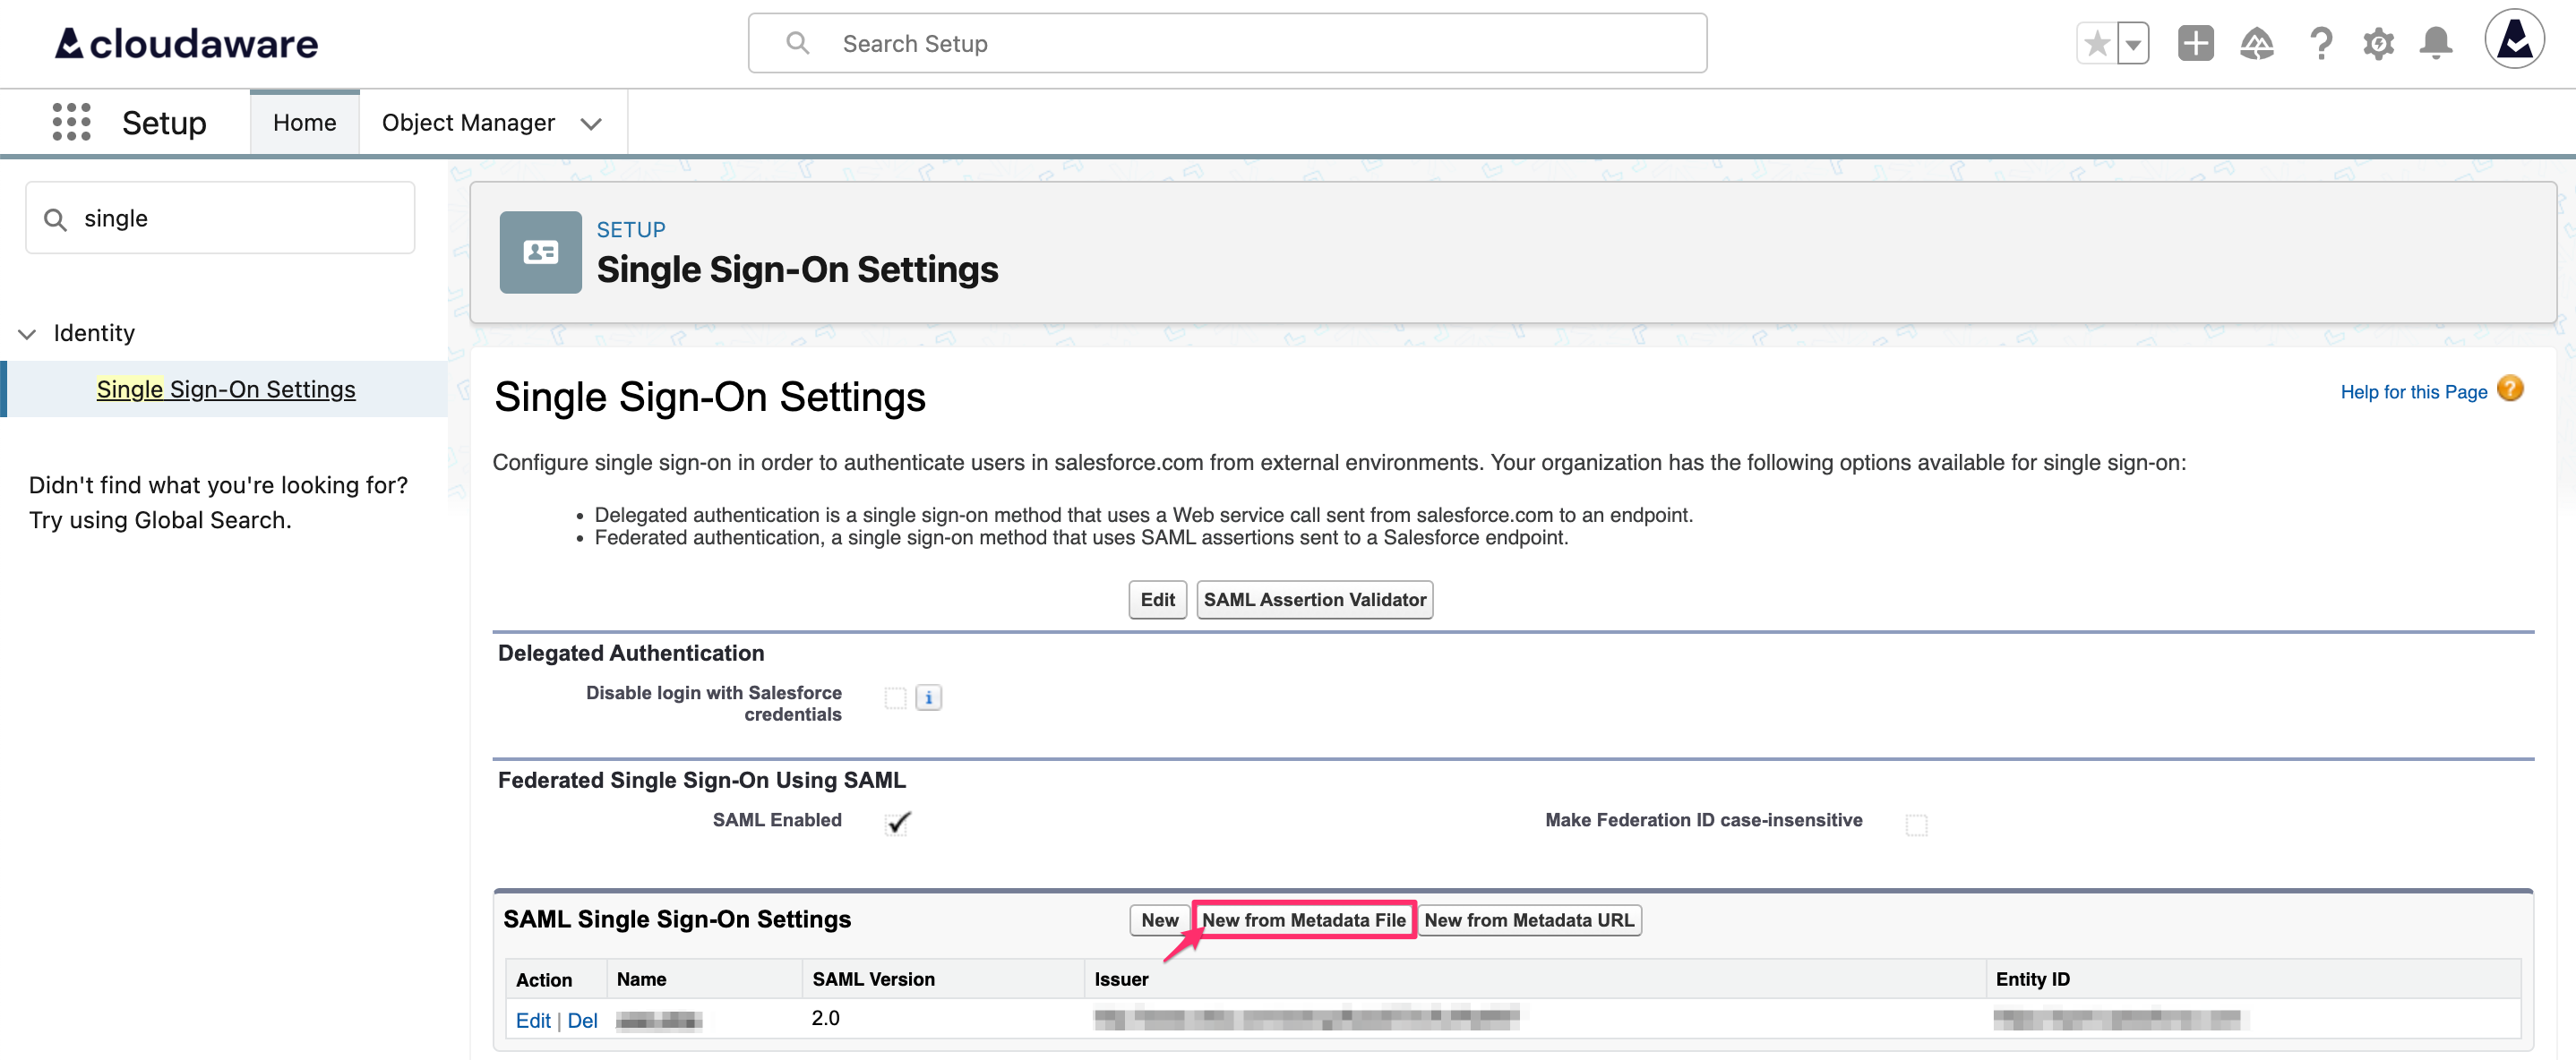
Type Single in the Quick Find bar. Under Identity, select Single Sign-On Settings. Ensure that the SAML Enabled checkbox is checked.
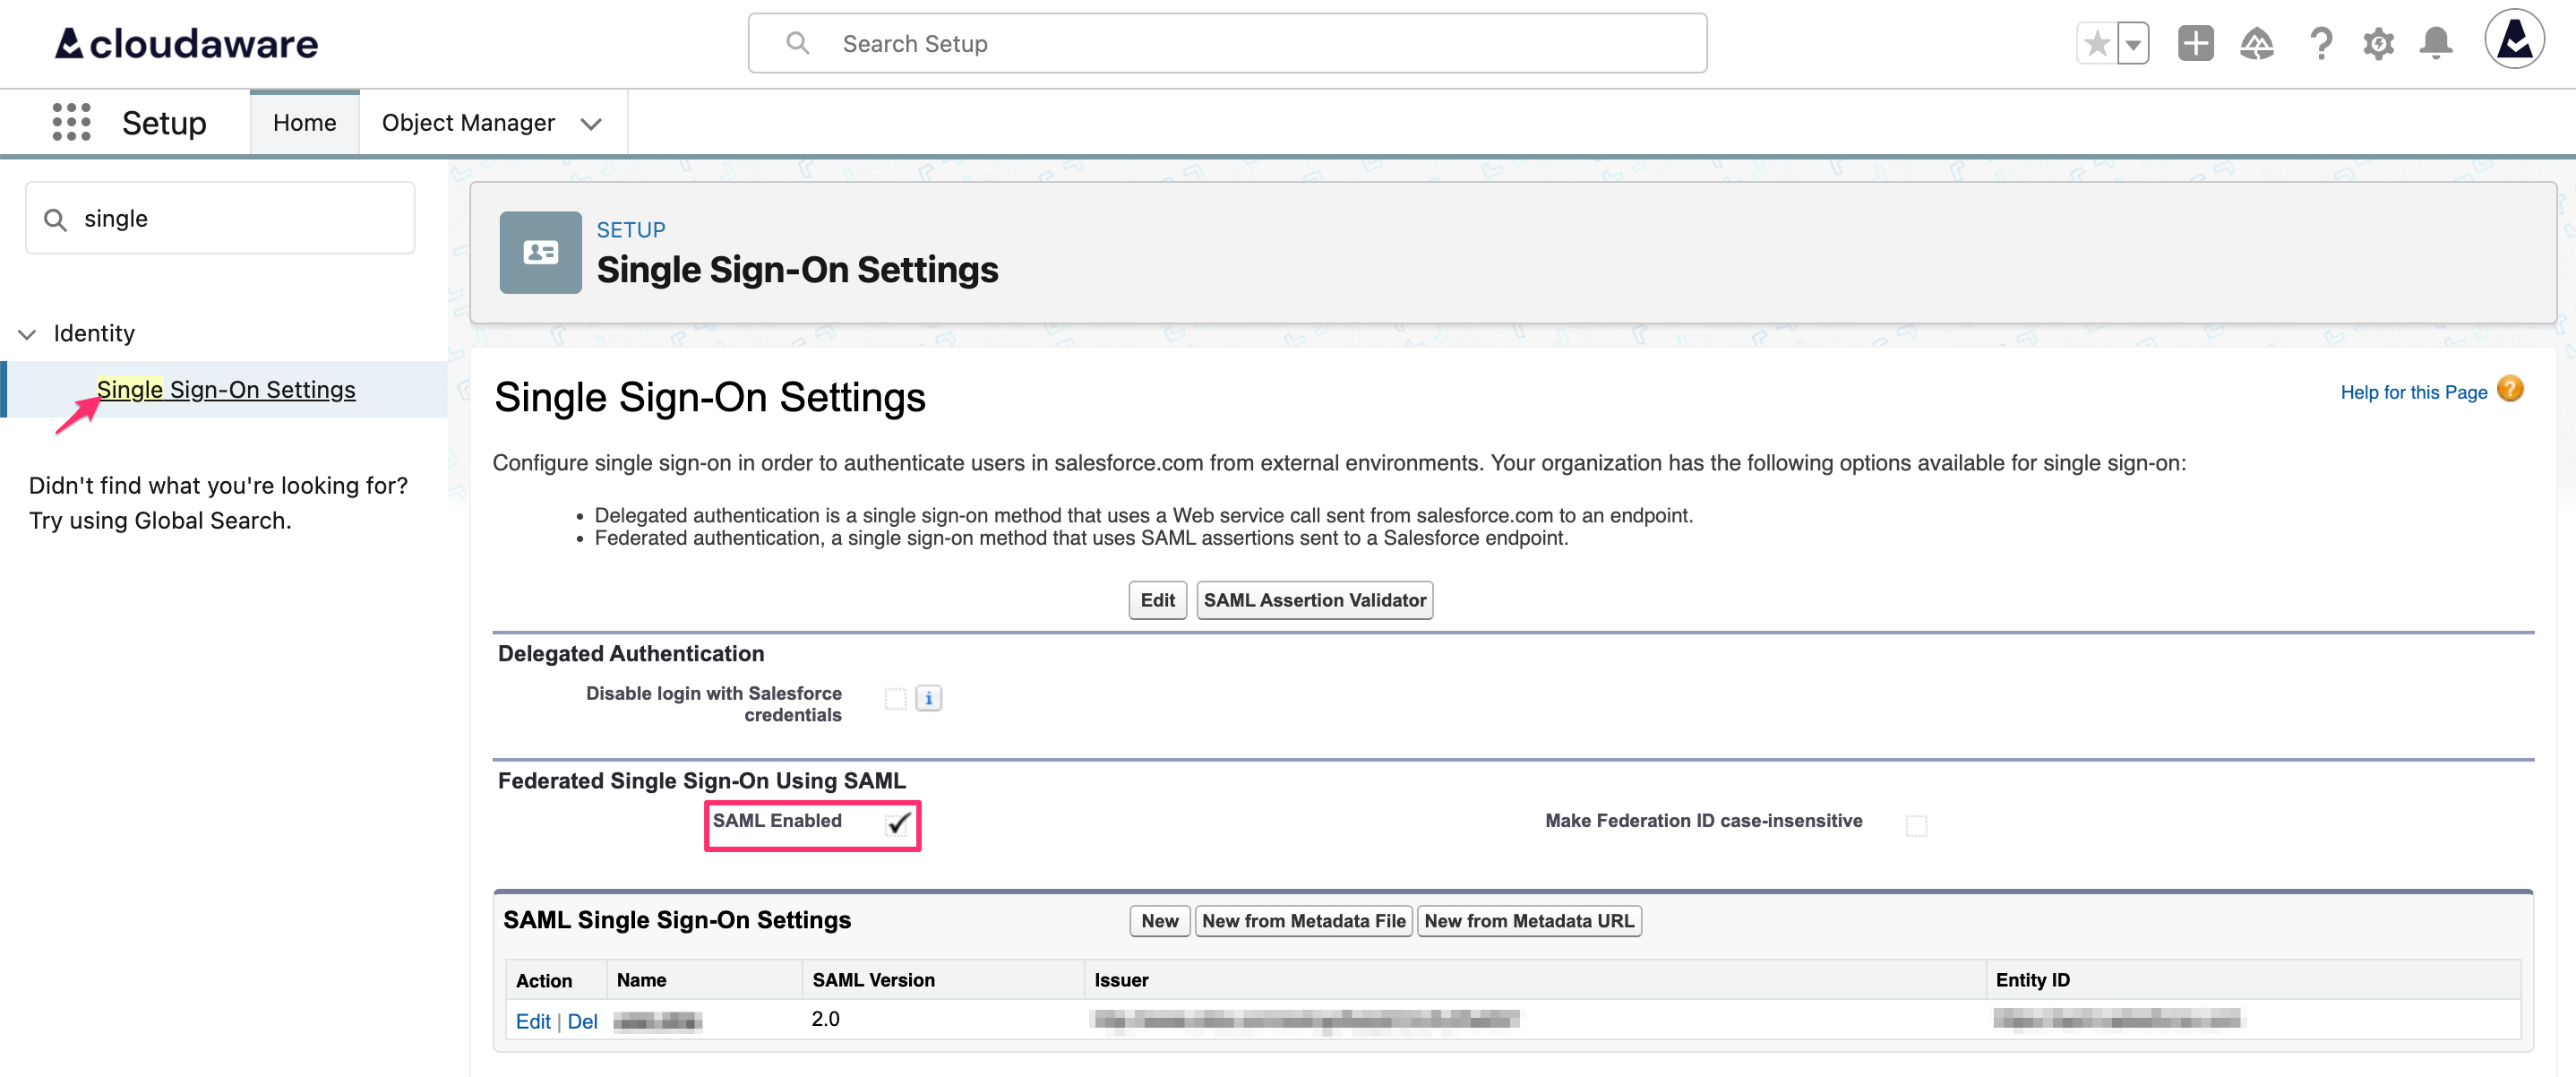
Otherwise, click Edit, check the box and save the changes.
By default, the Federation ID required for SSO setup is case-sensitive. If required, make the setting case-insensitive by selecting the Make Federation ID case-insensitive checkbox:

-
Create a new SSO setting. Click New from Metadata File, upload the XML file from Azure Entra ID, and click Create.
-
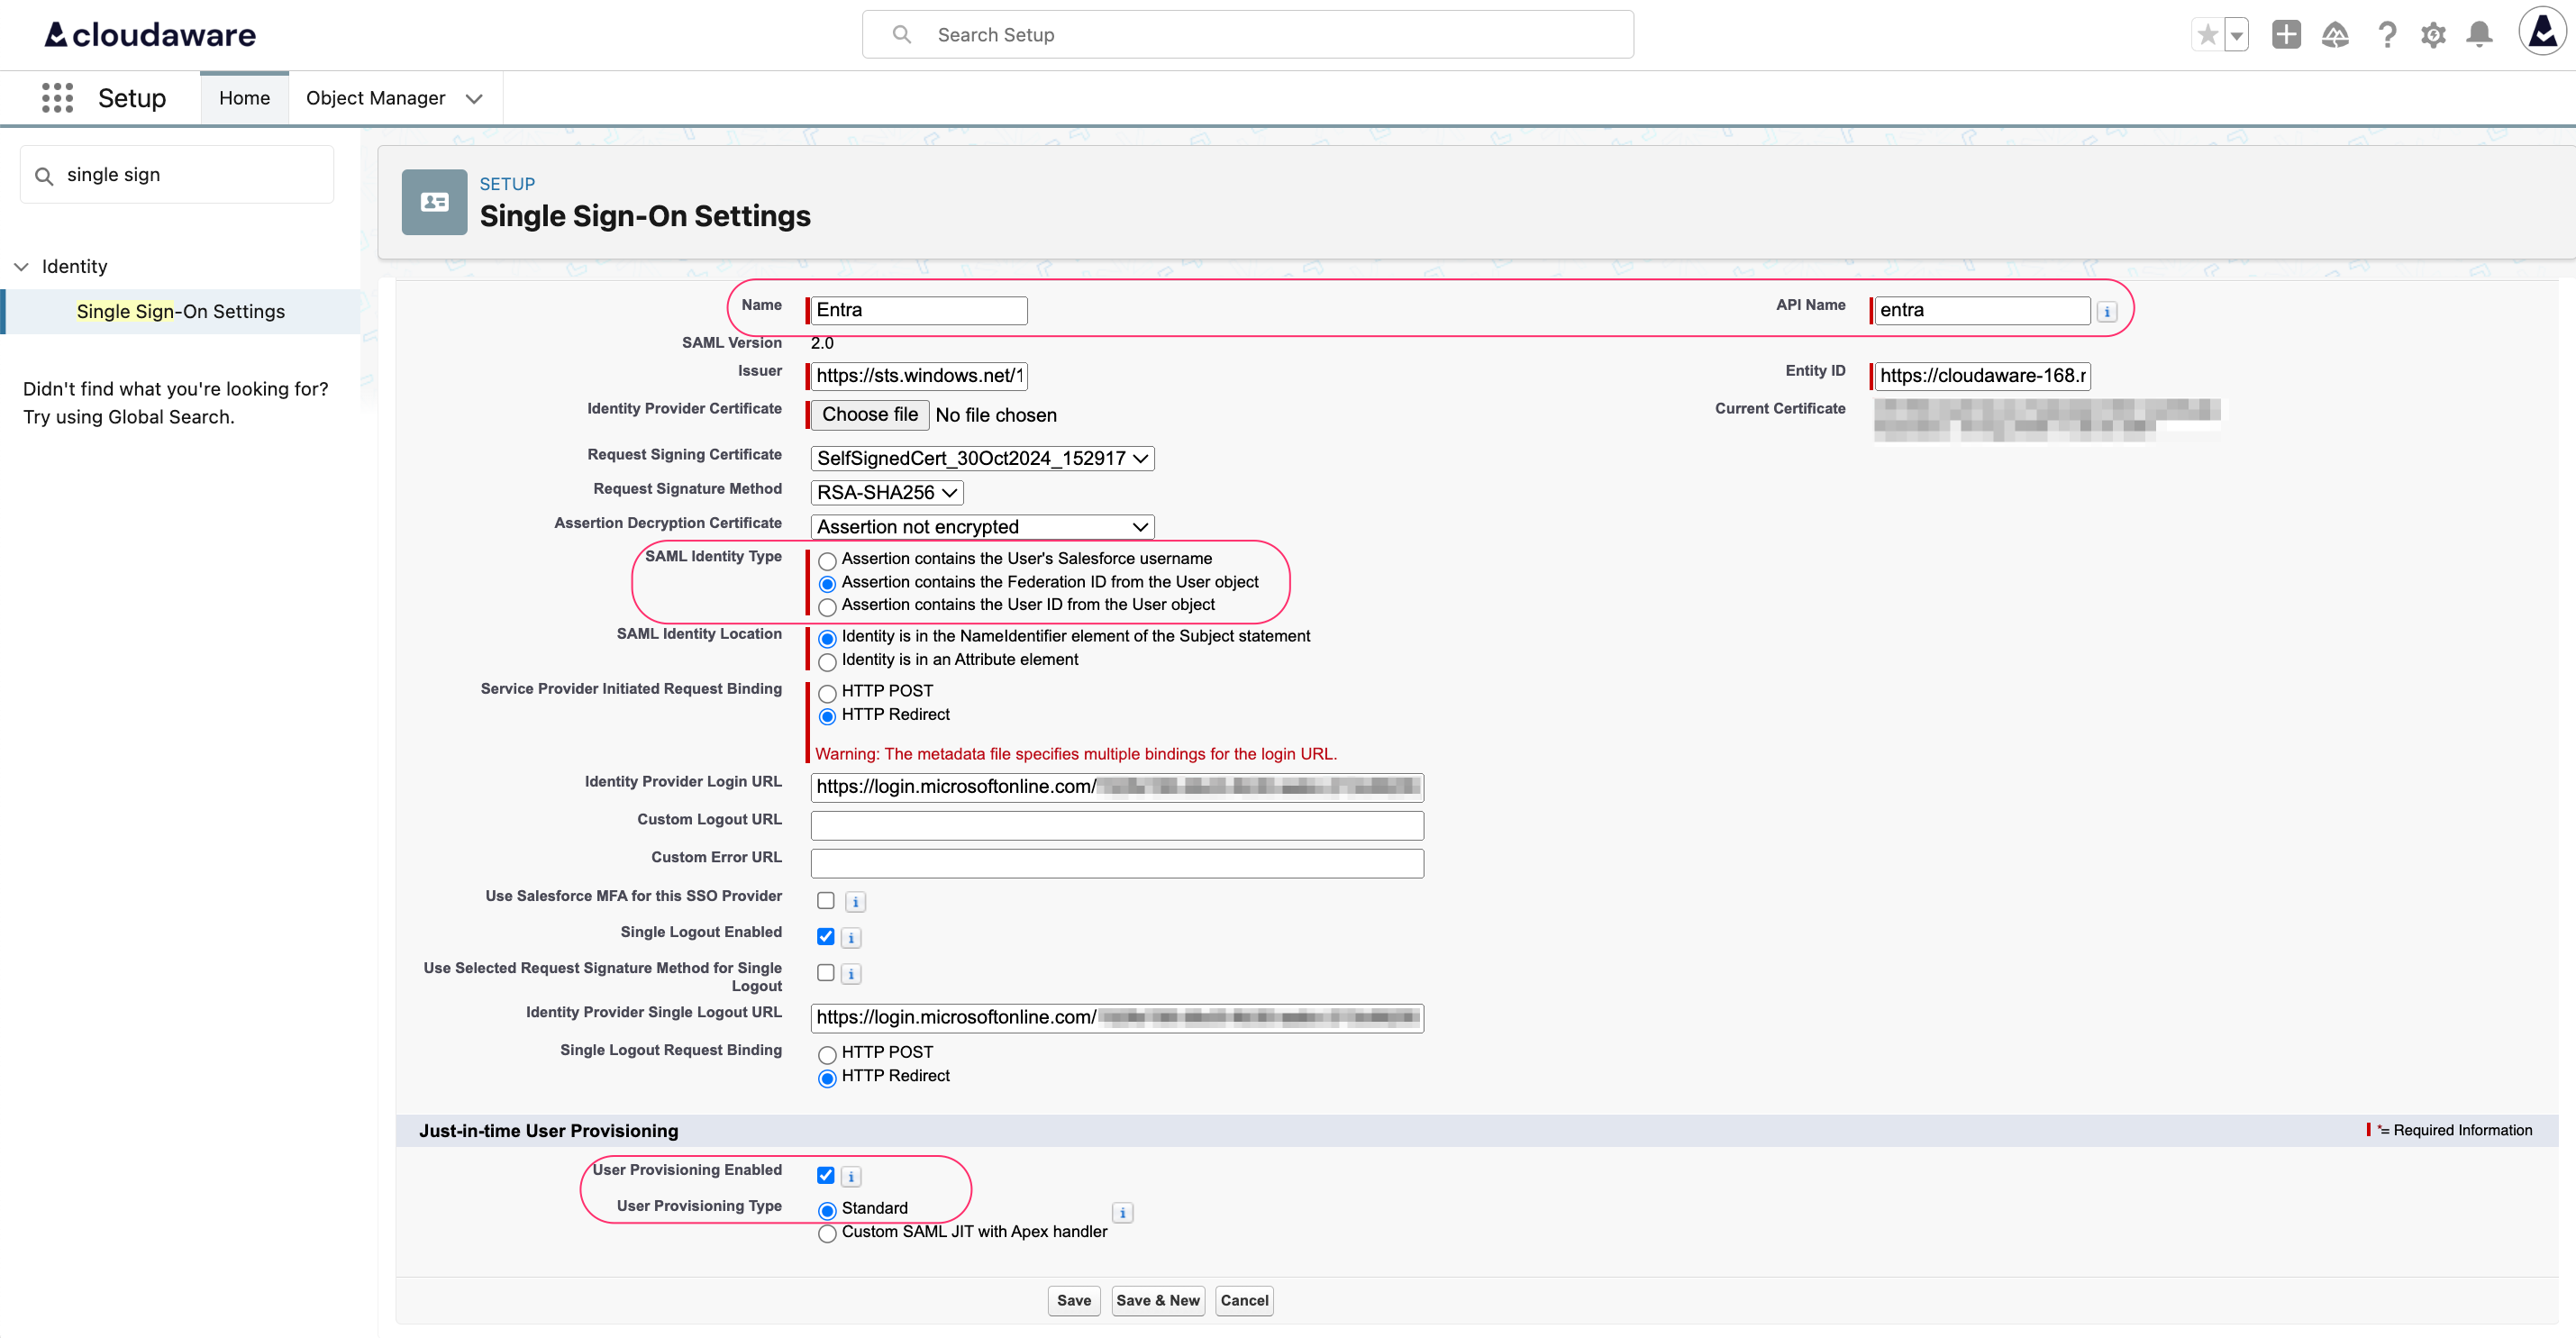
Configure SAML Single Sign-On settings:
WHERE
Name: set a descriptive name for the SSO setting
API Name: auto-populated
SAML Identity Type: if JIT is required, select Assertion contains the Federation ID from the User Object
Just-in-time User Provisioning: if JIT is required, check the User Provisioning Enabled box and select Standard in User Provisioning Type
Click Save.
-
Configure Azure Entra as an authentication service. Type My domain in the Quick Find bar. Select My Domain. Scroll down to the Authentication Configuration section and click Edit.
Select the checkbox near the name of the recently created SSO configuration (in this example, Entra):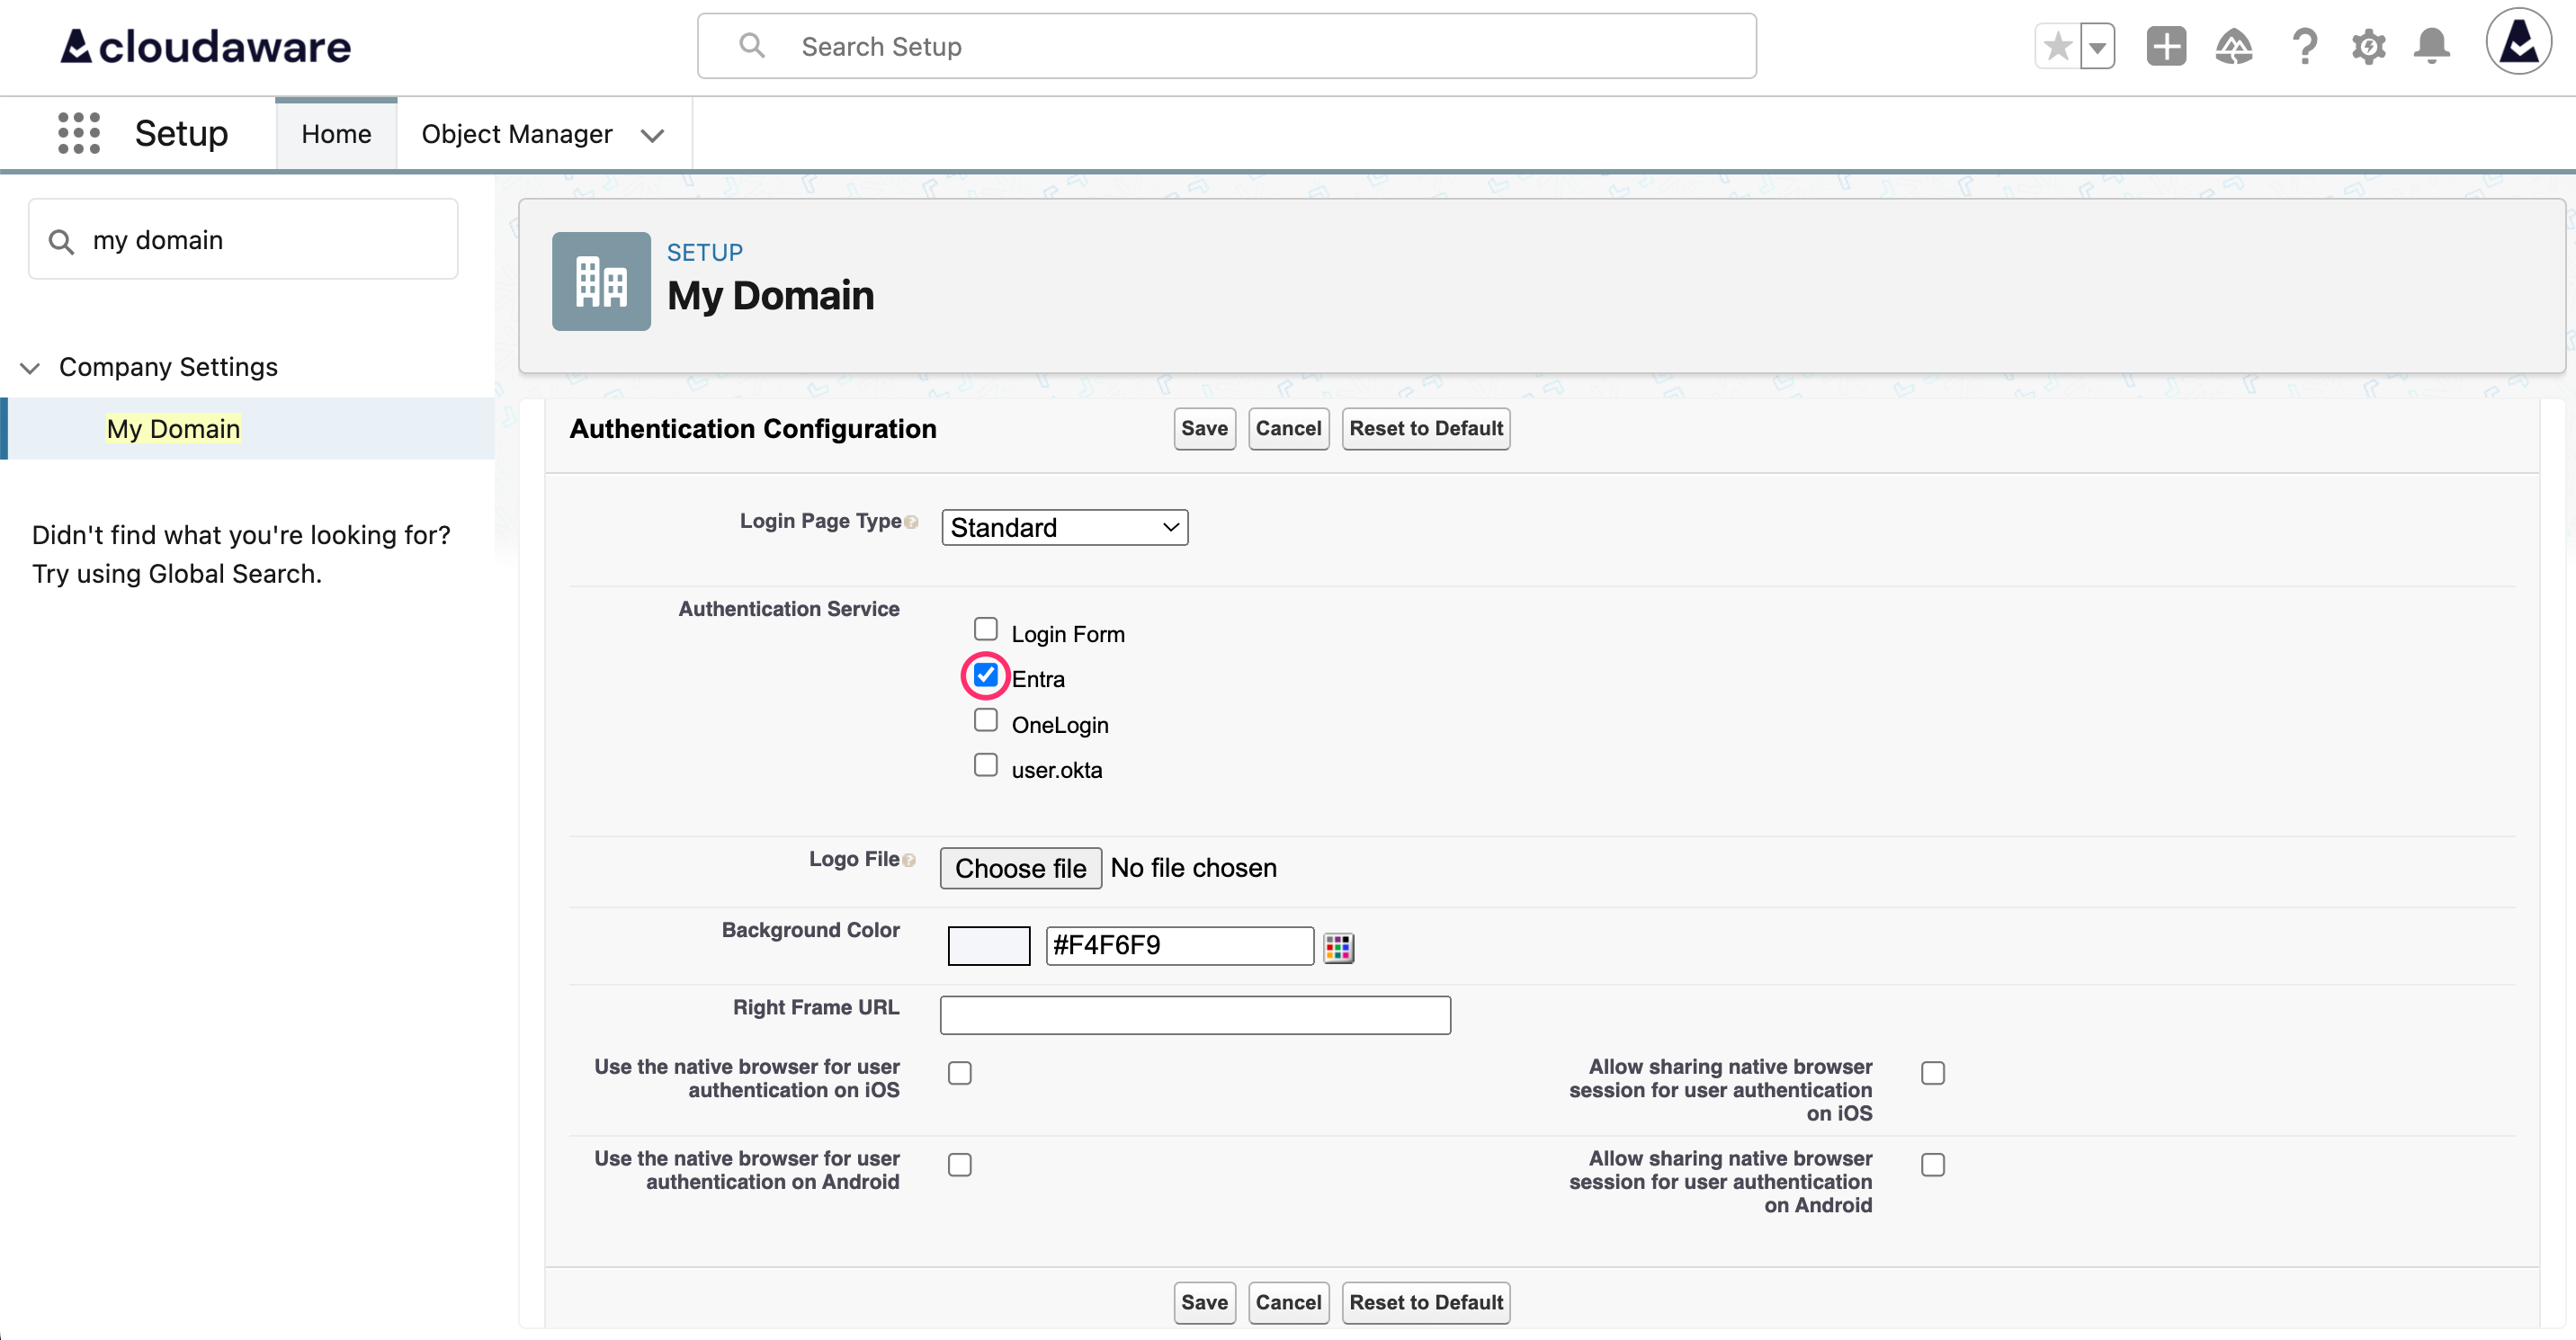
Click Save.