AWS Organizations and Linked Accounts Billing
If you prefer to avoid adding the master payer account to Cloudaware when using AWS Organizations, set up individual linked account billing reports and add them as a separate integration for each account.
Set up AWS linked account billing integration
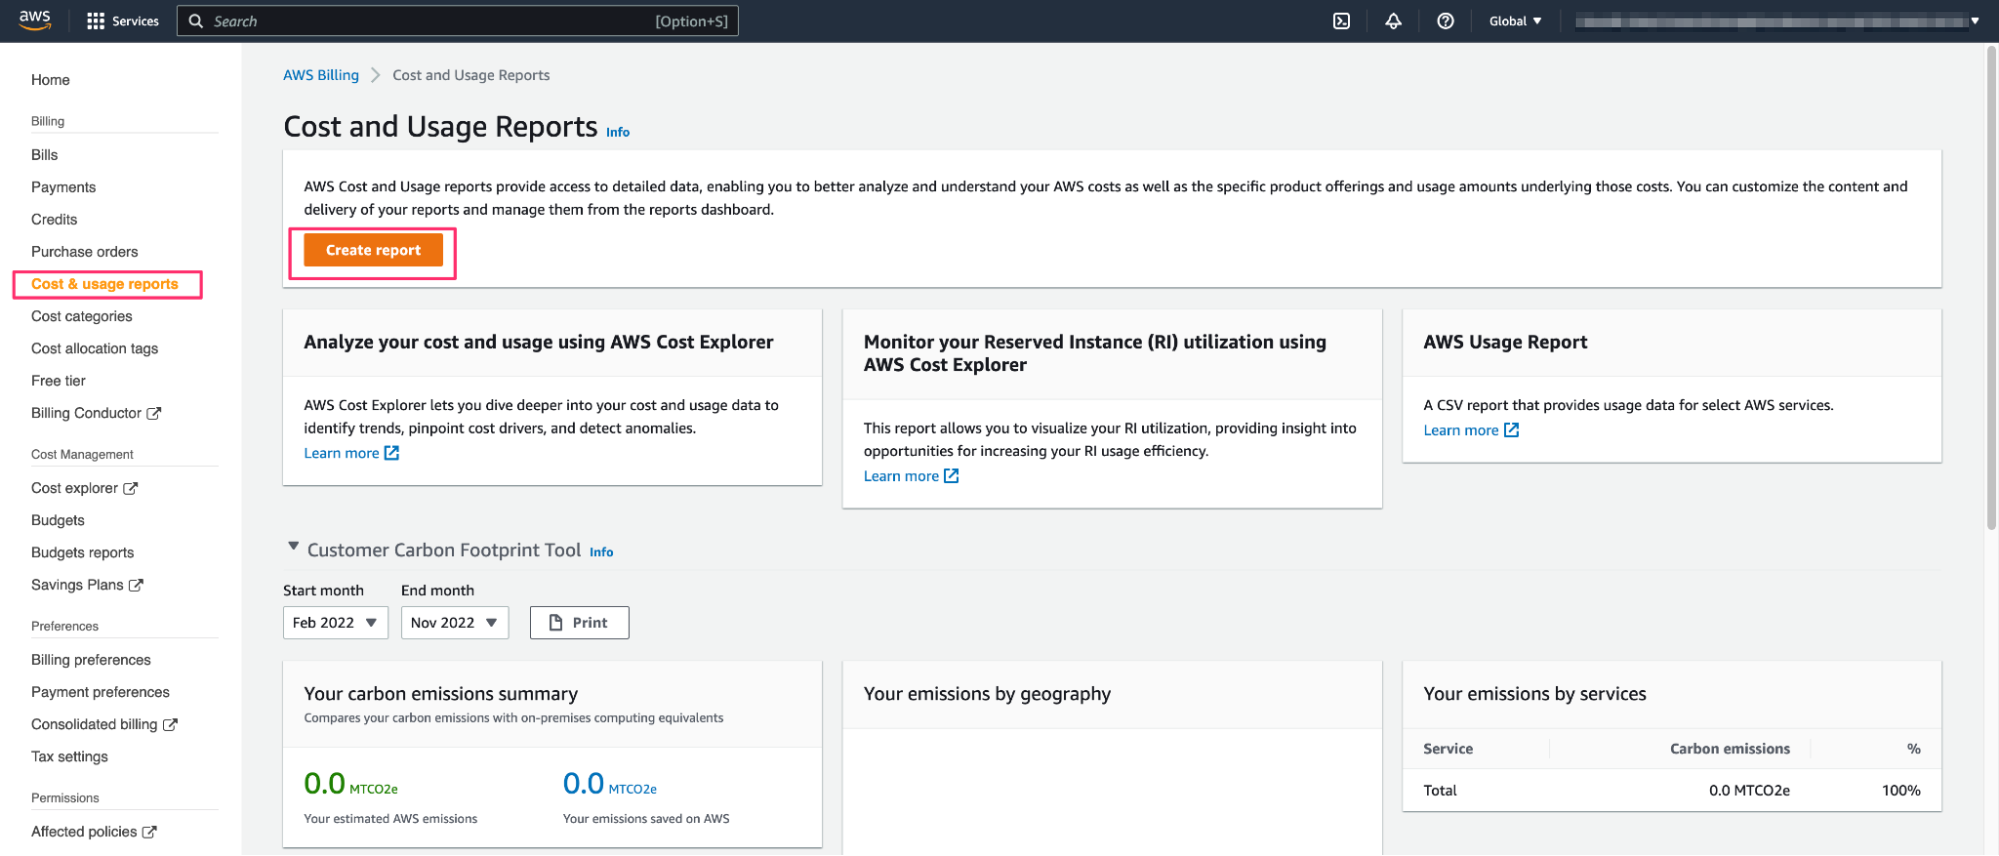
1. Enable Cost and Usage Report for a linked account in Amazon Console. Go to Services → Billing → Cost & Usage Report → Create Report:
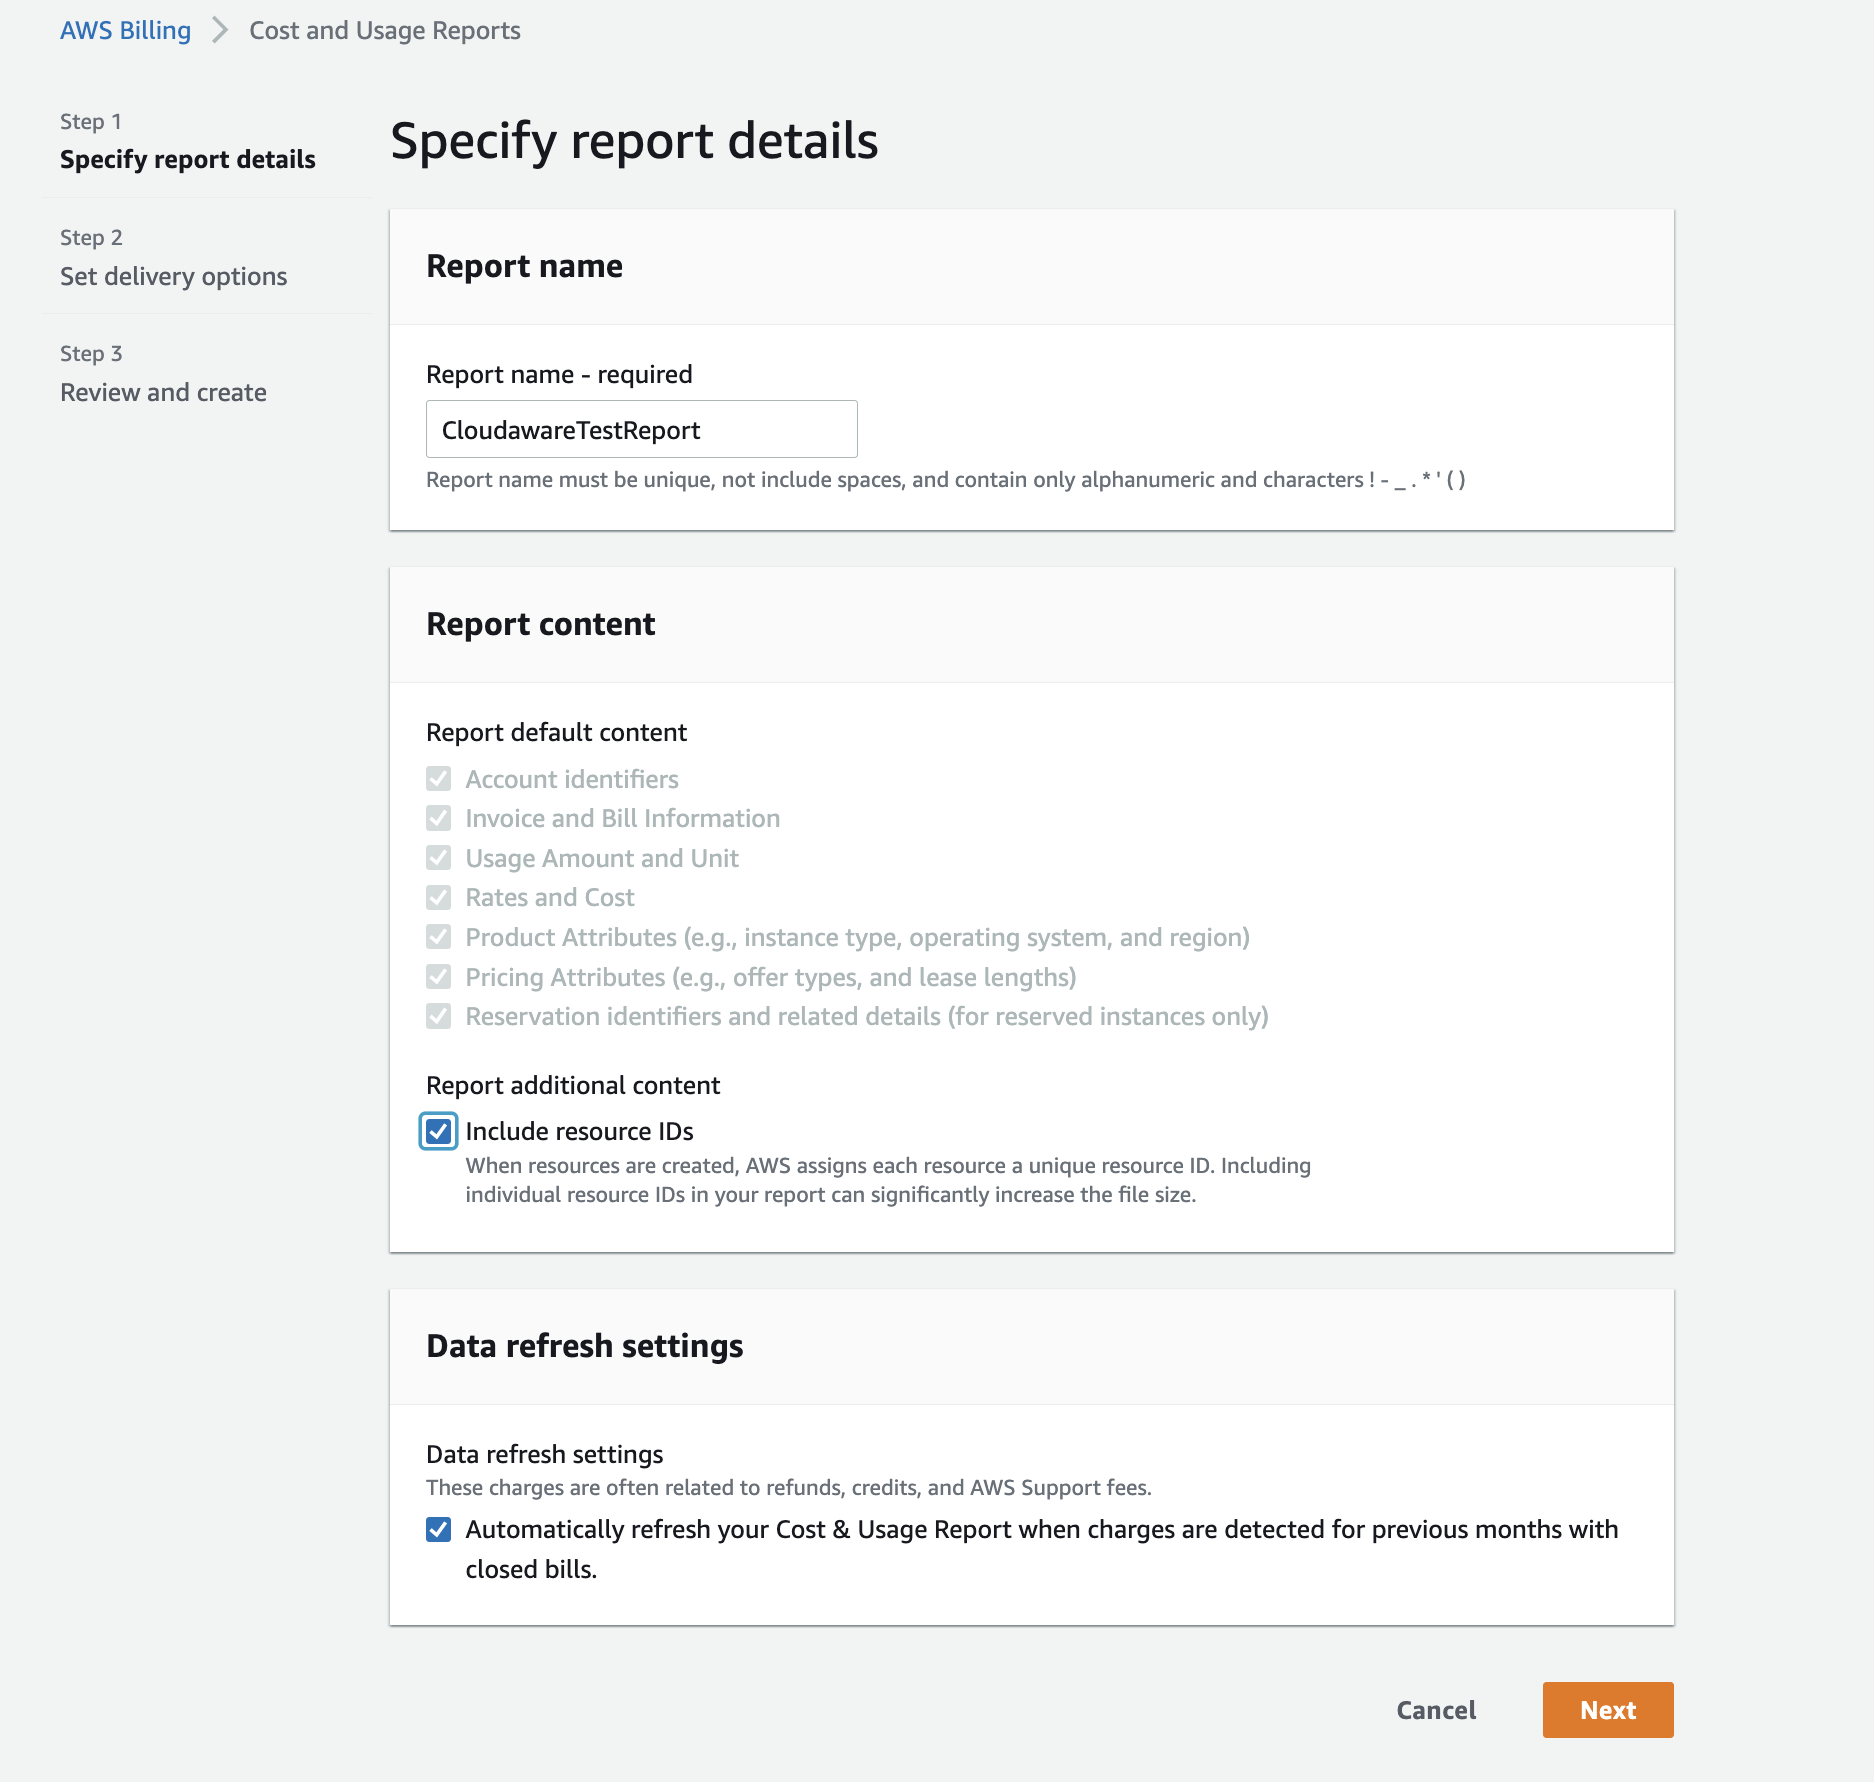
2. Specify the report details and click Next:
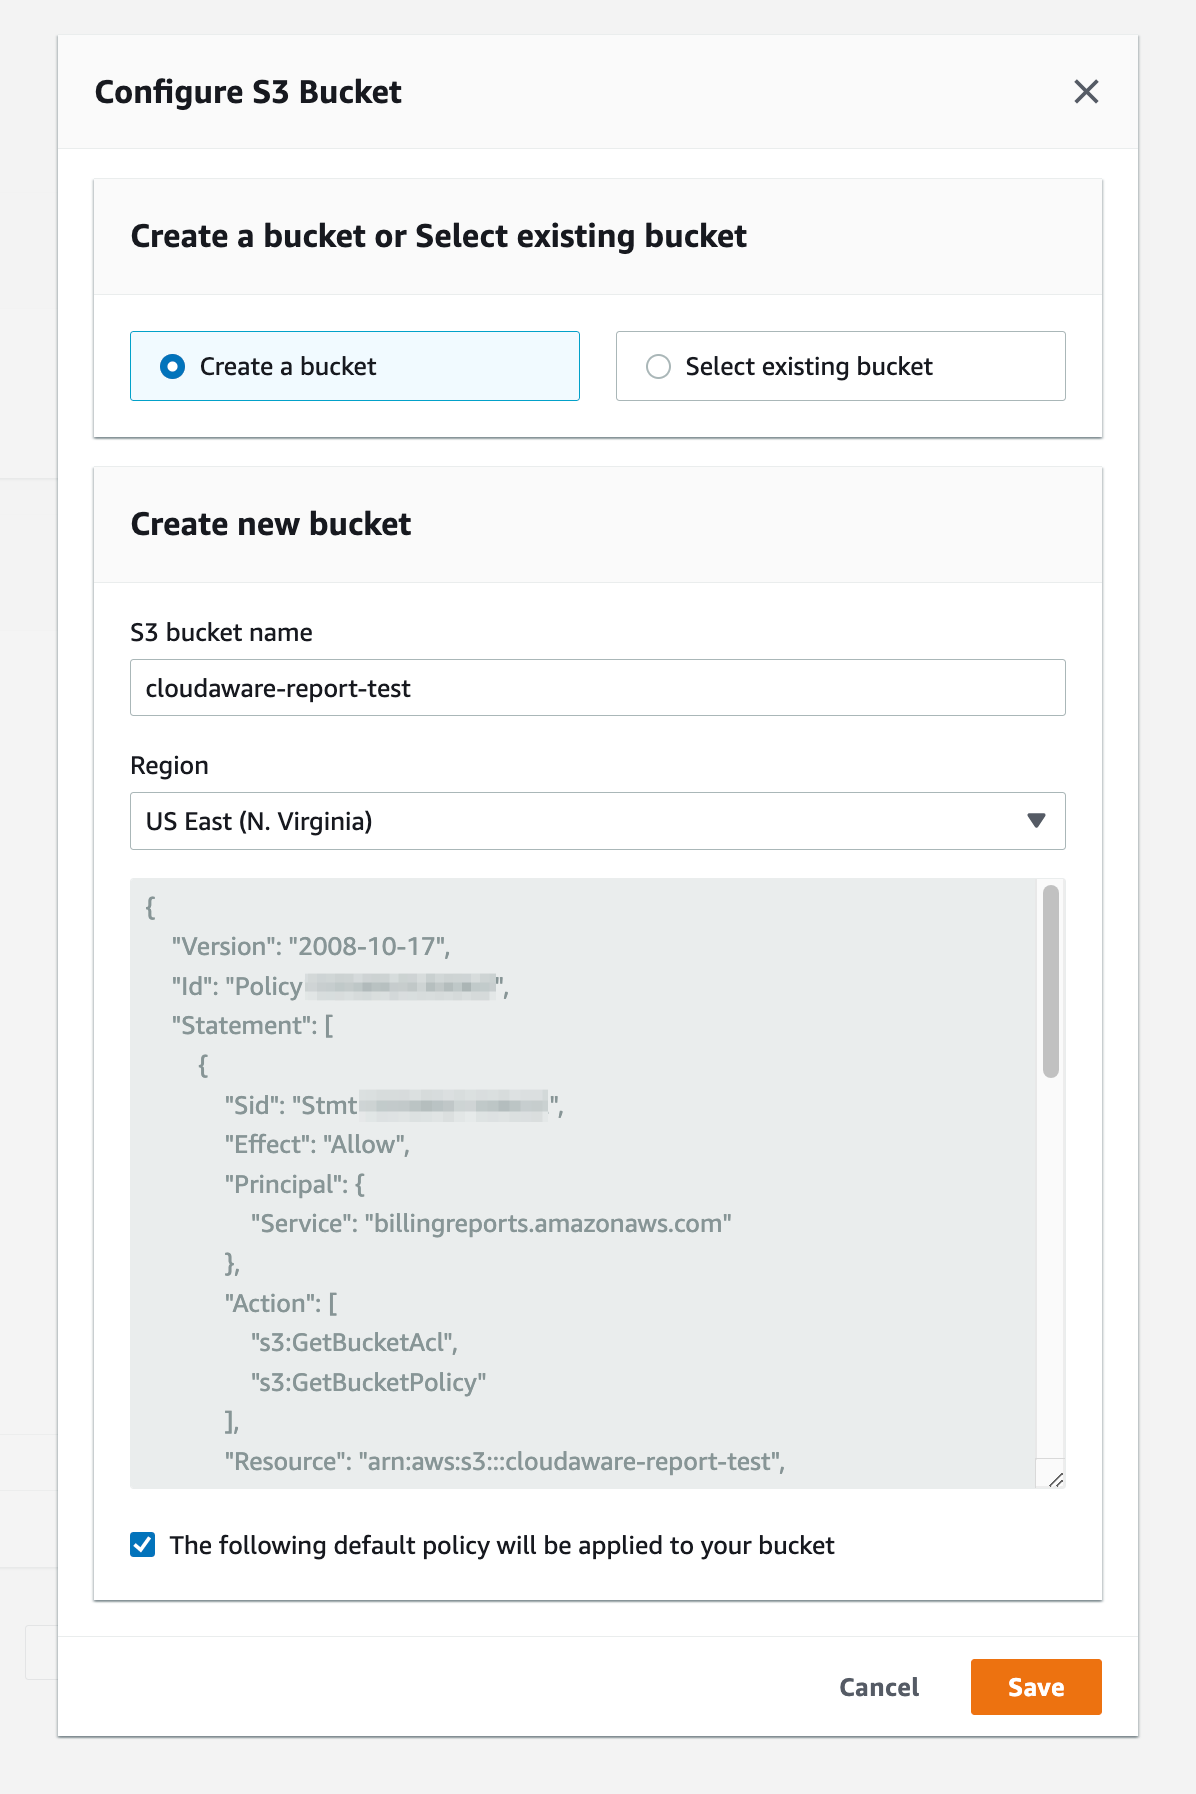
3. Configure the S3 Bucket the report should be placed in and click Save:
4. Setup time granularity and report versioning:
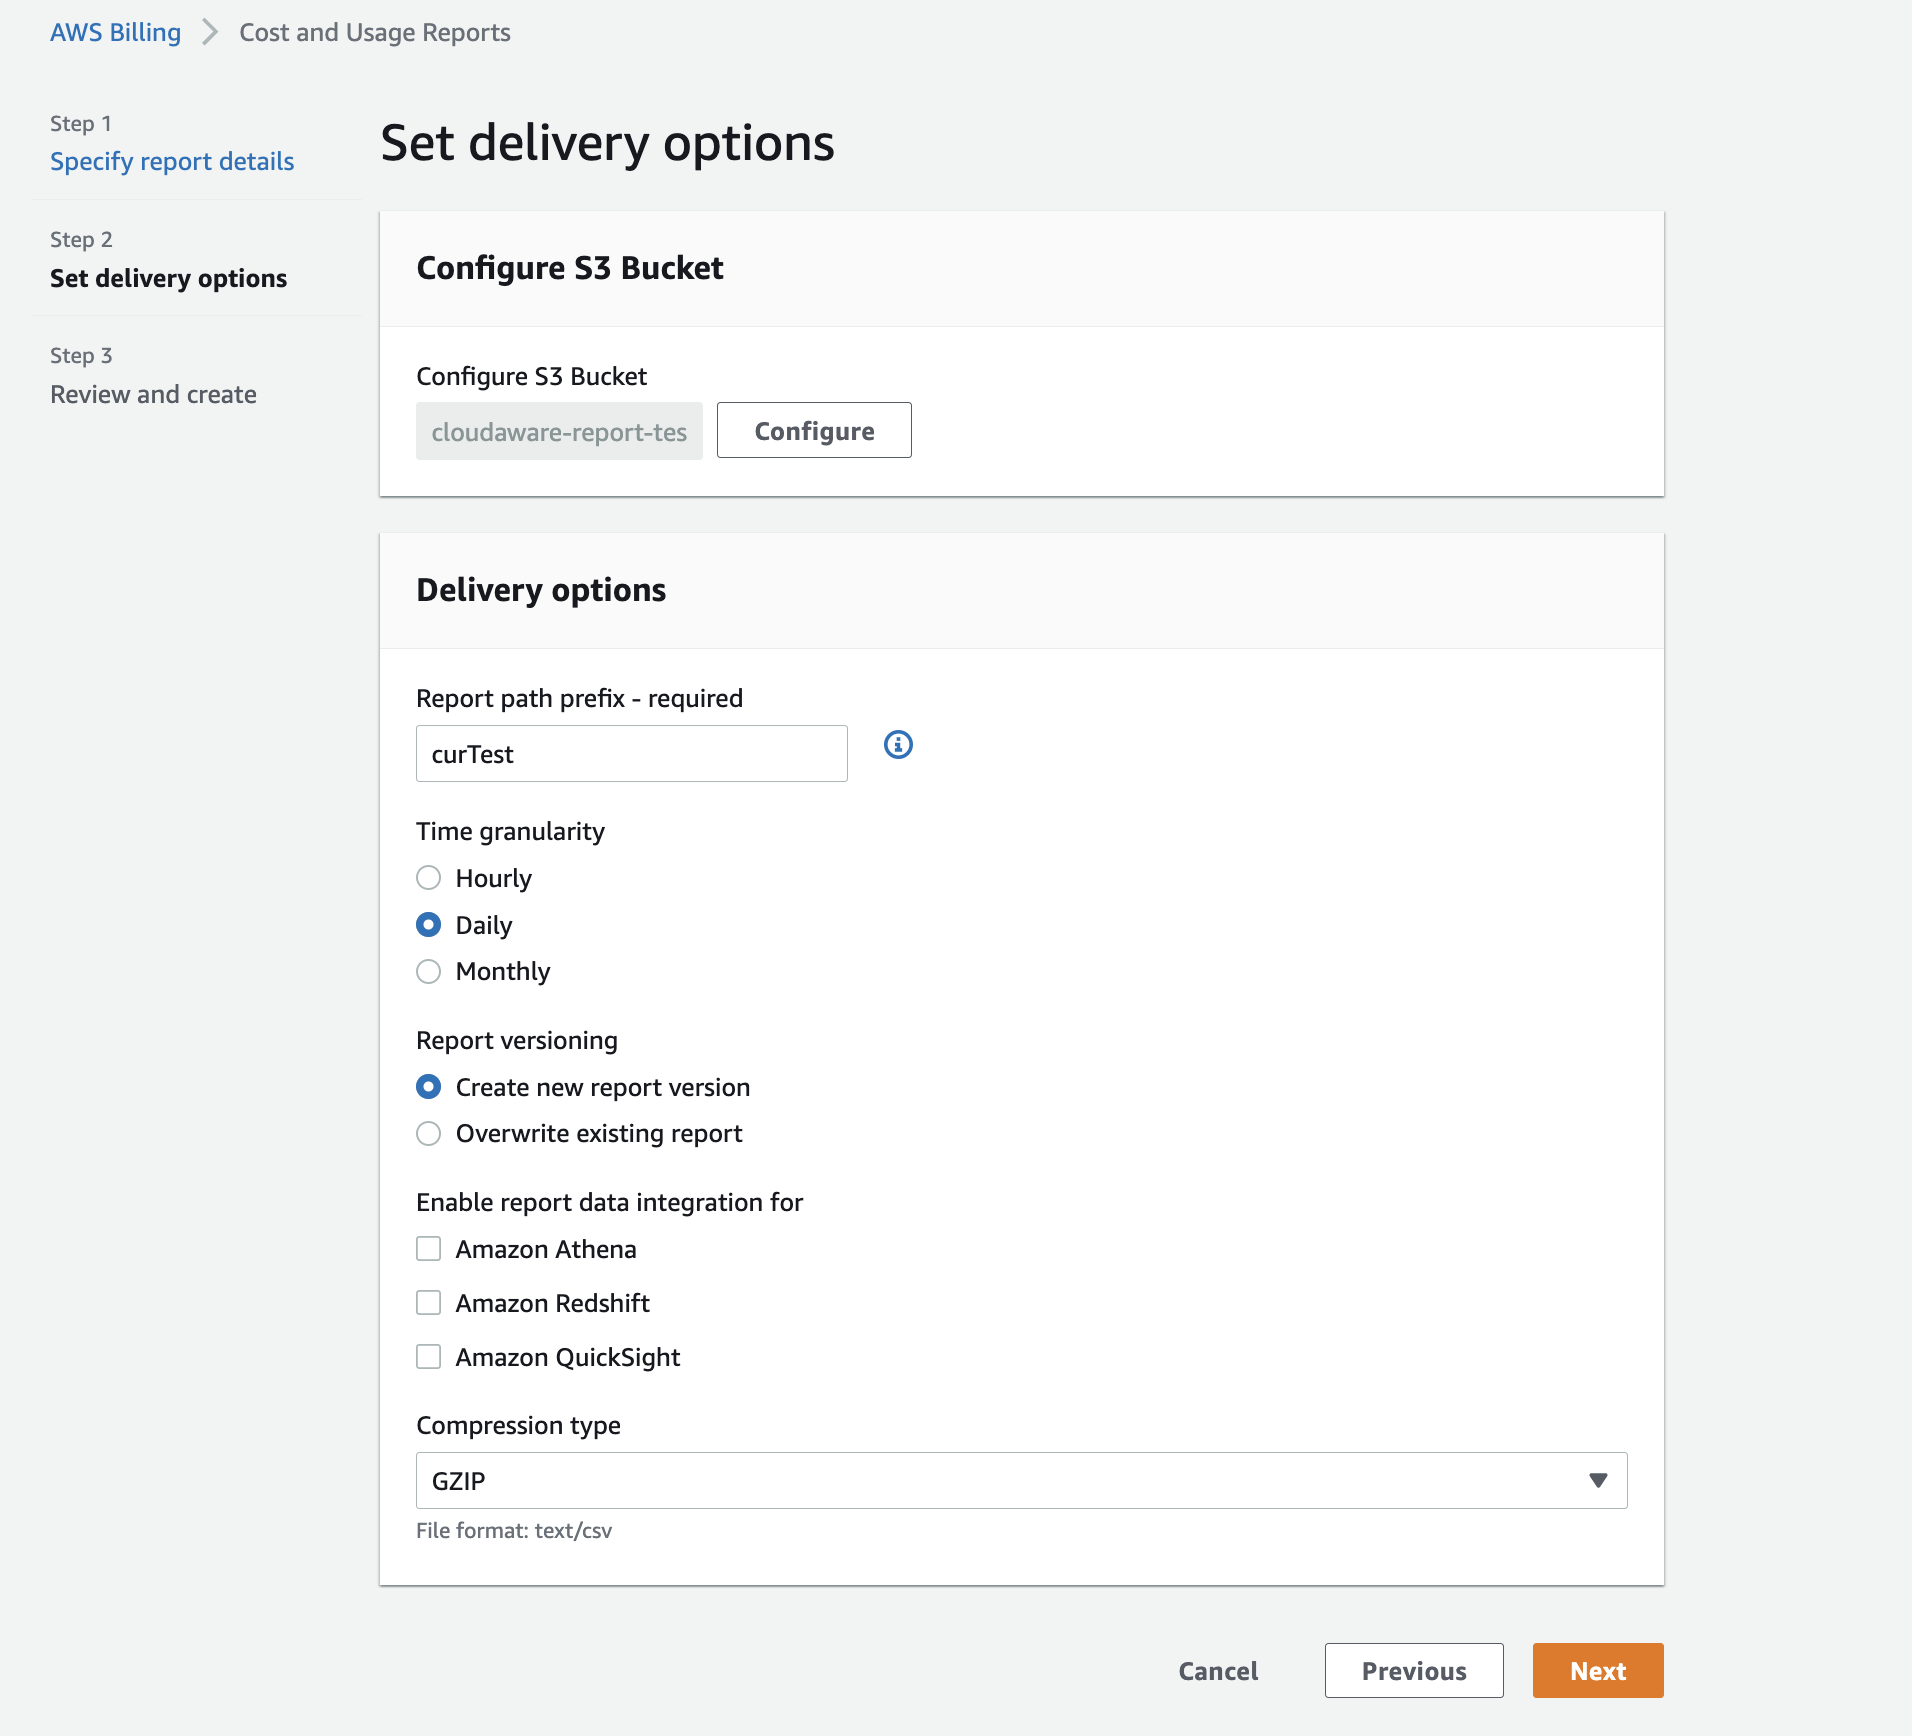
Click Next.
Set up the integration in Cloudaware
Cloudaware should have S3: GetObject permission for the bucket where the billing report is stored.
1. Log in to your Cloudaware account. Go to Admin → N Configured in Amazon Organizations & Accounts. Select the AWS account in question → click three dots and click "Download CloudFormation Template" to download the template.
2. Ensure that the downloaded template has the name of the bucket storing CUR files inserted.
3. Go back to Amazon console. Select the stack and click Update. Replace the template in your AWS console to provide Cloudaware with read access to your CUR data.
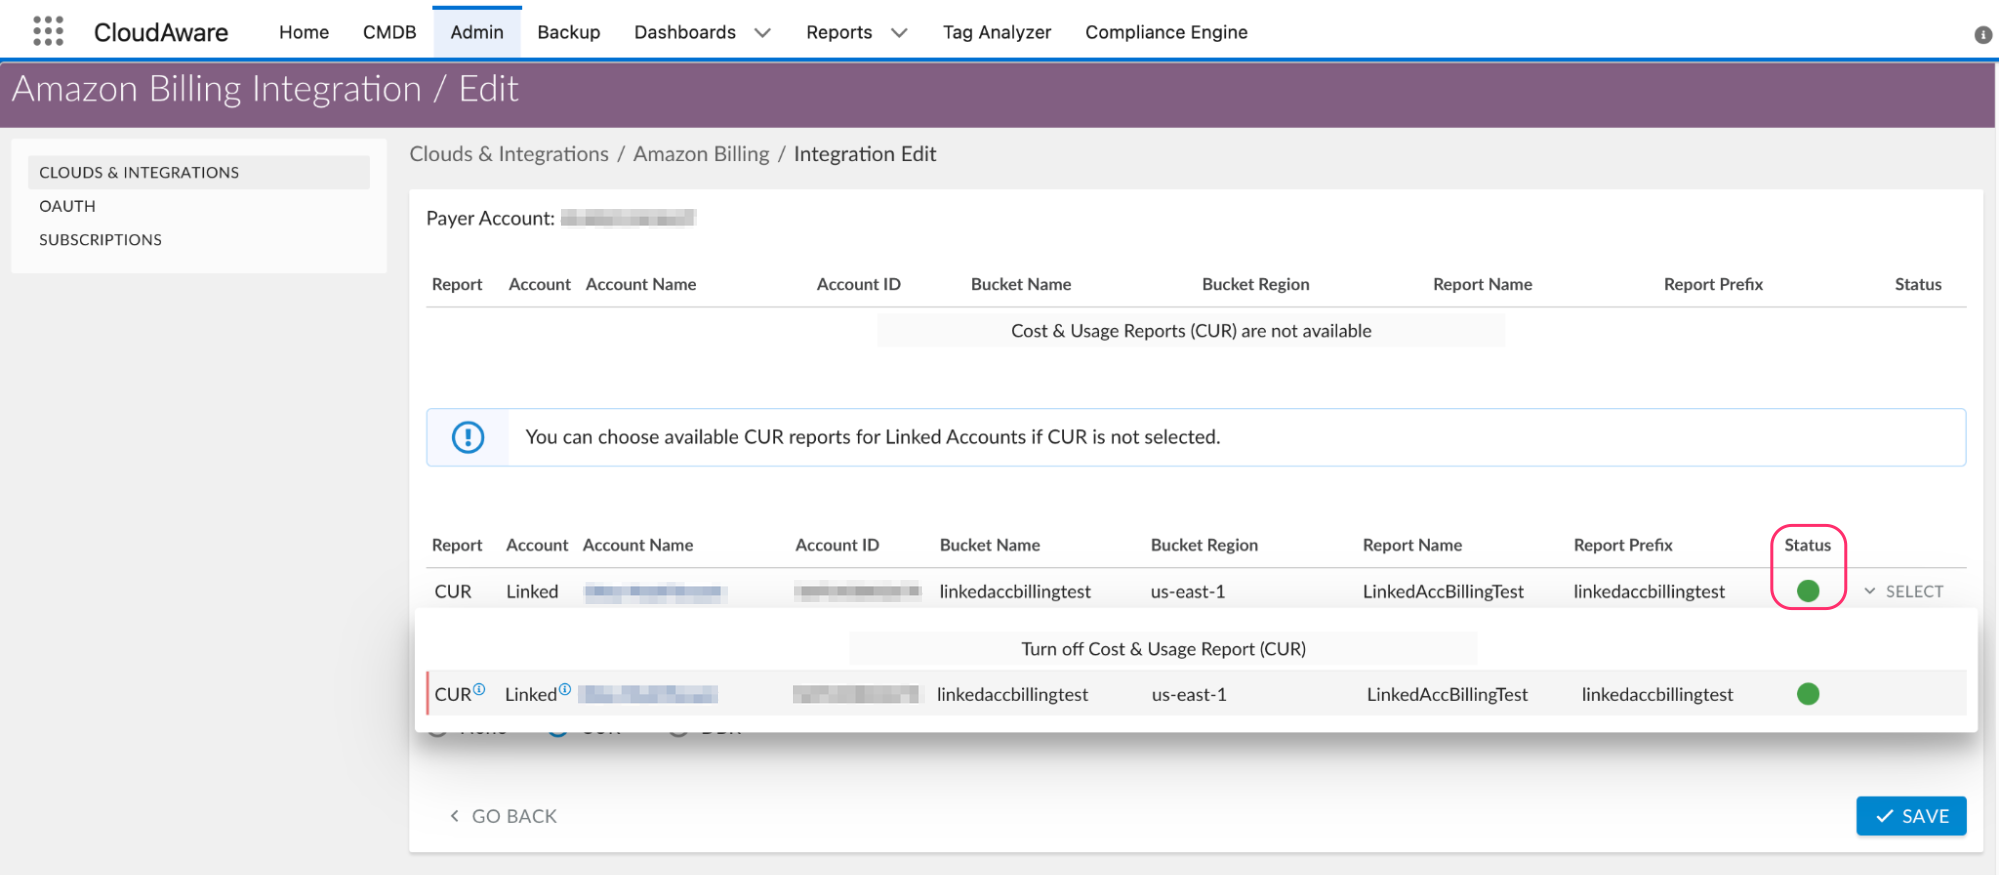
4. Go back to Cloudaware Admin → Amazon Billing. Select the Linked Account CUR report from the list. Ensure that the integration has a green status.
