
This guide explains how to add cloud accounts to Cloudaware using APIs. Cloudaware uses the OAuth standard to authenticate users who send requests to the Cloudaware API. Users must get a token to add or view accounts, depending on their permissions.
Get an OAuth token
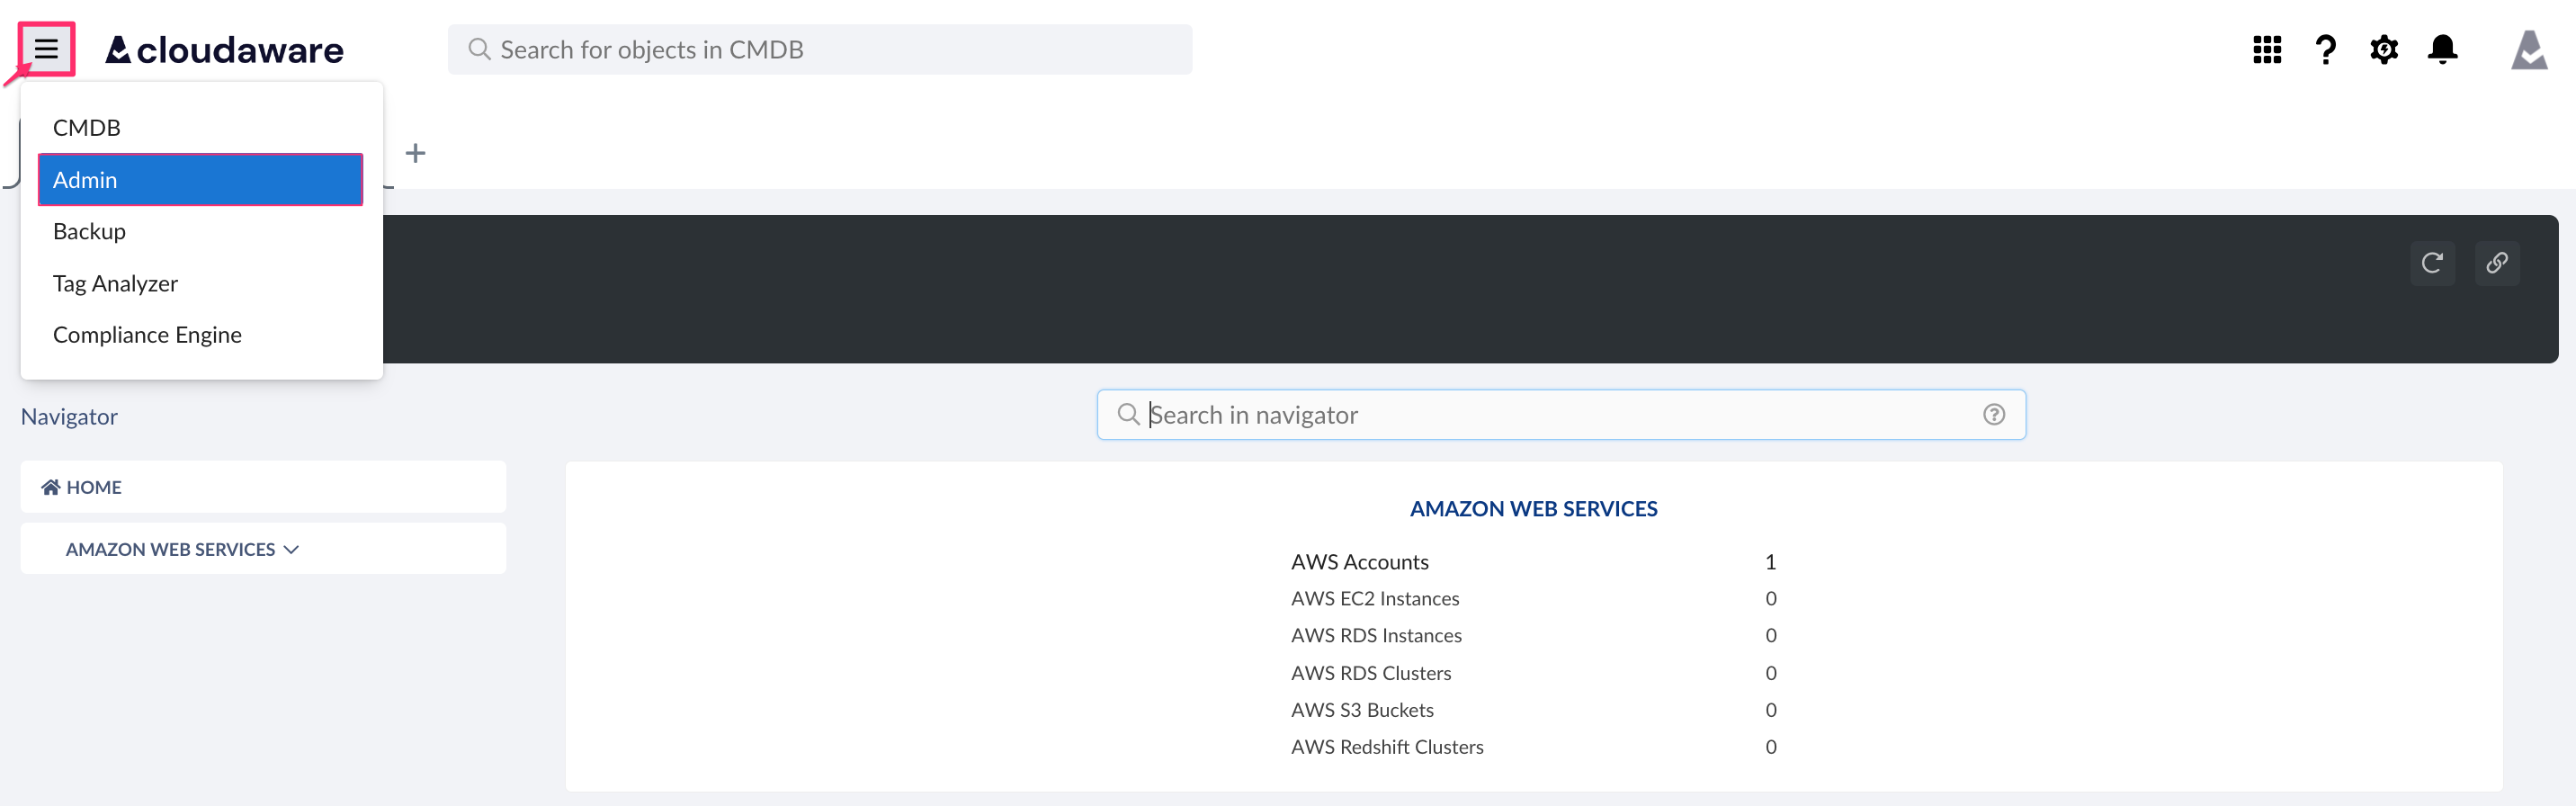
1. Log in to Cloudaware → Admin.
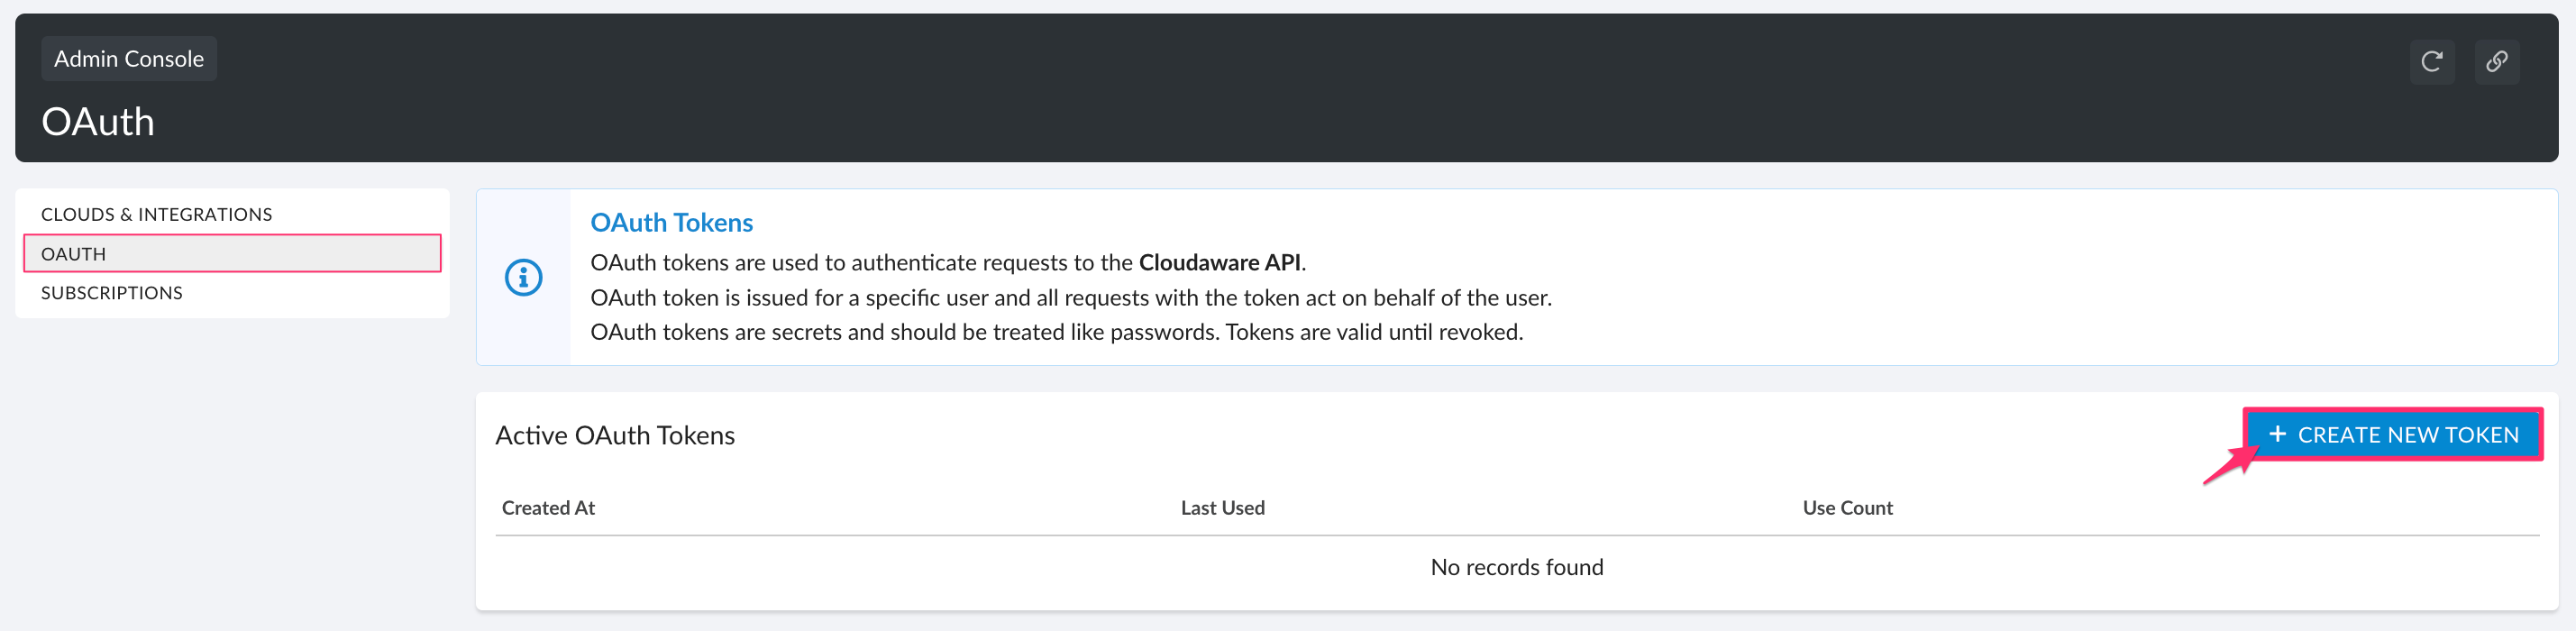
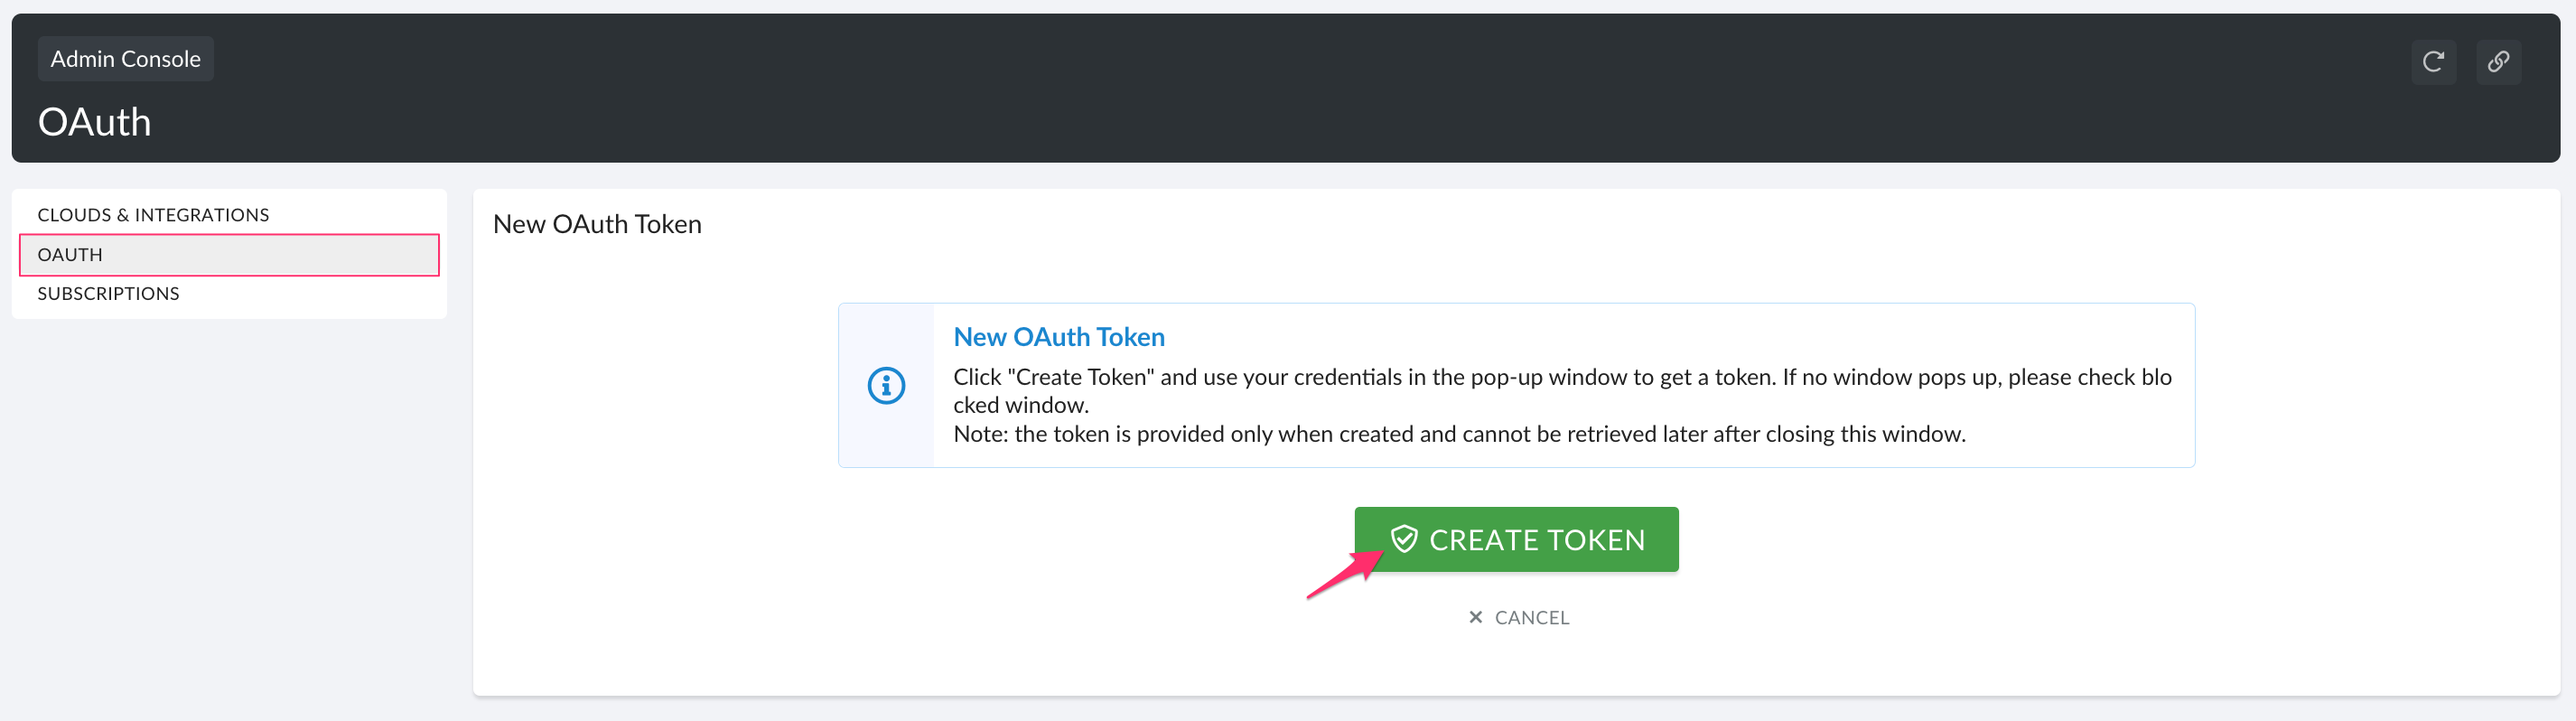
2. In the left menu, select OAUTH → +CREATE NEW TOKEN → CREATE TOKEN.
You might be redirected to a force.com page to grant access to Cloudaware OAuth2. Click Allow to continue.
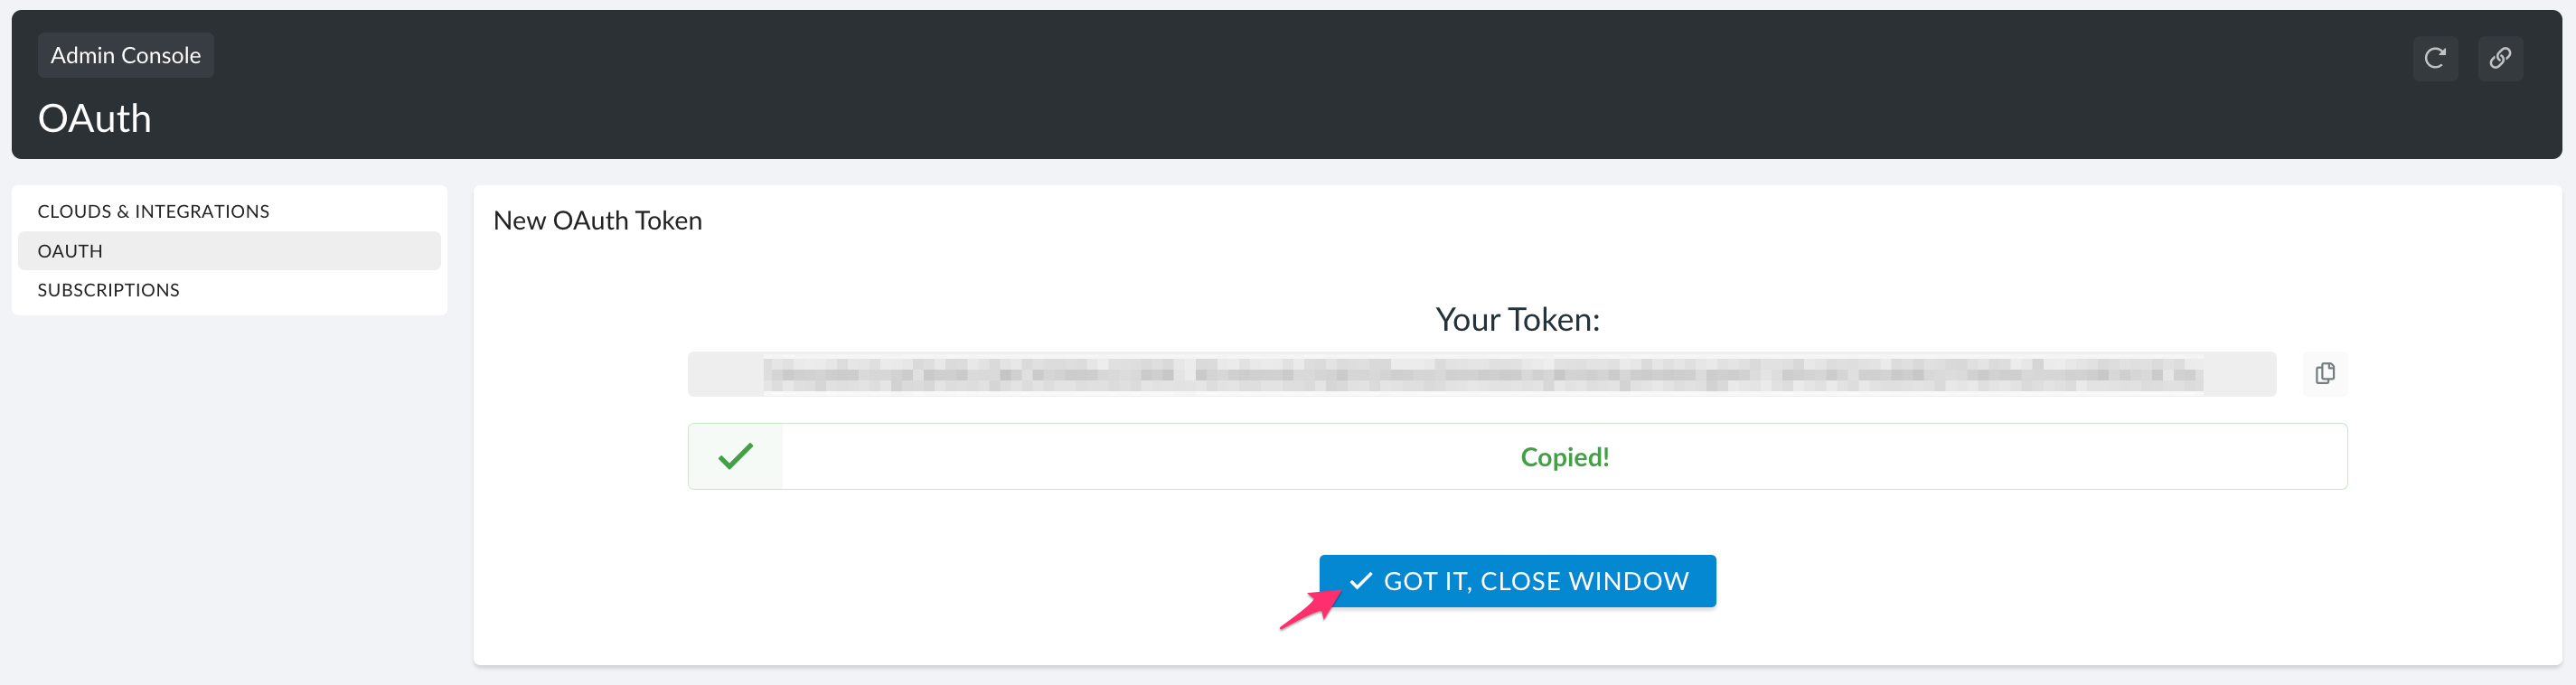
3. Click Copy To Clipboard to copy and save the token.
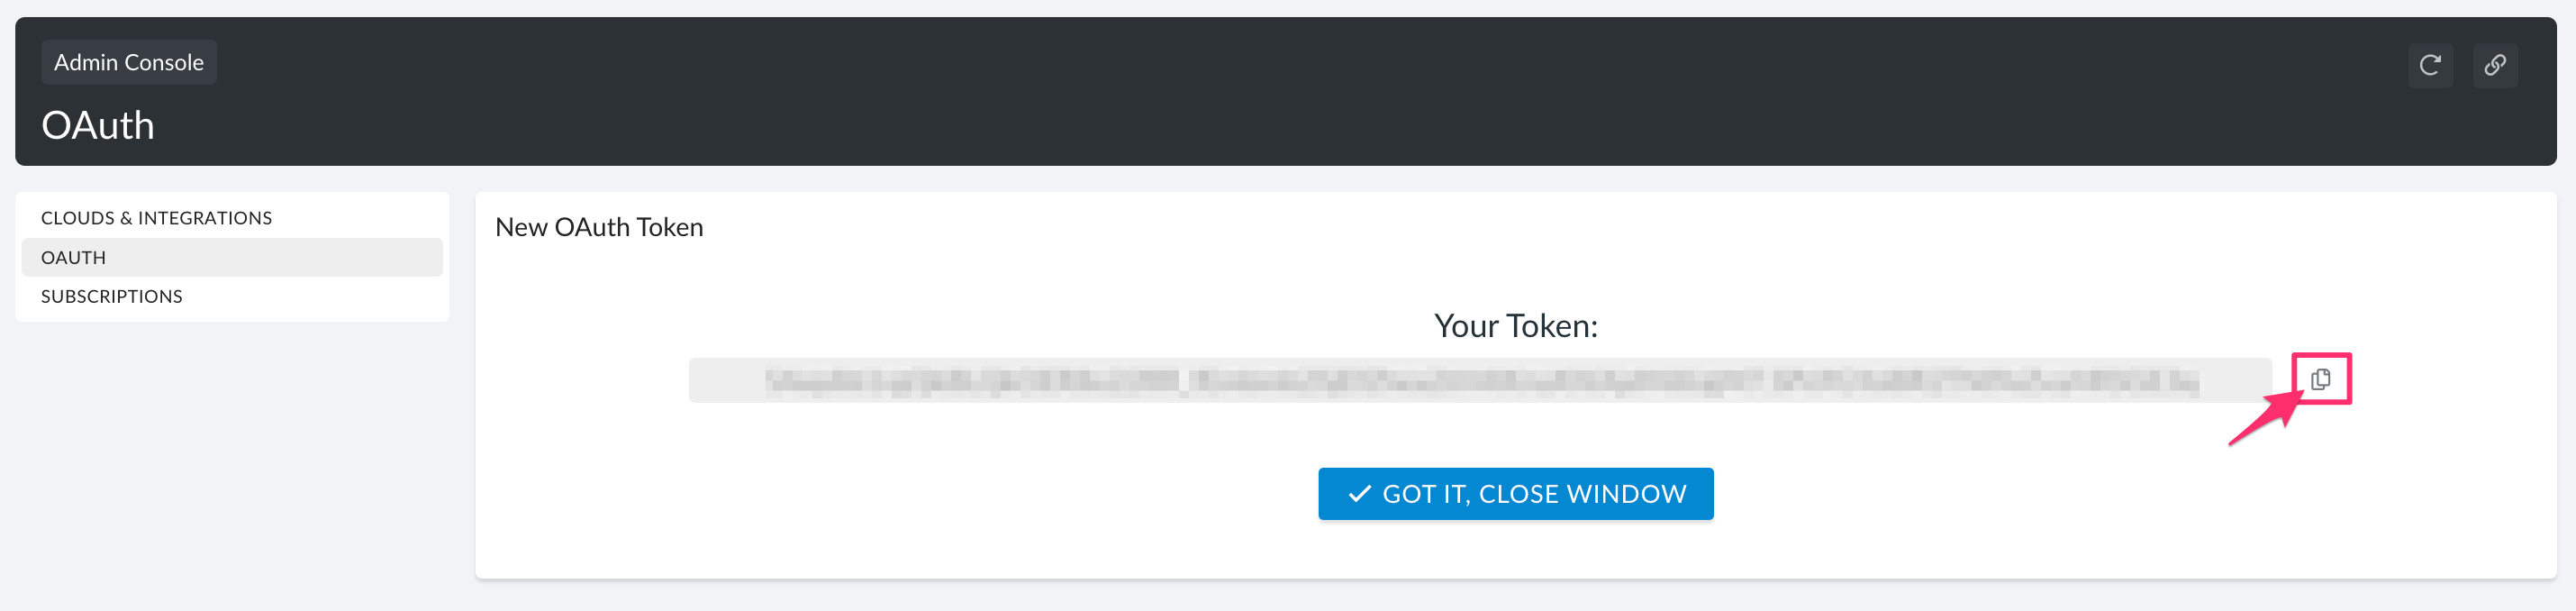
4. Click GOT IT, CLOSE WINDOW to proceed.
5. Check the list of tokens counts.
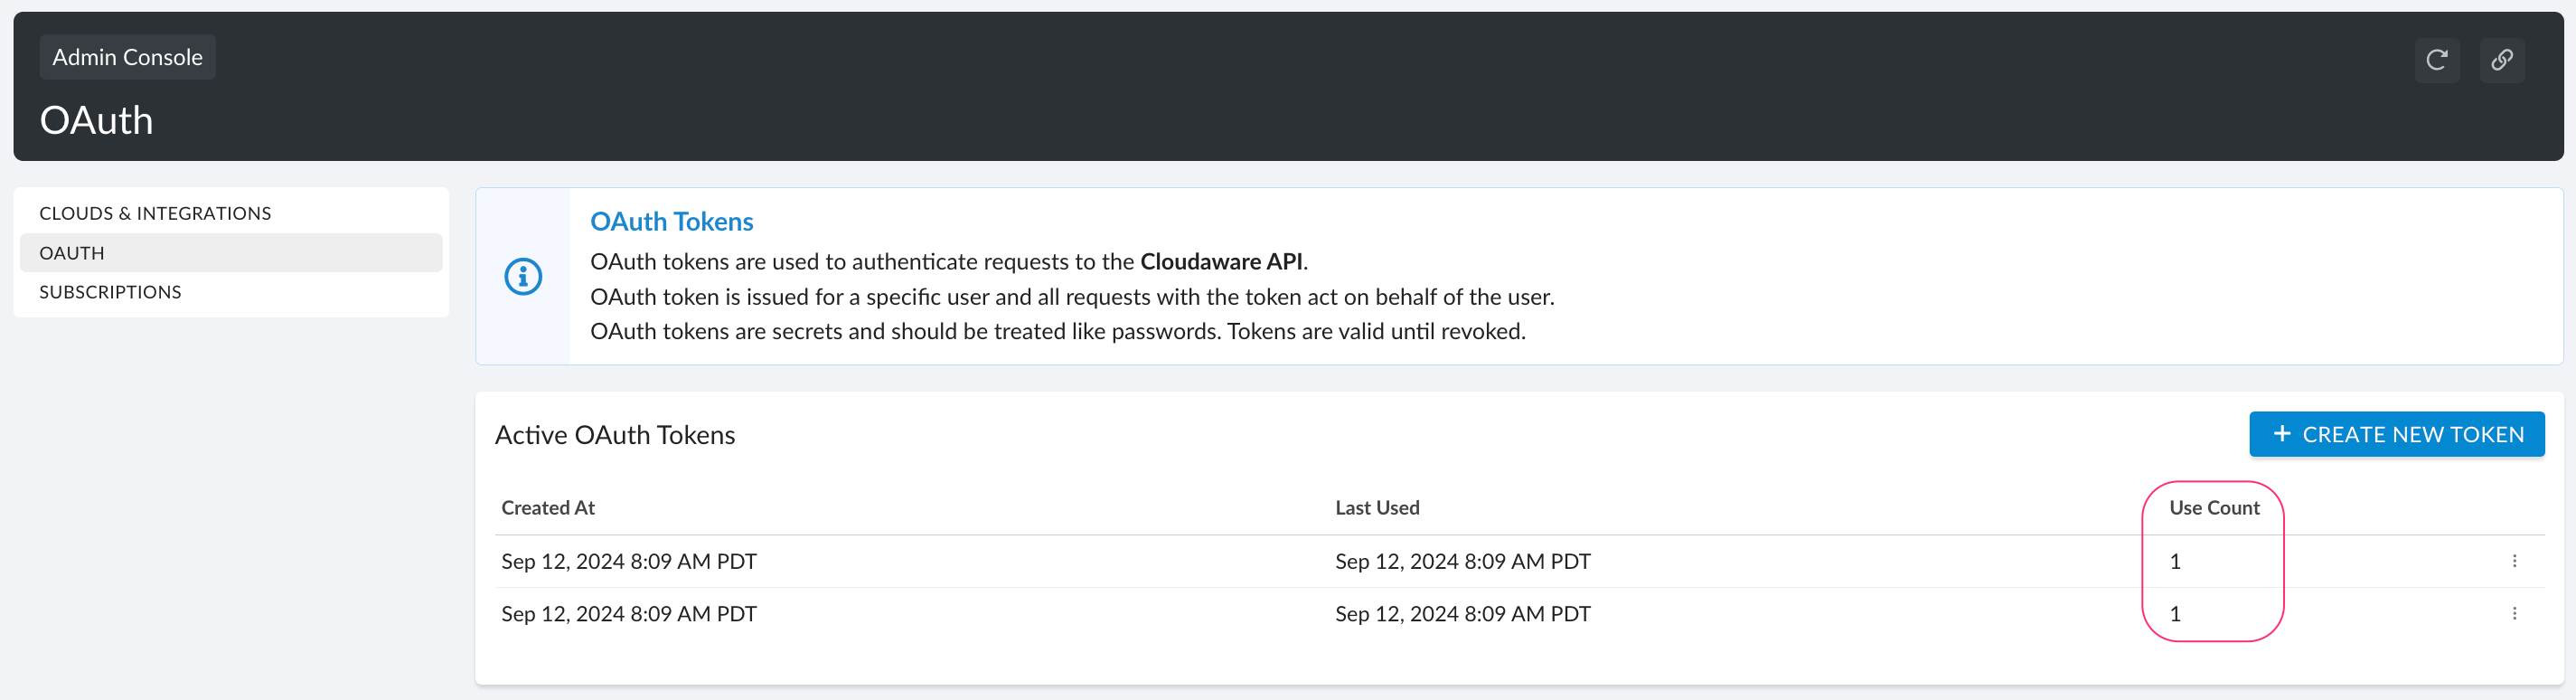
You can have 4 active tokens at a time. The ‘Use Count’ column shows how many times each token has been used.
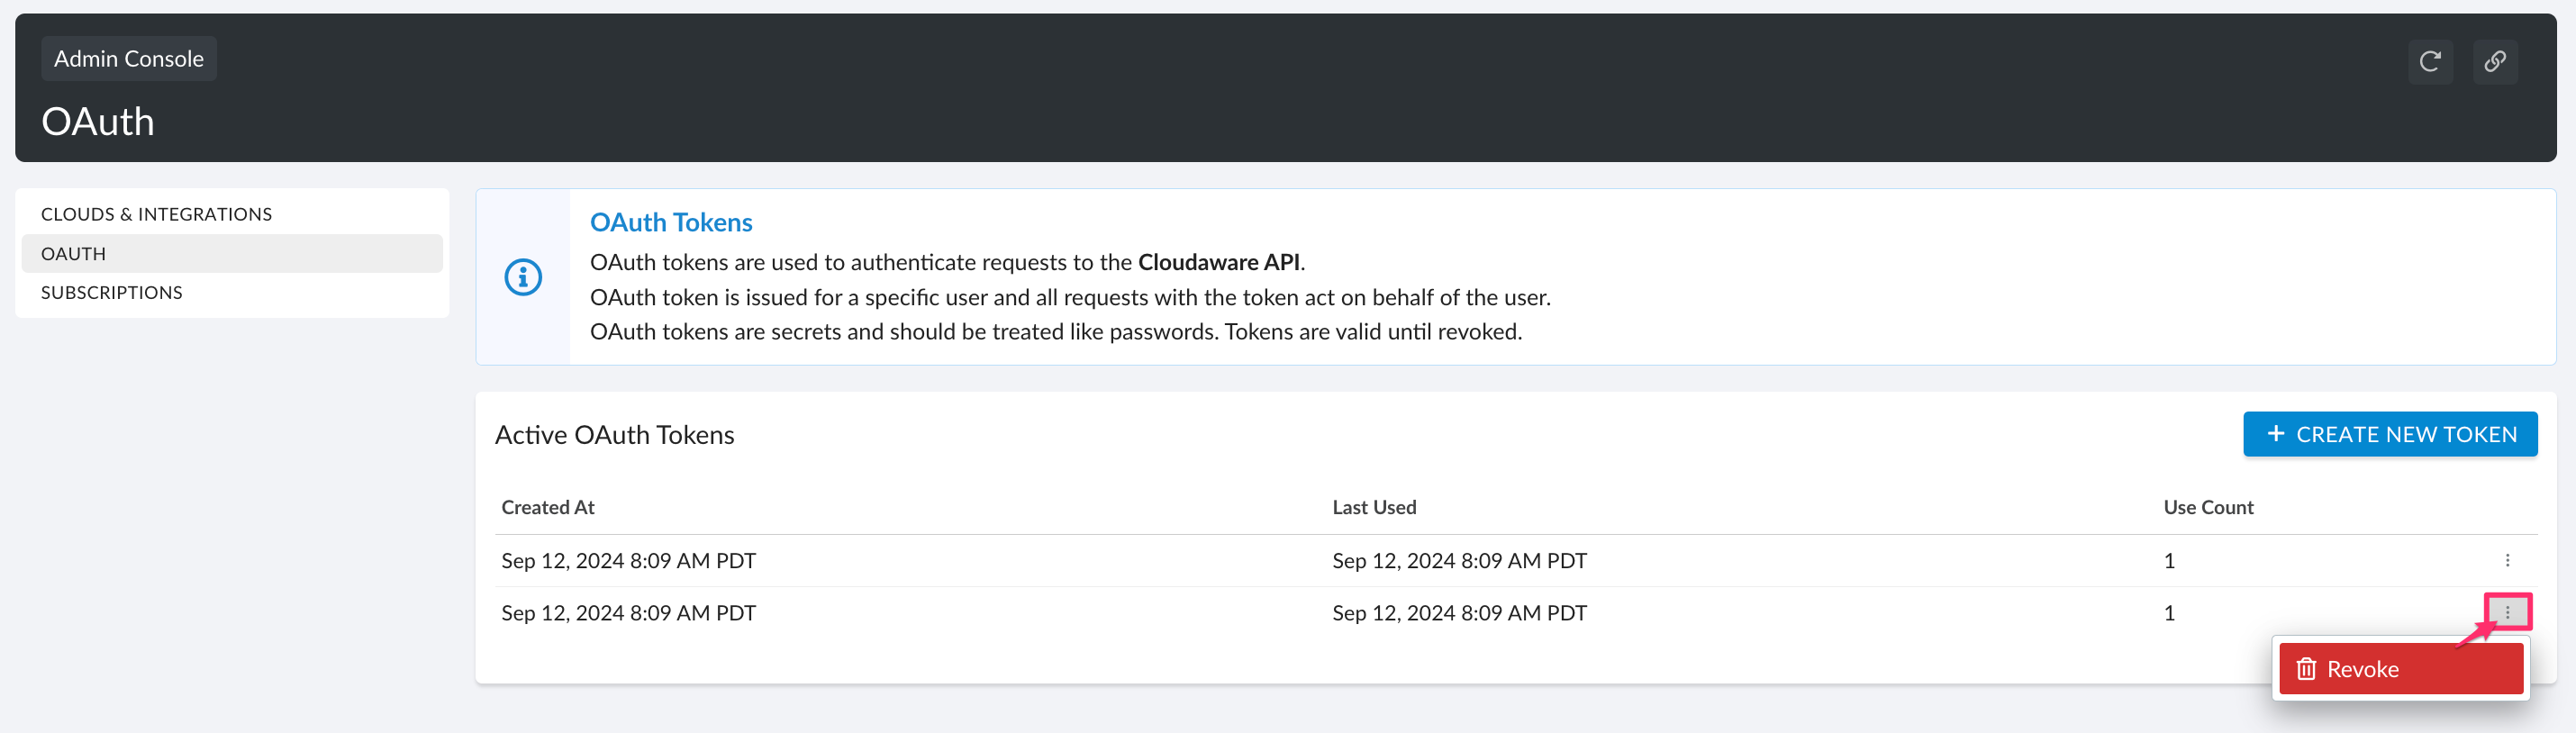
6. Note that if a token has been compromised, it must be revoked: click triple dots → Revoke → Yes, Revoke.
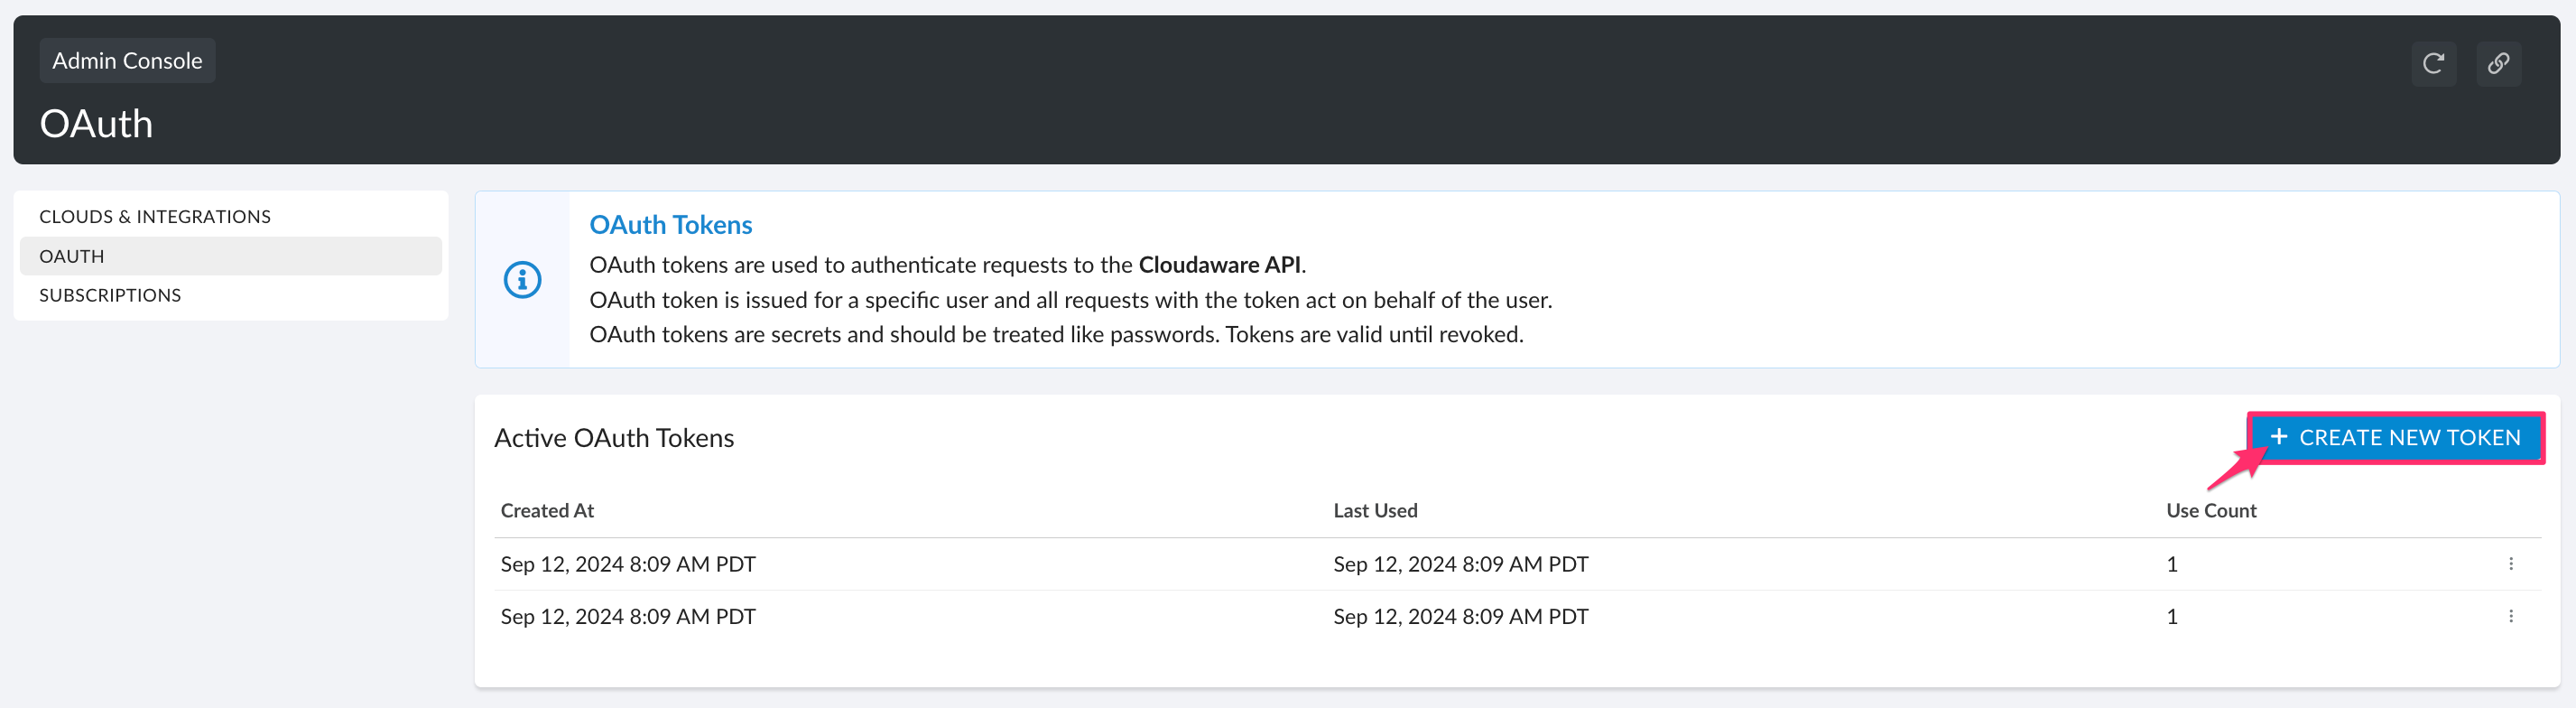
7. To generate another token, click +CREATE NEW TOKEN.
8. If your environment has IP restrictions, update the OAuth policy settings as described in the tip below:
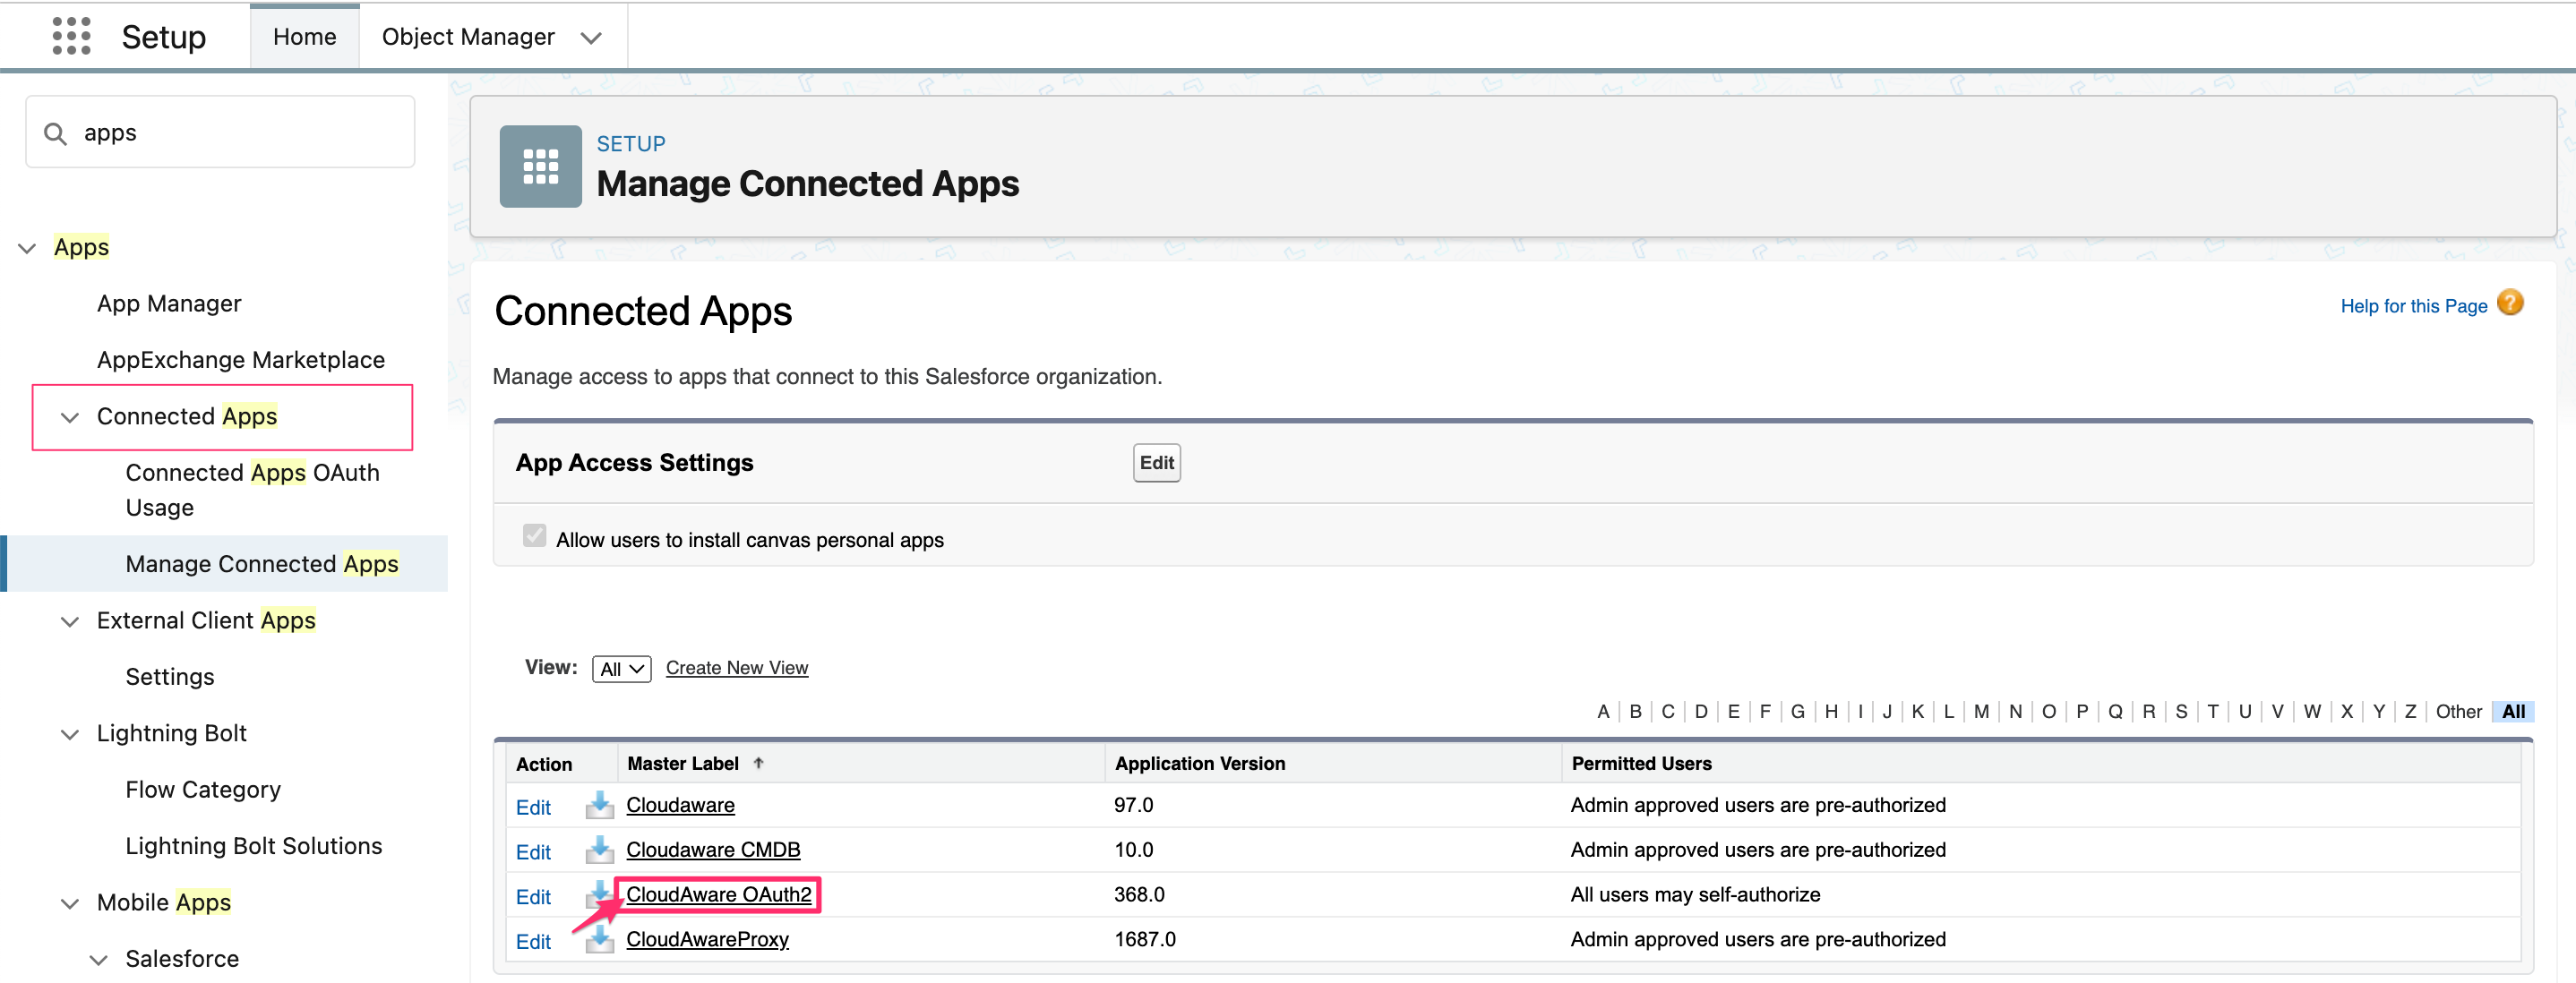
8.1. Log in to Cloudaware → Setup:

8.2. Type Apps in the Search bar → Connected Apps → Manage Connected Apps → click on the Cloudaware OAuth2 app:
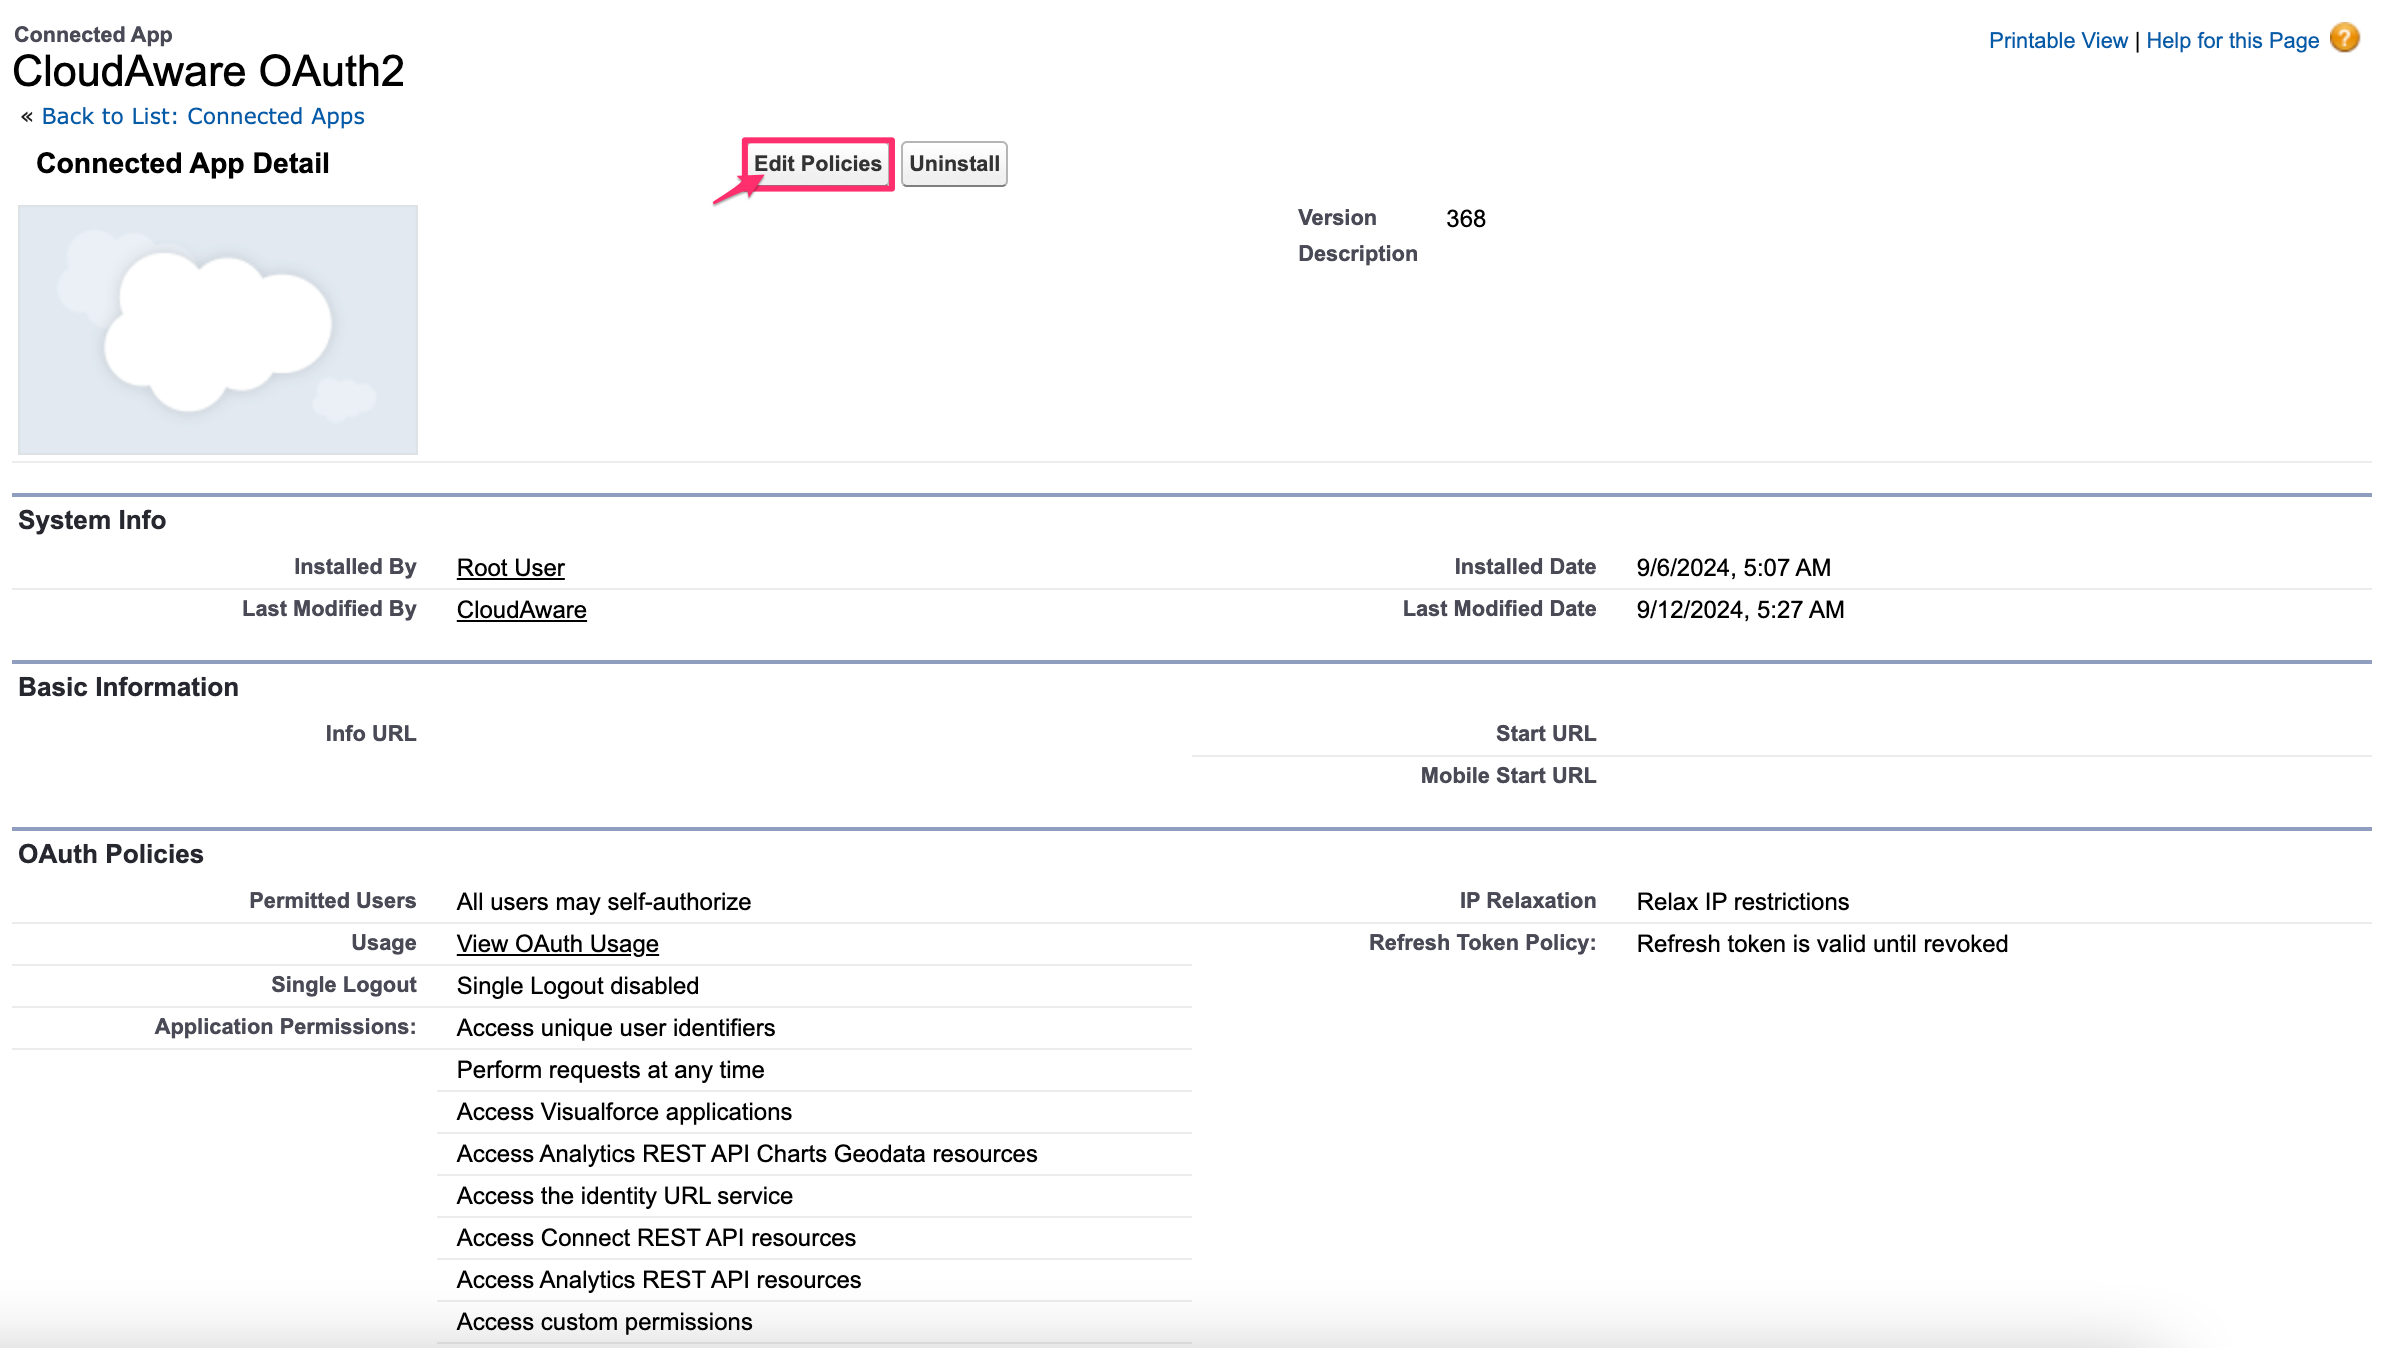
Click Edit Policies:
8.3. Select ‘Relax IP restrictions’ in ‘IP Relaxation’:
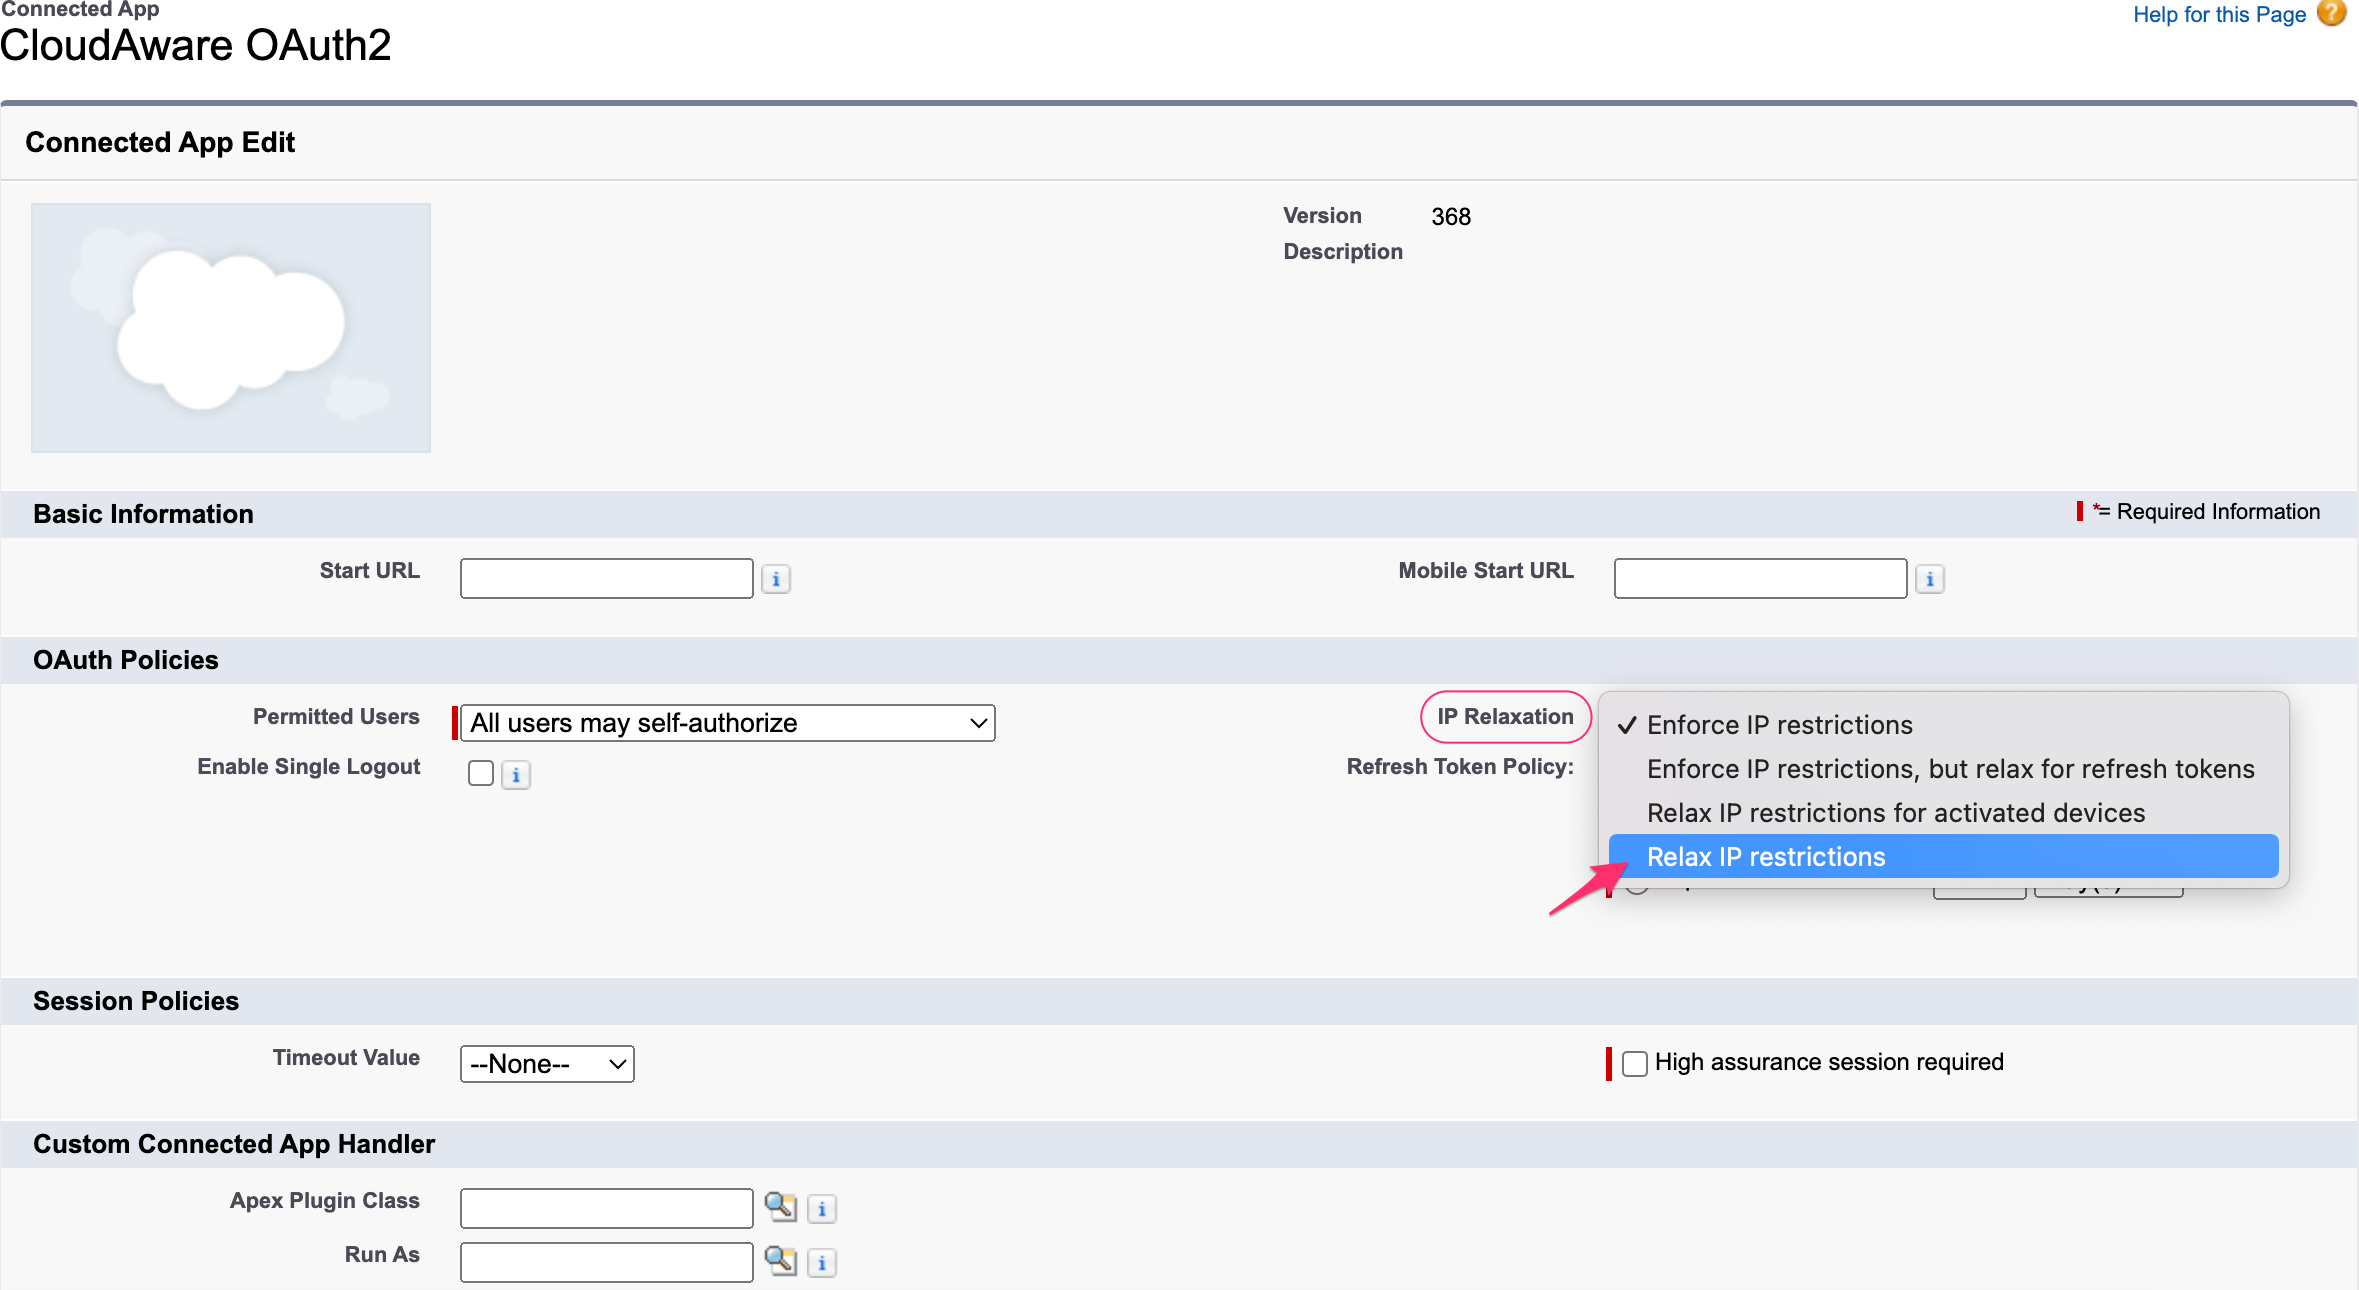
Click Save.
Get an API key
An API key is required to send requests to the Cloudaware API.
1. Create a Google Cloud Project account.
2. Submit an access request to support@cloudaware.com, including the full email address of the associated Google Cloud Project account.
3. Activate API access:
-
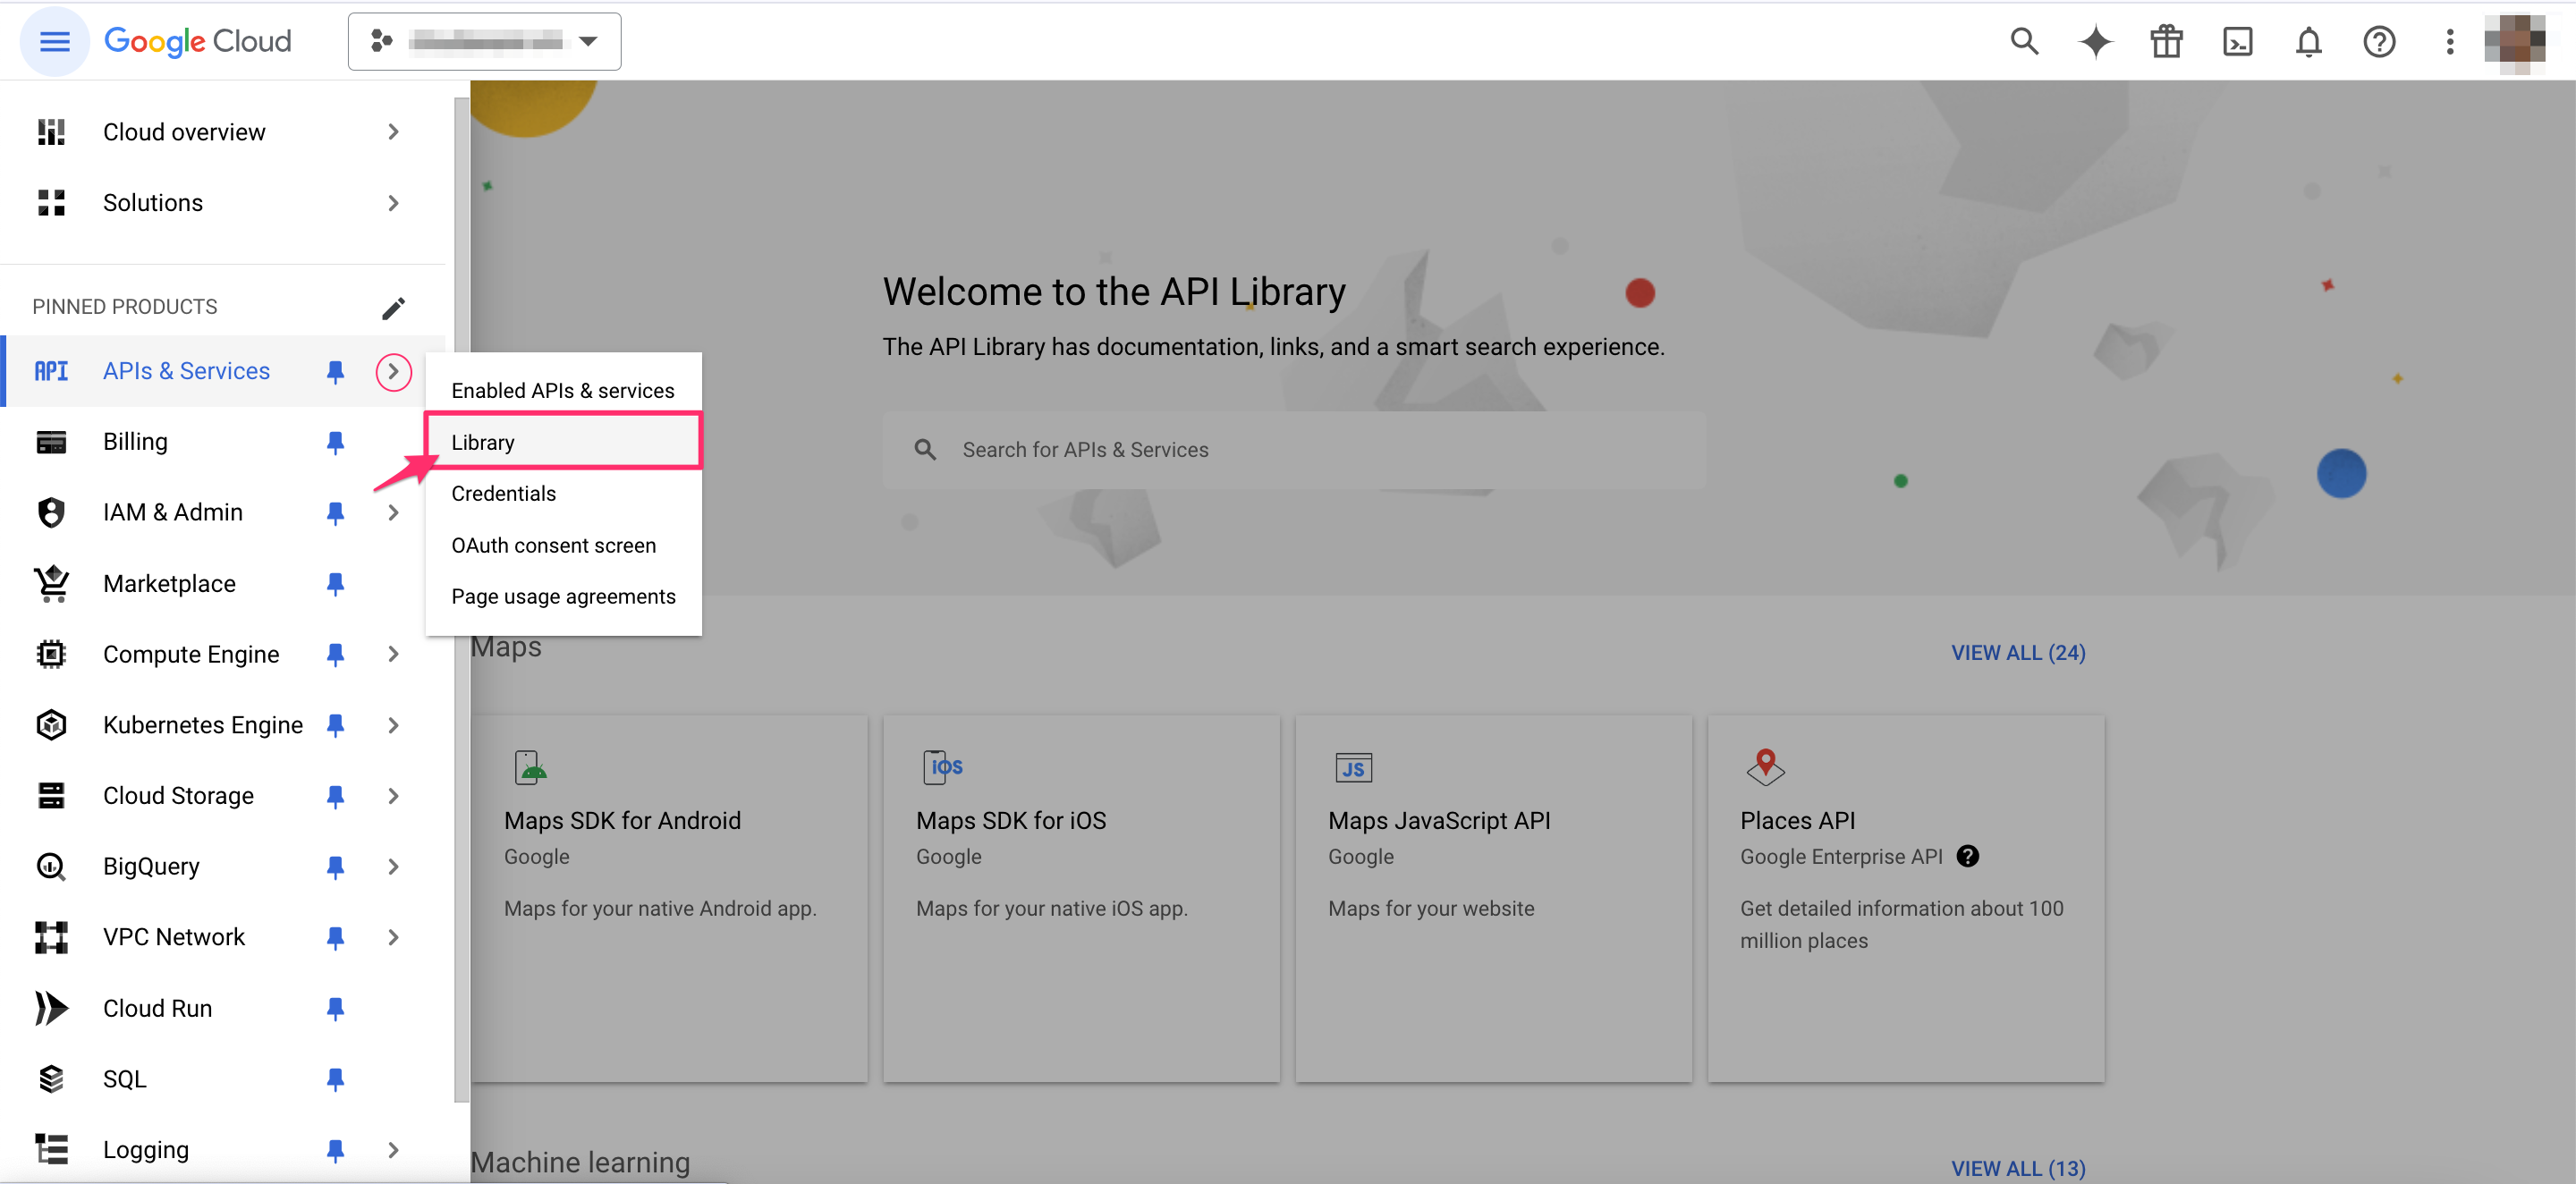
Go to Google Cloud Console.
-
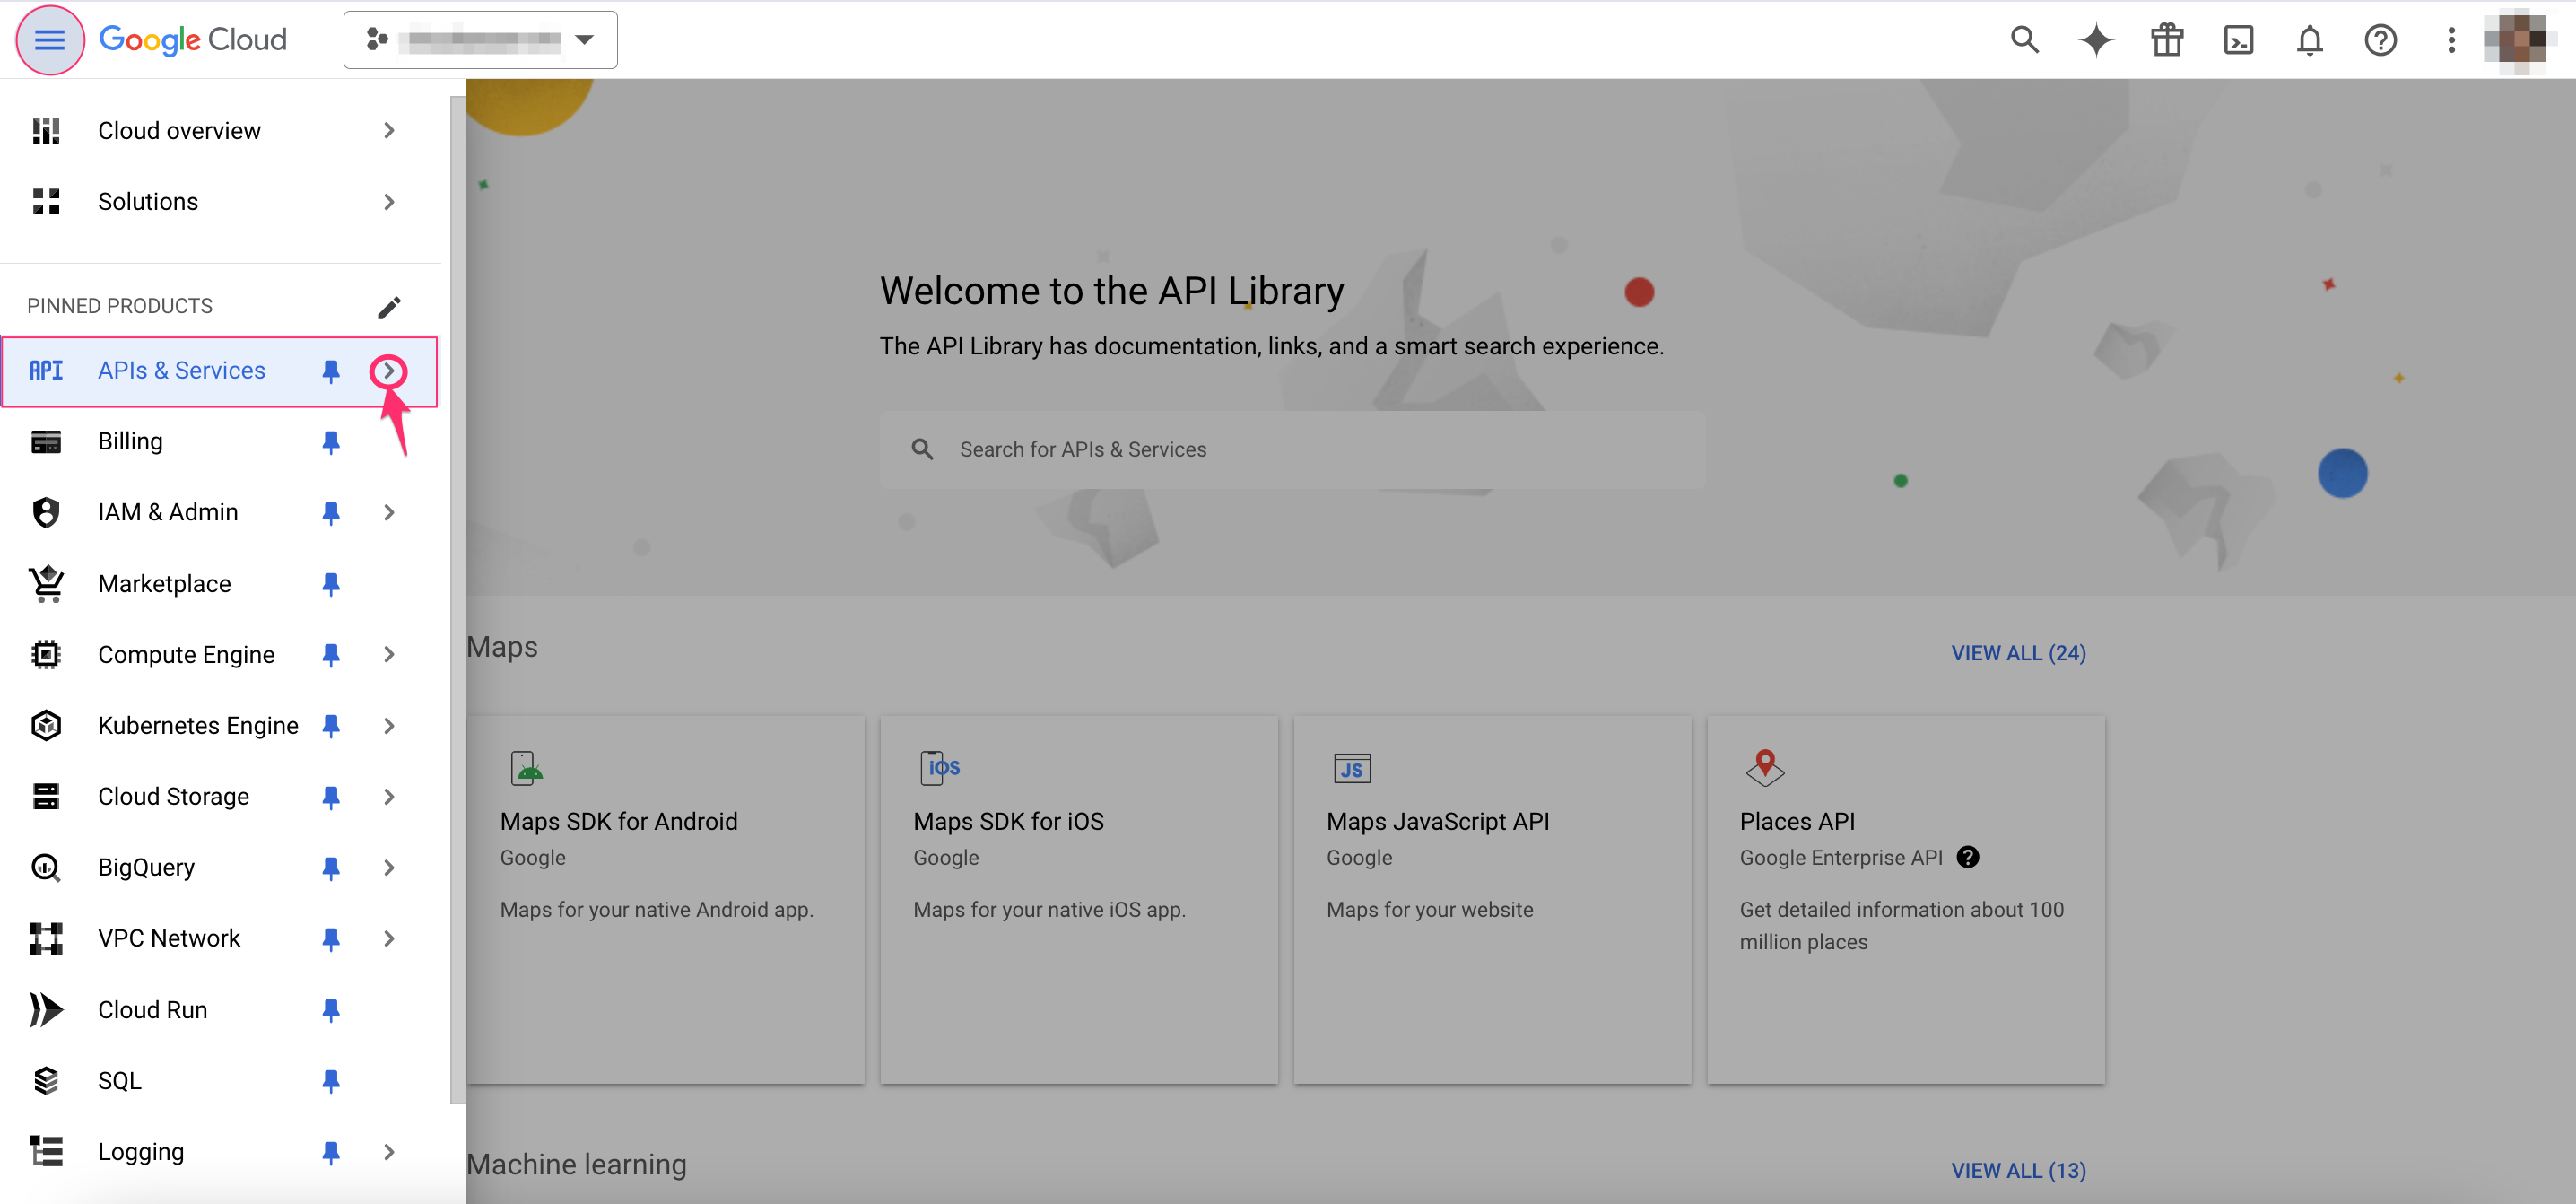
Open the navigation menu (☰) → select APIs & Services → Library.
-
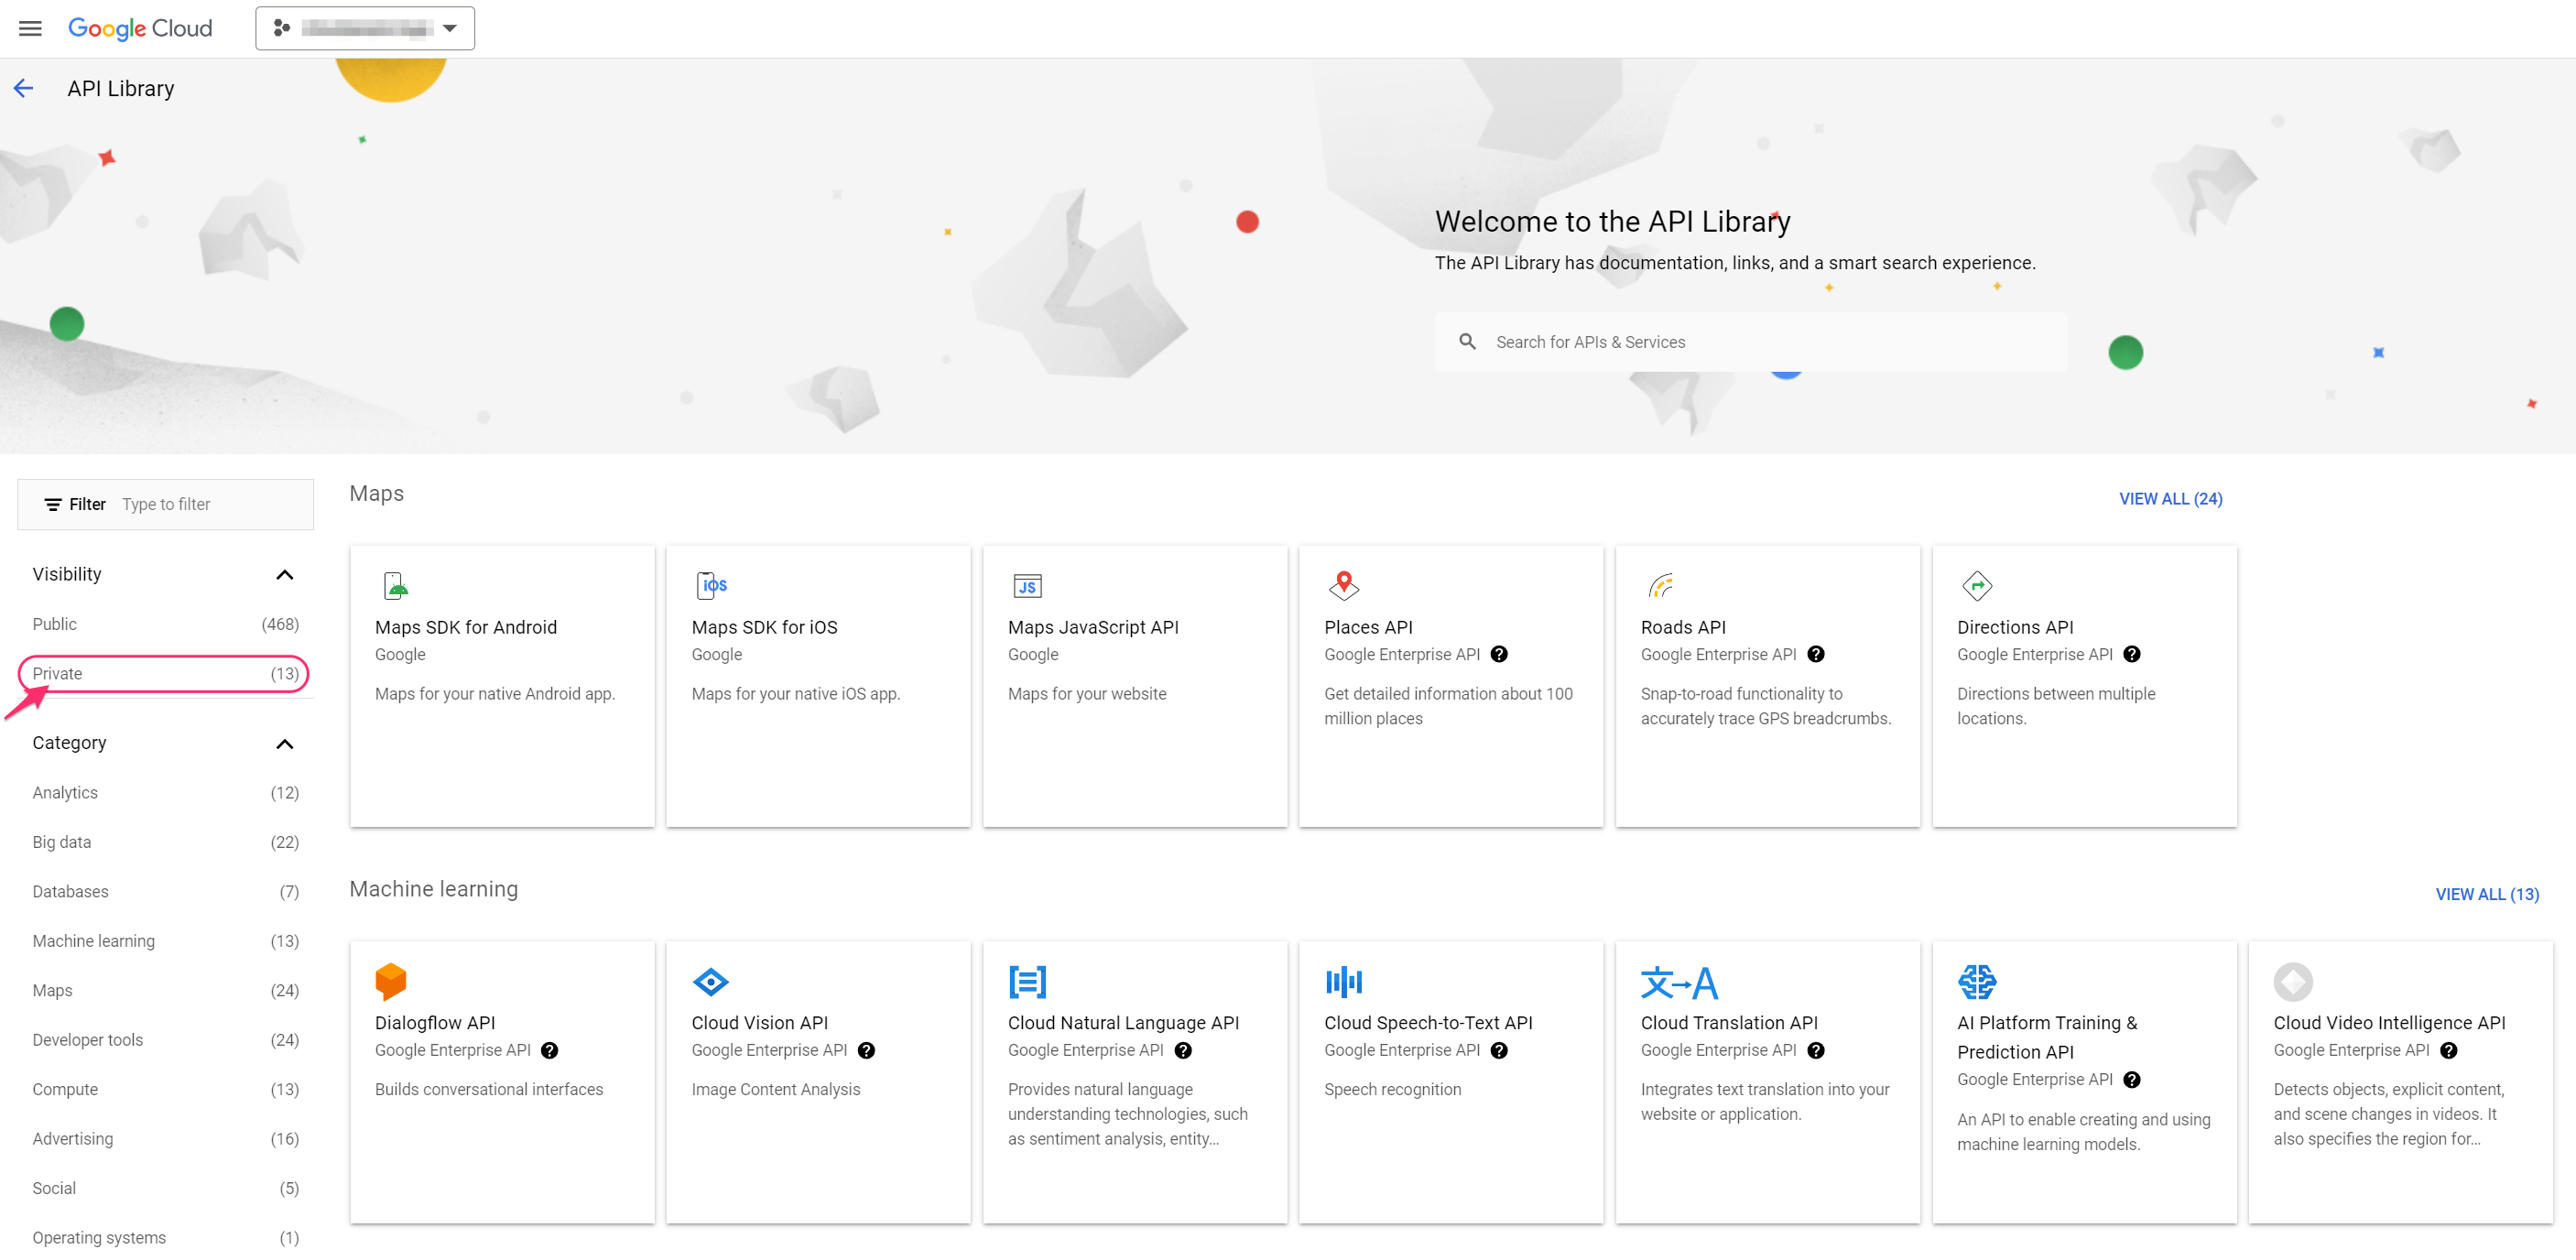
Filter by Private:
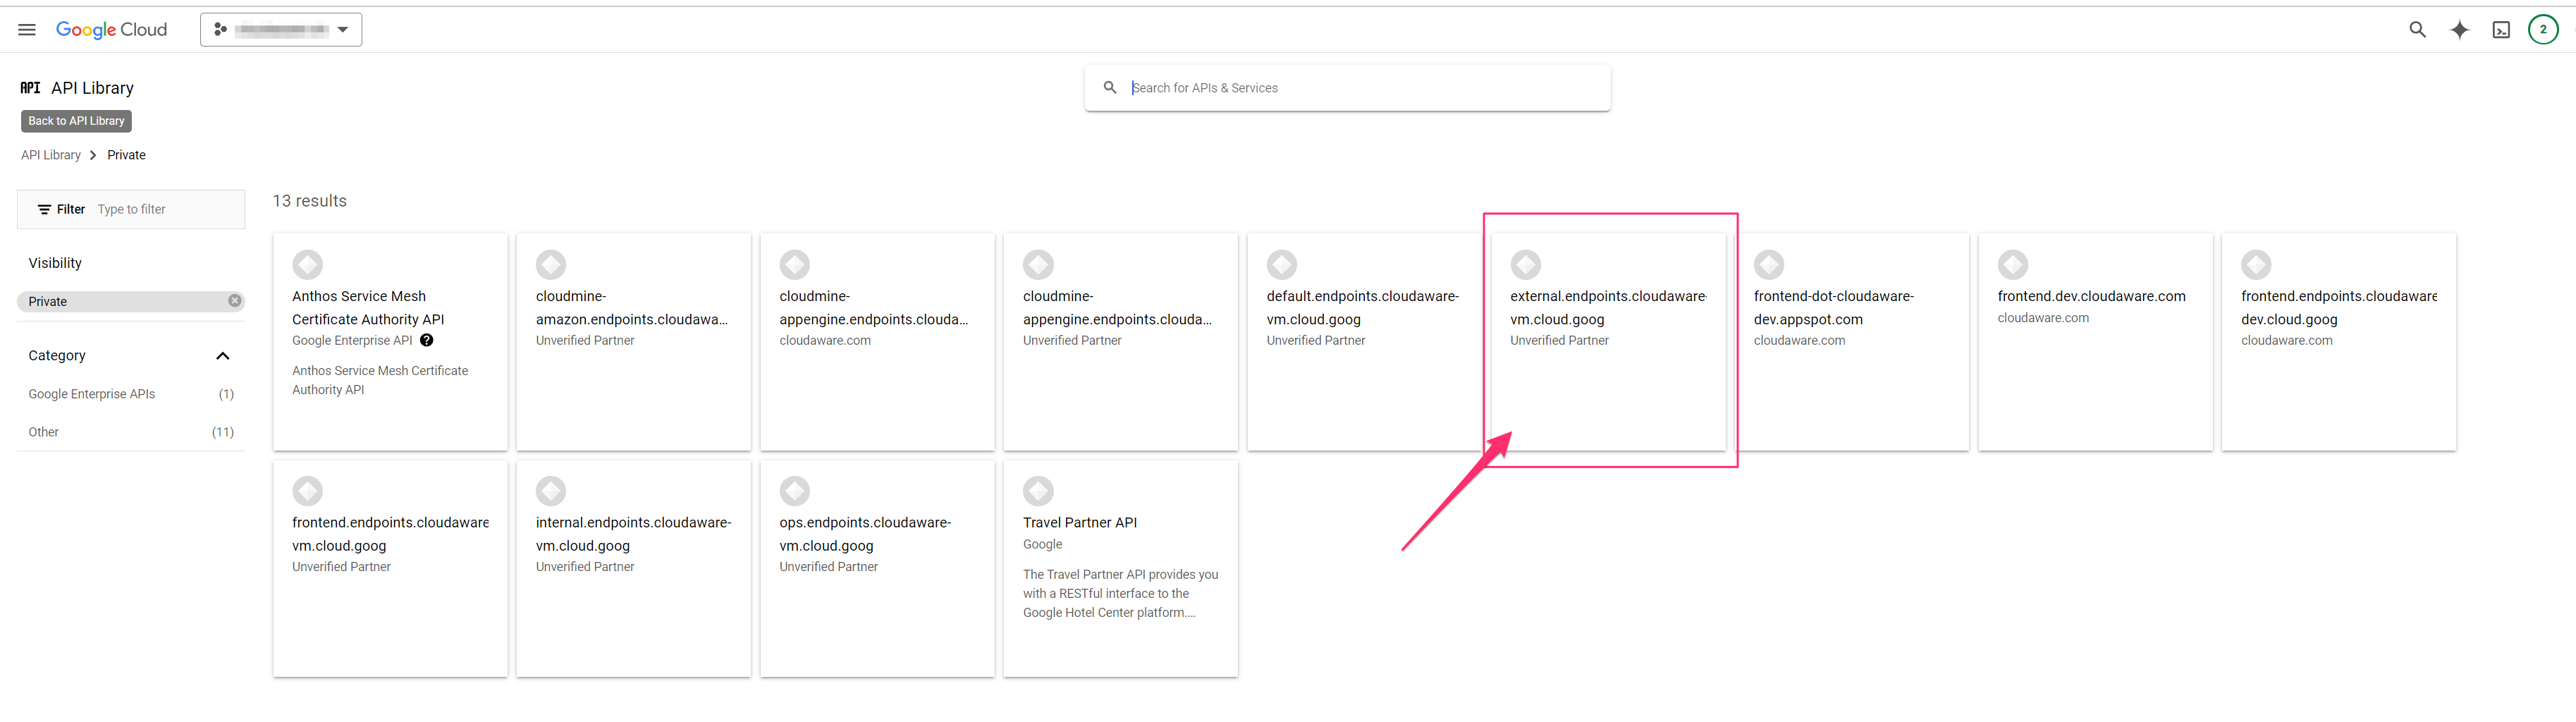
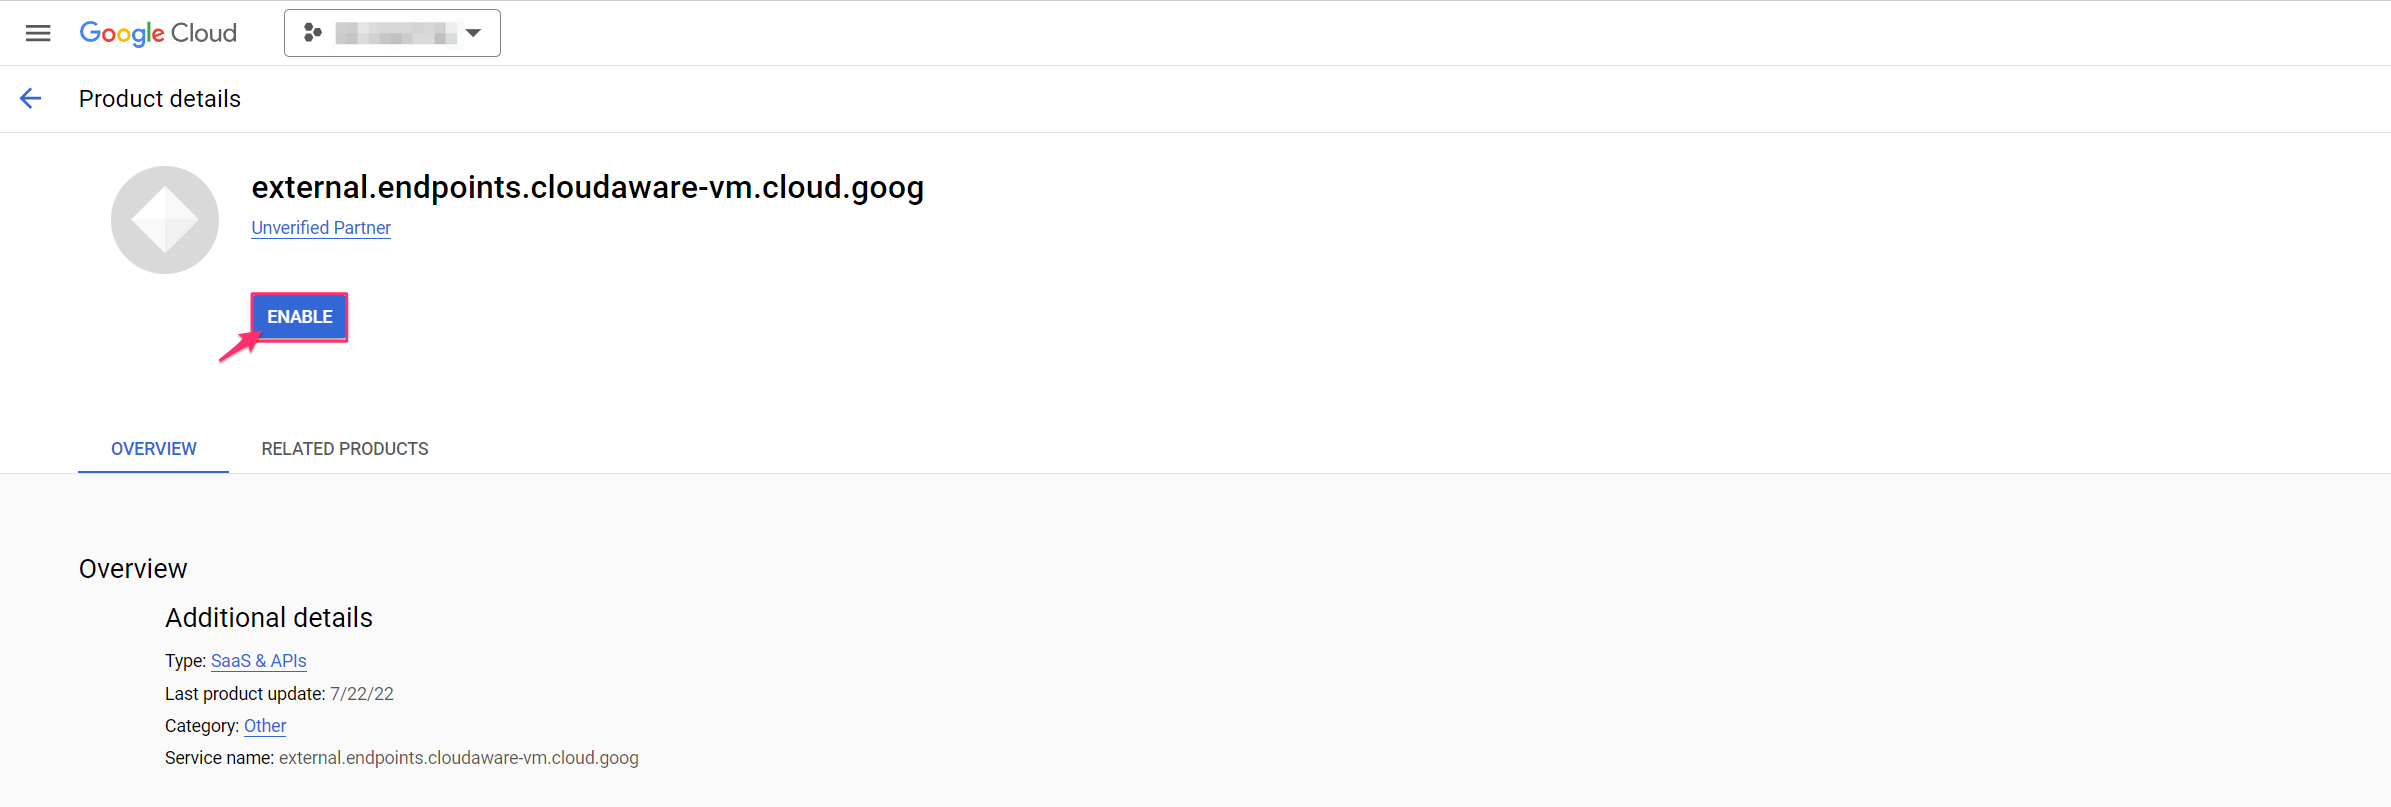
4. Select external.endpoints.cloudaware-vm.cloud.goog → Enable.
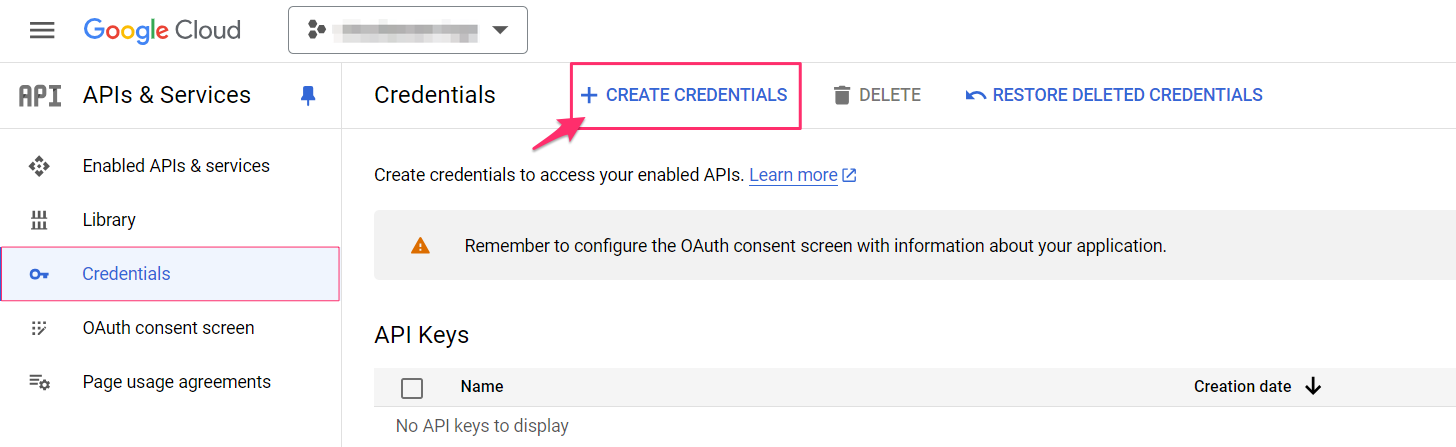
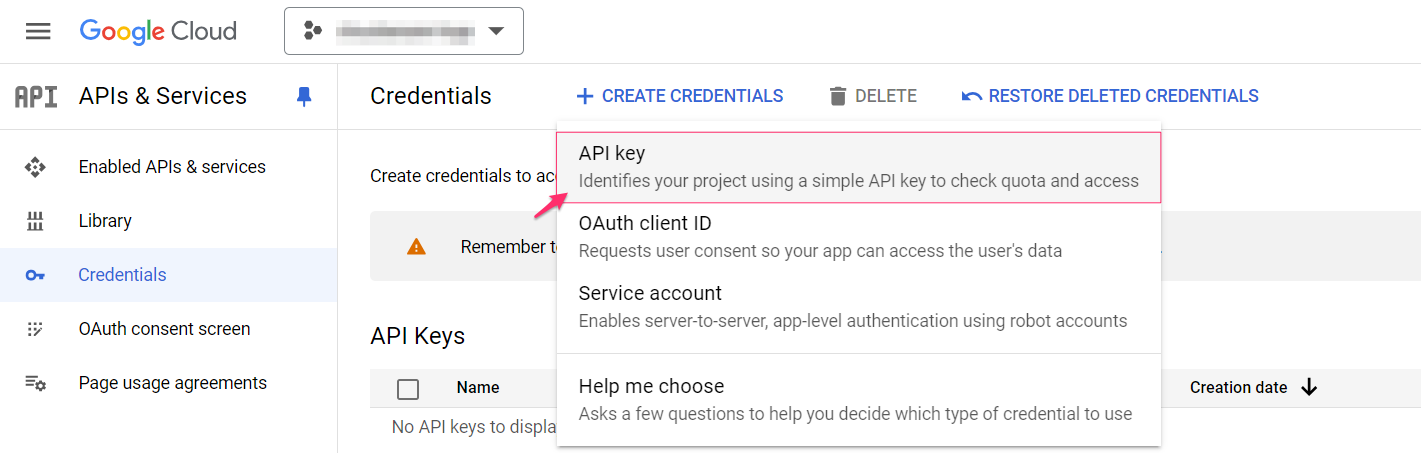
5. Go back to APIs & Services → Credentials → Create Credentials → API Key.
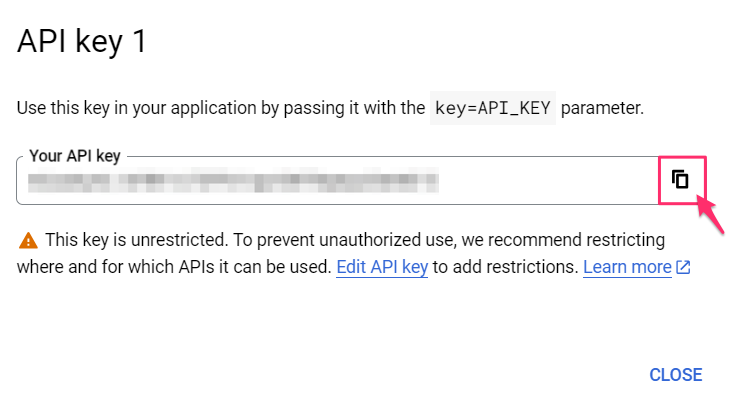
6. Copy the API Key to your clipboard:
Setup in API Explorer
The Google APIs Explorer allows you to explore and test APIs. The following example demonstrates how to add AWS accounts to Cloudaware using public APIs.
1. Open Google APIs Explorer.
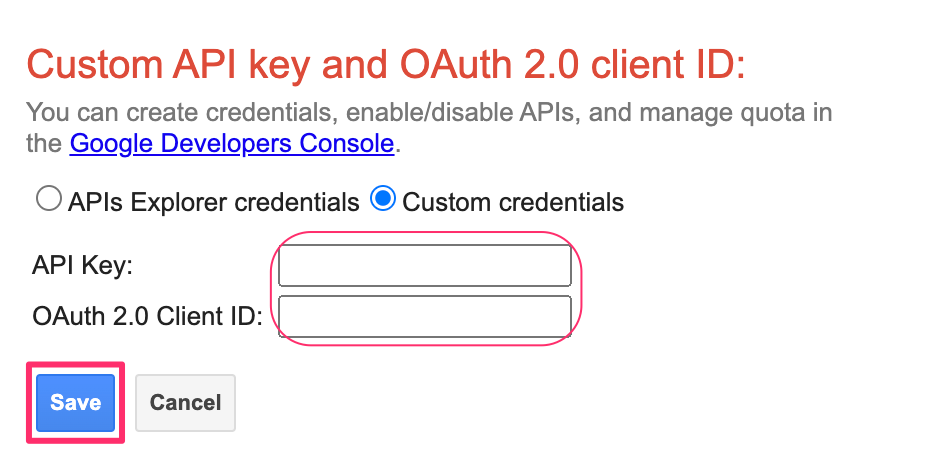
2. Click the gear icon (⚙) → Set API key / OAuth 2.0 Client ID:
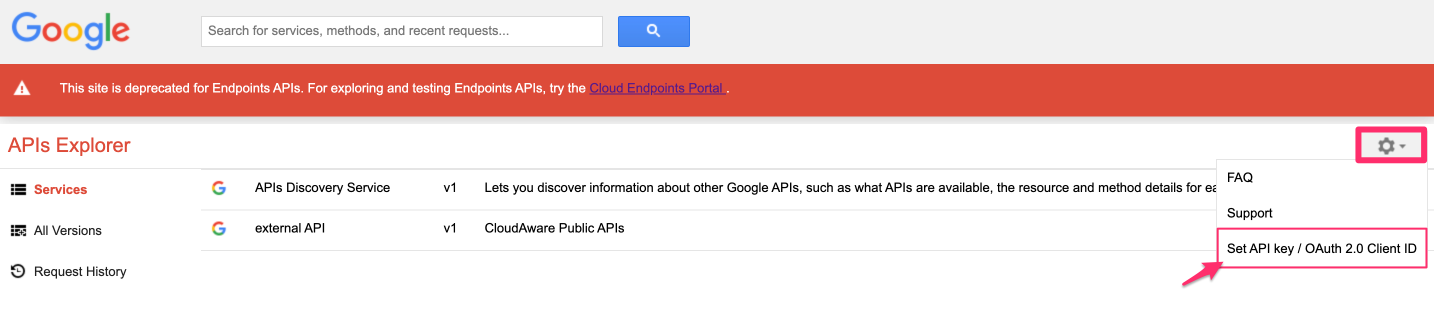
Paste the API key and OAuth 2.0 token, then click Save.
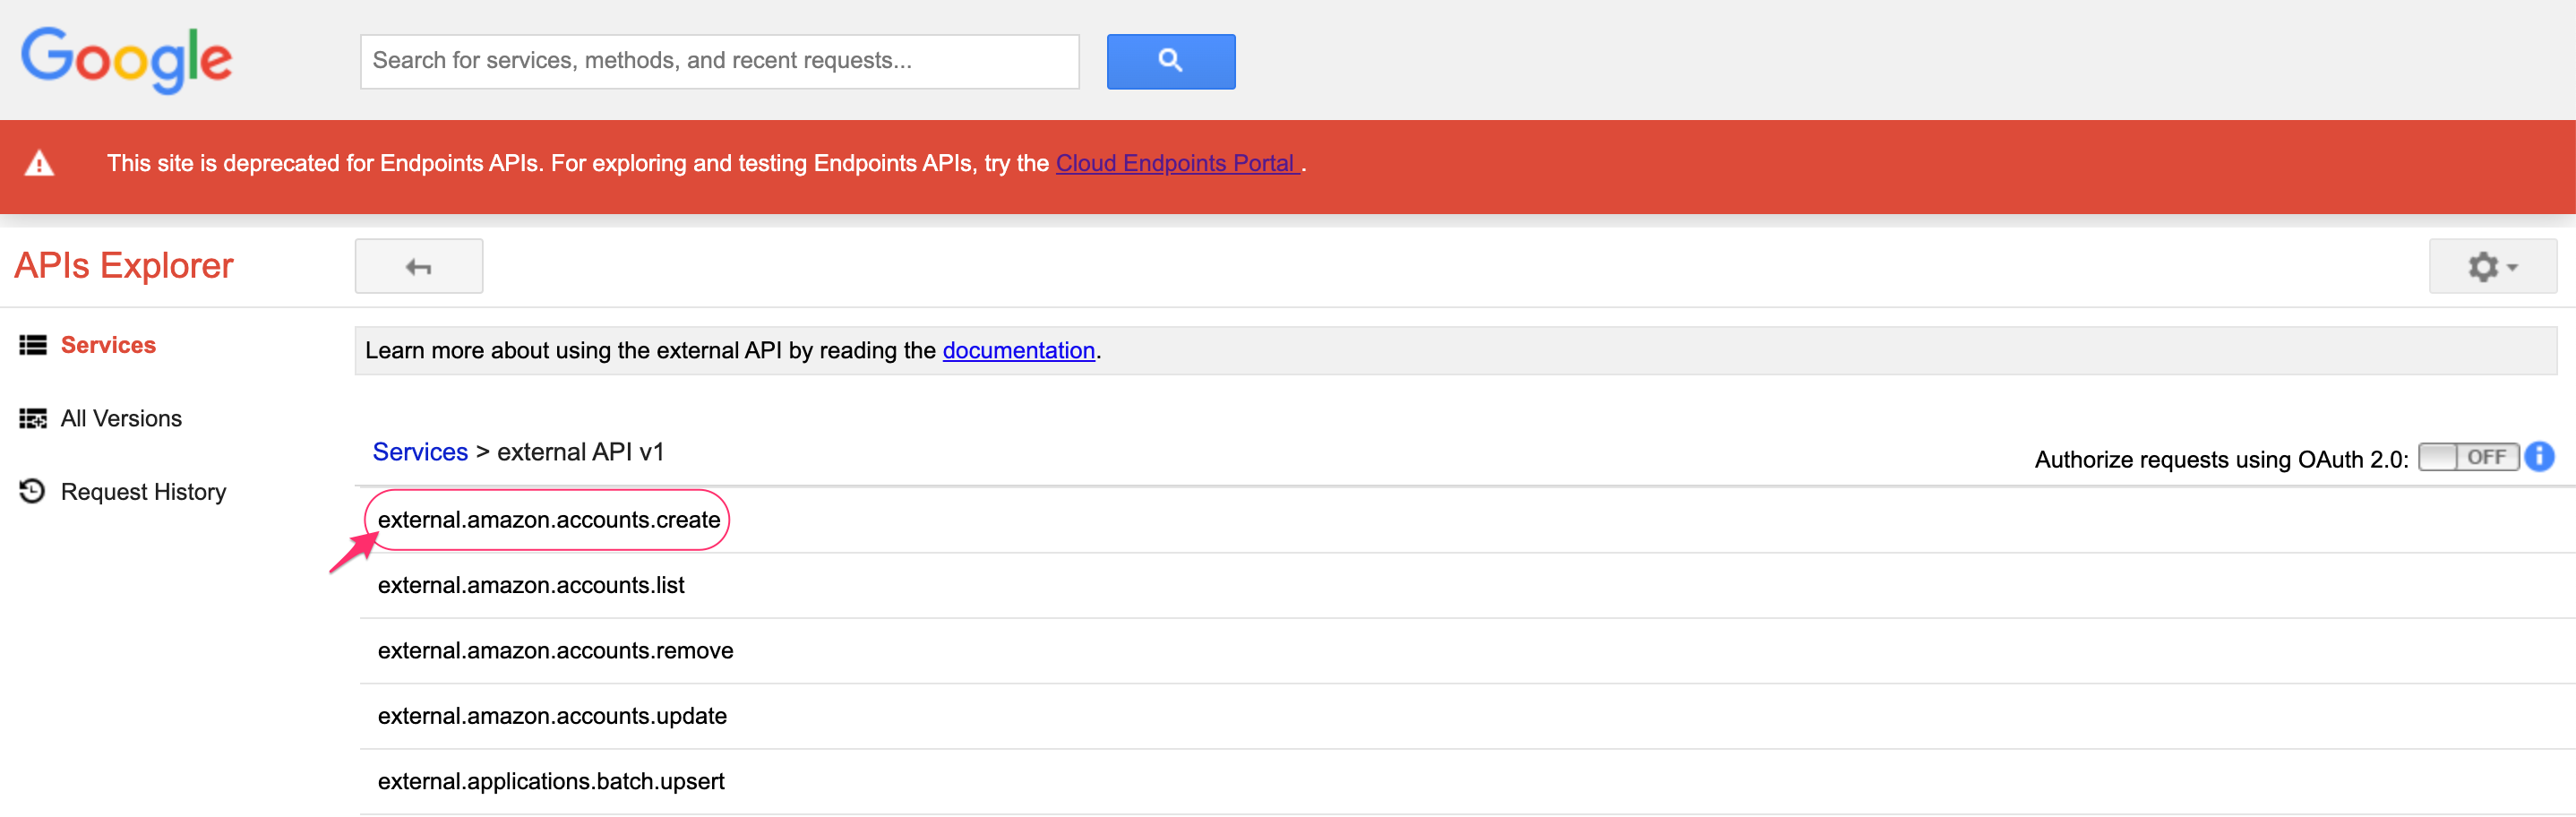
3. Go to Services → External API v1 → select external.amazon.account.create.
4. Fill out the form:
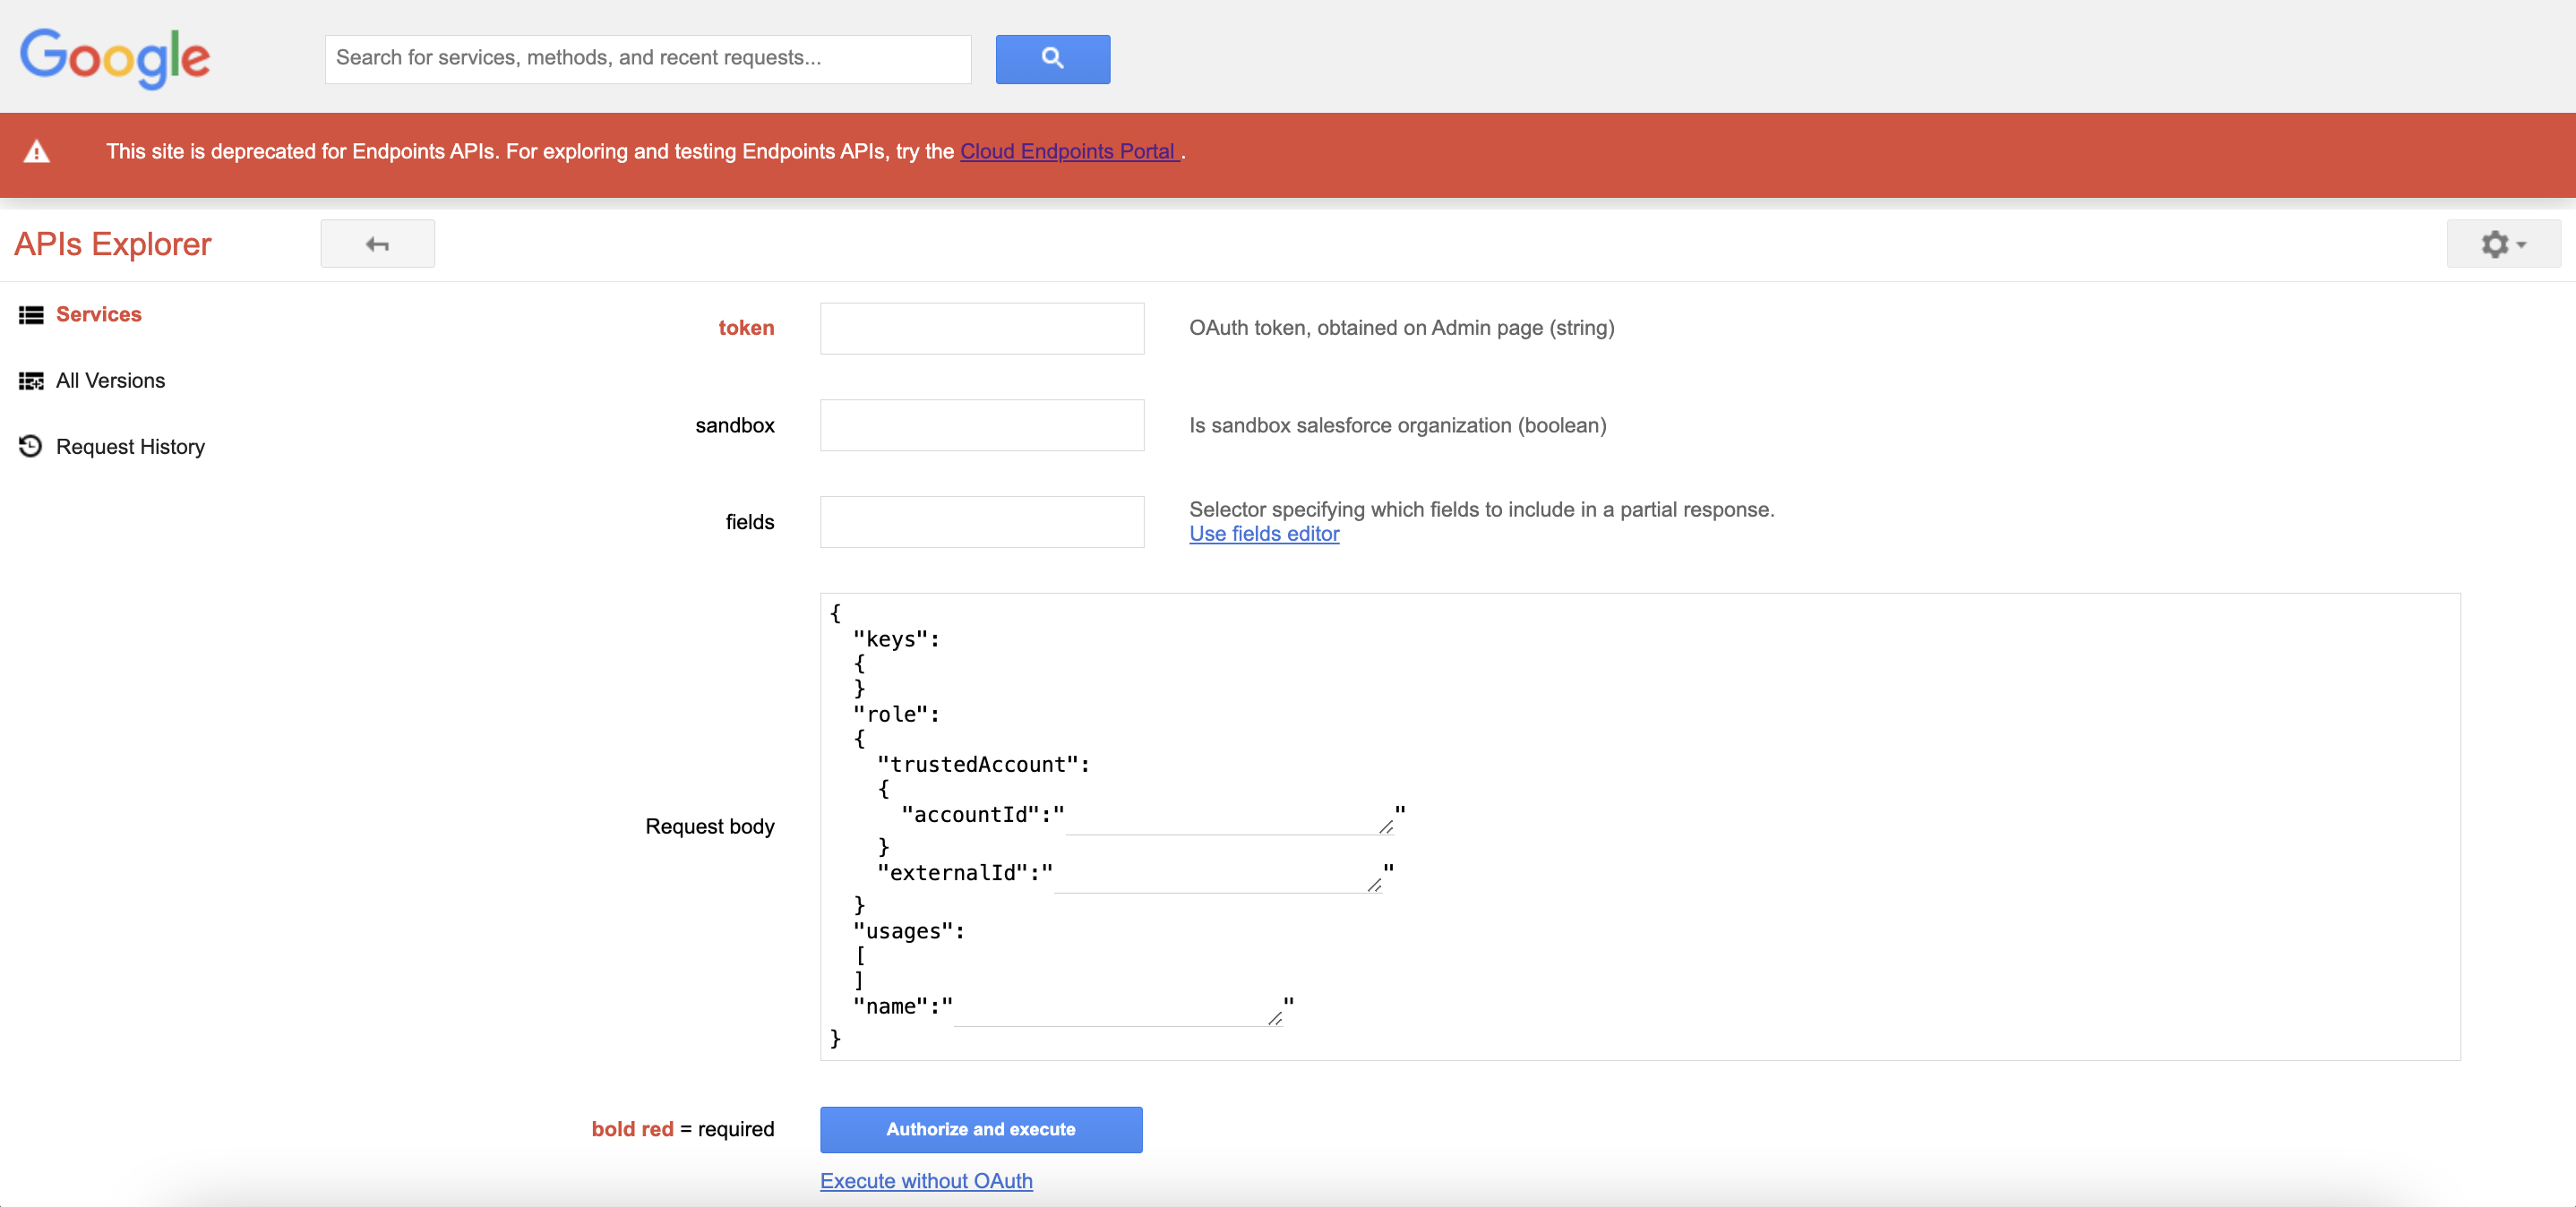
WHERE
token - paste the OAuth token generated before. Select fields in ‘Request body’ to make it look like below:
sandbox - select true if your Salesforce org is a sandbox; otherwise, select false
Request body - add the following properties: role, trustedAccount, accountId, externalId, usages, name
Here is a sample of request body query (no values inserted):
{
  "role":
  {
    "trustedAccount":
    {
      "accountId": ""
    },
    "externalId": ""
  },
  "usages":
  [
  ],
  "name": ""
}
5. Click Authorize and Execute.
List of APIs
The following APIs are available:
external.amazon.accounts.create
external.amazon.accounts.list
external.amazon.accounts.remove
external.amazon.accounts.update
external.applications.batch.upsert
external.applications.list
external.applications.remove
external.applications.tiers.remove
external.azure.activeDirectories.create
external.azure.activeDirectories.list
external.azure.activeDirectories.remove
external.azure.activeDirectories.update
external.azure.applications.list
external.azure.applications.remove
external.azure.applications.update
external.azure.subscriptions.create
external.azure.subscriptions.list
external.azure.subscriptions.remove
external.azure.subscriptions.update
external.compliance.policies.executeTests
external.compliance.policies.generate
external.compliance.schema.list
external.compliance.types.filter
external.compliance.types.get
external.compliance.types.list
external.incidents.create
external.newRelic.accounts.create
external.newRelic.accounts.getAll
external.newRelic.accounts.remove
external.newRelic.accounts.rotateApiKey
external.newRelic.accounts.update
external.session.create
external.tunhub.tunnels.getAll
external.tunhub.tunnels.routes.getAll
external.tunhub.tunnels.swapChannels
external.tunhub.tunnels.update