
External Client App with OAuth 2.0 JWT Bearer Flow
This guide explains how to configure an External Client App using OAuth 2.0 JWT Bearer Flow for Cloudaware CMDB API access.
Prerequisites
Contact your dedicated technical account manager or tam@cloudaware.com to enable the required Cloudaware User Profile permissions:
View all External Client Apps
View all External Client App, view their settings, and edit their policies
Create, edit, and delete External Client Apps
The OAuth 2.0 JWT Bearer Flow requires an RSA X.509 certificate (with a private key) for signing tokens. You may use an existing certificate if it meets these criteria:
Uses RSA encryption (2048-bit or stronger)
Includes 'Digital Signature' in Key Usage
Is in PEM, CRT, or DER format
Otherwise, generate a new certificate using OpenSSL. You can use this instruction provided by Salesforce.
Set up the app
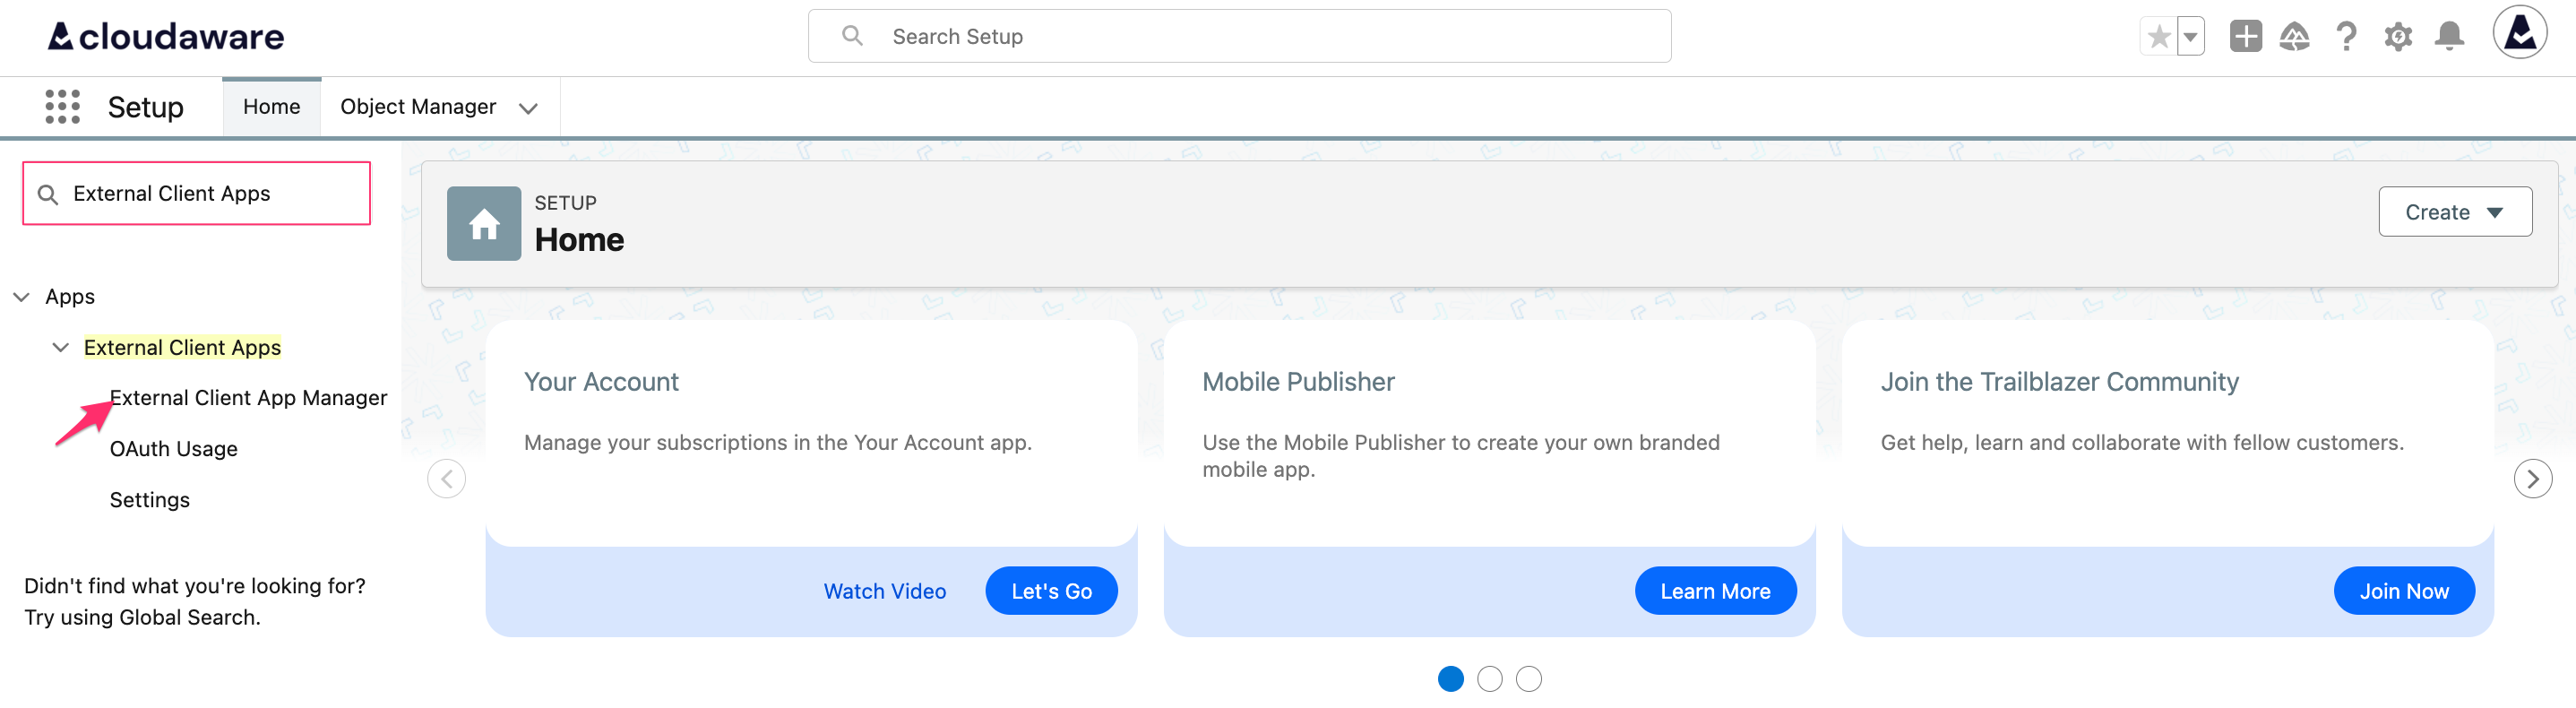
Log in to Cloudaware → Setup.

In a Quick Find bar, search for External Client Apps and select 'External Client App Manager' under Apps.
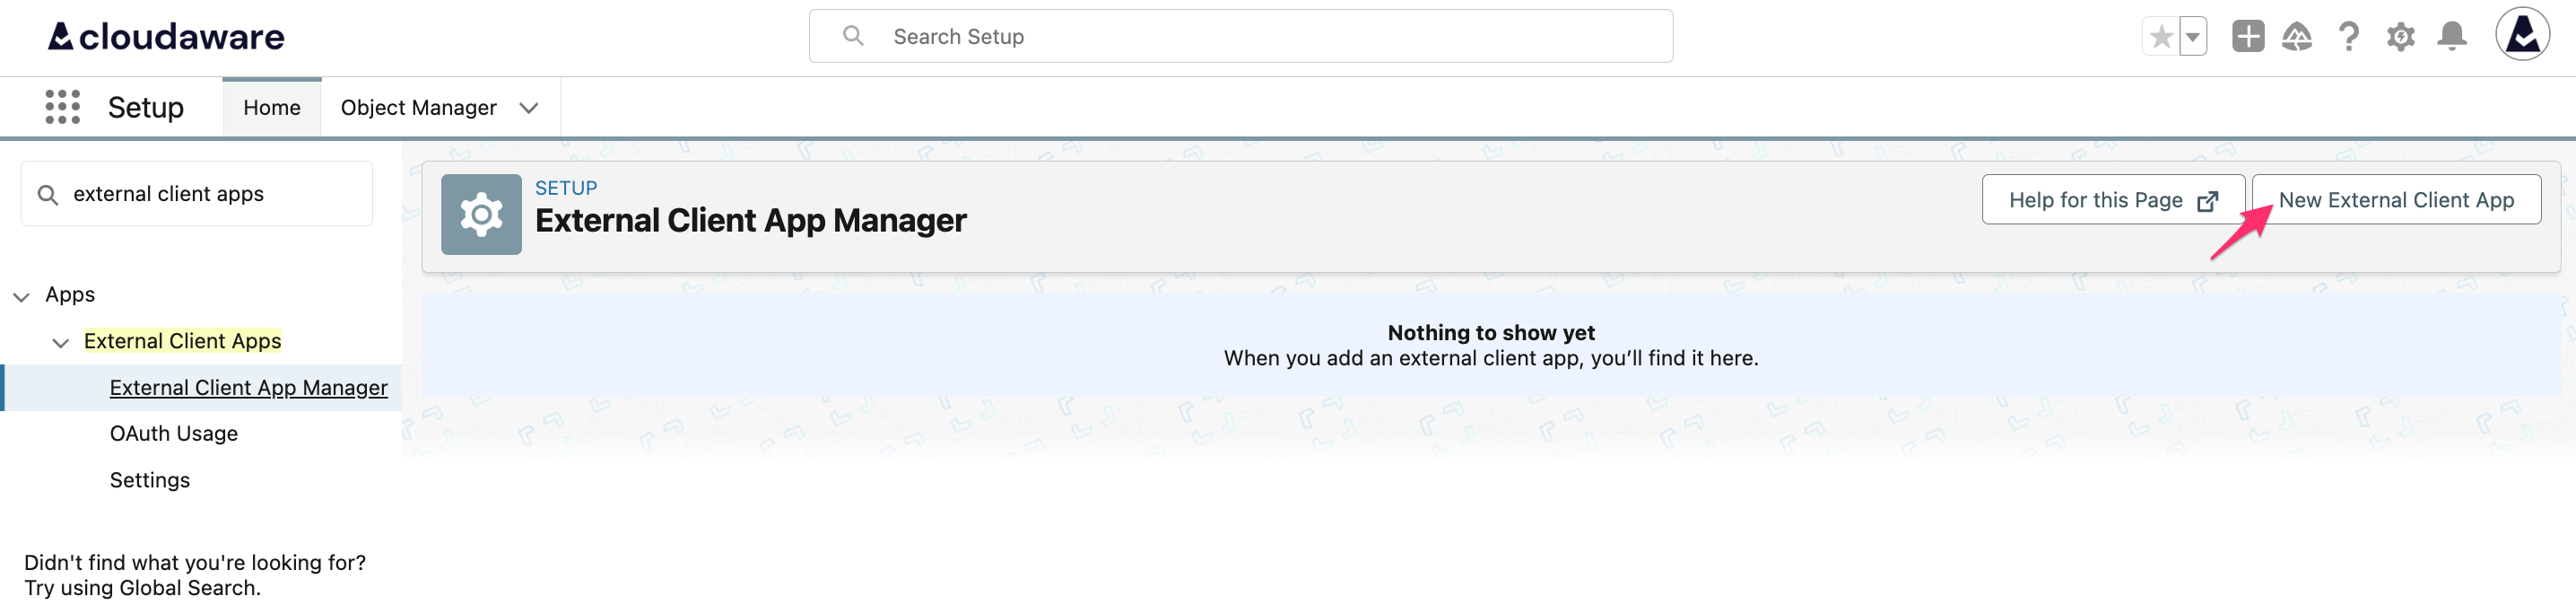
Click New External Client App.
Set a name and a contact email for the app. The API name will be auto-populated. Leave Distribution State as 'Local':

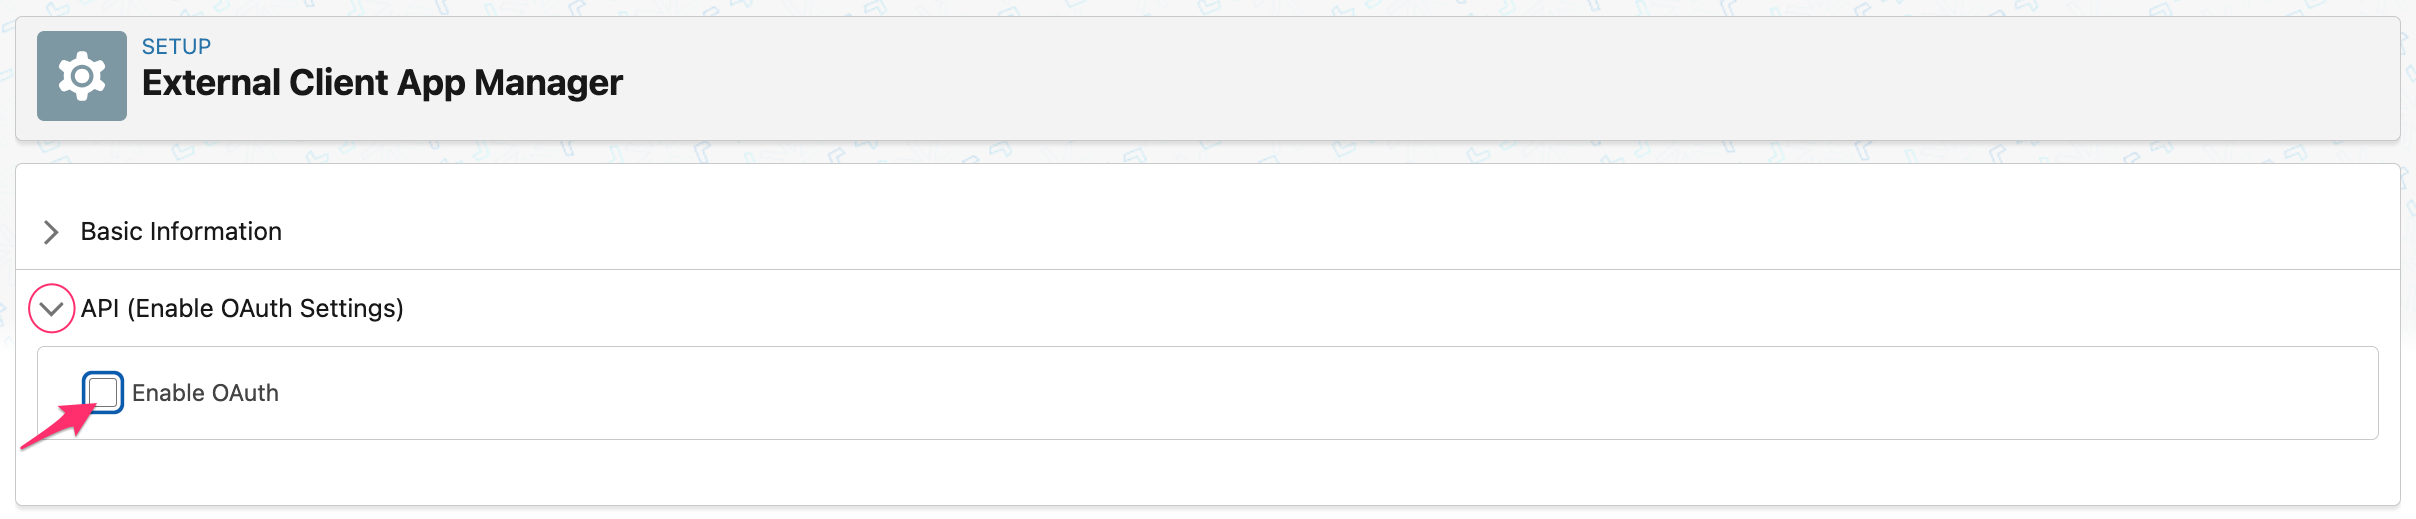
Collapse the 'Basic Information' section. Expand the 'API (Enable OAuth Settings)' section, and check the box 'Enable OAuth':
Under App Settings, use
http://localhost:1717/OauthRedirectas the Callback URL.
Select the following OAuth scopes:
Manage user data via APIs (api)
Perform requests at any time (refresh_token, offline_access)
Optional: Access Analytics REST API resources (wave_api) to access Cloudaware Analytics datasets programmatically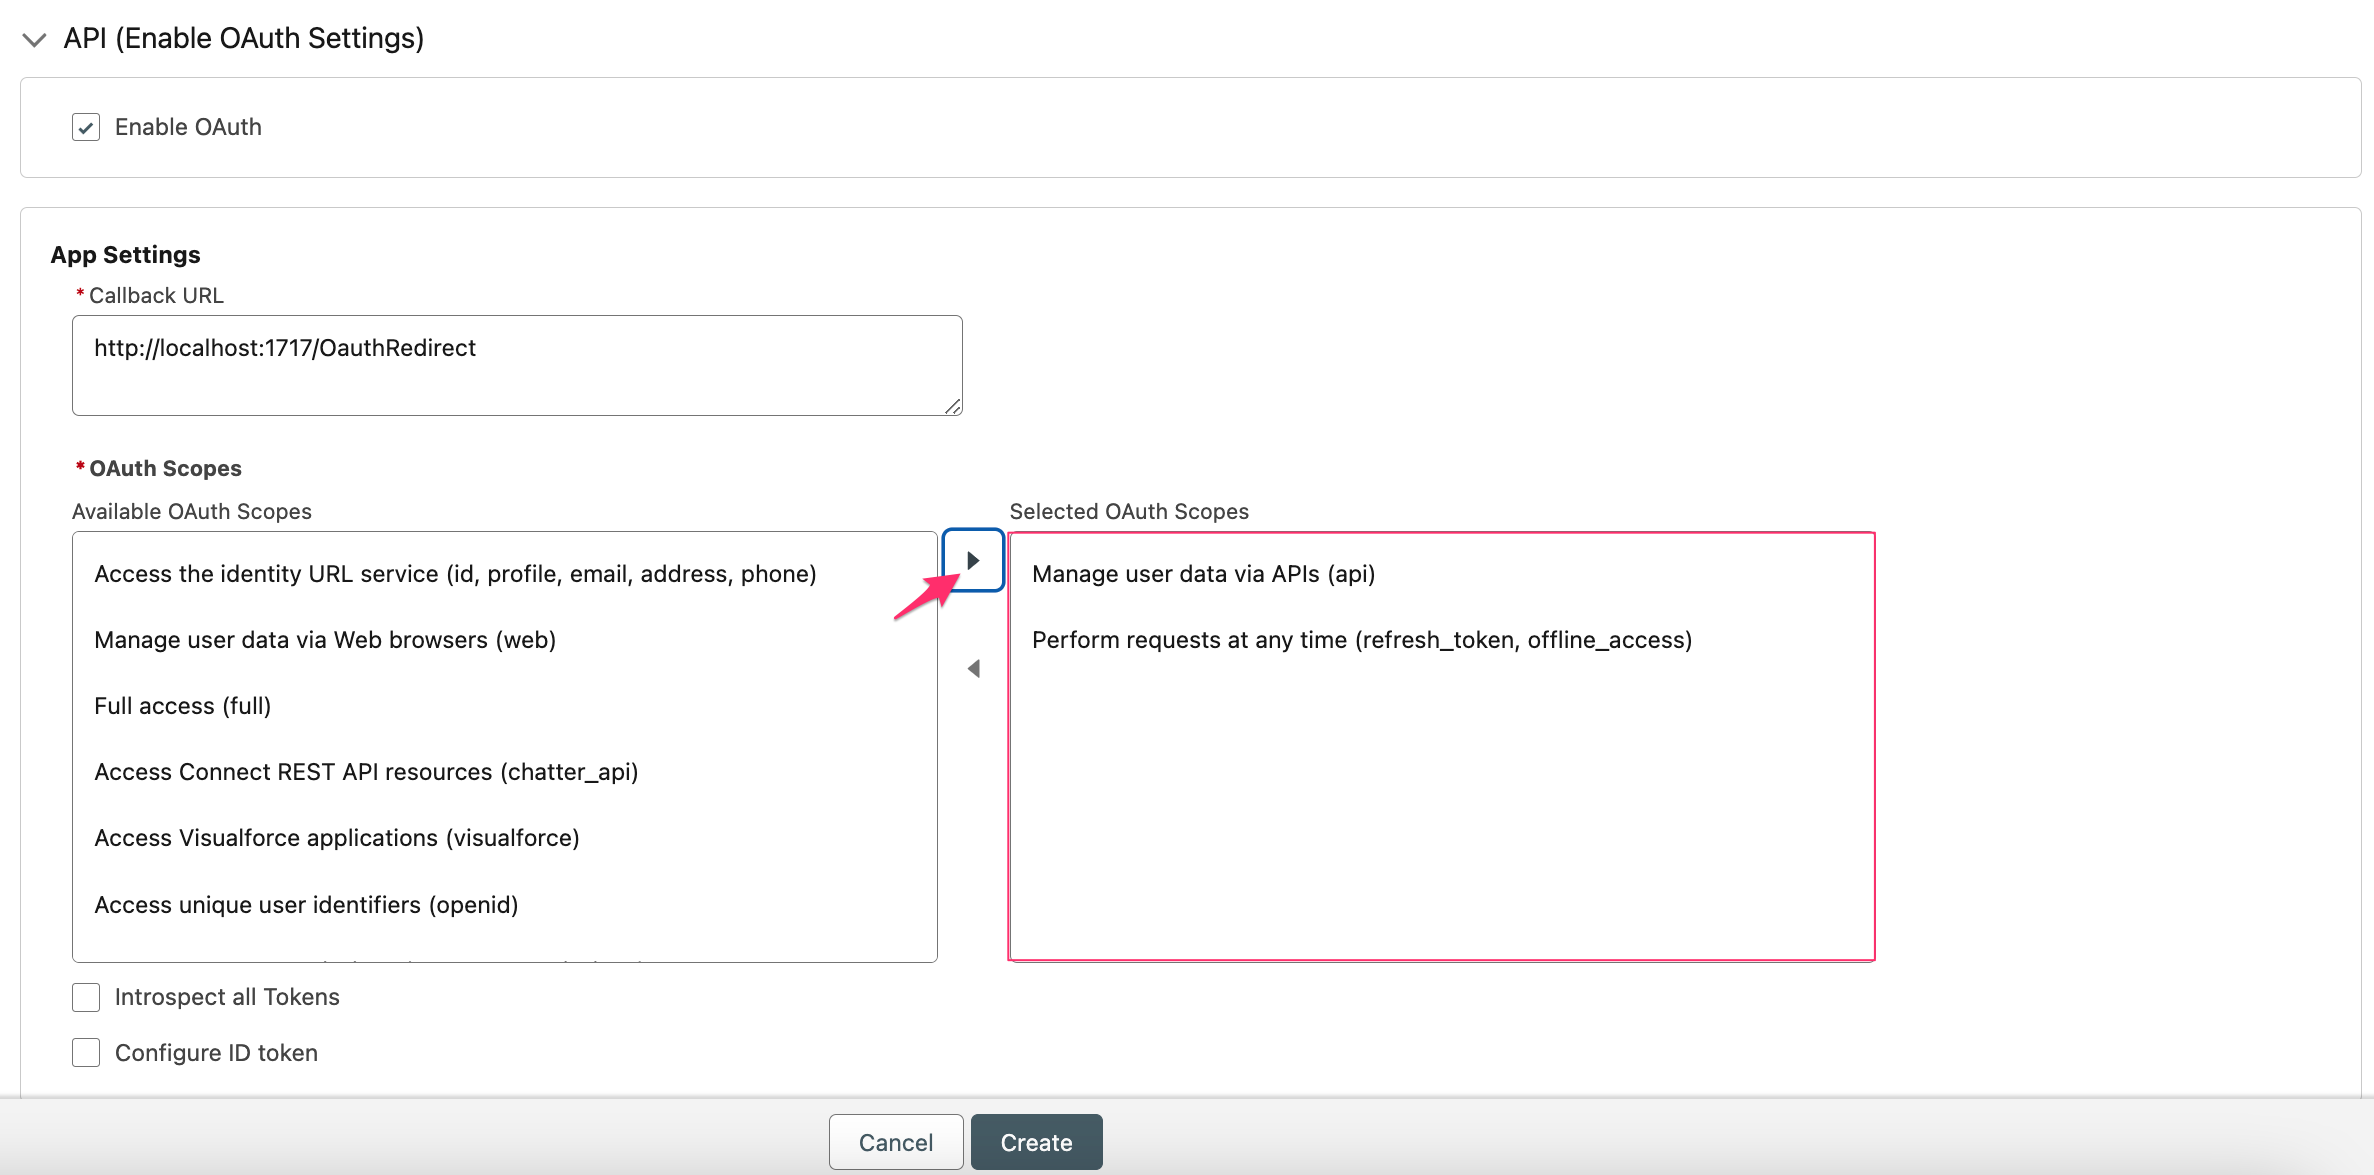
Under Flow Enablement, check the box 'Enable JWT Bearer Flow' and upload an X.509 Certificate that will be used to verify your JWT:
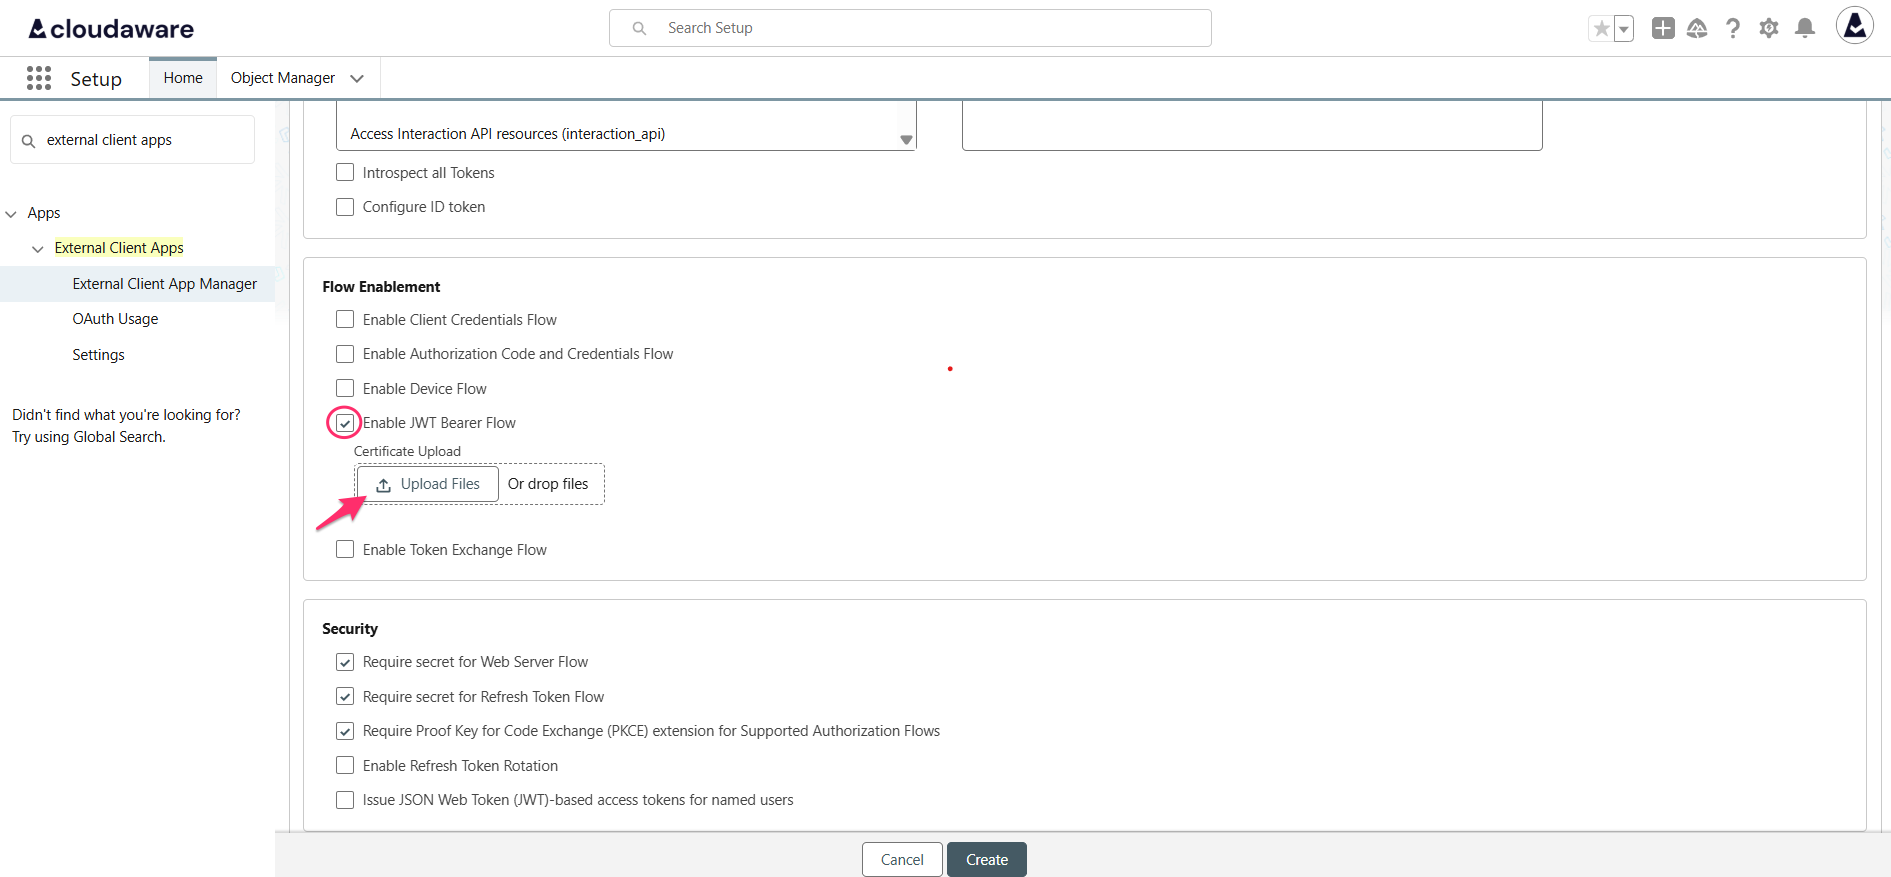
Under Security, uncheck the box 'Require Proof Key for Code Exchange (PKCE) Extension for Supported Authorization Flows' unless it is required on your end:
.png?inst-v=dd402248-4cb6-4aef-a711-de26d959d370)
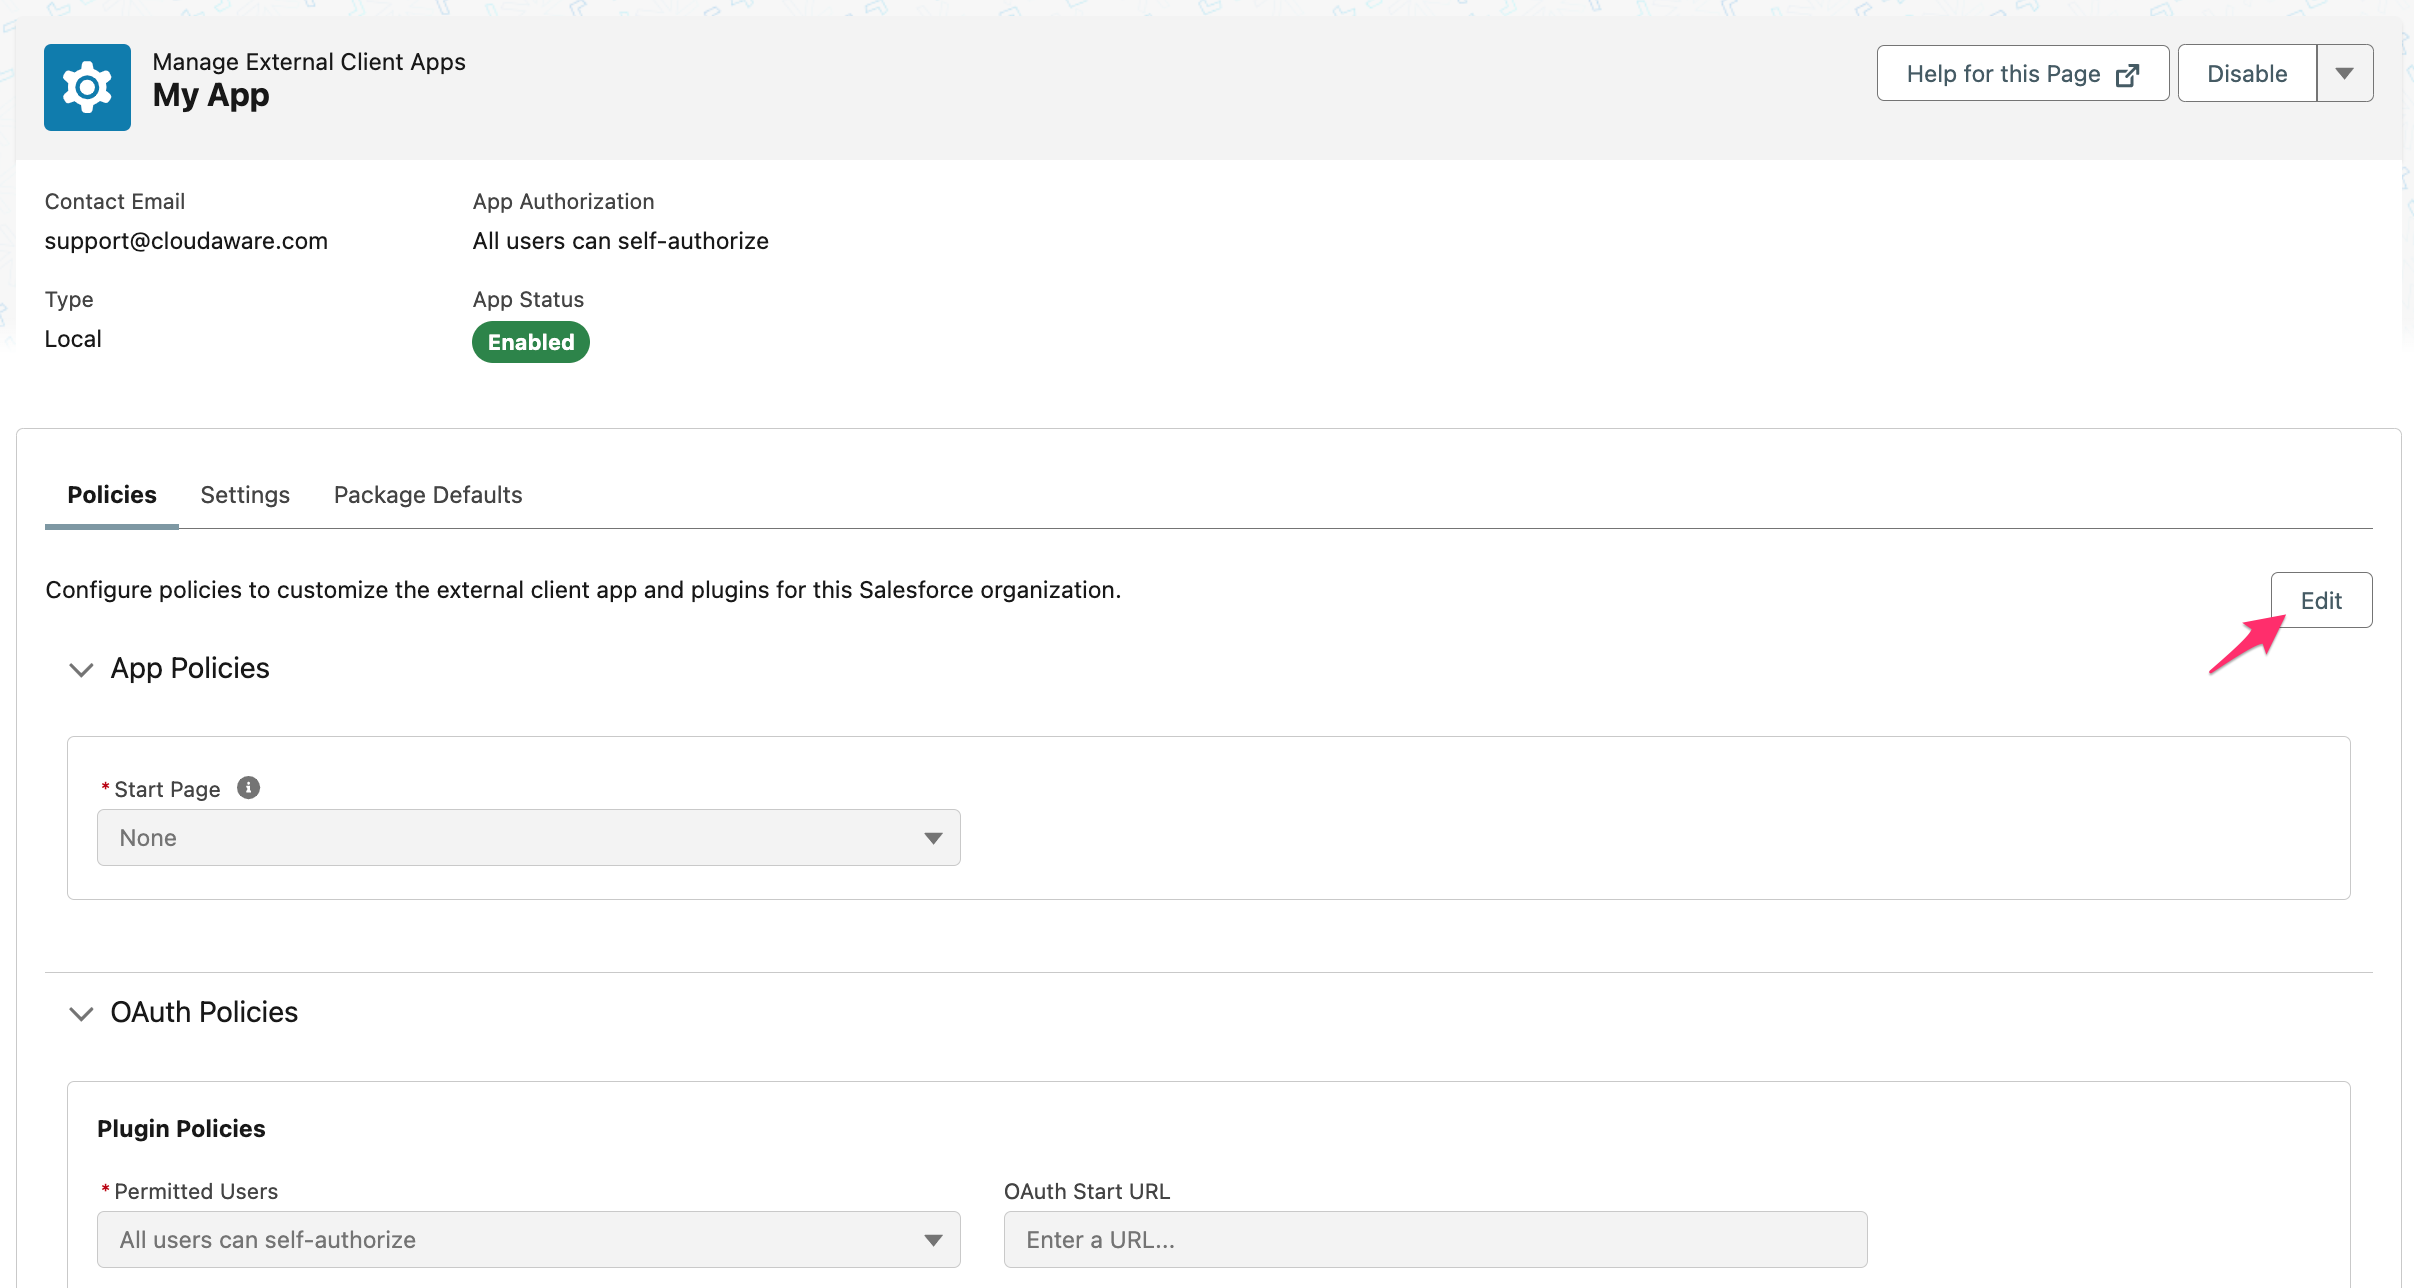
Click Create.Ensure that the app has the 'Enabled' status. In the 'Policies' tab, click Edit.
Expand the 'OAuth Policies' section. Choose 'Admin approved users are pre-authorized' and move the needed Cloudaware Profiles to the Selected Profiles section:
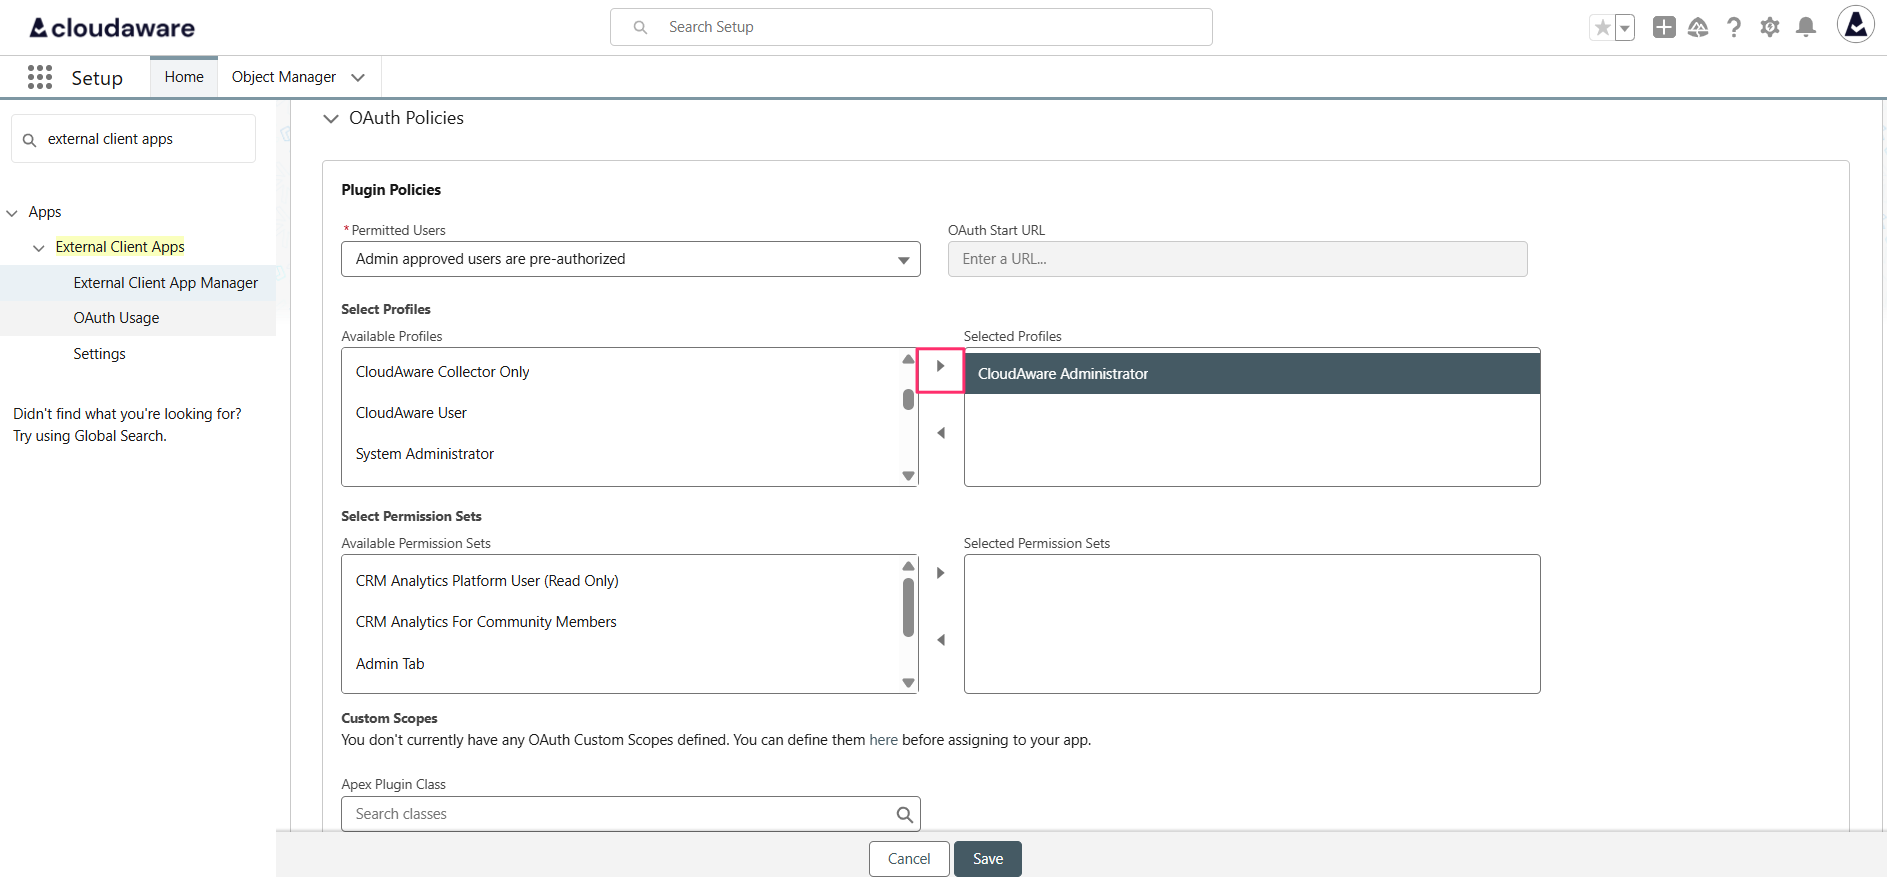
Click Save. Allow some time for the app to update or manually refresh the page.
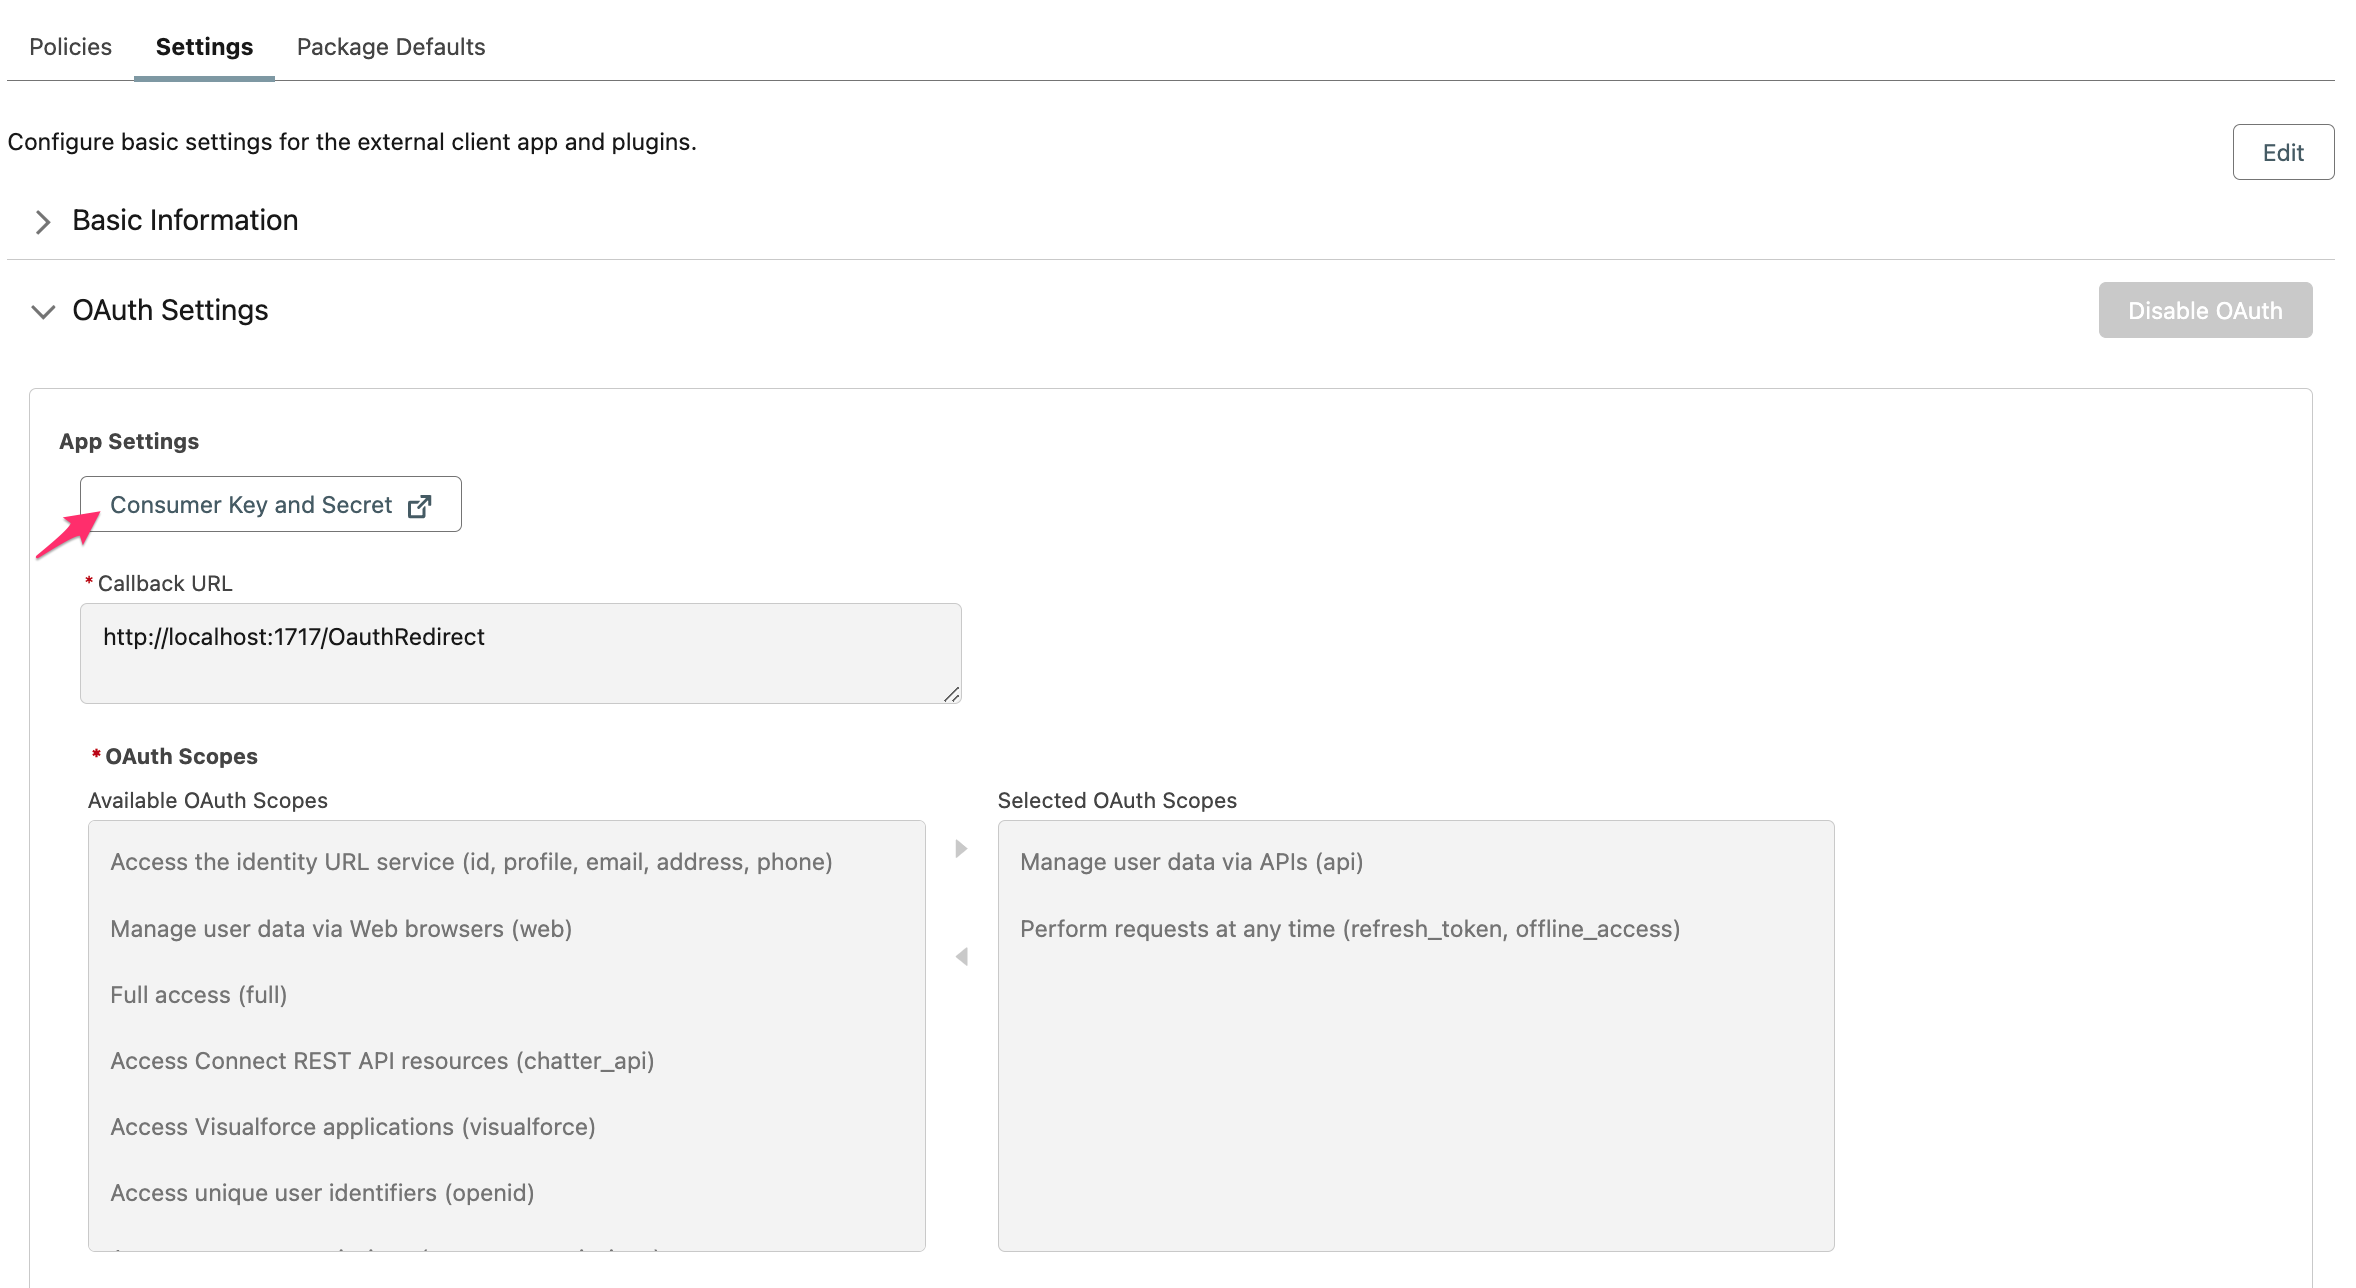
Go the tab 'Settings' → expand the 'OAuth Settings' section. Click Consumer Key and Secret:
You will be redirected to an identity verification page. Enter the code sent to the app's contact email to view and copy the the Client ID (Consumer Key) and Client Secret (Consumer Secret).